




[FREE] Dell Laptop Data Recovery: Get Your Files Back Fast
Accidentally lost important files on your Dell computer? Don’t panic, this guide will walk you through several Dell data recovery methods so you can quickly retrieve your files, even without any technical experience.

By Ivy Updated on May 26, 2026


Help! How to recover deleted files on Dell laptop
Lost important files on your Dell laptop? Don’t panic,deleted data is often not gone forever. Whether you accidentally deleted files, emptied the Recycle Bin, or lost data due to system issues, there are still several ways to recover deleted files from a Dell computer.
Retrieving Deleted Files
How do I retrieve deleted files/photos once I deleted them from my Recycle Bin? Is there any way possible to retrieve deleted files/photos?
- Question from Dell Technologies
Dell provides in-lab data recovery for certain non-RAID hard drives, depending on your warranty and the type of damage. However, professional recovery services can be costly, often ranging from $100 to $1000, depending on the severity of data loss.
Because of the high cost and time involved, many users prefer trying more affordable or free recovery methods first. In this guide, we’ll walk you through simple and effective Dell laptop data recovery methods to restore your lost files quickly and safely, even if you don’t have a backup.
How to perform Dell data recovery step by step
Generally speaking, if you accidentally delete a file, you can usually recover it from the Recycle Bin. If, unfortunately, your file is permanently deleted or you mistakenly emptied the Recycle Bin, you’ll need to try other methods.
▶ Solution 1. Recover files from Dell SupportAssist OS Recovery backup
If you previously created a backup using SupportAssist OS Recovery, you can restore your files after reinstalling Windows, repairing your Dell PC, or due to other data loss scenarios.
Step 1. Plug the external hard drive containing the backup into your Dell computer. Inside the folder SupportAssist_Backup, open the backup time point and double-click the File_Restore.exe files to access the restore app.
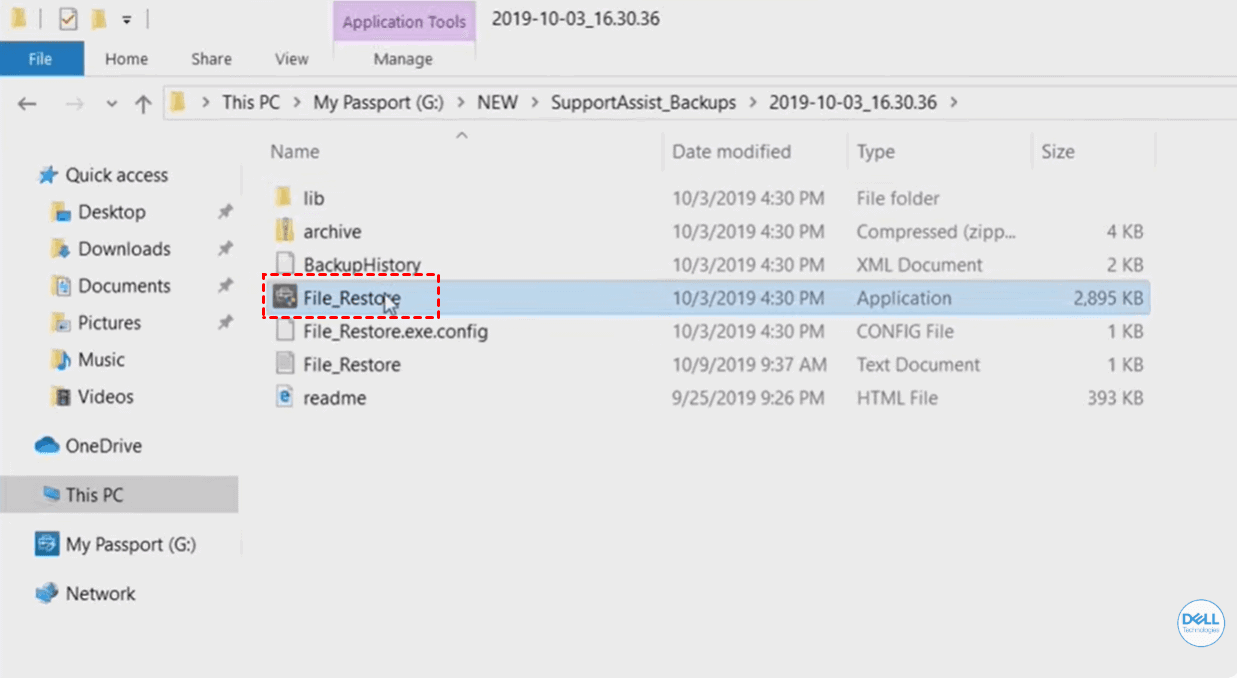
Step 2. Click Looking for a different backup, navigate to the external drive and select the archive.zip file.
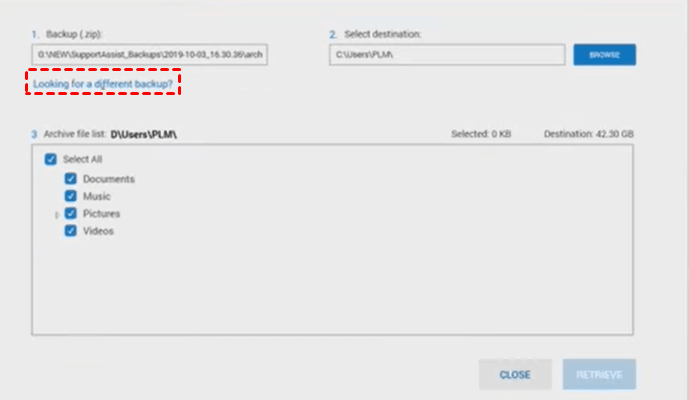
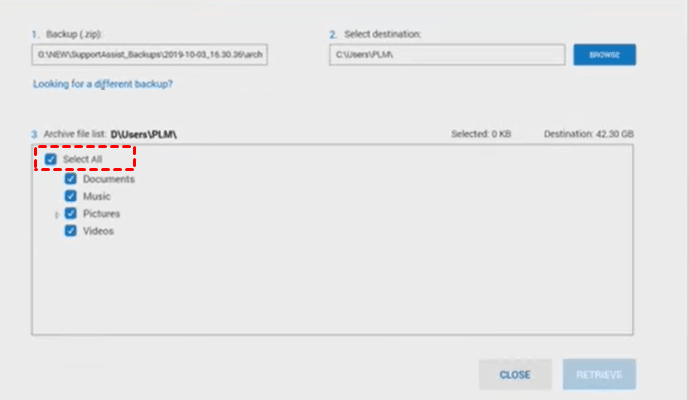
Step 3. Select the files you want to recover. Or click Select All to restore everything.
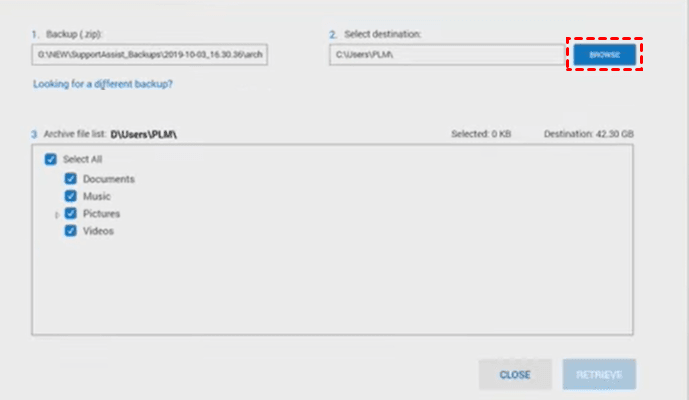
Step 4. Then, click Browse next to Select destination, and you can then select a local folder to save lost data.
Step 5. Click RETRIEVE to start Dell data recovery. The process will take several minutes.
If your computer fails to boot,restart the PC and press F12 at startup, then choose SupportAssist OS Recovery, and press Enter.
▶ Solution 2. Recover Data from a Dell Hard Drive using File History
If you don’t have any backups made using the official backup tool, you can turn to the Windows backup feature as well. File History will store the copies of your user files on the C: drive. Using it, you could even recover permanently deleted files.
Step 1. Launch Control Panel > System and Security > File History to check if it's enabled.
Step 2. Click Restore personal files.

Step 3. Select the data you want and click Recover. To select a new path, click the Settings icon > Restore To.
▶ Solution 3. Restore Dell data to a previous version
Previous Versions is a good option as well. Using it, you can restore previous versions of files and folders to get back the data you need. Be sure the File History or System Protection (usually on the C: drive) is enabled.
Step 1. Navigate to the parent folder where the deleted files are stored. Right-click it and select Restore previous versions.
Step 2. It will navigate you to the Previous Versions window. Choose the version containing lost data and click Restore.
A better option for Dell data recovery
The Dell SupportAssist OS Recovery is indeed very useful, and backup features like File History can meet your demands as well. But more users haven’t made any backups ever. Perhaps, they think they will never be that unlucky to get into data loss trouble.
Then, is there any way to solve this? How to recover deleted files on Dell laptops without backups?
Given this, you might as well use a professional Windows data recovery tool. AOMEI FastRecovery is a reliable tool that can simplify the process of recovering data from Dell hard drive in Windows 7, 8, 8.1, 10, 11, and Windows Server.
AOMEI FastRecovery- 👍Free data recovery, supporting up to 500MB.
- Recover deleted or lost images (JPEG, PNG, GIF, SVG), documents (DOC, XLSX, CSV, PPT), audios (MP3, CDA, WAV), videos (MP4, MOV, AVI, ASF, WMV), etc., up to 1000+ data formats.
- Integrate Quick Scan and Deep Scan to find all recoverable data, ensuring a high recovery rate.
- Organize and display data by type and path, with options to sort, search, filter, and preview files, making it easier and faster to find files.
- Support HDDs/SSDs, external drives, USB drives, SD cards, etc., and NTFS, FAT32, exFAT, and ReFS file systems.
- Recover data in any scenario, such as permanent deletions, disk formatting, system crashes, virus attacks, etc.
 100% Secure
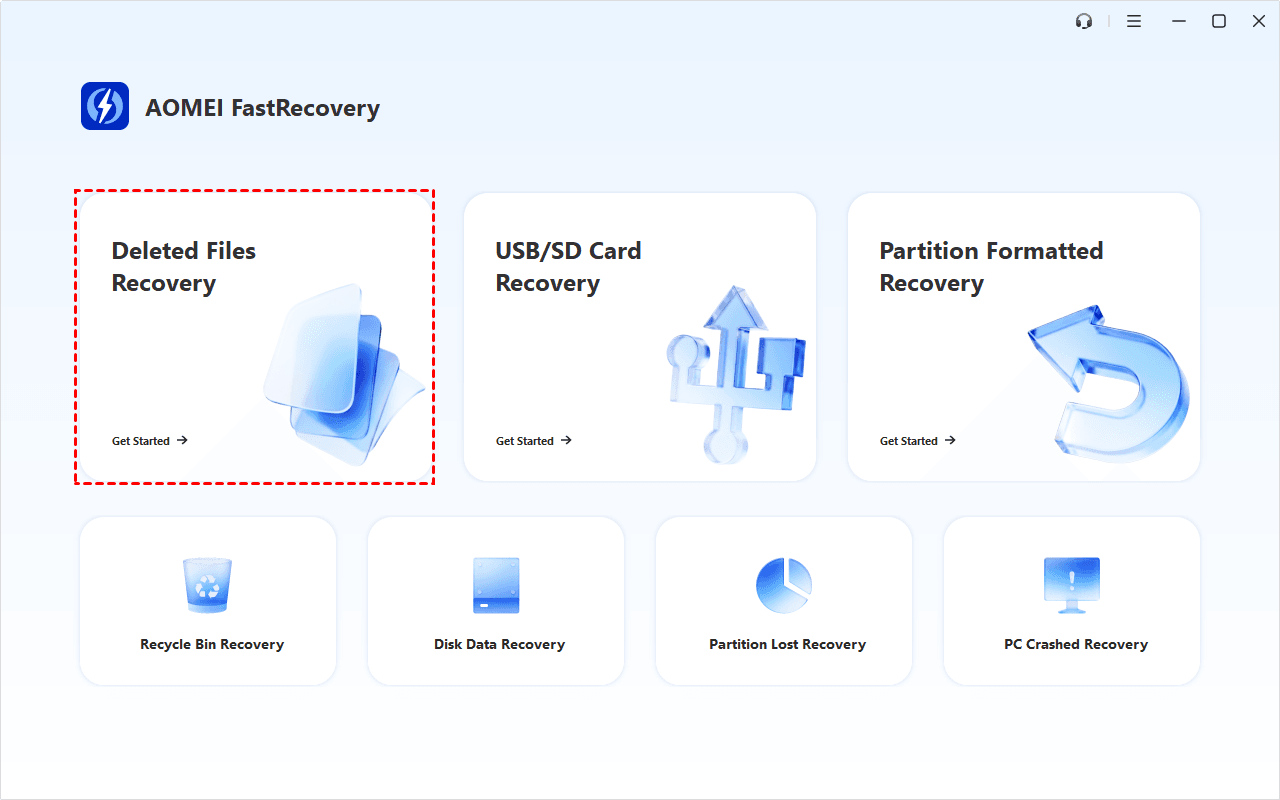
Step 1. Install and run AOMEI FastRecovery. Then, click Deleted Files Recovery, specifically designed for quick recovery.
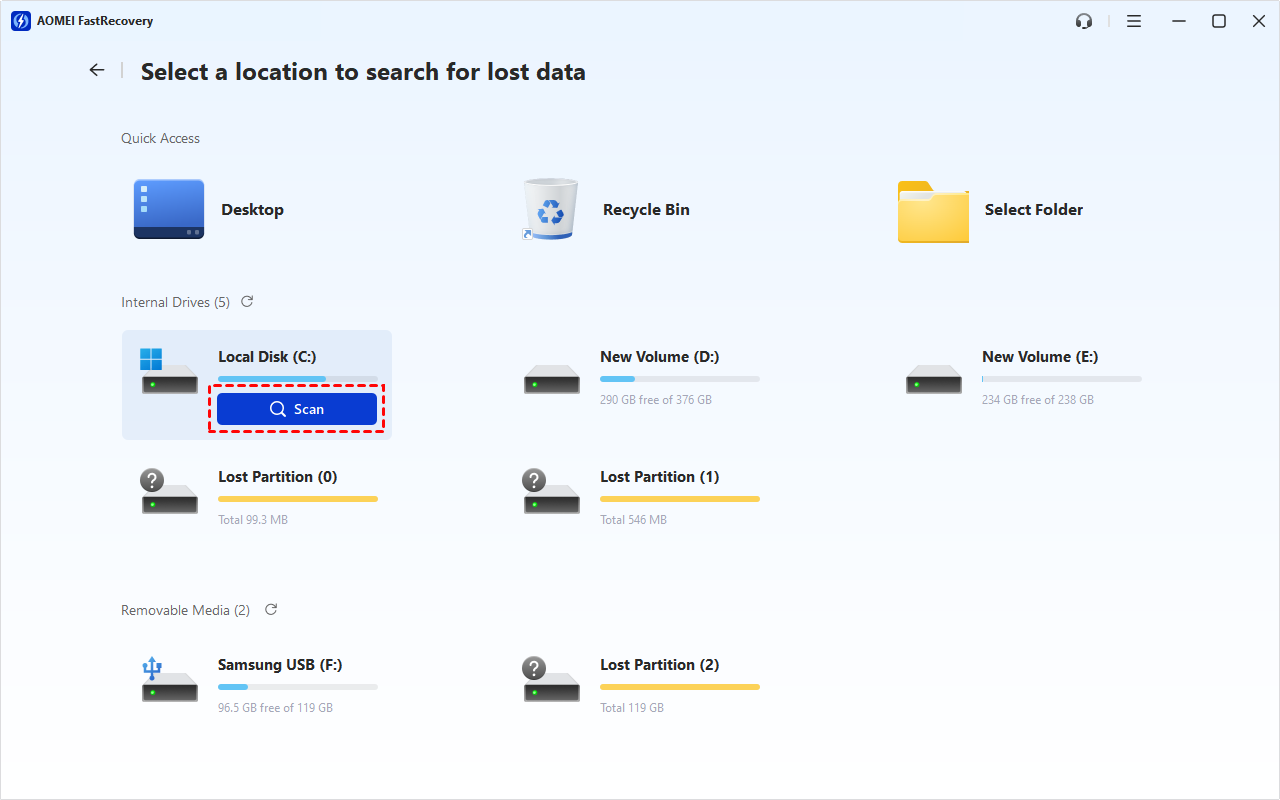
Step 2. Hover the mouse over the drive, and click Scan.
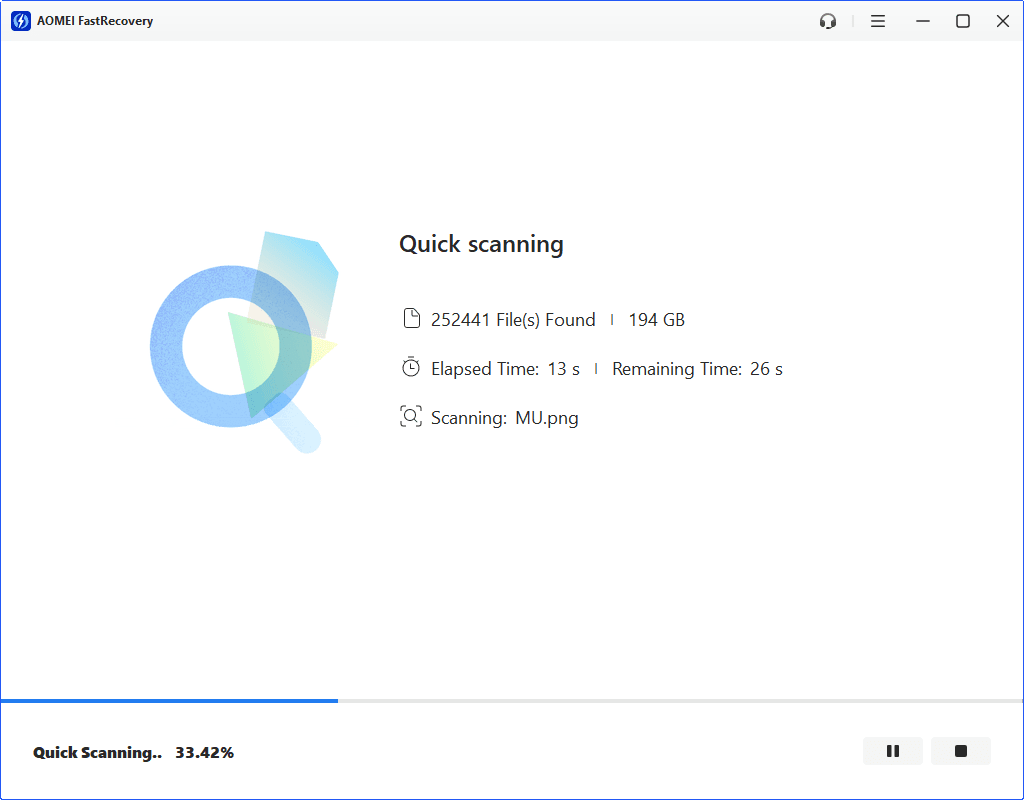
Step 3. It will start the quick scanning process to find all recoverable data. You won't have to wait long. Scan time mainly depends on disk size and health, especially regarding bad sectors or file system corruption.
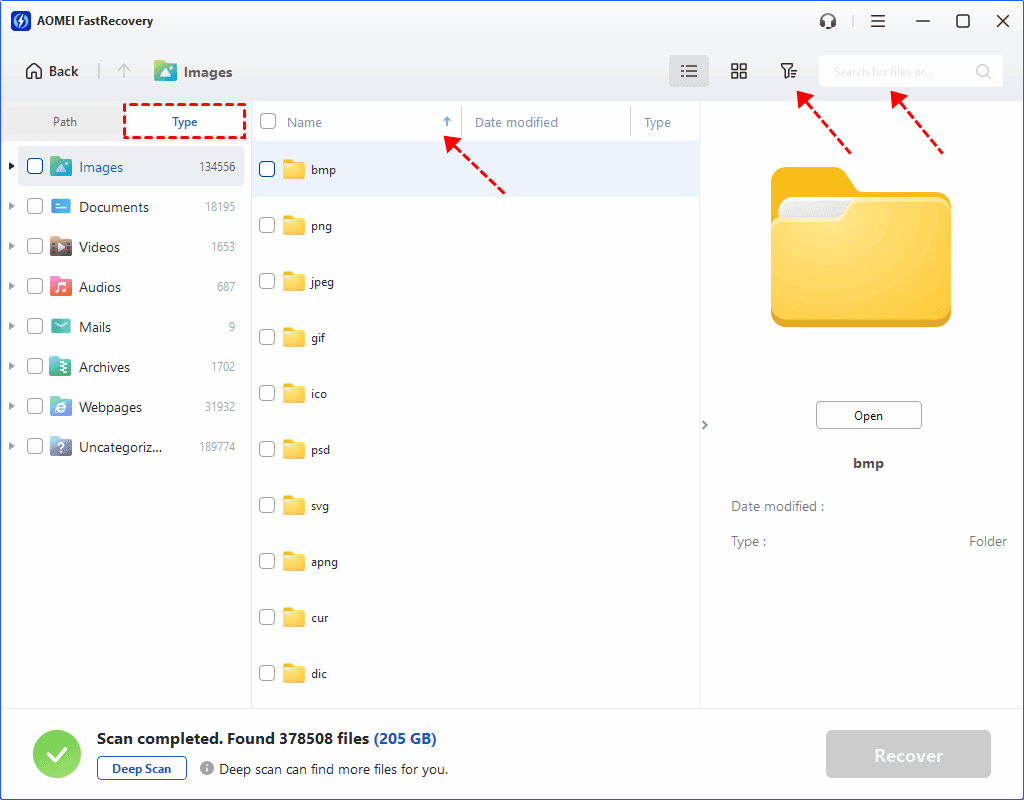
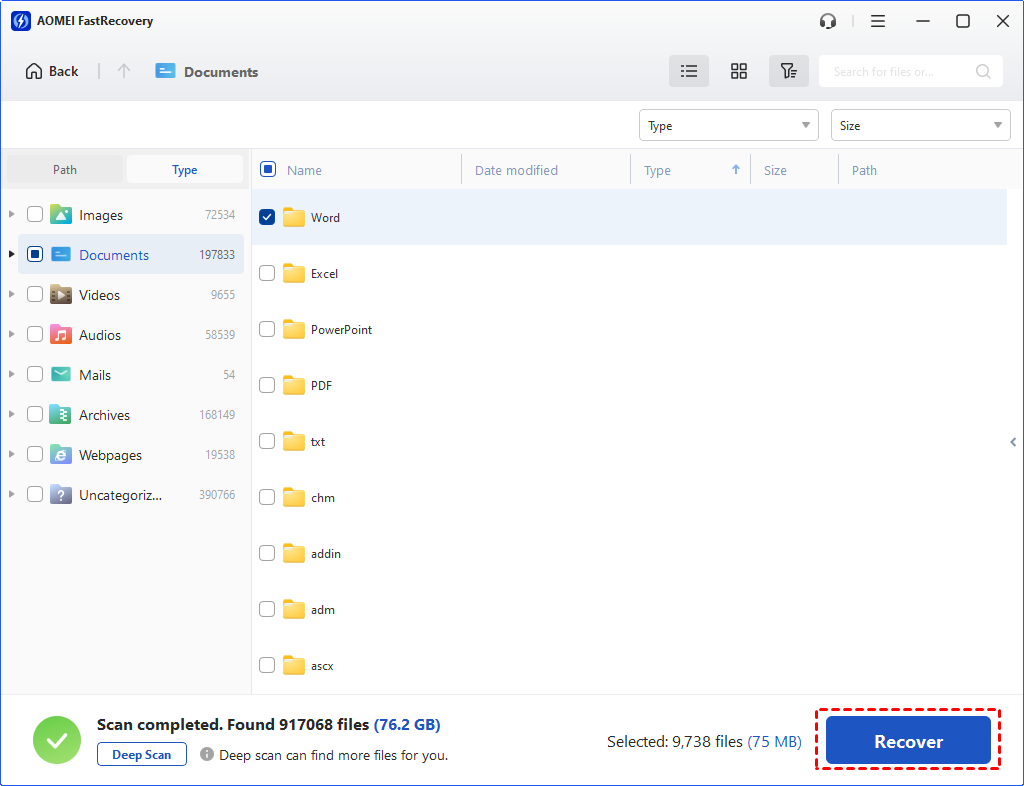
Step 4. Wait for the process to complete. You can select files by Type (default) or Path, with options to sort, search, filter, and preview files, making the process easier and faster.
👉Under the Type section:
- Specify the data type and click the arrow next to type, size, date modified, etc., to sort files.
- To locate files quickly, type the file name or extension in the search box.
- Or use the filter feature, similar to the Type category, allowing you to further specify the size of files, from less than 512 KB to 1GB above.
- Once found, double-click the files to preview.
👉 Under the Path section: Directly navigate to the original location where you saved deleted files. Sort files if needed.
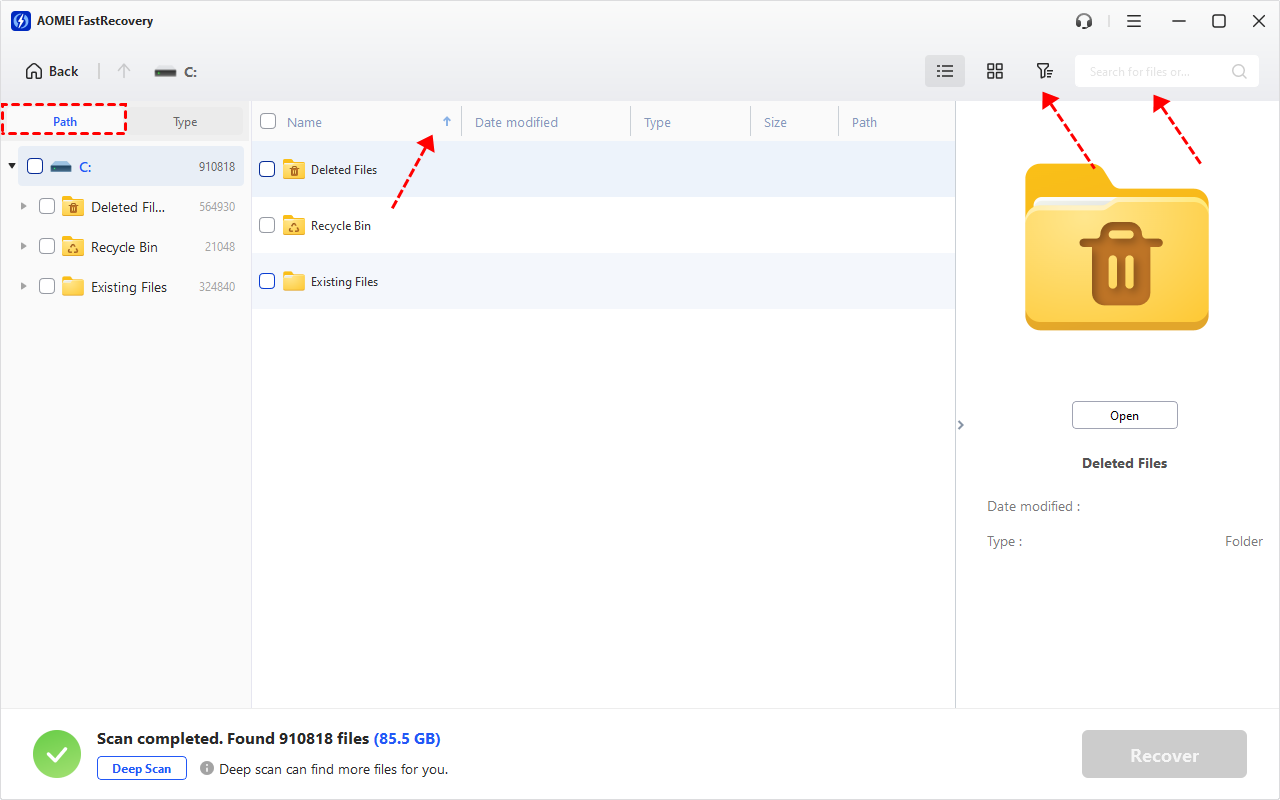
- The Type categories and filter options include all supported data types, such as images, videos, documents, mails, web pages, compressed files, etc.
- Click the Deep Scan to find more data if Quick Scan fails. It will scan every sector of the disk and take longer.
Step 5. Choose the wanted files and click Recover to get them back quickly. Please save them in a new path to avoid data overwriting.
AOMEI FastRecovery supports you to recover files for free, up to 500MB. To recover all data, please consider upgrading to the advanced edition.
Conclusion
To sum up, let’s do a quick recap of the methods to achieve Dell data recovery. You could utilize the official tool – Dell SupportAssist OS Recovery, File History, Previous Versions, as well as a reliable Windows data recovery software, especially useful if you don't have any backup.
In view of this, it's necessary to back up files regularly so you can restore deleted or lost data easily and quickly. Even if your computer fails to boot, having a backup remains highly beneficial.

 as a preferred
source on Google
as a preferred
source on Google