Recycle Bin Recovery Software: Recover Files Deleted from Emptied Recycle Bin

Lost files from the Recycle Bin due to accidental emptying, Shift+Delete, large file bypass, or third-party cleaner software? After scanning your drives, AOMEI FastRecovery allows you to preview and selectively recover files, ensuring you restore exactly what you need. Furthermore, it supports recovering over 1000 file types, including documents, photos, videos, and archives lost from your local PC folders. To top it off, it is fully compatible with all Windows systems and works perfectly with HDD, SSD, and NVMe internal drives.

Download FreewareWindows 11/10/8/7/Server

Important: Once your Recycle Bin is emptied, stop saving new files or installing apps on that drive immediately. Every background process, from system updates to cache generation, can overwrite your lost data.

A blue Recycle Bin with a recovery arrow
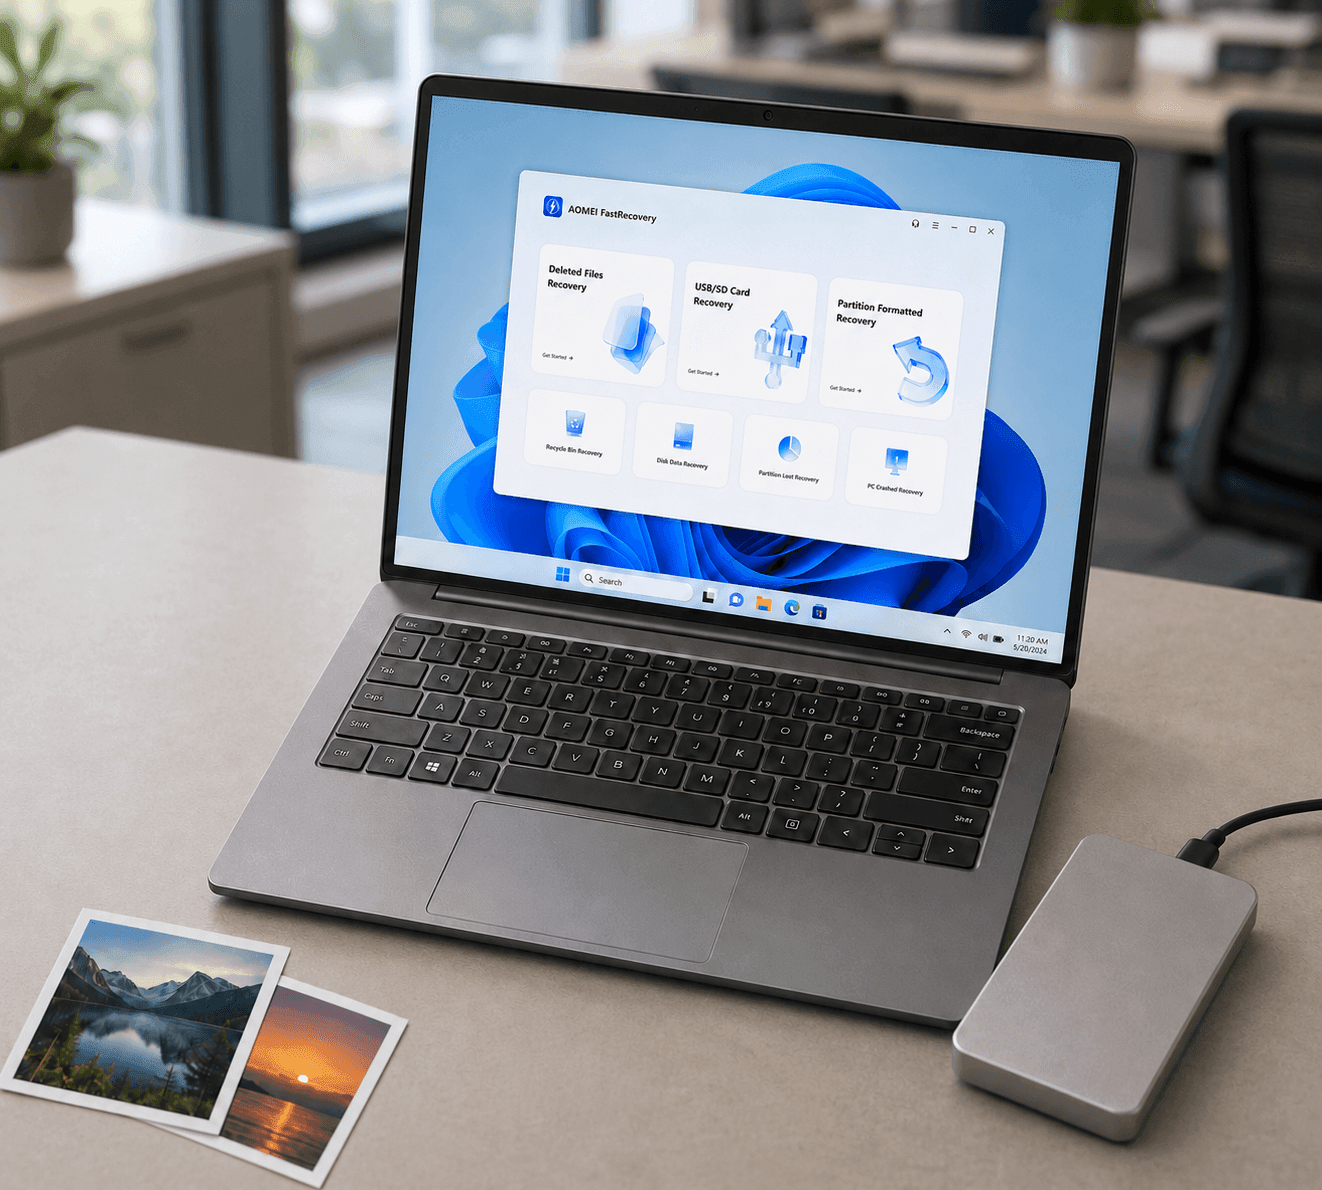
AOMEI FastRecovery scanning deleted files on a laptop
QUICK ANSWER

Can I Recover Deleted Files After Emptying the Recycle Bin?

Yes. In many cases, files emptied from the Recycle Bin can still be recovered if the deleted data has not been overwritten. When you empty the Recycle Bin, Windows does not instantly erase the file contents. Instead, it deletes the file's index record in the Master File Table (MFT) and marks that disk space as "available".

To maximize your chances of successful recovery, stop using the affected drive as soon as possible. Avoid saving new files, installing software, or performing other write operations that could overwrite the deleted data. Then scan the drive with a professional recovery tool like AOMEI FastRecovery.

See How It Works

Common Recycle Bin Data Loss Scenarios and Recovery Chances

Files can disappear from the Recycle Bin for many reasons, and the likelihood of recovery depends on how the data was deleted and whether it has been overwritten.

Accidental Emptying

Clicking "Empty Recycle Bin" without checking the contents is common, but it only clears the directory pointers. Your files are still hiding on your hard drive. As long as you don't save massive new files, they are completely recoverable.

Recovery Chance: High

Using Shift + Delete

Pressing "Shift + Delete" bypasses the Recycle Bin entirely. Although the file disappears instantly, the underlying data is often still recoverable unless it has been overwritten.

Recovery Chance: High

Auto Cleanup by Storage Sense

Windows Storage Sense can automatically remove files from the Recycle Bin after a specified period. Since this is a system deletion, the files are handled just like a manual empty.

Recovery Chance: Medium

Files Too Big to Recycle

When deleting huge files or large folders, Windows will prompt that they are "too big to recycle" and delete them permanently. Although Windows deletes them immediately, the file data generally remains on the drive until overwritten, making recovery possible in many cases.

Recovery Chance: Medium

Virus & Malware Attack

Malicious software can bypass user authorization to wipe system directories or force-empty the Recycle Bin. If the deleted data has not been overwritten, recovery software can often restore the files after the system is secured and the malware has been removed.

Recovery Chance: Medium

SSD with TRIM Enabled

Most modern SSDs use the TRIM command to erase deleted data blocks in the background for better performance. Once TRIM has processed the deleted data, software recovery becomes much more difficult or even impossible.

Recovery Chance: Low
Download Free Recycle Bin Recovery Tool

Before You Start Recovery: 4 Tips to Maximize Your Success

The actions you take immediately after losing files can make a significant difference. Follow these best practices before starting a recovery scan to improve the chances.

  1. 1

    Minimize computer usage right away

    The exact moment you realize your data is missing, reduce system operations. Simply browsing the web or opening software creates temporary files that can silently overwrite your lost data.

  2. 2

    Do not install the recovery software on the same drive

    Never download or install AOMEI FastRecovery onto the exact same drive partition (e.g., the C: drive) where the deleted files were located. Doing so could permanently stomp over the very data you are trying to rescue.

  3. 3

    Avoid system updates or large downloads

    Block pending Windows updates or heavy background downloads. These processes perform extensive write sequences across your hard drive, risking permanent data destruction.

  4. 4

    Save recovered files to a different location

    When you click "Recover," always save your rescued files to a separate partition or an external drive. Saving them straight back to the original partition may overwrite other deleted files that have not yet been recovered.

AOMEI FastRecovery on a laptop beside an external drive

Recover Files Deleted from Emptied Recycle Bin Using AOMEI FastRecovery

Follow this comprehensive, easy-to-understand guide to successfully retrieve permanently deleted data in just a few simple clicks.

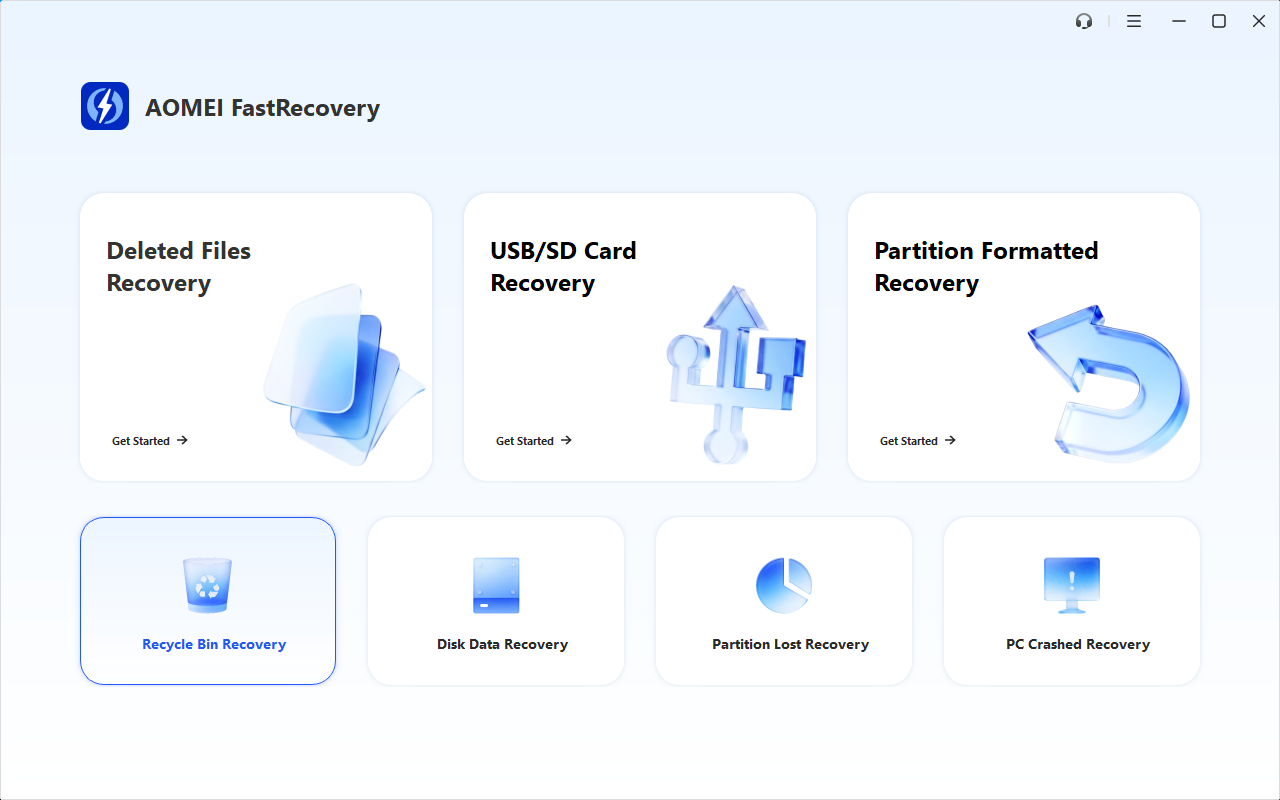
Step 1. Choose "Recycle Bin Recovery"

Launch AOMEI FastRecovery on your computer. On the main interface, locate and click the "Recycle Bin Recovery" in the lower-left corner to enter this specialized data recovery module.

Tips: This option is specifically optimized for retrieving files that were emptied from the Windows Recycle Bin or permanently deleted using the "Shift + Delete" shortcut.

Choose Recycle Bin Recovery in AOMEI FastRecovery
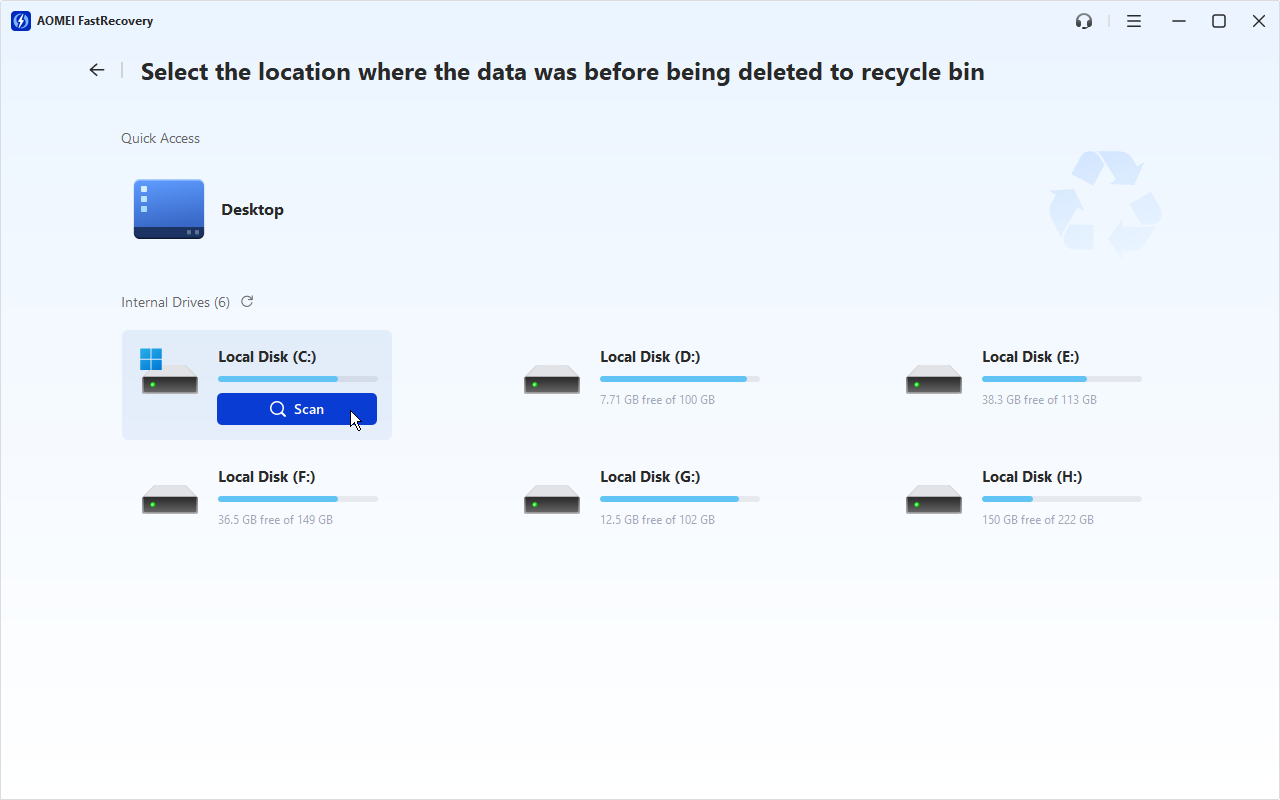
Select the original drive and start scanning

Step 2. Select the Original Location Before Deletion

On the next screen, you will see a list of available drives. Look for the original drive (such as Local Disk C:) where your lost files were stored before they were deleted to the Recycle Bin. Hover your mouse over the target drive and click the blue "Scan" button.

Tips: Since the Recycle Bin itself is a system-defined shell that references files across various locations, you need to scan the specific partition where the data originally resided to achieve the highest recovery success rate.

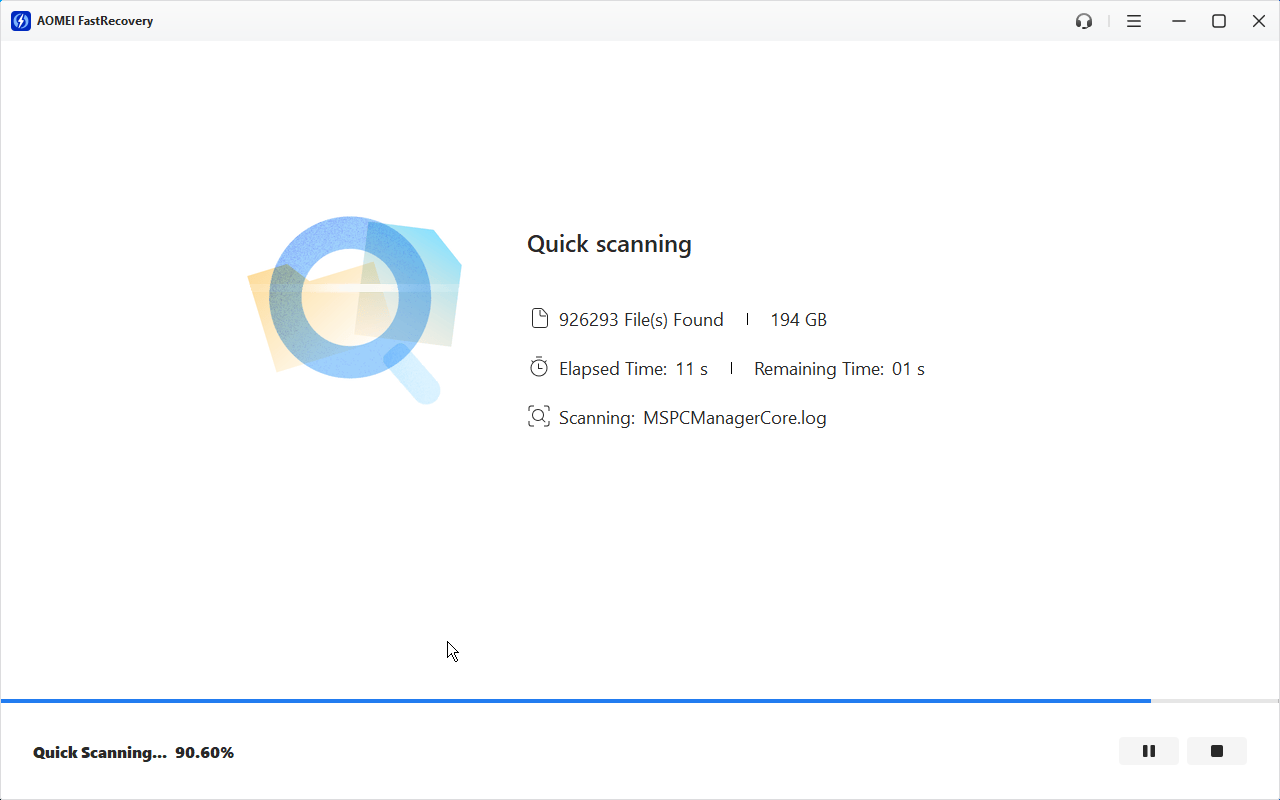
Step 3. Wait for the Scanning Process to Complete

The software will automatically initiate a quick scan on the selected drive to search for deleted data. A progress bar will display the elapsed time, remaining time, and current scanning status.

Tips: Found files cannot be dynamically viewed while the scanning process is actively running. Although you can pause or stop the scan at any time using the control buttons in the bottom right corner, it is highly recommended to wait until the scan completes fully.

AOMEI FastRecovery scanning progress
Filter and select deleted files for recovery

Step 4. Filter and Select Your Lost Files

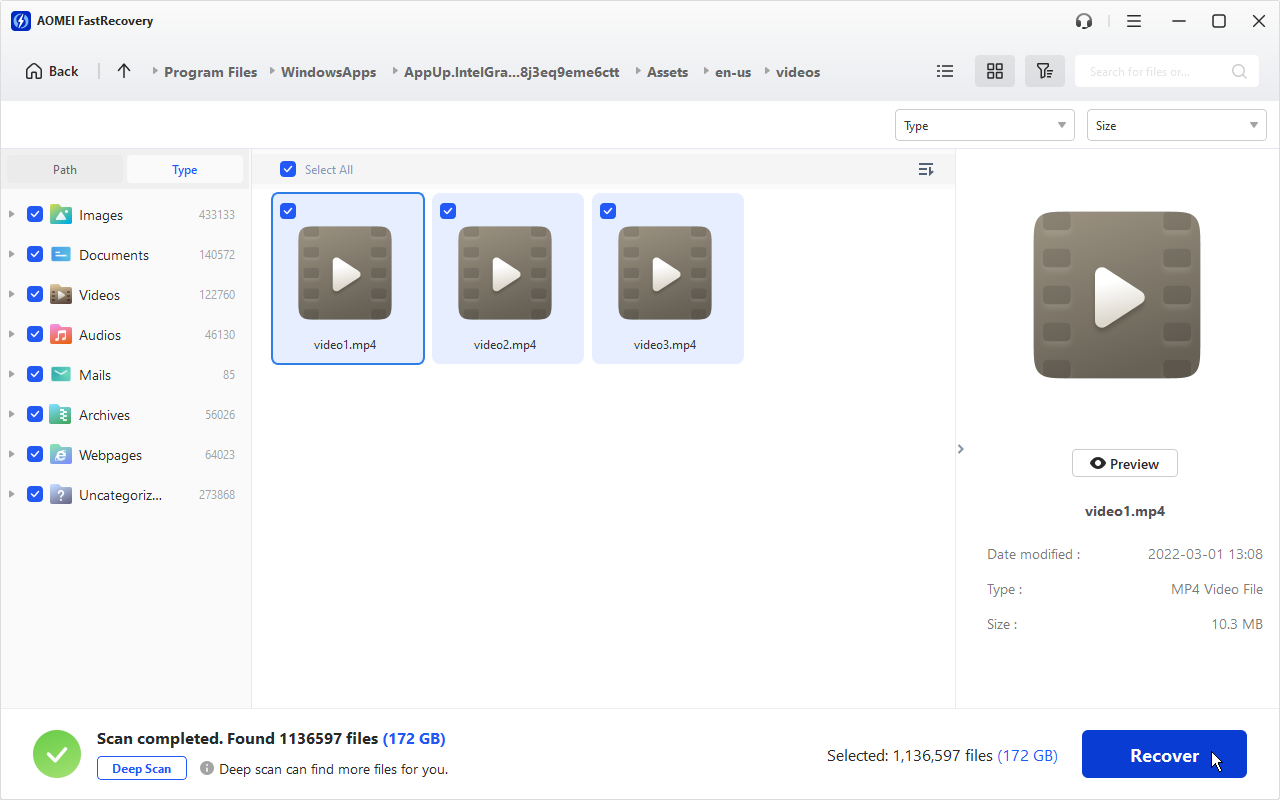
Once the initial scan is complete, you can browse the found items. If you cannot find your desired files, you can manually click the "Deep Scan" button to perform a more thorough search. Use the "Path" or "Type" tabs on the left pane to navigate through categories. Check the boxes next to the files you wish to restore.

Tips: If you are dealing with a large volume of data, you can utilize the search bar or the filter dropdown menus (by Type or Size) in the upper-right corner to quickly narrow down and locate your target files.

Step 5. Recover and Save Your Data

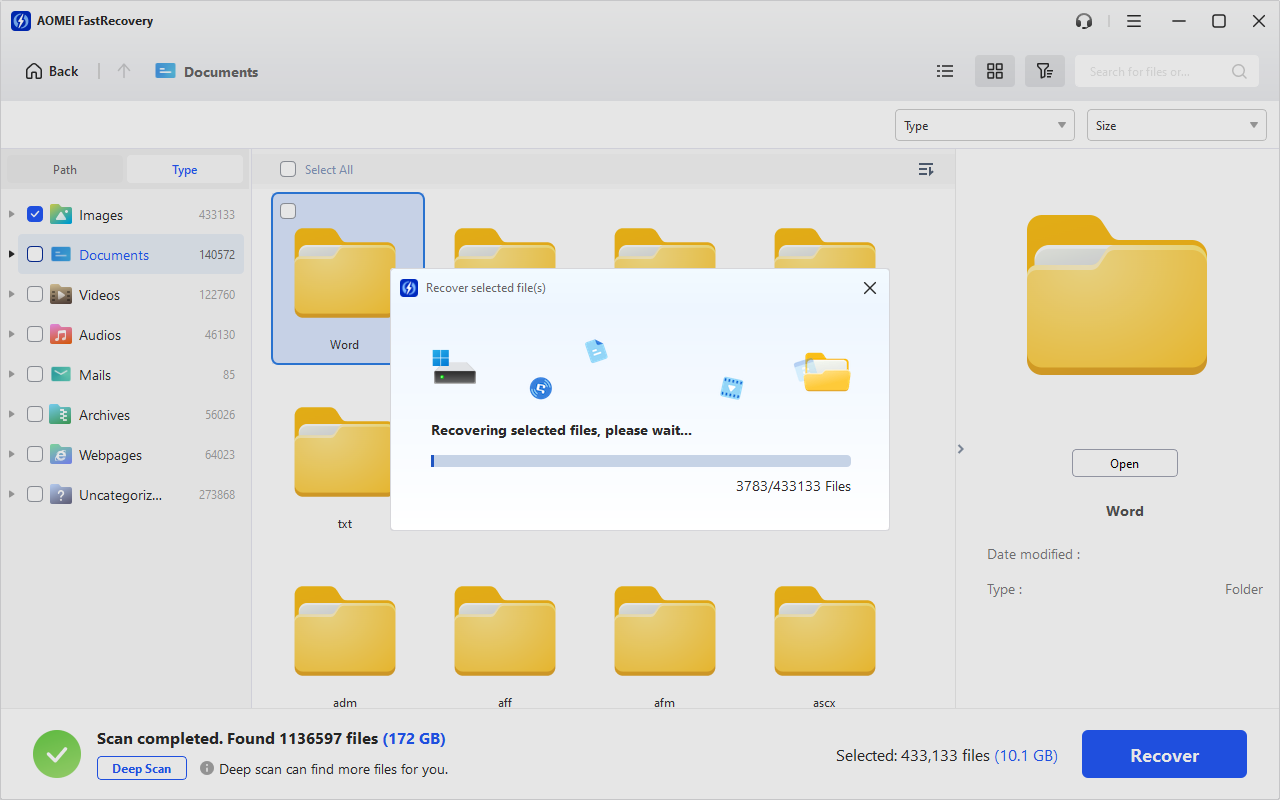
After checking all the items you want to retrieve, click the blue "Recover" button in the bottom right corner. A dedicated pop-up window will appear to show the real-time file restoration progress.

Notes: Always choose a safe destination path on a different drive or an external storage device to save your recovered files. Never save them back to the original partition being scanned.

Choose a safe location for recovered files
Download and Recover Now
Computer and NAS protected by AOMEI Backupper

Prevent Data Loss After Emptying Recycle Bin

The best free Recycle Bin recovery method is to back up your important data in advance. AOMEI Backupper helps you automatically create backups of your files and folders, so you can quickly restore lost data easily after accidental deletion, emptying the Recycle Bin, or other unexpected data loss situations. With scheduled backups, you can keep multiple file versions and restore the data you need without relying on recovery software or worrying about permanent file loss.

Backup My Data Now

More Methods to Recover Recycle Bin Files

Discover alternative methods to recover files from the Recycle Bin, including built-in Windows features, backups, and other recovery solutions.

Method 1: Use the "Undo" Shortcut (Ctrl + Z)

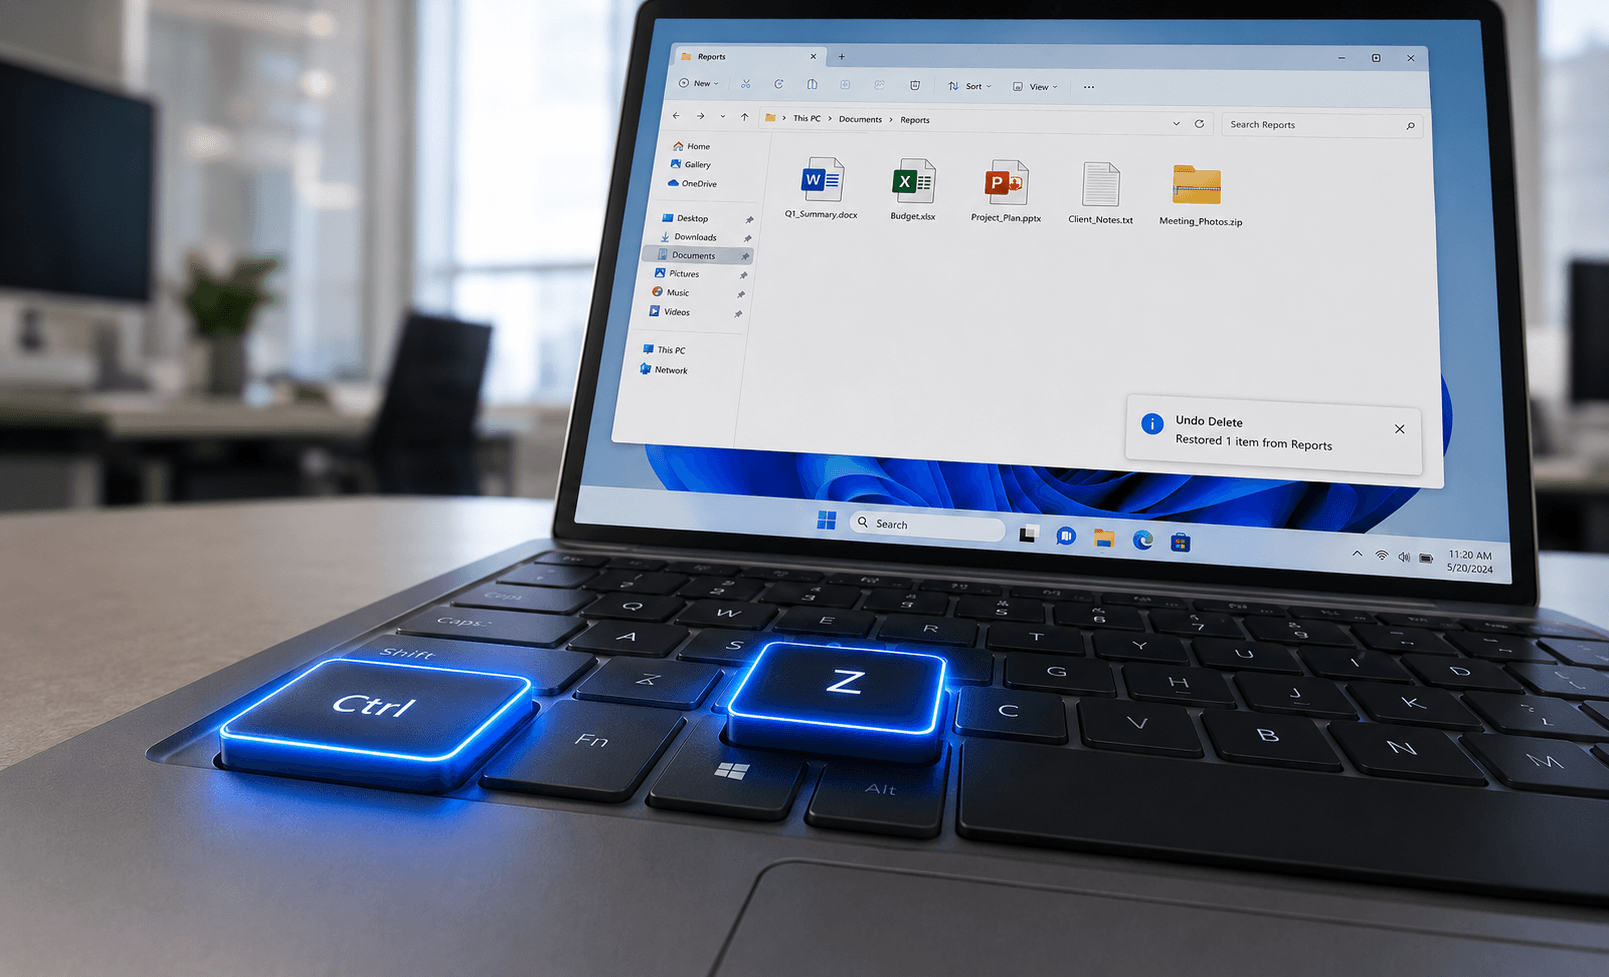
If you just accidentally deleted a file and haven't performed any other actions or restarted your computer, you can easily reverse the deletion using a simple keyboard shortcut.

  1. Click the desktop or the folder where the file was deleted.
  2. Press Ctrl + Z on your keyboard simultaneously. Alternatively, you can right-click on an empty space and select Undo Delete from the context menu.

Limitation: This method only works for the most recent action. Once you close the window, reboot the PC, or perform multiple other file operations, the Undo history is cleared, and this shortcut will no longer work.

Using Ctrl and Z keys to undo a deletion

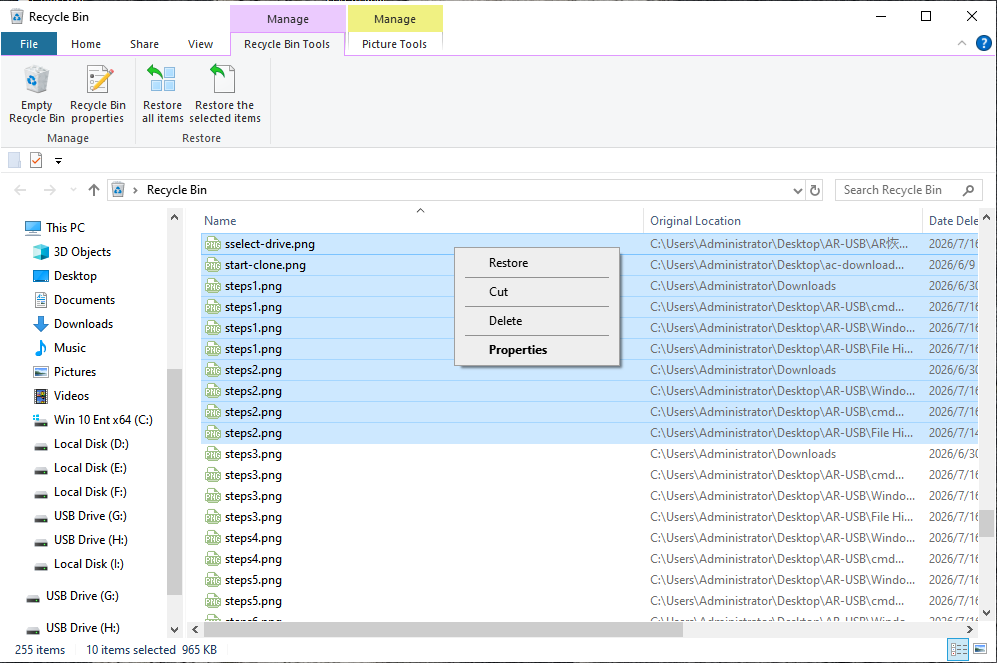
Method 2: Restore from an Unemptied Recycle Bin

If you haven't manually emptied the Recycle Bin or used a system cleaner like Disk Cleanup since deleting the file, your data is likely still sitting safely inside it.

  1. Double-click the Recycle Bin icon on your desktop to open it.
  2. Locate the deleted file or folder. You can use the search bar at the top right if there are too many items.
  3. Right-click on the file you want to recover and select "Restore". The file will automatically return to the exact folder it was deleted from.

Limitation: This is useless if you used Shift + Delete or if the Recycle Bin has already been emptied.

Restore a file from the Windows Recycle Bin

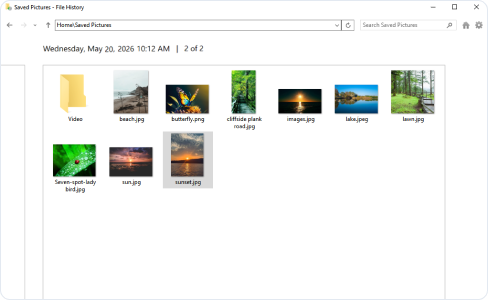
Method 3: Restore via Windows File History

Windows "File History" regularly backs up files in your default folders (Documents, Music, Pictures, Desktop), allowing you to extract previous versions even after the Recycle Bin is emptied.

  1. Type Control Panel in the Windows search bar and open it. Navigate to System and Security > File History.
  2. Click on Restore personal files in the left-hand menu. Browse the timeline at the bottom to find the version of your files from before they were deleted.
  3. Select the files and click the green "Restore" button.

Limitation: This method strictly requires that you have previously connected an external drive and enabled the File History feature before the data loss occurred. If it was turned off, this method cannot help you.

Restore personal files with Windows File History

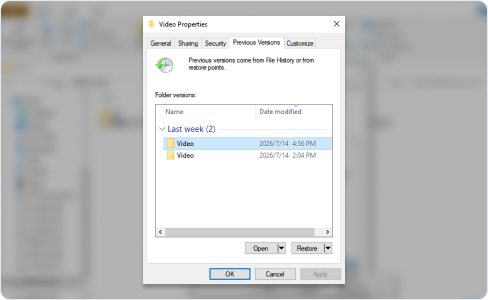
Method 4: Restore "Previous Versions"

Windows automatically saves Shadow Copies of files and folders when creating System Restore points. You might be able to retrieve your data by restoring the parent folder to an earlier state.

  1. Open File Explorer and locate the folder that originally contained the deleted file. Right-click the folder and select Properties.
  2. Switch to the Previous Versions tab. Select a folder version dated before your file was permanently deleted.
  3. Click "Open" to verify the file is there, then click "Restore" or "Restore To...".

Limitation: This relies on Windows System Protection being turned on and a recent restore point being created. If no restore points exist, the list will be empty.

Previous Versions tab in Windows folder properties

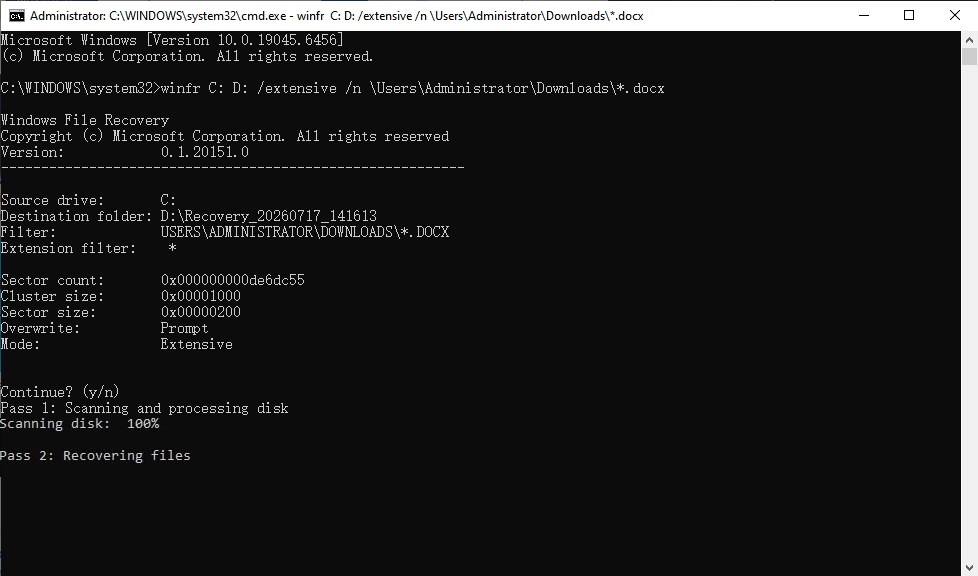
Method 5: Use Windows File Recovery

If no backups exist, Microsoft provides a free tool to scan the hard drive for leftover data fragments.

  1. Open the Microsoft Store, search for Windows File Recovery, and install it. Run it as an administrator from the Start menu.
  2. Type the recovery command. For example: winfr C: D: /regular /n \Users\\Documents\report.docx (These attempts to recover a file from C drive to D drive).
  3. Type Y to confirm.

Limitation: It lacks a graphical interface (GUI), requiring users to type command lines, which is prone to errors.

Windows File Recovery command line

Method 6: Check the OneDrive Cloud Recycle Bin

If your Desktop or Documents folders are synced with OneDrive, files deleted locally and cleared from the PC's Recycle Bin might still be recoverable from the cloud.

  1. Go to the OneDrive website and sign in.
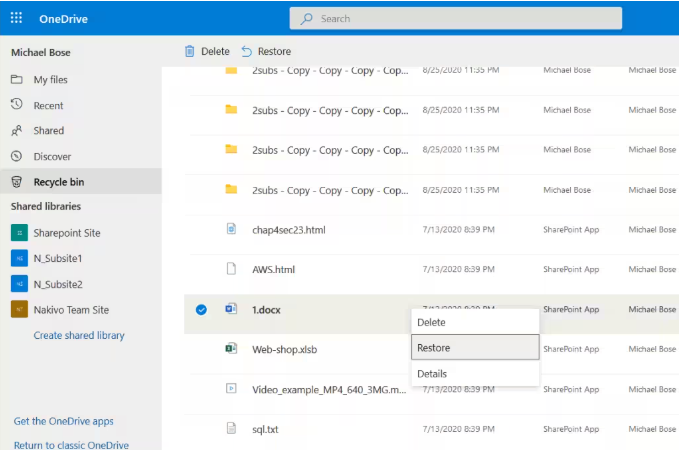
  2. Click on Recycle bin in the left navigation pane.
  3. Find your deleted files, check their boxes, and click "Restore" at the top. Or right click on the files and select "Restore" in the drop-down menu.

Limitation: This only works for folders you have explicitly chosen to sync with OneDrive. Additionally, OneDrive automatically deletes items in its Recycle Bin after 30 days.

Restore a file from the OneDrive Recycle Bin

Best Practices to Minimize Recycle Bin Data Loss

A few simple settings and habits can significantly minimize the chances of losing your files permanently. Follow these best practices to keep your data protected.

Turn On Delete Confirmation

Windows 10/11 no longer asks for confirmation before deleting files by default. Right-click your Recycle Bin, select "Properties" and check the box that says "Display delete confirmation dialog." This simple prompt prevents accidental deletions.

Review Storage Sense Settings

Storage Sense can automatically remove items from the Recycle Bin after a set period. Go to Settings > System > Storage > Storage Sense. Change the setting for "Delete files in my recycle bin if they have been there for over" to "Never" if you prefer manual control.

Increase Recycle Bin Capacity

A small Recycle Bin may automatically skip or permanently remove large deleted files once its storage limit is reached. Right-click the Recycle Bin, go to "Properties", select your drive, and increase the "Custom size" to allocate more disk space for deleted files.

Avoid the "Shift+Delete" Habit

The Shift + Delete shortcut permanently deletes files without sending them to the Recycle Bin. Break this habit for important work folders. Let files rest in the Recycle Bin as a safety net. You can always empty it manually at the end of the month.

Frequently Asked Questions About Recycle Bin Data Recovery

Yes, absolutely. When you empty the Recycle Bin, the actual file content is not immediately destroyed. Windows simply removes the file's index from the directory and marks that storage space as "available." As long as you don't save new files that overwrite that exact space, AOMEI FastRecovery can rebuild the path and rescue your data.

Hear From Users Who Got Their Data Back

Don't just take our word for it. Discover how everyday users and professionals successfully retrieved their permanently deleted Recycle Bin files.

OC
Oliver C.3D Animator

"Recovered a bypassed 10GB video project"

"I deleted a massive rendering file to clear space, but Windows said it was too large for the Recycle Bin and wiped it instantly. I realized an hour later I needed a specific clip from it. AOMEI's deep scan dug right into my D: drive and pieced the entire 10GB file back together flawlessly."

CW
Chloe W.PhD Candidate

"Saved my thesis after a CCleaner wipe!"

"I ran a third-party disk cleaner to speed up my PC, and it aggressively emptied my Recycle Bin which contained several older drafts of my thesis I desperately needed to reference. AOMEI FastRecovery was incredibly simple. Within 5 minutes, it located my deleted Word documents."

BH
Benjamin H.Amateur Photographer

"Defeated the automatic Storage Sense"

"Windows Storage Sense quietly emptied my recycle bin after 30 days. I didn't know the complex Microsoft command-line tool syntax to get them back, so I tried FastRecovery. The visual interface was a breeze, and it easily located and restored my entire folder of family photos without a hitch."

RG
Rachel G.Financial Consultant

"Fastest solution for a Shift+Delete mistake"

"I have a bad habit of using Shift+Delete to skip the Recycle Bin. I accidentally wiped a crucial client invoice spreadsheet. I installed this tool on my backup drive to avoid overwriting the C: drive. It took maybe 40 seconds to scan and pull the exact Excel file back."

DF
Daniel F.Systems Engineer

"Recovered from an SSD right in the nick of time"

"I have a bad habit of using Shift+Delete to skip the Recycle Bin. I accidentally wiped a crucial client invoice spreadsheet. I installed this tool on my backup drive to avoid overwriting the C: drive. It took maybe 40 seconds to scan and pull the exact Excel file back."

AOMEI FastRecovery

Rescue Your Data from an Emptied Recycle Bin Now

Windows background processes are constantly writing new data that can permanently overwrite your deleted files. Act fast! Download AOMEI FastRecovery now to rescue your data.

Download FreewareWindows 11/10/8/7/Server
AOMEI FastRecovery interface and a Recycle Bin