
Complete Guide to Using M.2 NVMe as Boot Drive (2 Cases)
Upgrading to an M.2 NVMe drive as your boot drive can dramatically improve system responsiveness, boot times, and overall performance. Scroll down to get detailed upgrade steps.
By Lily Updated on May 12, 2025
Upgrade to an M.2 NVMe boot drive for instant performance gains—faster load times, better responsiveness, and a cleaner setup. Whether building a new PC or reviving an old one, proper setup is key to unlocking NVMe’s full speed.
This guide covers everything: hardware checks, installation, BIOS settings, and OS setup. Ready to ditch slow boot times? Let’s begin.
Prepare for using M.2 NVMe as boot drive
Before jumping into installation, it’s crucial to prepare your system and confirm that everything is compatible. Here’s what you need to check and set up to ensure a smooth transition to using NVMe as boot drive.
1. Check Motherboard Compatibility
Not all M.2 slots support NVMe booting—especially on older motherboards.
- Look for PCIe Support: Ensure your M.2 slot supports PCIe NVMe, not just SATA M.2.
- Consult Your Manual: Your motherboard’s documentation will specify if booting from NVMe is supported.
- Check Chipset and BIOS Version: Most modern chipsets (e.g., Intel Z170+, AMD B350+) support booting from NVMe with the correct BIOS.
2. Update Your BIOS/UEFI Firmware
A BIOS update may be required for full NVMe support, especially on pre-2016 systems. Visit the manufacturer’s website to download the latest BIOS update for your motherboard.
3. Download OS cloning software (for moving OS)
If you're replacing an old boot drive, you can clone the existing OS to your new NVMe drive with the best cloning software - AOMEI Cloner.

- Disk Clone: Perfectly copy your entire drive, maintaining all partitions, software, and personal data.
- System Clone: Move just your operating system with all boot components to new storage - no fresh install required.
- SSD Alignment: Our automatic alignment technology prepares your SSD for peak operation right from the start.
- Resize Partitions: Adjust disk space when cloning to a smaller/larger NVMe.
- NVMe Support: Compatible with all major NVMe SSD brands, including Samsung, Western Digital, Crucial, Seagate, and more.
Download and install AOMEI Cloner on your PC now.
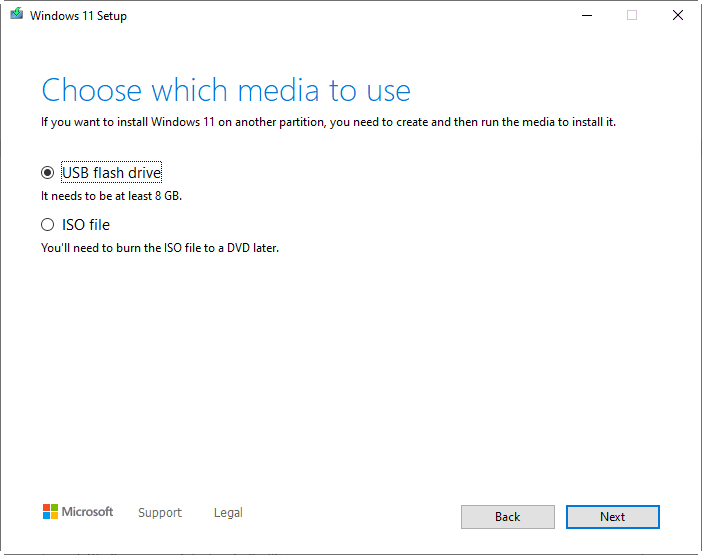
4. Create a Bootable USB Installer (for installing OS)
To fresh install Windows on your new NVMe drive, you need to prepare a Windows installation USB drive:
- Download Media Creation Tool (Windows 10 or Windows 11)
- Run the Tool→ Accept terms → Select Create installation media. Follow the wizard to create a bootable USB.
How to install M.2 NVMe SSD on your computer
To use M.2 as boot drive, you should safely mount your NVMe drive first. Here’s a step-by-step guide:
1. Power Down and Unplug Your PC
Before handling any components:
- Shut down the system completely.
- Unplug the power cable and any peripherals.
- Press and hold the power button for 5–10 seconds to discharge remaining power.
2. Open Your Case
Use a screwdriver to remove the side panel of your desktop tower or open your laptop’s bottom cover (if upgrading a laptop).
3. Locate the M.2 Slot
Most motherboards have at least one M.2 slot, usually located:
- Near the PCIe slots or CPU socket.
- Horizontally on the board or underneath a pre-installed M.2 heatsink.
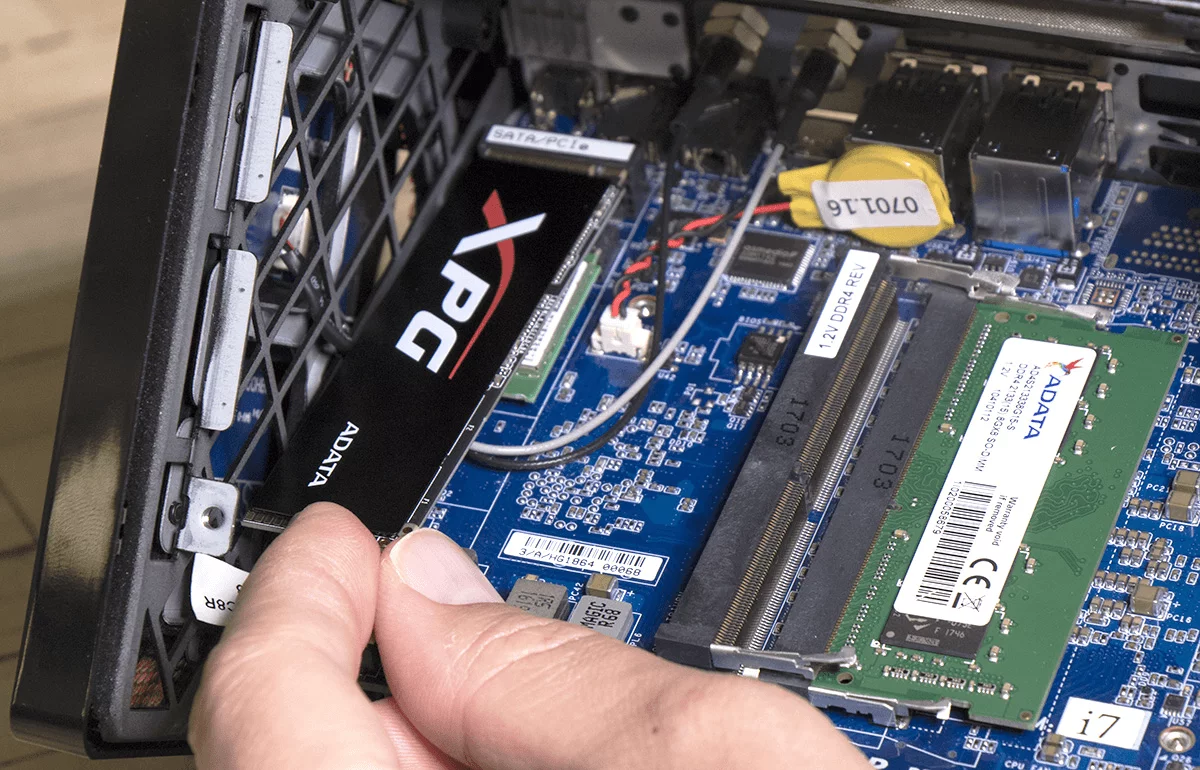
4. Insert the M.2 NVMe SSD
- Hold the NVMe SSD at a 30–45° angle and align the notch with the M.2 slot.
- Gently slide it into the slot until fully seated.
5. Secure the Drive with a Mounting Screw
- Push the SSD down flat against the motherboard.
- Use the included M.2 mounting screw to secure the drive at the end. Don’t overtighten—just enough to hold it firmly.
If your motherboard includes a heatsink or thermal pad:
- Remove the plastic film from the pad.
- Carefully reattach the heatsink over the SSD after installation.
6. Close the Case and Reconnect Power
Once the SSD is installed, reattach the side panel or bottom cover. Then reconnect your power cable, monitor, and peripherals.
How to use M.2 NVMe SSD as boot drive
In this part, you’ll learn how to use M.2 SSD as boot drive. Two cases are included.
Case 1: Clone existing system
Cloning your current system to an M.2 NVMe SSD is a fast way to migrate your OS, files, and apps without reinstalling Windows. Here's how to clone your drive via AOMEI Cloner:
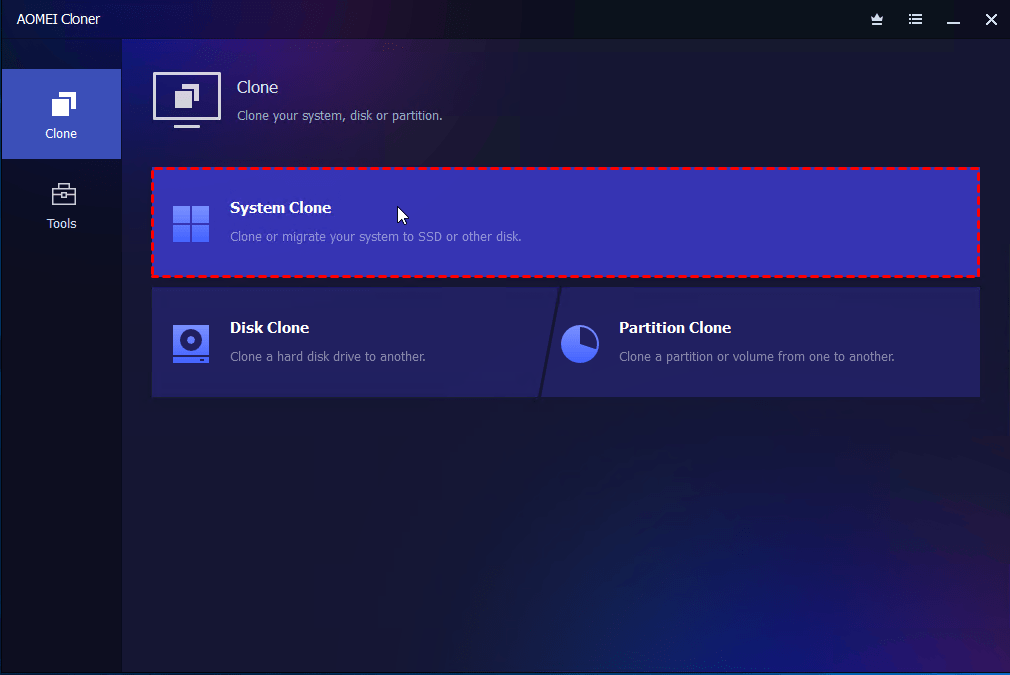
1. Start your computer from the old hard drive. After booting, open AOMEI Cloner and select System Clone from the Clone menu.
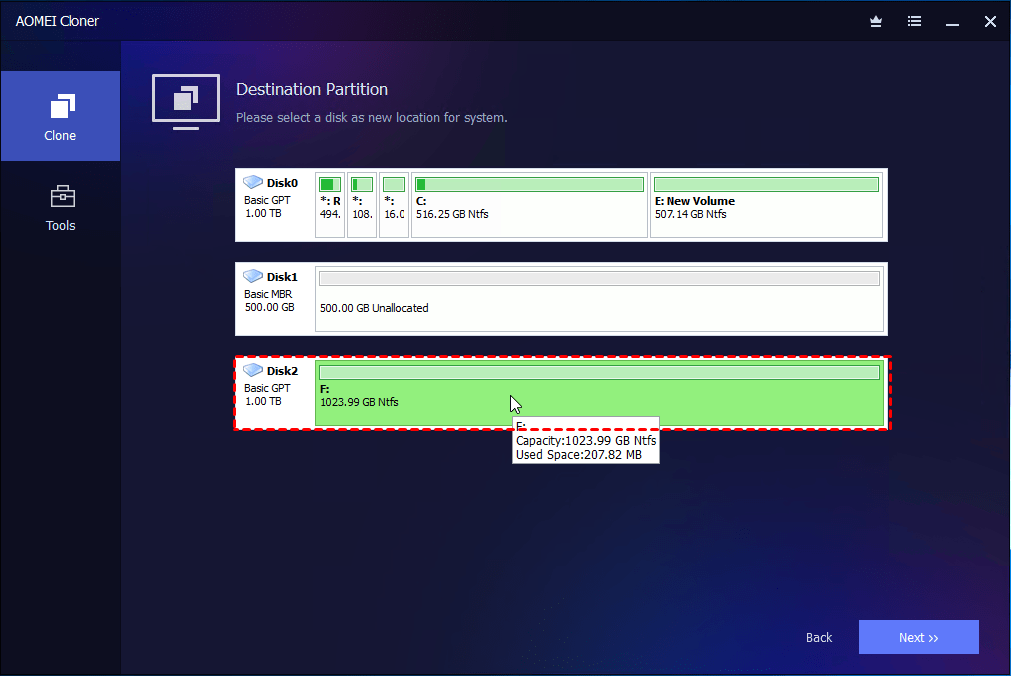
2. The application automatically includes system and boot partitions. Select your destination NVMe SSD.
3. Configure more settings and click Start Clone to begin the transfer.
👉 Make full use of disk space: It is automatically enabled to utilize all available storage capacity when migrating to a larger drive.
👉 SSD Alignment: Recommended for enhanced SSD performance and extended lifespan.

4. After cloning completes, set the NVMe SSD as boot drive in BIOS.
- Restart your PC and enter BIOS/UEFI (usually DEL or F2 at startup).
- Navigate to the Boot Order or Boot Priority section. Set your M.2 NVMe SSD as the first boot device.
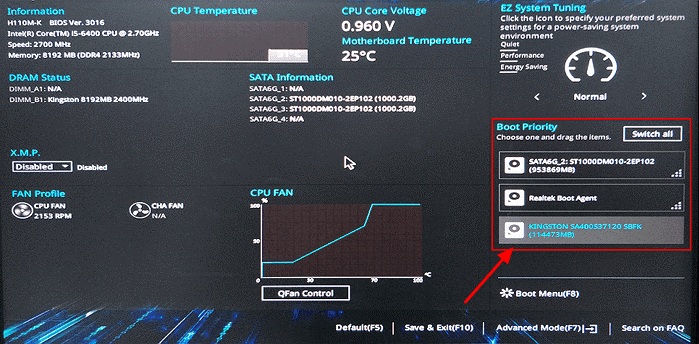
- Save changes and exit BIOS.
Case 2: Clean install Windows
If you want the best performance and a fresh start, a clean install of Windows onto your M.2 NVMe SSD is the ideal approach. Here’s how to do it right:
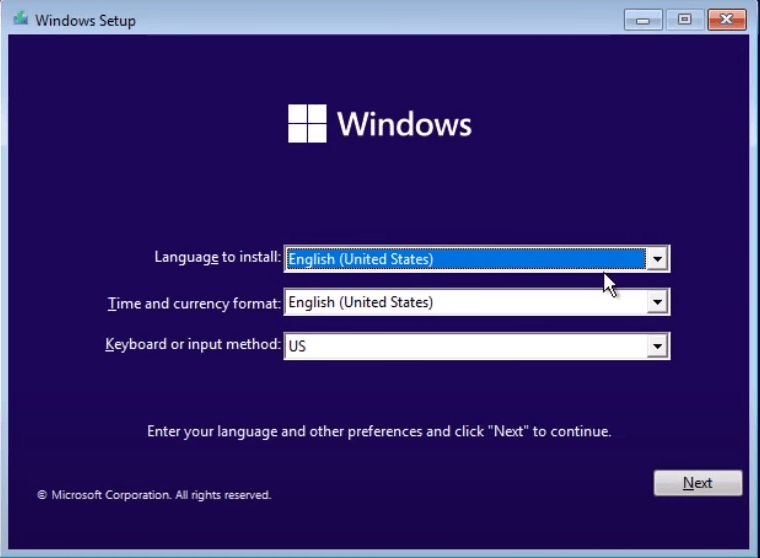
1. Start your computer from the Windows installation USB created before.
2. The Windows installer will launch. Choose your language and other preferences and click Next > Install now.
3. Enter the product key (if required).
- If you have a valid Windows license key, enter it when prompted.
- If reinstalling Windows on a device with a digital license, select I don’t have a product key and activate it later.
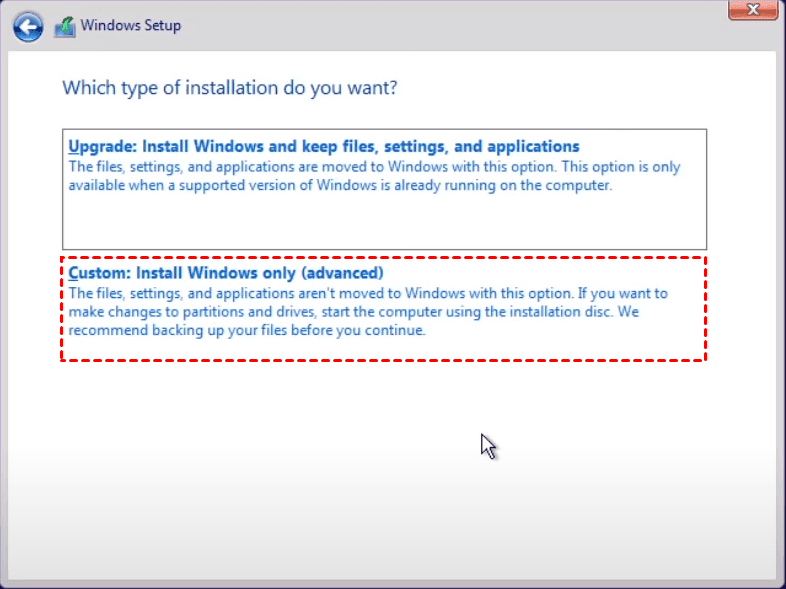
4. Select Custom: Install Windows only (advanced).
5. When asked “Where do you want to install Windows”, select your M.2 NVMe SSD and click Next.
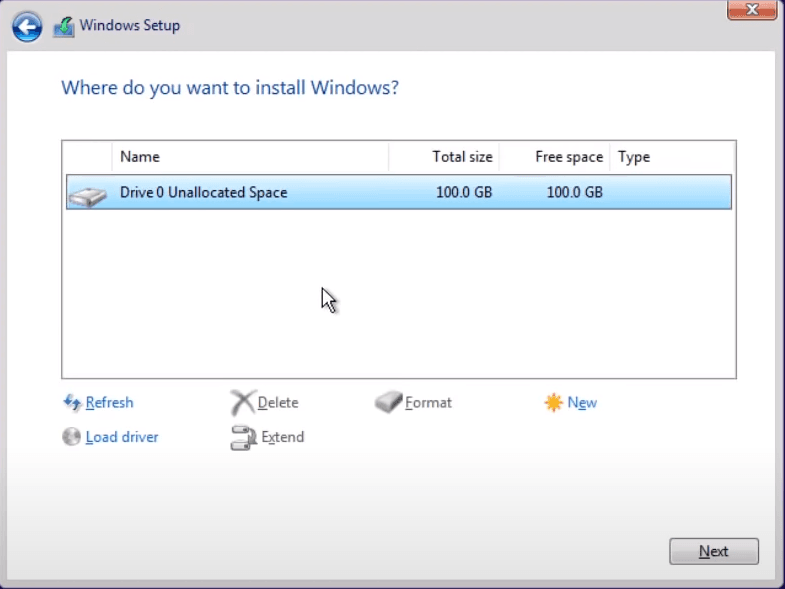
💡 Note: Generally, your M.2 NVMe SSD shows as unallocated space. If not, delete all existing partitions on the NVMe SSD and leave the space unallocated.
6. Windows will copy files, install features, and configure settings automatically. Your PC will restart several times during the process.
💡 Note: Remove the USB drive when prompted (or after first reboot) to prevent boot looping.
7. After installation, follow the on-screen instructions to finalize the setup and boot into the desktop.
The end
Switching to using M.2 NVMe as boot drive is one of the most effective upgrades for faster boot times, quicker app loading, and overall system responsiveness. Whether you choose to clone your existing system or perform a clean installation of Windows, the process is straightforward with the right setup procedures.
AOMEI Cloner is the best cloning software to help you move the existing OS. It can also help you replace old NVMe with new NVMe when you encounter the NVMe not showing up issue. Just give it a shot!
A reliable disk clone software can help you easily clone system, disk, partition with secure boot.
