How to Clone Windows 11/10 to NVMe SSD: Step-by-Step Guide
Windows does not provide the clone tool. Discover how to clone Windows to NVMe with a top-rated tool. This step-by-step guide ensures a smooth and hassle-free process.
By Jonna Updated on March 17, 2026
Can you put Windows on a NVMe SSD? Of course! Upgrading your hard drive to an NVMe SSD is one of the best ways to improve your computer's performance. You can install a fresh copy of Windows on an NVMe SSD or migrate an existing Windows installation from another drive, such as a SATA SSD or HDD.
Cloning an existing Windows installation to an NVMe SSD is an easy way to switch without having to reinstall everything from scratch. In this guide, we'll walk you through the process of cloning Windows SSD to NVMe and how to get the most out of your new drive.
🌟 To check more Windows drive cloning scenarios, please refer to this complete guide: Replace C Drive with SSD.
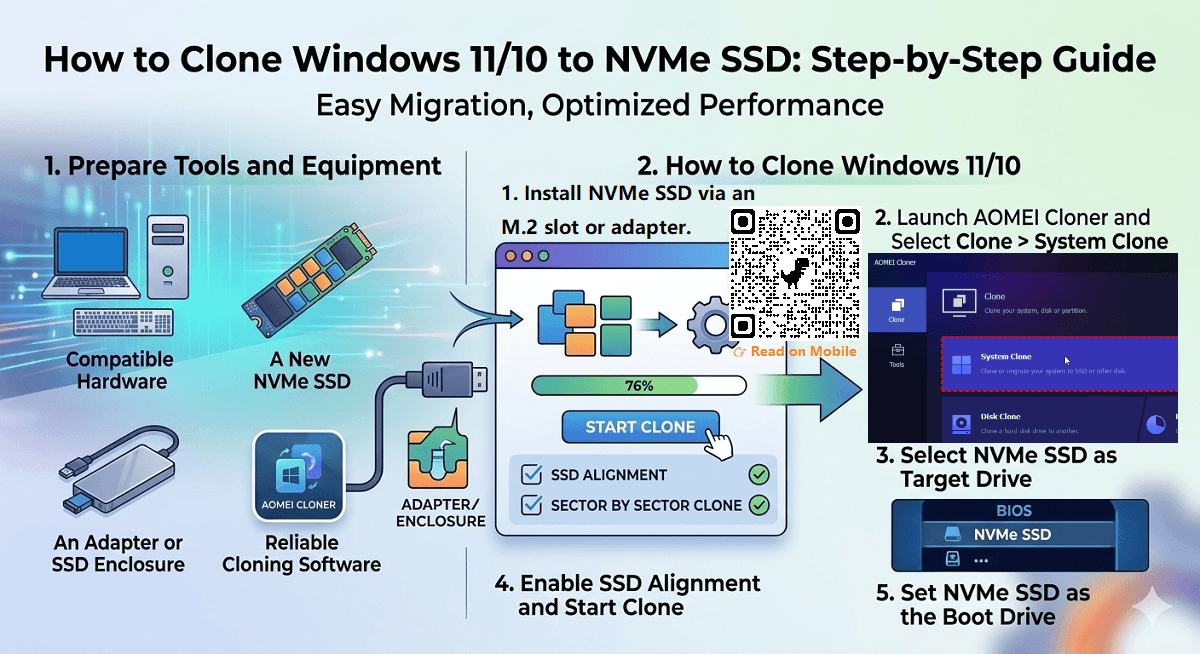
Prepare Tools and Equipment for Windows Clone
Before you begin, make sure you have the following items ready:
1. Compatible Hardware
With NVMe SSDs being a newer SSD model, you'll need to have computer hardware with a Skylake chipset or higher, an M.2 PCI-E x4 slot, UEFI firmware, and UEFI boot mode.
2. A New NVMe SSD
Make sure the free space on the NVMe SSD is larger than the space for data on the source disk in Windows.
3. An Adapter or SSD Enclosure
If there's only one slot, you’ll need an adapter or external NVMe enclosure to connect the new NVMe SSD.
4. Reliable Cloning Software
AOMEI Cloner is the best disk cloning software for Windows PC and server systems. It provides powerful cloning capabilities to simplify the migration process.

- OS Migration: Transfer only Windows OS to a new SSD or HDD without reinstalling Windows.
- Disk Clone: Copy an entire disk to upgrade or replace a hard drive.
- Intelligent Clone: Copy only used space on the source disk. Useful for cloning a larger drive to a smaller drive.
- Sector by Sector Clone: Create an exact copy of the source disk, including blank or logically bad sectors.
- SSD Alignment: Ensure proper data alignment for faster read/write speeds and extended drive lifespan.
- Wide Compatibility: Support various disk brands (Samsung, Intel, WD, etc.), disk types (HDD, SDD, SSHD, etc.), disk interfaces (SATA, NVMe, etc.).
How to Clone Windows 11/10 to NVMe SSD
If you're ready, go ahead and follow the steps below to clone Windows to M.2 SSD.
Step 1: Install NVMe SSD
If you haven't installed an NVMe SSD yet, now is the time to do so.
- Follow the manufacturer's instructions to make sure the SSD is properly connected to your PC via the M.2 slot.
- If there's only one slot, try using an adapter or SSD enclosure to connect it.
In addition, if it's a new NVMe SSD, use Disk Management to initialize it to the GPT format.
Step 2: Launch AOMEI Cloner and Select a Clone Mode
For the cloning process, AOMEI Cloner is a great choice for both beginners and experts. It supports a variety of cloning operations, including cloning Windows to NVMe SSD. The tool supports almost all common SSD brands and models. You can use it to clone HDD to Samsung SSD, Crucial SSD, etc.
Download this SSD cloning software to try it now:
- Launch AOMEI Cloner, and click the Clone tab.
- Select the System Clone option, which will clone only the partitions required to boot Windows (including the System Reserved Partition and the OS partition).

If you want to clone all the data on the source drive to the NVMe SSD, you can choose Disk Clone.
Step 3: Select NVMe SSD as Target Drive
The program automatically selects the system partition(s). You just need to select your newly installed NVMe SSD as the Destination Partition.
Step 4: Configure Cloning Options and Start Clone
- Make full use of disk space: It is available when cloning to a larger drive, helping to use the full capacity.
- SSD Alignment: You should enable it when cloning to an SSD. It will optimize the performance of your SSD.
- Sector By Sector Clone: Check this only if you want an exact replica, including blank sectors on the source drive.
Confirm your settings and click Start Clone to start the cloning process. AOMEI Cloner will clone your Windows installation to the NVMe SSD. The cloning process may take some time, depending on the size of the data to be transferred.
Step 5: Set NVMe SSD as the Boot Drive
After the cloning process is complete, you need to set the NVMe SSD as the primary boot device:
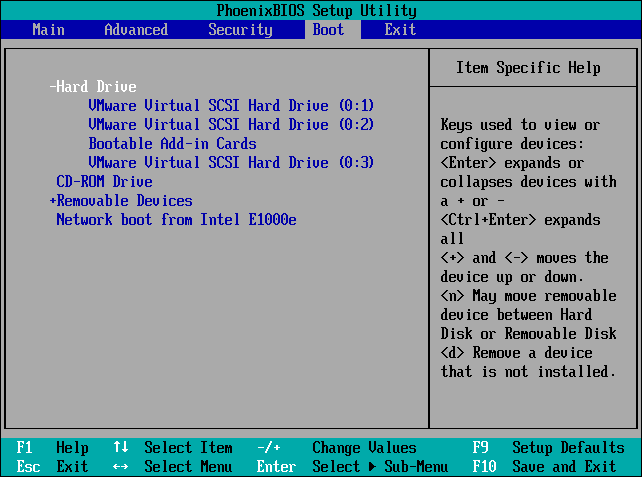
- Restart your computer and enter the BIOS/UEFI setup (usually by pressing the DEL or F2 key during boot).
- In the BIOS menu, set the NVMe SSD as the first boot device.
- Save the changes and exit the BIOS.
Your PC will now boot from the NVMe SSD, giving you a faster, more responsive experience.
Note: If your computer doesn't boot as expected, please refer to this article: "Cloned Drive Won't Boot."
FAQs About Clone Windows 11/10 to NVMe SSD
1. Do I need to reinstall Windows after cloning to an NVMe SSD?
No, cloning with AOMEI Cloner transfers your entire Windows setup to the new SSD, so there’s no need for reinstallation.
2. What if my NVMe SSD isn’t showing up?
Make sure your NVMe SSD is correctly installed and recognized in the BIOS/UEFI. If you're using an external enclosure, ensure the connection is stable.
3. Can I clone my drive to a smaller SSD?
Yes, AOMEI Cloner supports cloning to a smaller disk, as long as the data on the source disk fits within the capacity of the target disk.
4. Will cloning erase data on the target NVMe SSD?
Yes, the target SSD will be overwritten during the cloning process, so make sure to back up any important data before proceeding.
Conclusion
Cloning your Windows 11/10 system to an NVMe SSD is a simple and effective way to upgrade your PC's performance without reinstalling Windows and all your software. With AOMEI Cloner, the cloning process is easy to complete, ensuring a smooth transition to your new NVMe SSD. Download now and make your SSD upgrade hassle-free.