Solved | Reagentc Enable Not Working (5 Ways)
This article aims to help you fix Reagentc enable not working on Windows 10/11. Keep reading to get 5 effective solutions.
By Jonna Updated on April 30, 2026
The reagentc /enable command is a Windows command-line operation that activates the Windows Recovery Environment (Windows RE) on your system. Windows RE is the built-in recovery platform that allows you to troubleshoot startup failures, repair system files, restore images, reset the PC, and perform advanced recovery tasks.
When Windows RE is enabled, the system creates and maintains a hidden recovery partition or stores recovery tools in a protected location. The reagentc /enable command tells Windows to register and activate that recovery environment so it becomes available during boot. The problem of reagentc enable not working is usually caused by the following reasons:
- Missing or corrupted WinRE image (winre.wim)
- Recovery partition deleted or resized incorrectly
- Incorrect WinRE file path registered in Windows
- Insufficient permissions (access denied)
- Command not recognized due to environment issues
How to Fix Reagentc Enable Not Working Easily
Now that we know what we are dealing with, let’s go on to get into the 5 practical fixes below, starting with the simplest solution.
- Note: Before beginning to adjust WinRE, ensure the following conditions are fulfilled:
- You need administrator privileges to change WinRE settings.
- Be sure to suspend BitLocker to prevent recovery prompts or access issues during startup configuration changes.
- Make sure that the WinRE image (Winre.wim) resides in the system reserved partition or recovery partition.
Fix 1. Re-enable Windows Recovery Environment (WinRE)
If WinRE is disabled due to a system update, disk operation, or configuration glitch, re-enabling it can refresh the settings and restore functionality.
Step 1. Press Windows + S, type cmd, and select Run as administrator.
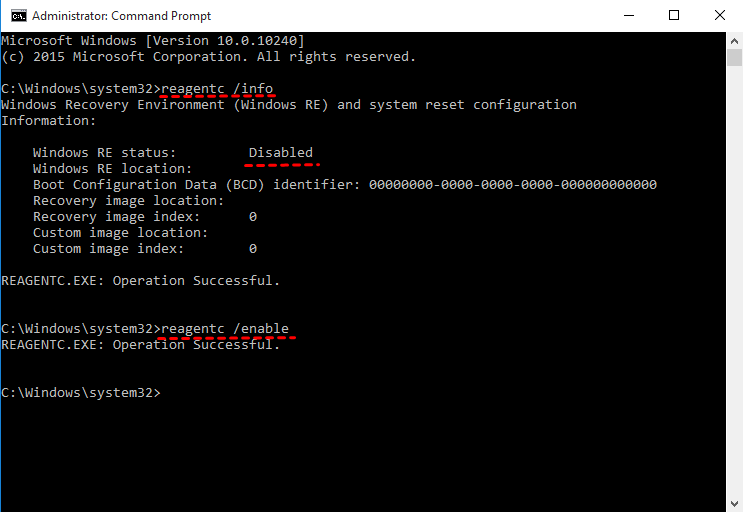
Step 2. Check the current WinRE status by entering the reagentc /info command.
Step 3. If disabled, you will be prompted with: Windows RE status: Disabled. In such a case, you can reactivate WinRE and restore recovery options with reagentc /enable.
If the WinRE status is Enabled, but the location of the recovery image is incorrect or missing, you may need to go on with the following solutions to resolve reagentc enable not working.
Fix 2. Restore WinRE Image Manually
If you encounter errors like reagentc /enable the windows re image was not found, that normally means the Winre.wim file either disappeared or was relocated. You may follow these steps to manually assign the correct path.
Step 1. Download a Windows ISO from the Windows Software Download page, right-click the ISO file, and click on Mount.

Step 2. Navigate to the Winre.wim file location on the mounted media: <DriveLetter>:\sources\boot.wim.
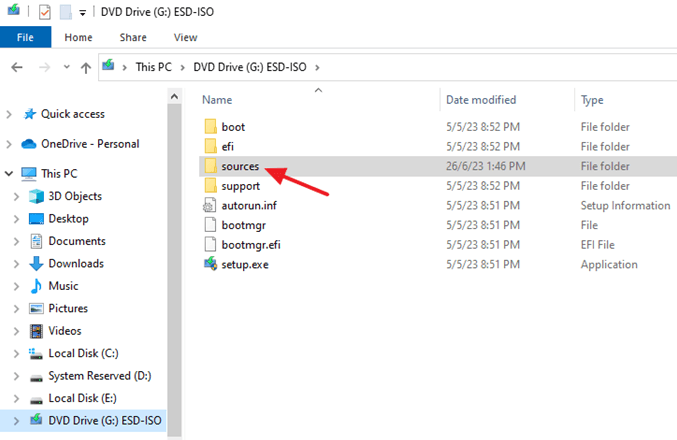
Step 3. Then, copy Winre.wim to the recovery location on your broken system: C:\Windows\System32\Recovery.
Step 4. Finally, re-register the recovery environment by using the following commands one at a time in the Command Prompt (Admin):
- reagentc /setreimage /path C:\Windows\System32\Recovery
- reagentc /enable

Fix 3. Rebuild Recovery Partition
WinRE depends on a dedicated recovery partition. If that partition was deleted during disk cleanup, resizing, or OS migration, Windows simply has nowhere to store recovery data. Here, you may try rebuilding the recovery partition to fix reagentc enable access denied on Windows 11/10.
Step 1. Press Windows + X, and select Disk Management.
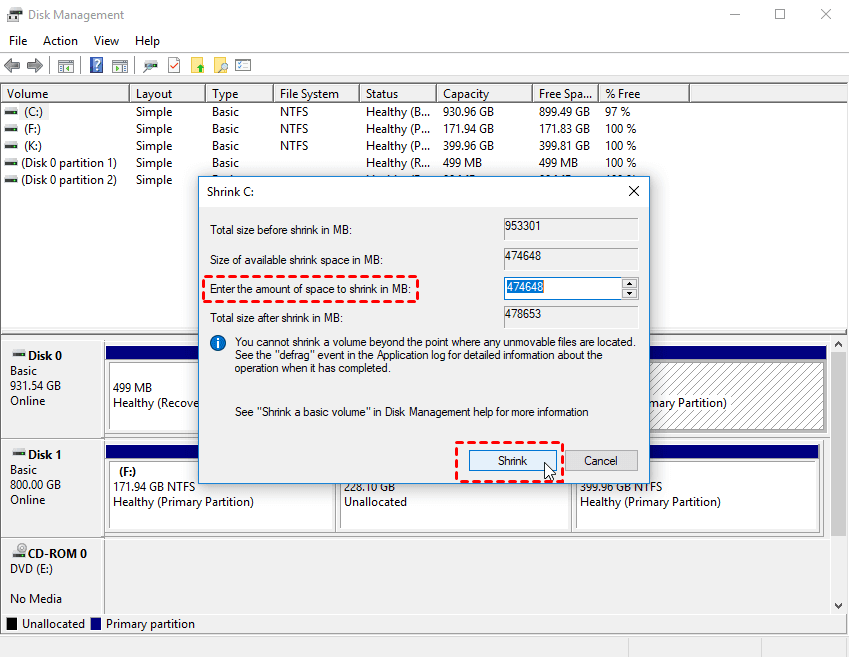
Step 2. Right-click the C drive, and select Shrink Volume, then set the space to about 500MB - 1GB in size.
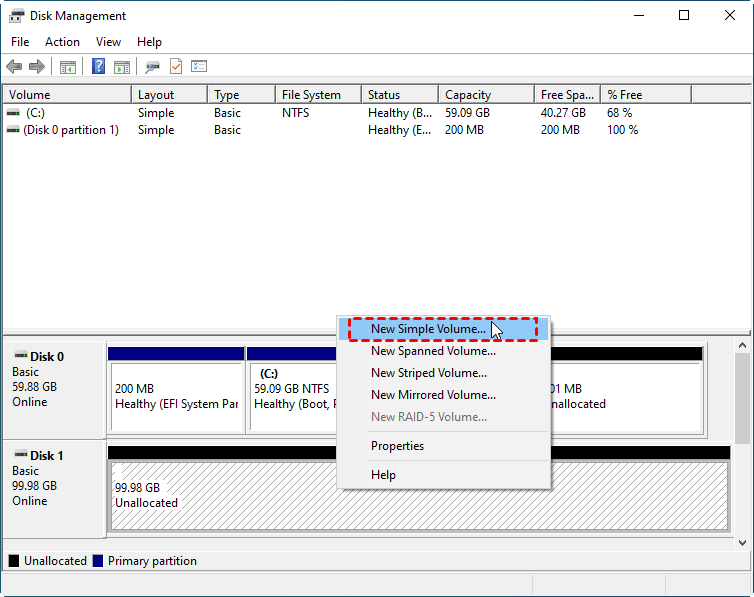
Step 3. Right-click the unallocated space, select New Simple Volume to create a new partition.
Step 4. Open this new partition, and create a Recovery and WindowRE folder respectively.
Step 5. Copy the winre.wim file into the new folder from a Windows ISO or bootable USB.
Step 6. Now, point Windows to that location, and enable it again with the following command.
- reagentc /setreimage /path C:\Recovery\WindowsRE
- reagentc /enable
Fix 4. Check and Set the winre. wim File Path
Sometimes WinRE exists, but Windows is pointing to the wrong location, causing reagentc enable not working or reagentc is not recognized error. You can reset the file path, forcing Windows to re-register the correct location of the recovery image.
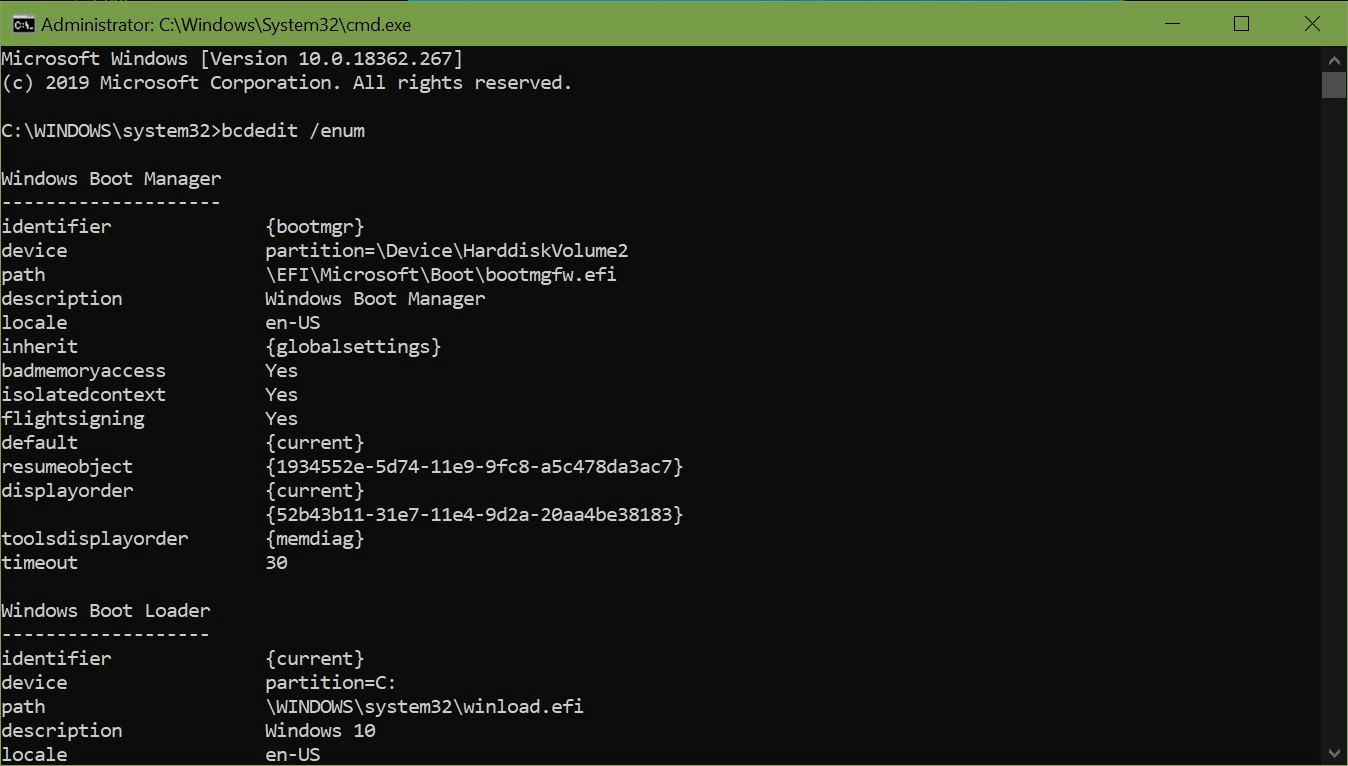
Step 1. Run cmd, and type bcdedit /enum all to display all BCD (Boot Configuration Data) entries.
Step 2. Locate the identifier={current} column, and then recovery sequence with the GUID recovery sequence attribute value.
Step 3. Use the "identifier value and the GUID recovery sequence attribute value" to identify the Windows boot loader and ensure that the Windows RE description on the device is the same as the description on the operating system device.
Step 4. If the path is inconsistent, type bcdedit / set {current} recovery sequence {FoundGUID} to set the path. Then, press Enter.
Fix 5. Easier Way to Create Windows Recovery Environment
To be honest, not everyone is willing to go through the trouble of dealing with partitions and command-line tools. If you want a simpler, safer, and more user-friendly Windows recovery solution, there is a better option.
AOMEI Backupper allows you to create a bootable recovery environment without relying solely on the fragile Windows RE configuration. The following is how to create Windows Recovery Environment and restore Windows using AOMEI Backupper:
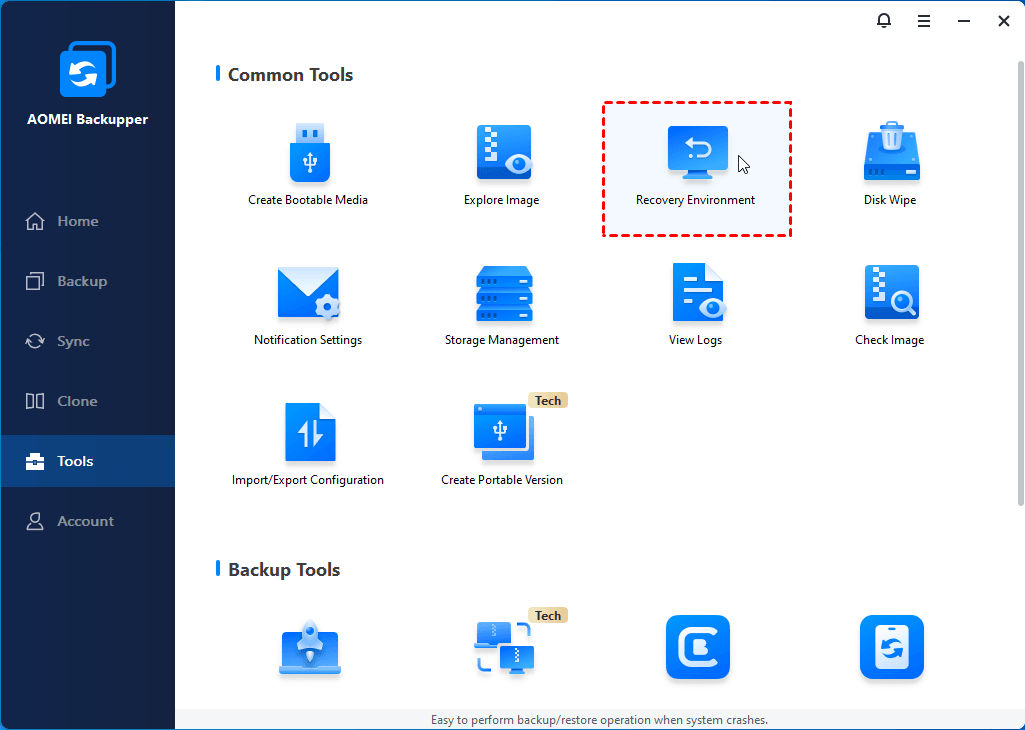
Step 1. Run AOMEI Backupper, click Tools, and select Recovery Environment.
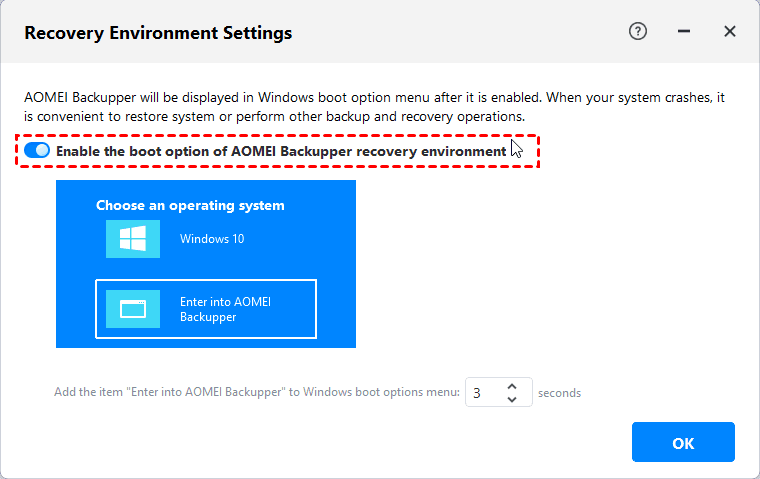
Step 2. On the pop-up screen, tick the Enable the boot option of AOMEI Backupper recovery environment option. Then, set the time of Windows boot options, it is 3 seconds by default. And, click OK to confirm.
- Notes:✎...
- The recovery environment created by AOMEI Backupper is stored in the C:\Aomei Recovery path. If your C drive is formatted or corrupted, this recovery environment will be unusable. You can choose to create a bootable USB drive to ensure you always have a way to boot if your computer fails to start.
- You can also create a system image or disk image to easily restore system whenever needed. The Universal Restore feature of this software allows you to restore system image to dissimilar hardware with a secure boot. That is to say, you can restore an image created on another working computer.
Step 3. To restore system using AOMEI Backupper, connect the backup drive containing system/disk image, restart computer, and click Enter into AOMEI Backupper.
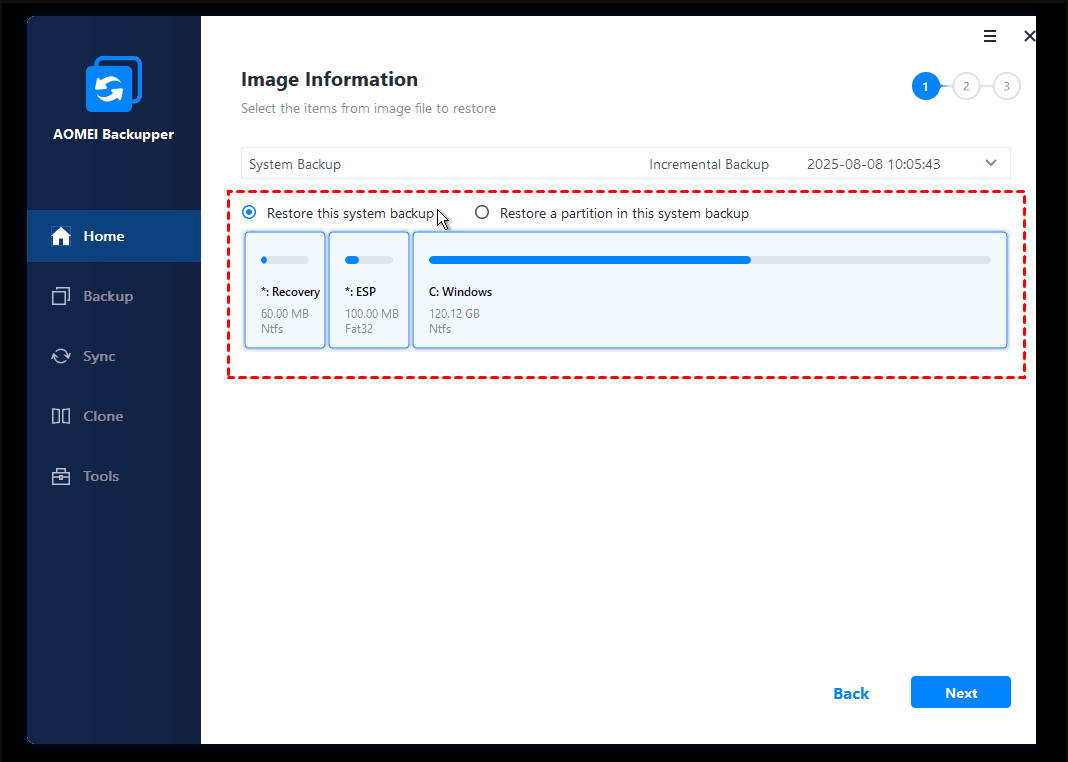
Step 4. Go to Home > Restore > select a system image task.
Step 5. Select Restore this system backup and follow the on-screen guide for quick system recovery.
In the End
The reagentc enable not working problem may leave you feeling helpless or panicked. By following the step-by-step guidance above, you can resolve it. But if you want an easier Windows recovery, try AOMEI Backupper. With this tool, you can create a bootable USB or CD/DVD, create system images, and create your own recovery environment for quick system recovery.
Also, it comes with full cloning options to help you move Windows 11 or 10 to new computer with no boot errors.