Can't Install Windows 10/11 on NVMe: How to Fix It Easily
Can't install Windows 10/11 on NVMe? Whether you are troubled by NVMe not detected/recognized or errors like "Windows cannot be installed to this disk" or "Windows cannot install required files," read this post to get a solution and an alternative to install Windows error-free.
By Jonna Updated on March 12, 2026
Why Can't I Install Windows 10 on My NVMe?
Using NVMe as boot drive after installing Windows on it is a great way to speed up your computer and installed programs. However, many users report that they can't install Windows 10 on NVMe, even when everything seems connected properly. But don’t worry. We will explore the common reasons why Windows failed to install on NVMe and walk you through step-by-step fixes.
If your NVMe isn't showing up at all during Windows installation or you're seeing messages like "Windows can’t be installed on this drive", there are a few likely culprits. Here's why you can't install Windows 11/10 on NVMe:
- Boot mode conflict between Legacy BIOS and UEFI prevents the installer from recognizing the disk.
- Secure Boot is enabled, interfering with unsigned drivers or custom installation media.
- Incorrect partition table, such as using MBR instead of GPT, blocks installation in UEFI mode.
- NVMe driver is missing during setup, especially on older Windows 10 builds or motherboards without native NVMe support.
- NVMe SSD isn’t formatted or initialized, making it invisible during setup.
- Outdated BIOS that doesn’t support booting from NVMe drives.
How to Fix Can't Install Windows 10/11 on NVMe
Below are six proven solutions that help you to address the issue of can't install Windows to NVMe SSD. Follow them one by one to run Windows on your new SSD without a hitch.
Note: If your Windows is installed on NVMe but won't boot, it may be that you have not set the NVMe as the first boot option. Enter your BIOS settings and make sure that the NVMe SSD is selected as the primary boot device.
Solution 1. Check NVMe Connection
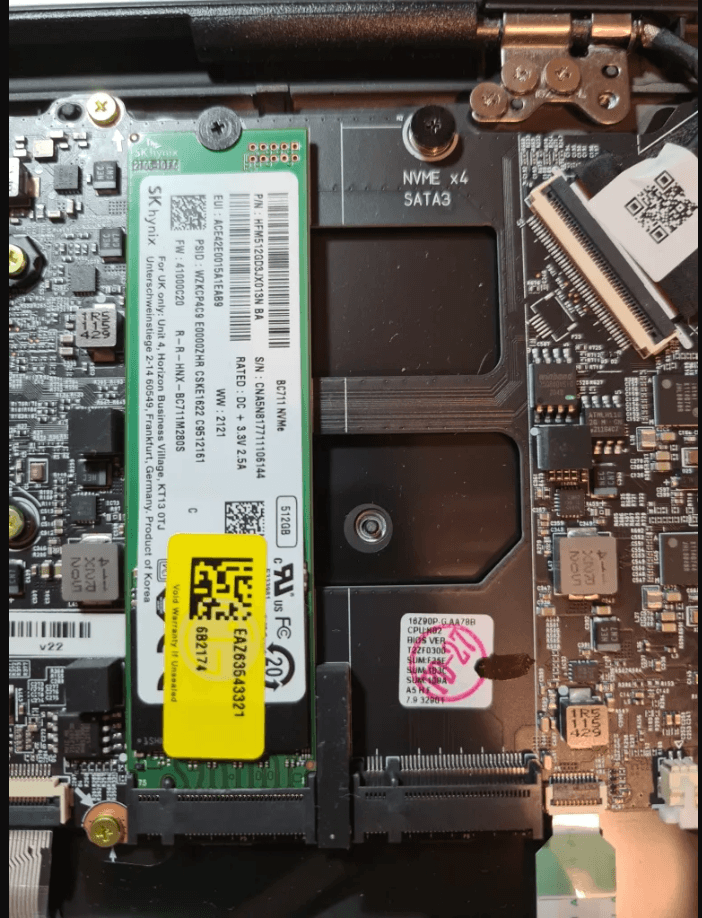
Before diving into BIOS settings or complex configurations, make sure your NVMe SSD is properly connected.NVMe SSDs use the M.2 slot on your motherboard, but improper seating is common.
Power off your PC and open the case > Remove the NVMe SSD and reinsert it gently into the M.2 slot > Ensure the mounting screw is tight (but not overtightened) > Boot into BIOS and check if the drive is detected under storage or NVMe settings. If your NVMe doesn't show up in BIOS, the Windows installer will not see it either.
Solution 2. Change Boot Mode
One of the most common reasons you can’t install Windows 10/11 on NVMe is because of a boot mode mismatch. NVMe drives usually require UEFI mode, not Legacy BIOS.
Step 1. Restart your PC and enter BIOS (usually by pressing F2, F10, or DEL).
Step 2. Go to the Advanced menu tab, and select CSM Configuration in BIOS Settings.
Step 3. Within the Boot option filter section, select UEFI only in the CSM or disable CSM entirely.
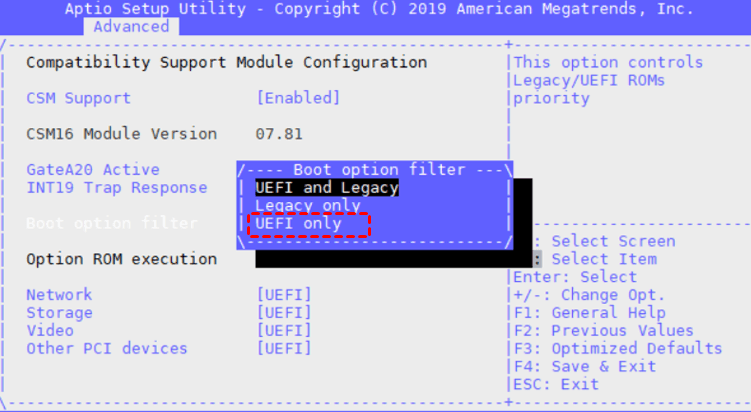
Step 4. Save the changes and exit BIOS.
Solution 3. Reset BIOS
Sometimes your BIOS settings might be corrupted or misconfigured. A clean BIOS reset often resolves issuesincluding can’t install Windows 11 on SSD.
Step 1. Reboot into BIOS.
Step 2. Find the Load Optimized Defaults or Reset to Default Settings option.
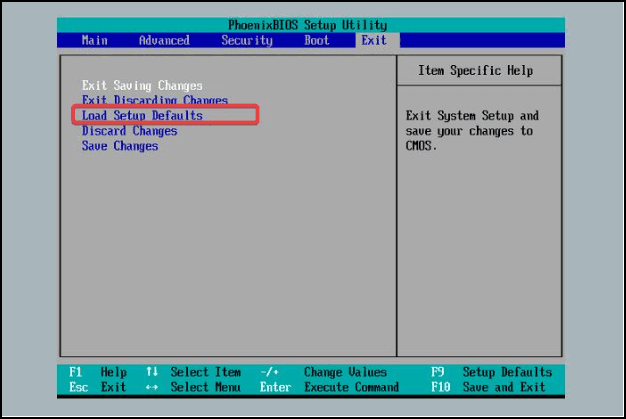
Step 3. Save the selection and exit.
Step 4. Reboot and re-enter BIOS to ensure that UEFI mode is enabled.
Solution 4. Update Disk Driver
Older motherboards may lack the correct NVMe or Intel Rapid Storage Technology (IRST) drivers, causing your SSD to disappear during installation.
Step 1. Go to your motherboard or laptop manufacturer's website. Then, download the NVMe or IRST driver.
Step 2. Save the driver files onto a USB drive or other external hard drive.
Step 3. During Windows installation, when it asks where to install, click Load Driver.
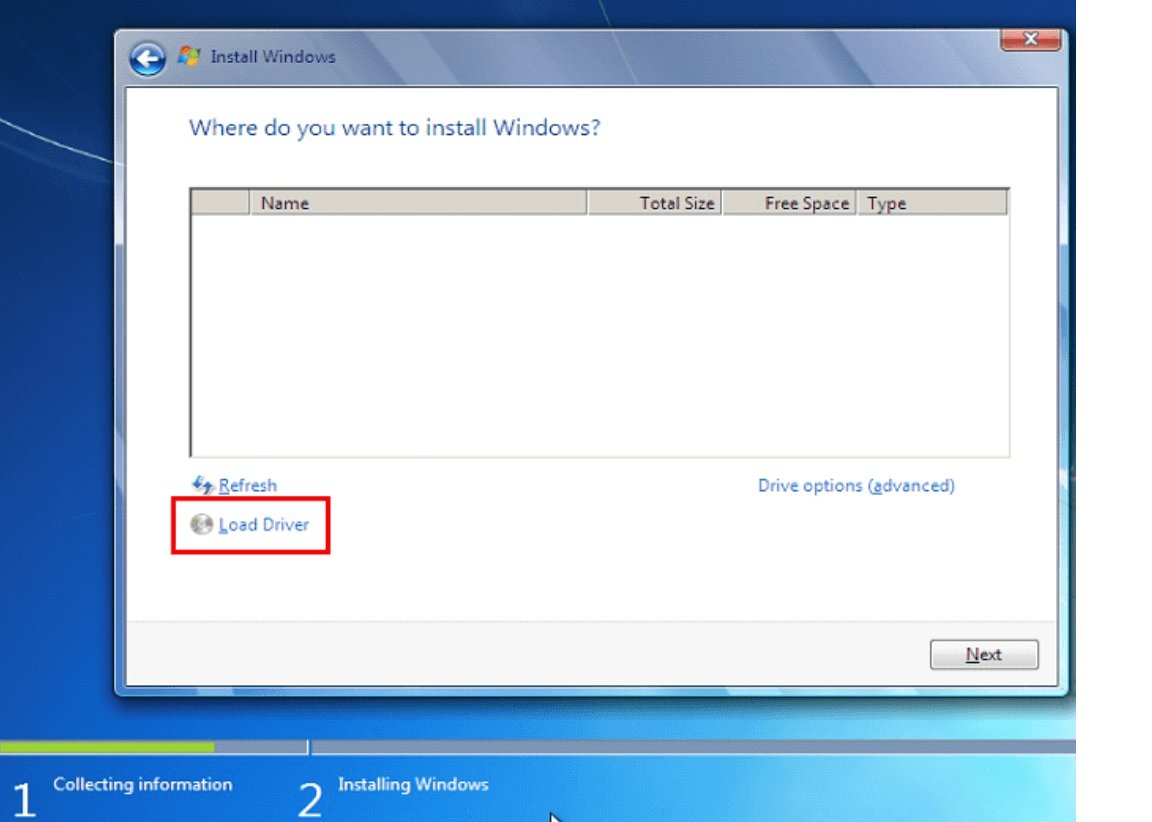
Step 4. Select the folder where the driver is located and let it load. Once loaded, the installer should refresh and display your NVMe SSD.
Solution 5. Secure Boot Conflicts
Secure Boot protects against unauthorized operating systems, but it can interfere with custom Windows installers or unsigned drivers, causing can't install Windows 10 on NVMe, NVMe detected but not bootable, and other issues.
Step 1. Enter your BIOS/UEFI.
Step 2. Locate the Secure Boot option, usually under the Security or Boot tab.
Step 3. Set it to Disabled.
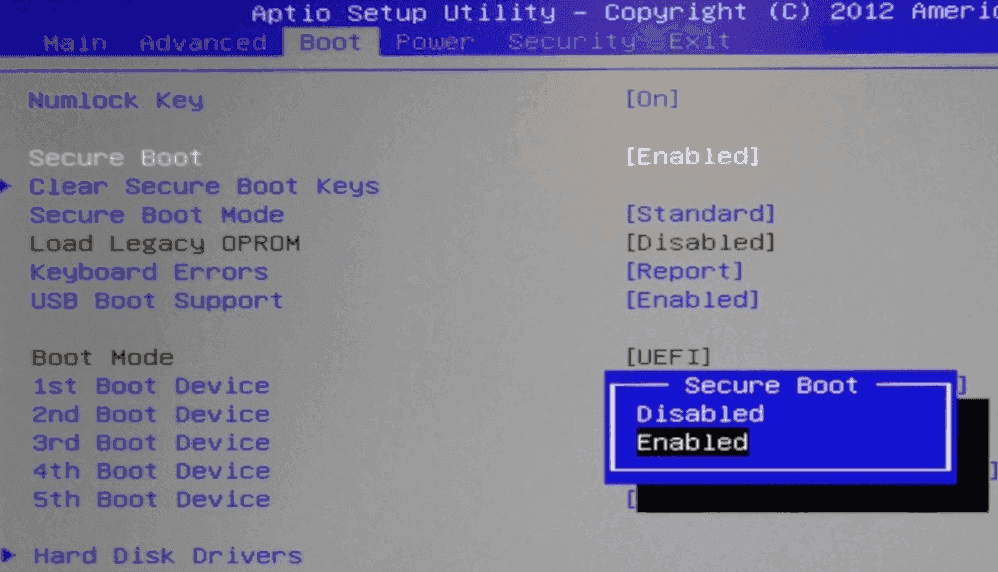
Step 4. Save and exit.
Solution 6. Format NVMeSSD
If the NVMe is unallocated or has a wrong partition table, Windows might reject it. You can format it and prep it correctly with the steps below:
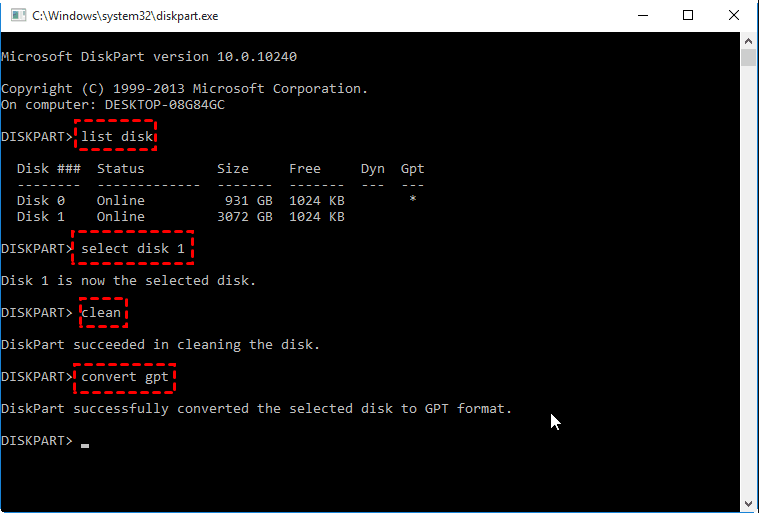
Step 1. During Windows installation, press Shift + F10 to open Command Prompt.
Step 2. Type the following commands one by one:
- Type diskpart and hit Enter.
- Type list disk to identify your NVMe (usually the one with no OS).
- Type select disk X (replace X with your NVMe disk number).
- Type clean to erase all partitions.
- Type convert gpt to prepare the disk for UEFI mode.
- Exit and return to the setup.
Step 3. Close Command Prompt and restart the installation.
Easiest Way to Install Windows 10/11 on NVMe with NO ERRORS
Apart from reinstalling Windows 10/11 on NVMe, there is a hassle-free way to migrate your OS to your NVMe SSD - just clone your OS from your current drive to the new NVMe. This method uses disk cloning software, like AOMEI Cloner, to move your Windows system exactly as it is, making the NVMe boot-ready with no reinstall required.
AOMEI Cloner is a beginner-friendly cloning software that comes with various advanced features. Except for migrating Windows to NVMe SSDs, it is also capable of copying entire system drive to new SSD, with no need to worry about boot errors or driver conflicts.

- It offers 3 cloning options, namely System Clone, Disk Clone, and Partition Clone, to meet different needs.
- It will only copy the used sectors by default, so you can clone from a larger drive to a smaller drive or clone hard drive with bad sectors.
- It can improve the NVMeSSD's performance and prolong its lifespan with 4K alignment.
- It can clone while Windows is running, and ensures a bootable clone, so to make sure you can boot PC directly from the cloned hard drive.
Download and install this software now to figure out how to install Windows 11 on NVMe SSD by cloning it from your old drive without reinstalling.
Step 1. Plug in the NVMe SSD via an M.2 slot or adapter, and make sure it is recognized.
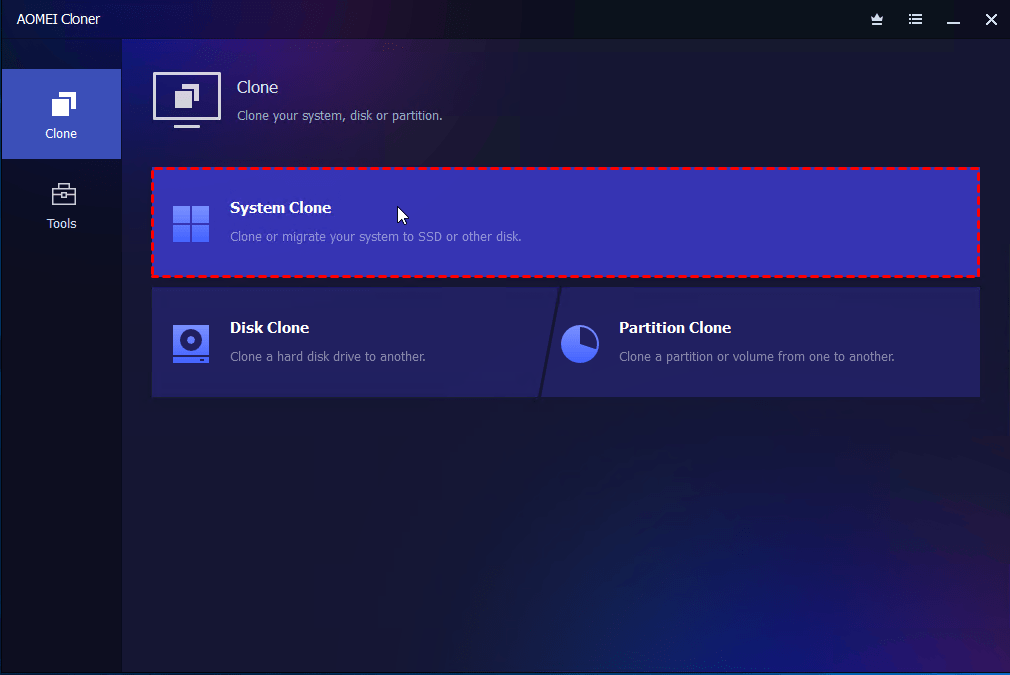
Step 2. Launch AOMEI Cloner, choose Clone > System Clone.
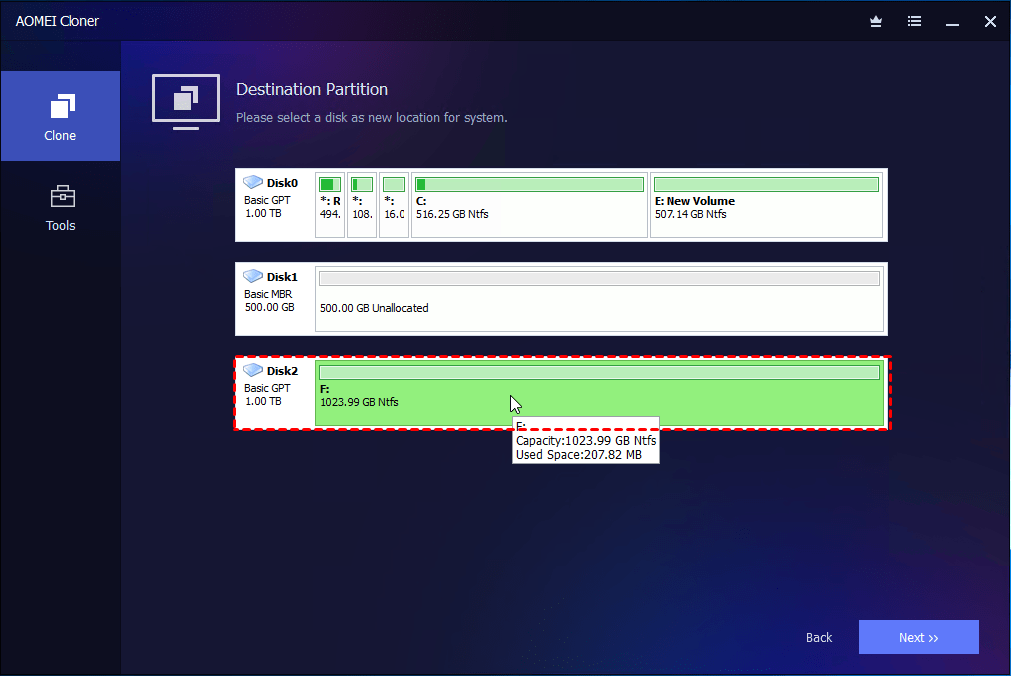
Step 3. Select your NVMe SSD as the destination. This tool is designed to select all boot-related partitions as the cloning source automatically.
Step 4. Check SSD Alignment, and click on Start Clone to install Windows on NVMe.

Step 5. After the process finishes, remove your old drive or change the boot order in BIOS to boot from NVMe.
Conclusion
To deal with can't install Windows 10 on NVMe, you should first verify your disk connection, and then make sure settings like BIOS settings and disk driver are configured correctly. Of course, the easiest way to run Windows on a new SSD is to utilize a professional and reliable cloning tool like AOMEI Cloner to copy Windows OS to the new drive directly. This software is workable not only for Windows 11/10/8/7 but also for cloning hard drive on Windows Server.