
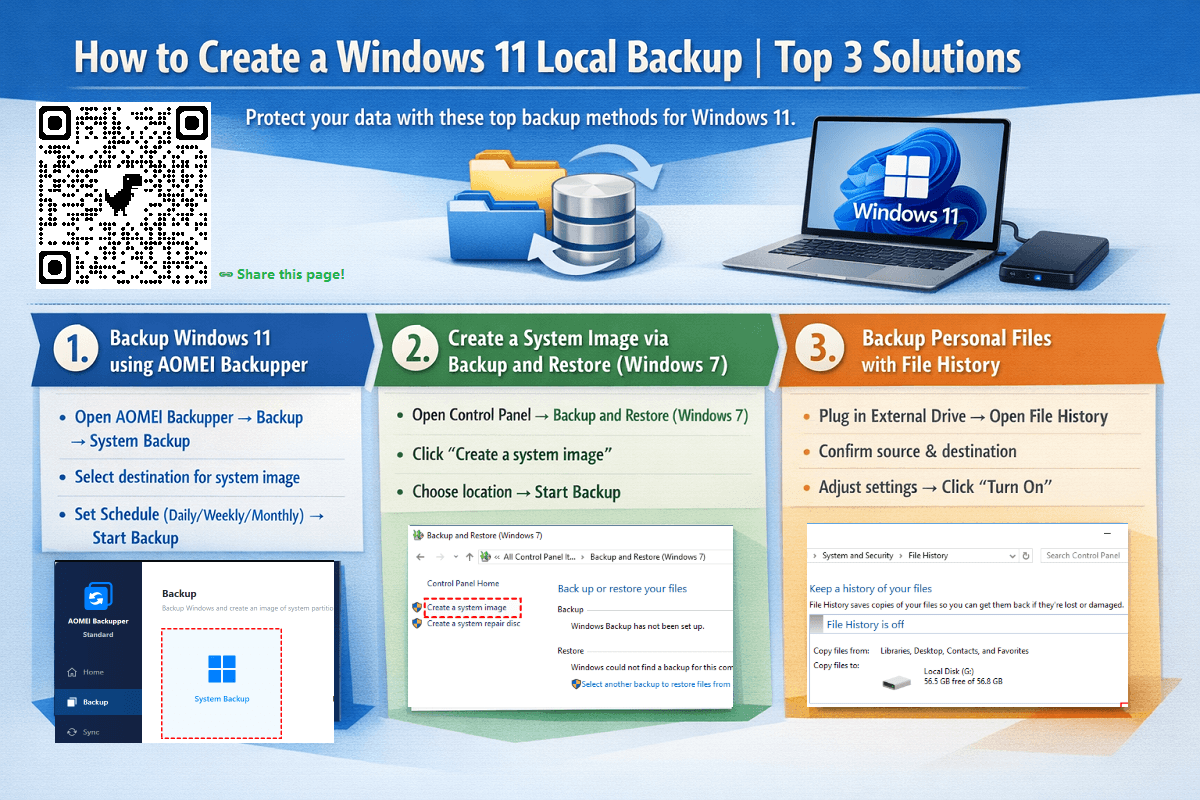
How to Create a Windows 11 Local Backup | Top 3 Solutions
Learn how to secure your data with a reliable Windows 11 local backup. Our guide covers native Microsoft tools and a powerful third-party option.
By Lily Updated on April 21, 2026
Unlike cloud-based solutions, local backups give you full control of your data, faster recovery times, and the peace of mind that everything you need is stored safely on your own drive or device. In this guide, I’ll show you the best local backup software for Windows 11 and how to create a local backup step by step.
3 Best Local Backup Software for Windows 11
When it comes to protecting your data, choosing the right local backup tool makes all the difference. Windows 11 includes several built-in options, and there are also reliable third-party tools that offer more flexibility and automation. Below are the three best solutions to create fast, safe, and consistent local backups on any Windows 11 PC.
1. AOMEI Backupper Standard
AOMEI Backupper Standard is the best free backup tool for Windows 11. It provides a modern interface, comprehensive backup modes, and more customization than the built-in utilities.

- Multiple Backup Types: You are able to backup OS, disks, partitions, or personal files by choosing the corresponding backup type.
- Schedule Backup: Set backups to run daily, weekly, or monthly without manual intervention.
- Incremental Backup: Save space and speed up backups with smart data comparison.
- Create Bootable Rescue Media: Build a WinPE bootable USB/CD/DVD so you can access backup tools outside of Windows.
2. Backup and Restore (Windows 7)
Despite the outdated name, Backup and Restore (Windows 7) is still included in Windows 11 because it offers one major advantage: full system image backups. This makes it highly valuable for local backup tasks that require complete system protection.
Key Features:
- Create a Complete Snapshot: Generate a system image that includes your personal files, applications, and OS configuration.
- Set It and Forget It: Automate backups on your schedule, saving directly to an external or network drive.
- Flexible Recovery: Retrieve individual files or perform a full system restore in the event of a crash or data corruption.
3. File History
File History is designed for continuous protection of your personal files. Instead of full system images, it tracks changes to documents, photos, desktop items, and other user folders—saving multiple versions so you can go back in time when needed.
Key Features:
- Automatic File Versioning: Keeps previous versions of files so you can restore older edits.
- Local Drive Support: Works with external drives and network locations for local backups.
- Easy Restore Panel: Browse and recover files with a clean, timeline-based interface.
Quick Comparison of Three Backup Tools
|
Backup Tool |
🙂 Pros |
🙁 Cons |
🌟 Best For |
|
AOMEI Backupper Standard |
+ Full system, disk, partition, and file backup + Easy interface with scheduling + Bootable media creation |
- Some advanced features locked behind paid version |
Users who want a feature‑rich, free backup tool with more flexibility than Windows’ built‑ins |
|
Backup and Restore (Windows 7) |
+ Built into Windows 11 + Can create full system image backups + Simple and reliable for basic use |
- Legacy tool with no major updates - Slower and less flexible than modern alternatives |
Users who want a simple, built‑in system image backup without installing extra software |
|
File History |
+ Automatic versioned backups of personal files + Easy restore of previous file versions + Lightweight and simple |
- Does not back up apps or system images - Requires external drive or network location |
Users who want continuous protection for documents, photos, and personal files |
How to Create a Local Backup in Windows 11
Below are three reliable methods to create a Windows 11 local backup, ranging from full system imaging to continuous file backup. Choose the approach that best fits your needs.
Method 1: Backup Windows 11 using AOMEI Backupper
Step 1. Download and open AOMEI Backupper on your Windows 11 PC. Go to Backup on the left and choose System Backup for full protection.
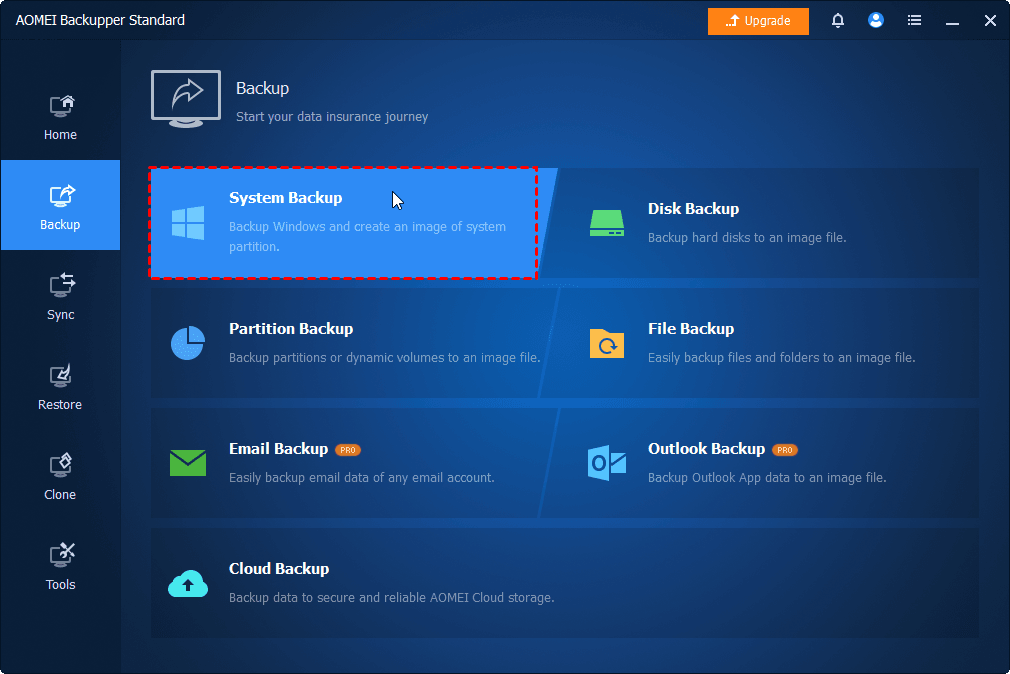
💡 Tip: To backup selective data, choose File Backup. If you upgrade to higher editions, you can also enjoy the Outlook Backup and Email Backup features.
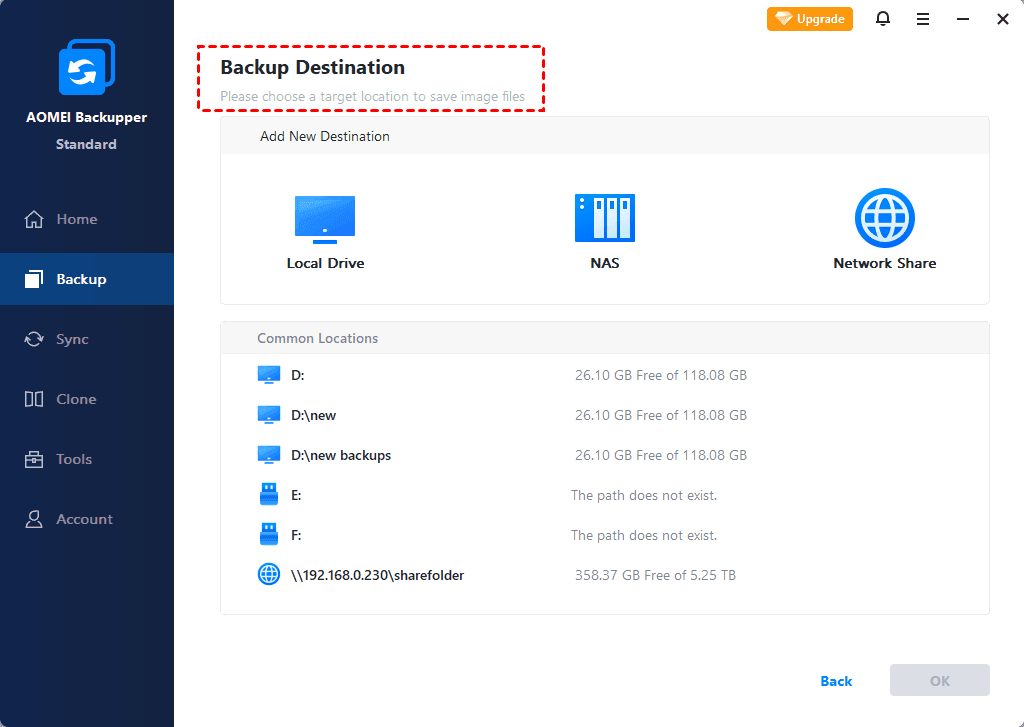
Step 2. Boot-related partitions are selected by default. Choose a destination path to store the system image. You can perform Windows 11 backup to local drive, external drive, USB drive, or NAS, etc.
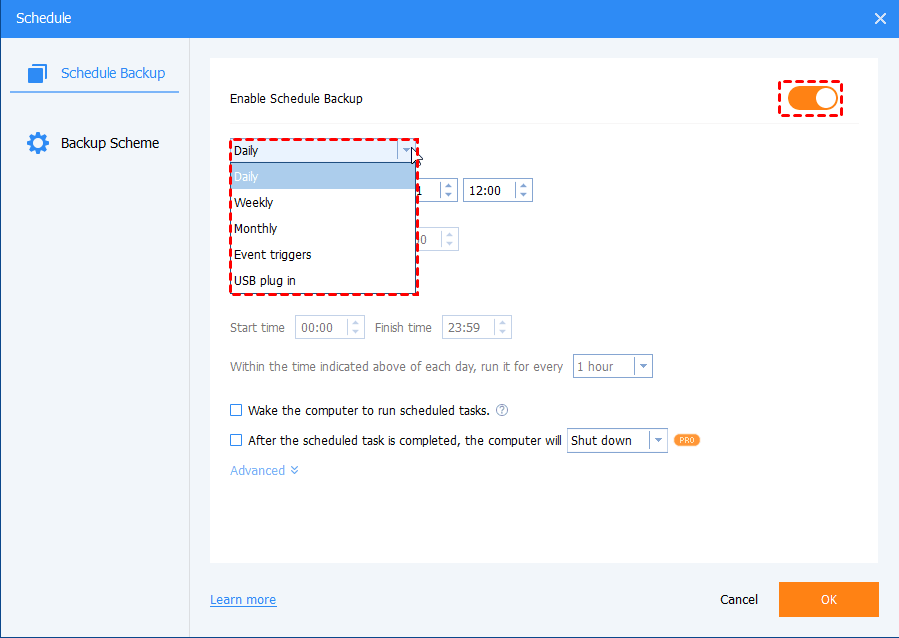
Step 3. (Optional) Enable Schedule to run your backup daily, weekly, or monthly. The program automatically uses incremental backups to save space.
Step 4. Click Start Backup. The program will create the backup and allow you to monitor or manage it at any time.
Method 2: Create a System Image via Backup and Restore (Windows 7)
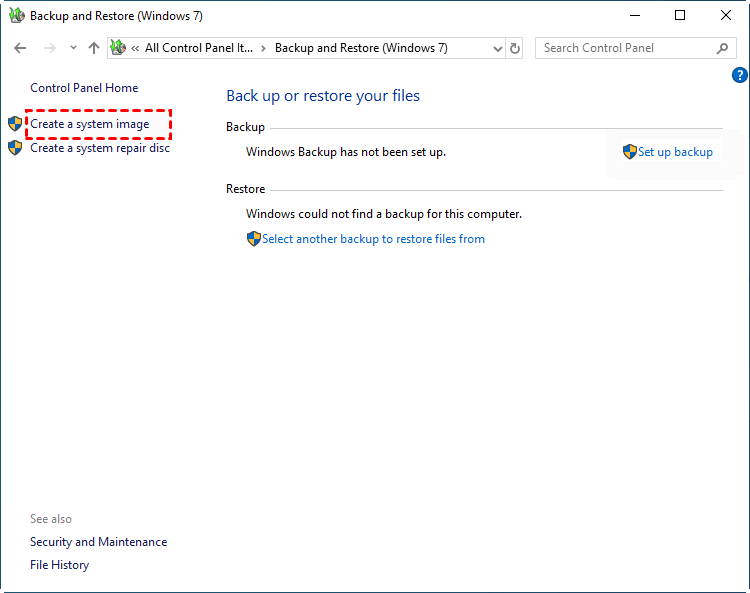
Step 1. Search for Control Panel in the Windows search bar and open it. Go to System and Security > Backup and Restore (Windows 7).
Step 2. In the pop-up window, click the Create a system image option from the left pane.
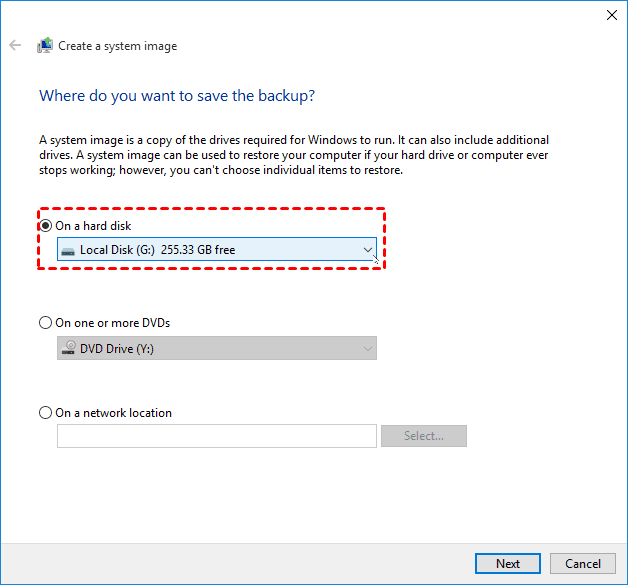
Step 3. Choose a location to save your system image, and then click Next. You can select On a hard disk, On one or more DVDs, or On a network location.
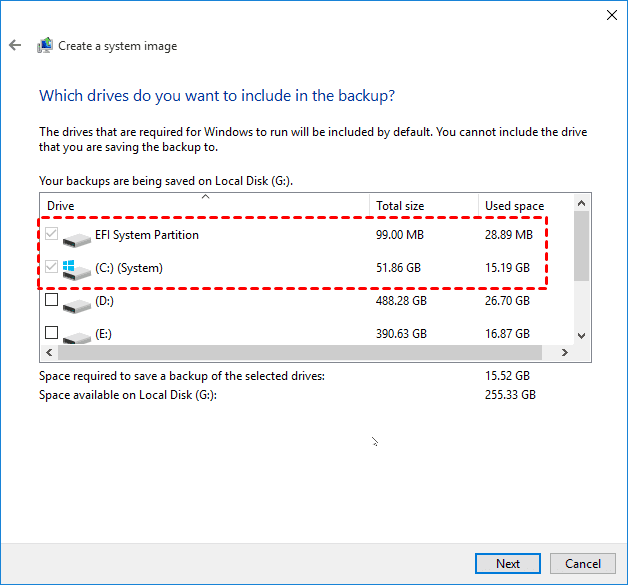
Step 4. Windows automatically includes system partitions. If needed, select other drives to be included in the backup and click Next.
Step 5. Click Start backup and wait for the process to finish.
Step 6. Once the backup finishes, you will be prompted to create a system repair disc. Select "Yes" to proceed or "No" to create a recovery USB drive instead at a later time.
Method 3: Backup Personal Files with File History
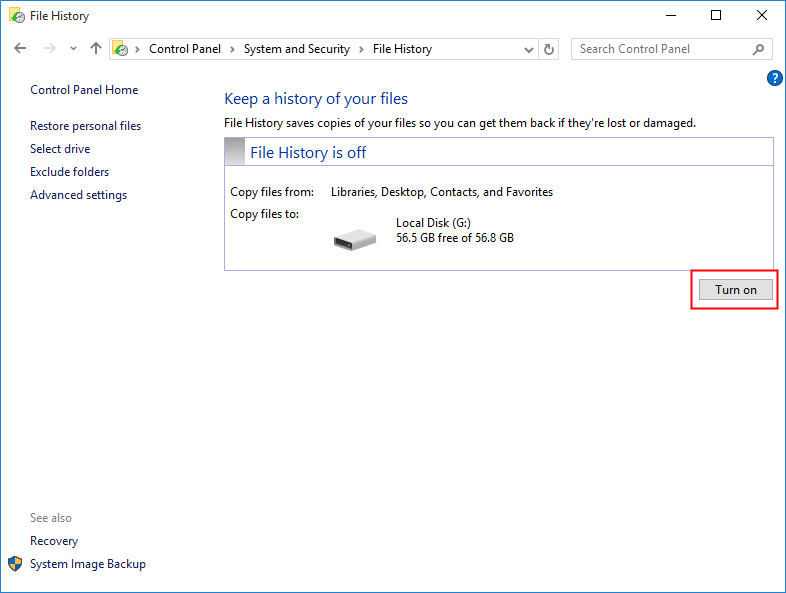
Step 1. Plug in an external drive. Then search for File History in the Windows search bar and open it.
Step 2. File History will choose the backup source (Libraries, Desktop, Contacts, and Favorites) and destination (the connected external drive) for you. To prevent certain folders from being backed up, click Exclude folders from the left panel to leave them out.

Step 3. Click Advanced settings to customize your backup schedule and storage.
- Save copies of files: Set your backup frequency from every 10 minutes to once a day (the default is every hour).
- Keep saved versions: Choose how long to keep old file versions, from one month up to forever (the default).

Step 4. Confirm your settings and click Turn on to save copies of your files for the first time.
✍ Notes:
● File History only supports external hard drives in NTFS format.
● To add specific folders you want to backup in File History, please open File Explorer, right-click on the folder and select Include in Library.
Advanced Windows 11 Backup Scenarios
Backing up Windows 11 can mean very different things depending on what you want to protect, where you want to store it, and how quickly you need to recover your system. The guides below help users find the exact method that fits their situation.
Some users need more than just file protection—they want a bootable backup that can restore Windows 11 even if the system won’t start. This cluster page is ideal for readers who:
- Want a complete, restorable copy of Windows 11 including apps, settings, and partitions
- Need a backup that can boot independently from USB or another drive
- Prefer a disaster‑recovery‑ready solution rather than simple file backups
🚩 Backup Windows 11 to External Hard Drive
Many people prefer backing up Windows 11 to an external hard drive because it’s inexpensive, portable, and easy to set up. This cluster page helps readers who:
- Want a straightforward backup method without cloud storage
- Are unsure how much storage their external drive needs
- Want to automate backups on a schedule
Not everyone needs a full system image. Some users only want to back up important folders like Documents, Pictures, Desktop, or work project directories. This cluster page is perfect for readers who:
- Want selective backups instead of full‑drive backups
- Prefer lightweight, fast backups that don’t consume much storage
- Need a simple method for protecting personal data before reinstalling Windows
🚩 Windows 11 Backup and Restore
Windows 11 still includes the legacy tool Backup and Restore (Windows 7), but many users don’t know where to find it. This cluster page is designed for readers who:
- Need step‑by‑step instructions for Backup & Restore
- Need help restoring files, system images, or previous versions
- Need a recovery plan that fits their device and storage setup
FAQs about Backing Up Windows 11
1. How to automatically backup Windows 11 to external drive?
To automatically backup Windows 11 to external drive, you can use built-in tools like File History or Backup and Restore (Windows 7), or opt for third-party backup software like AOMEI Backupper for more flexibility.
2. How to schedule daily image backup on Windows 11?
To schedule daily image backup on Windows 11, you can:
- Go to Control Panel > Backup and Restore (Windows 7).
- Click Set up backup.
- Choose your external drive.
- Select Let Windows choose or customize.
- Set the schedule to Daily.
3. Which backup method best protects Windows 11 PC?
The backup method that best protects Windows 11 PC comes from combining multiple backup methods rather than relying on just one:
- System image backup (best for full recovery):
Creates a complete copy of your OS, apps, and settings. Ideal for restoring your system after crashes, hardware failure, or ransomware.
- File-level backup (best for personal data):
Tools like File History continuously back up documents, photos, and other files, allowing easy version recovery.
- Cloud backup (best for off-site protection):
Services like OneDrive add an extra layer of safety in case of theft, fire, or drive failure.
Conclusion
Creating a solid Windows 11 local backup strategy is one of the smartest steps you can take to protect your data and keep your system running smoothly. Whether you prefer full system imaging or continuous file protection, you can find a way to go from this page.
While built-in tools offer limited features, you may pick AOMEI Backupper for a smoother, more powerful backup experience. What’s more, it is embedded with the file sync feature that can help you sync a laptop and a desktop. Why not give it a shot?
