




How to Change Media Sync Options on iPhone/iPad/iTunes
This guide explains how to change media sync options on iPhone/ iPad and introduces a simple way to make more storage available on iPhone/ iPad easily.

By Jonna Updated on August 21, 2026


User case: How do I change my media sync options?
I keep getting a 'Storage Almost Full' message on my 128GB iPhone. I noticed that my iPad and PC are constantly syncing every photo, song, and video automatically, which fills up both my device memory and my iCloud account. How do I change my media sync options so my iPhone doesn't automatically download everything, but I still keep my files backed up?
Keeping your digital life in sync across Apple devices is convenient, but automatic synchronization can quickly fill up your internal storage. High-resolution camera footage, offline music downloads, and TV shows frequently consume tens of gigabytes without your direct awareness. Knowing how to change media sync options on your iOS device and computer is one of the most effective ways to reclaim precious storage space while keeping your important files safe.
What do media sync options mean?
Media sync options control which content from a computer is copied to an iPhone, iPad, or iPod. Apple’s current Windows guidance describes syncing as selecting a content type, such as music, movies, TV shows, photos, files, or podcasts, then choosing whether all items or only selected items should be copied to the device. When storage is tight, changing these options can remove synced media from the iPhone while keeping the original files on the computer. It does not mean every photo, song, or app on the iPhone is deleted. It mainly affects content that came from computer syncing.
This comprehensive guide walks you through adjusting media synchronization settings on your iPhone, iPad, and iTunes, while presenting an alternative strategy to free up space without risking data loss.
Part 1. How to change media sync options on iPhone/iPad to make more storage available
The “Change media sync options” feature lets you control whether iTunes syncs media such as music, movies, TV shows, podcasts, and other content to your iPhone or iPad. If you have a large media library, synced files can take up a significant amount of your device’s storage. By turning off media synchronization for certain content, the synced files will be removed from your iPhone or iPad, helping you free up valuable storage space.
Before you begin, make sure you have the latest version of iTunes installed on your computer.
Step 1. Connect your iPhone or iPad to your computer and open iTunes.
Step 2. Click the Device tab.
Step 3. Under Settings, select the type of media you want to stop syncing. In this example, we'll use Podcasts. Uncheck the box next to Sync Podcasts.
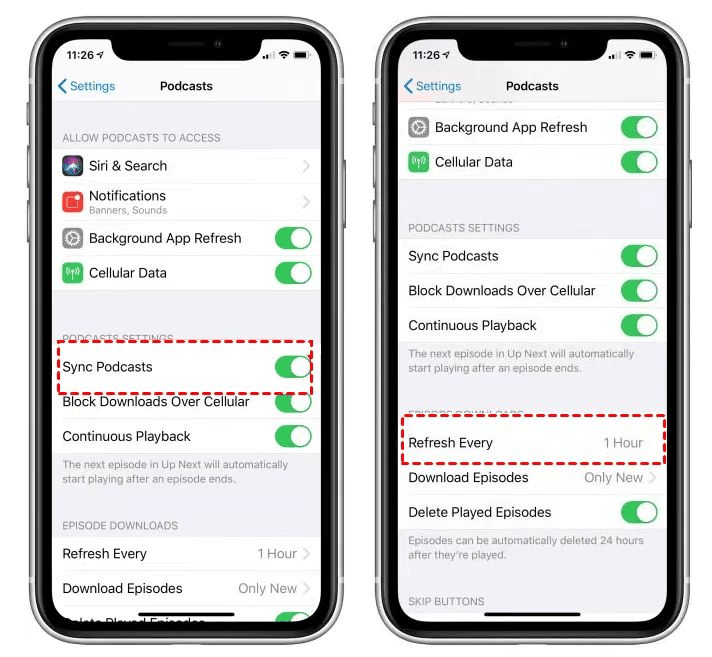
Step 4. Click Apply to save the changes.
Part 2. How to change iPhone media sync options via iTunes
When you manage your device using a PC running iTunes (or a Mac running macOS Mojave or earlier), connecting your iPhone over USB gives you direct, precise control over what gets synced between your computer's hard drive and your phone.
Step-by-Step Guide to Changing Sync Settings in iTunes
Step 1: Connect Your Device and Navigate to Summary
-
Launch the latest version of iTunes on your computer.
-
Connect your iPhone or iPad using a verified USB cable.
-
Click the Device Icon near the top-left corner of the iTunes window.
-
Select the Summary tab in the left sidebar.
Step 2: Configure General Options
Under the Options section on the Summary panel, check or uncheck the following boxes to suit your storage needs:
-
Manually manage music and videos: Checking this box turns off automatic library synchronization. It allows you to drag and drop individual songs, playlists, or movies onto your device without syncing your entire media folder.
-
Sync with this [Device] over Wi-Fi: Uncheck this option if you want to prevent your iPhone from initiating background syncs whenever it shares a Wi-Fi network with your PC.
-
Prefer standard definition videos: Checking this forces iTunes to transfer standard-definition (SD) versions of movies and TV shows rather than large High-Definition (HD) files.
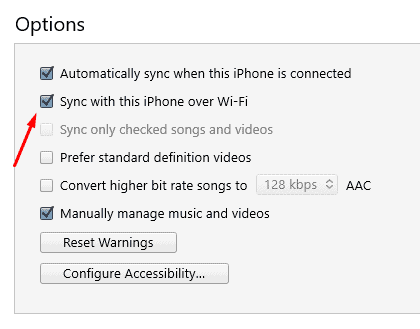
Step 3: Change Category-Specific Sync Settings
Use the sidebar under Settings to customize sync options for individual media categories:
-
Click Music: Check Sync Music, then select Selected artists, albums, genres, and playlists instead of "Entire music library." Choose only the specific playlists you want stored on your phone.
-
Click Movies & TV Shows: Uncheck Automatically include all movies and manually select only the media items you plan to watch soon.
-
Click Photos: Choose Sync Photos from and pick a small, specific folder on your PC rather than syncing your computer's entire photo directory.
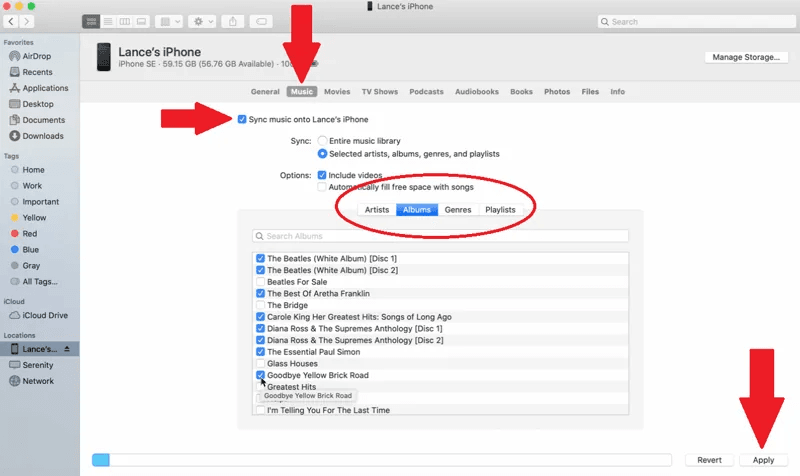
Step 4: Apply Your Changes
Click the Apply button in the bottom right corner of the iTunes interface to save your new settings and execute the updated sync protocol.
Part 3. Simple way to make more storage available on iPhone/iPad - no data loss
While learning how to change media sync options in iOS and iTunes helps manage automated transfers, standard synchronization mechanisms come with significant downsides:
-
iCloud space is restricted unless you pay monthly fees for storage upgrades.
-
iTunes sync is notoriously rigid: syncing a new library often overwrites and erases existing media files on your device.
-
Turning off sync services can leave your photos and videos without a reliable backup.
If you need to free up storage space on your iPhone without paying cloud subscription fees or risking data loss, a dedicated iOS management solution like AOMEI FoneBackup is the most practical alternative. It is a professional, easy-to-use iOS data transfer and backup software designed for Windows PCs. Unlike iTunes, which relies on rigid, two-way mirror syncing that can accidentally delete device files, AOMEI FoneBackup offers flexible, one-way transfers and non-destructive backups.
 AOMEI FoneBackup
- Selective Transfer & Backup: Choose exact photos, videos, messages, or contacts to backup iPhone to external hard drive or your PC without syncing unwanted files.
- No Data Overwriting: Backing up or restoring data will never erase original files currently stored on your iPhone or iPad.
- Photo Deduplication: Built-in tools scan your iPhone or PC to automatically detect and delete duplicate photos, instantly freeing up storage.
- Fast Transfer Speeds: Move thousands of high-resolution photos or 4K videos in minutes via direct USB connectivity.
 100% Secure
How to free up space and manage media with AOMEI FoneBackup (Step-by-Step)
To reclaim gigabytes of storage on your iPhone without losing a single memory, follow this simple process: back up your large media files to a computer or external drive, then safely remove them from your phone.
Step 1: Connect Device and Launch AOMEI FoneBackup
-
Download, install, and open AOMEI FoneBackup on your PC. Connect your iPhone or iPad to the computer using a USB cable. Tap Trust on your device screen if prompted.
Step 2: Select Photo/Video Transfer Mode
-
On the main interface, navigate to the Phone Transfer tab in the left sidebar. Hover over iPhone to PC and click Get Started.
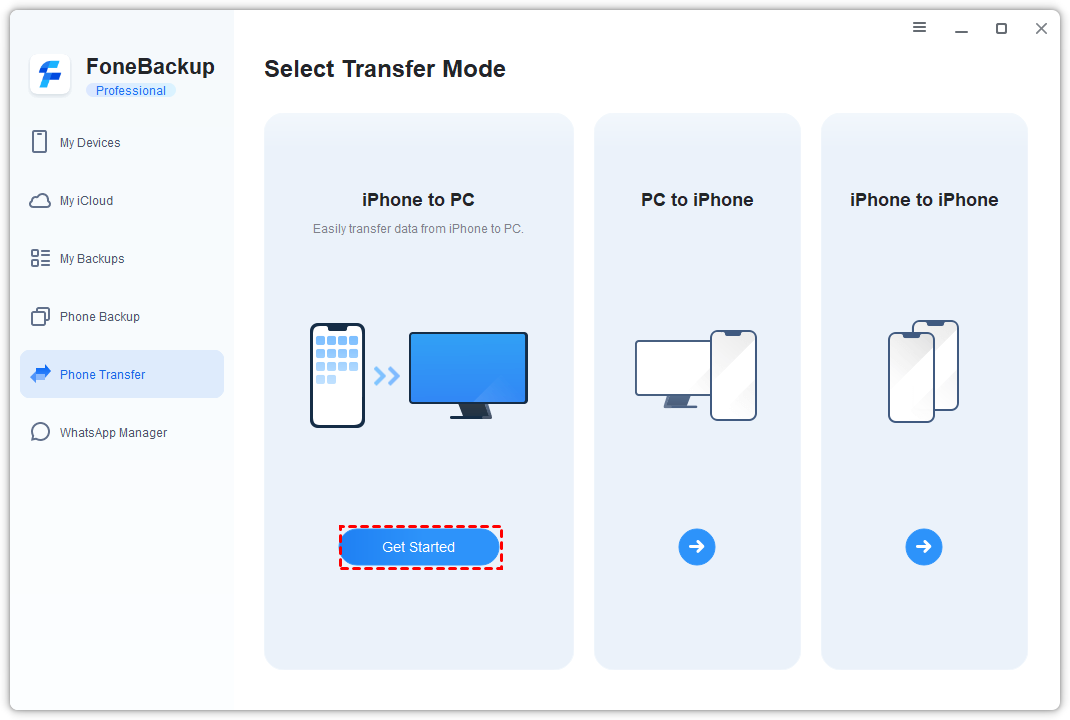
Step 3: Select Specific Media Files
-
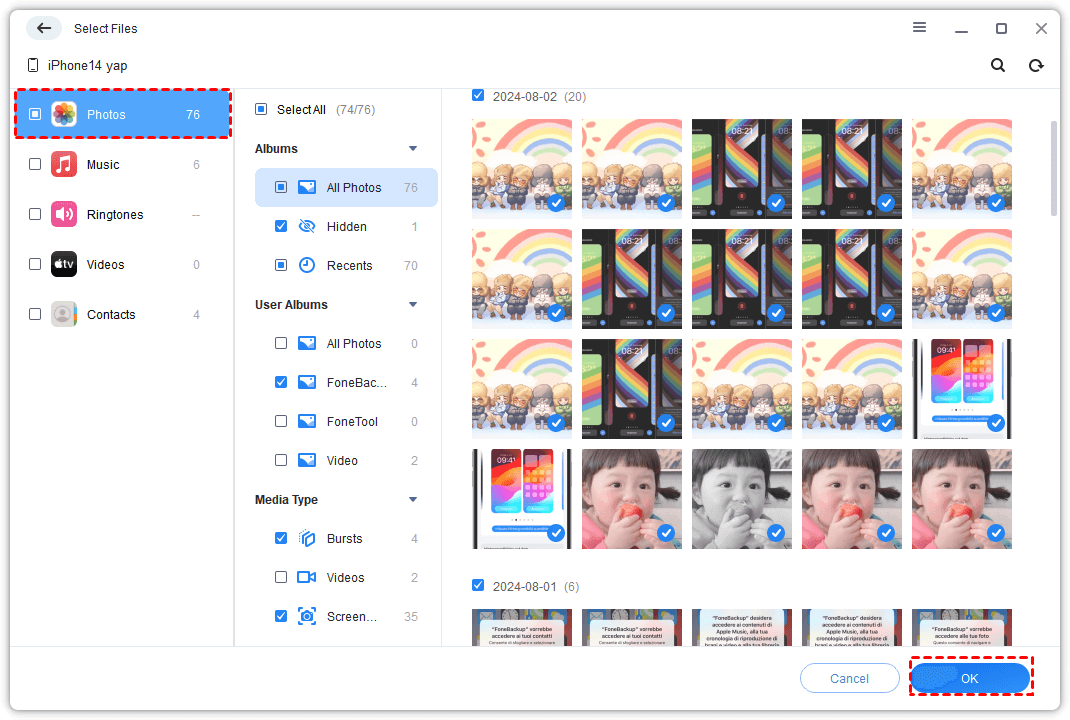
Click the Photos or Videos icons to browse your iPhone library by folder and thumbnail previews. Select the large video files, full-resolution photos, or music albums you want to offload to your PC. Click OK to return to the main transfer screen.
Step 4: Choose Storage Location and Export
-
Click Transfer Settings to choose a path on your PC's internal drive, an external SSD, or a network drive. Click Start Transfer to begin exporting your selected media files.
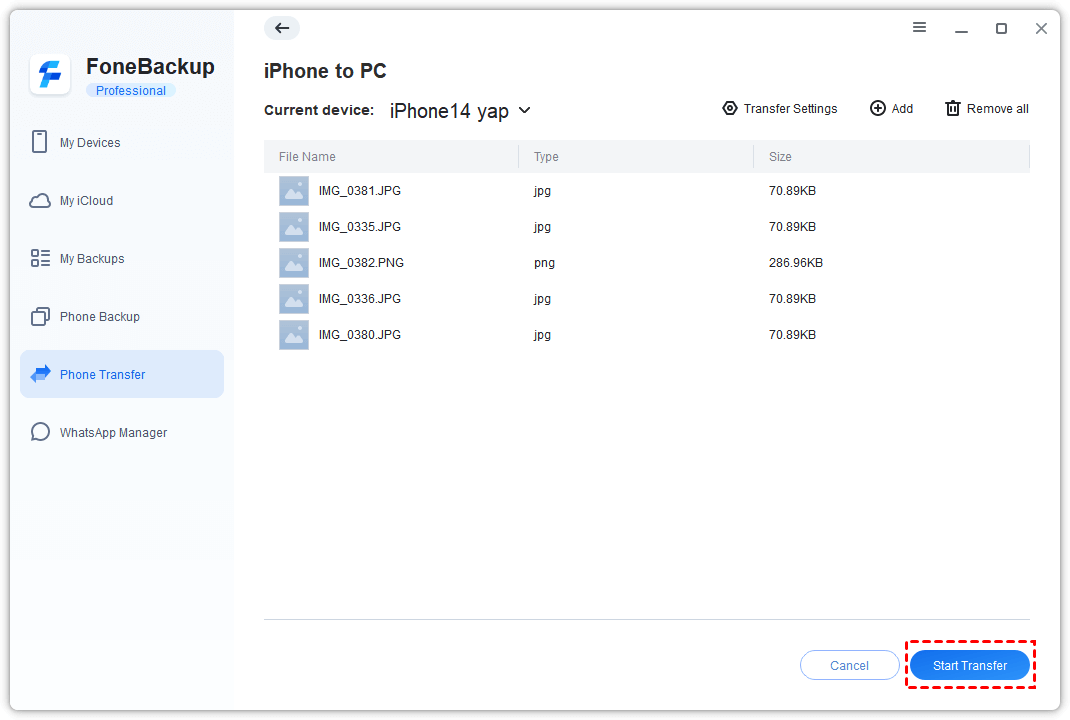
Once the transfer progress reaches 100%, your original media is securely stored on your computer. You can now delete those large media files from your iPhone's camera roll or storage menu, knowing they are safely archived.
Conclusion
Understanding how to change media sync options gives you full authority over your iPhone and iPad storage. If native cloud and iTunes options feel too restrictive or risk overwriting your files, third-party software like AOMEI FoneBackup offers a safer, more intuitive way to back up or transfer high-volume media directly to your PC, allowing you to maximize your iPhone storage without losing any important data.

 as a preferred
source on Google
as a preferred
source on Google