How to Recover Deleted MLV Files on Windows and Mac
If you're looking for ways to recover deleted MLV files, you're in the right place. This guide offers practical solutions to help you quickly recover lost or deleted MLV files on Windows and Mac with ease.
By Ivy Updated on March 31, 2026
What is the MLV file format?
The MLV file format opens up a world of advanced features and capabilities for Canon cameras, thanks to the Magic Lantern open-source code software. Acting as a powerful add-on to the Canon firmware, the MLV software enables users to unleash enhanced capturing potential by simply adding a memory card with the software to their camera. Though Canon has not officially endorsed the MLV firmware, its popularity has grown due to its impressive features.
The MLV format is highly favored by users for its ability to save footage in RAW data, resulting in stunning 14-bit and 4:4:4 format images. With over 68 billion color shades, this format allows for incredibly versatile editing options during post-production. The official website lists various functions that MLV supports, including audio controls, exposure controls, image overlays, display tweaks, advanced scripting, shoot features, and focus tools.
Possible reasons for MLV video loss
When working with MLV or similar file types, you may encounter data loss for various reasons. So it’s necessary to figure out the potential reasons for MLV video loss.
- Accidental deletion
- Disk formatting
- Unsaved workflows
- Virus or malware attacks
How to recover deleted MLV files
Since deletion is the most common data loss scenario, let’s demonstrate how to recover deleted MLV files from Canon camera SD cards. Here are 4 useful methods for Windows and Mac systems.
Way 1. Recover deleted MLV files via data recovery software
For a beginner-friendly and proficient data recovery approach, employing software like AOMEI FastRecovery is recommended, especially for users without regular backups.
This professional data recovery software is designed to recover deleted/missing videos (MLV, MP4, MOV, AVI, MKV, WMV, RMVB, ASF, etc.) from Canon camera SD cards.

- 📚 Wide recoverable data types: Recover 1000+ types of files, includingvideos, photos, videos, compressed files, audios, etc.
- 📌 Top algorithms: Provide both Quick Scan and Deep Scan to find all recoverable data, ensuring a comprehensive retrieval and recovery.
- 🔎 Pinpoint the files: Organize and display deleted or lost files by Type or Path, allowing you to sort, search, filter, and preview files.
- 👊 Excellent compatibility: Compatible with Windows 11, 10, 8, 7 &Serverand NTFS, FAT32, exFAT, and ReFS file systems.
- ❌💰 500MB free data recovery volume.
Step 1. Install and launch AOMEI FastRecovery on your Windows. Hover the mouse over the drive and click Scan.
Step 2. AOMEI FastRecovery will automatically run Quick Scan to scan your selected drive and display all the recoverable files by Type or Path. Under the Type section, switch to Videos and select MLV. Or directly type .mlv in the search box to locate files quickly.
Step 3. Choose the video files. Please click “Recover” to start MLV file recovery.
-
After SD card video recovery, please save your retrieved MLV videos in a new path.
-
You can recover deleted MLV videos up to 500 MB. Once exceeded, please upgrade to the advanced editions.
Way 2. Restore deleted MLV files from Recycle Bin
Additionally, if you have recently deleted MLV files, you can check the Recycle Bin (Windows) or Trash (Mac) for deleted MLV files. When files are deleted, they are usually temporarily stored here before being permanently deleted, so it is easy to recover them.
For Windows:
Step 1. Locate the Recycle Bin on your desktop and double-click to open it. Look for your deleted MLV files.
Step 2. Right-click on the file you want to restore and select Restore to return it to its original location.
For Mac:
Step 1. Open the Trash icon from your dock and look for the deleted MLV files.
Step 2. Right-click on the file and select Put Back to restore MLV files.
Way 3. Recover deleted MLV files using File History
If you have backup features enabled on your system, such as File History (Windows) or Time Machine (Mac), you may be able to recover MLV files from a previous version.
For Windows:
Step 1. Open File History by going to the Control Panel and clicking File History.
Step 2. Click Restore personal files from the left-hand menu.
Step 3. Once your deleted files appear, select them and click the Restore button to recover them.
Alternatively, you can right-click the folder containing the deleted files and choose Previous Versions. Then select the folder version from the desired date and click Restore.
For Mac:
Step 1. Open the window where you lost MLV videos. To make the Time Machine icon on your desktop, please go to the Apple menu > click System Preferences > Time Machine > Show Time Machine on the Menu bar.
Step 2. Click the Launchpad icon in the Dock, find Time Machine, and click Enter Time Machine.
Step 3. Use the up and down arrows to locate the MLV videos you want to restore and click Restore to get your desired MLV files back.
Way 4. Seek professional data recovery services
If you're unable to recover your MLV files using the above methods, you can turn to professional data recovery services. Companies like Geek Squad, OnTrack, CBL Data Recovery, etc., specialize in recovering files from damaged or inaccessible storage devices using advanced tools and techniques.
How to open an MLV file
Converting MLV files to formats compatible with commonly available software is a simple way to access and work with them. By downloading and installing the MLV app, you can easily import, playback, and process the files before converting them into different formats. The app caters to both Windows and Mac users.
Besides, other applications can open MLV files.
- RAWMagic
- Raw2dng
- Raw2cdng
- MLV Converter
- Rawanizer
How to prevent MLV files from loss
Moreover, there are some practical data loss prevention measures to safeguard your precious MLV files and avoid the frustration of data loss. Please take some of them into practice.
- Save your data periodically: Regular manual saves during projects can prevent potential data loss.
- Ensure a stable network connection: For projects involving MLV files, a reliable internet connection is crucial.
- Sustain a decent power supply: An Uninterruptible Power Supply (UPS) can provide valuable time to save your work during power outages.
- Avoid using pirated software: Using reputable software from legitimate sources helps prevent malware attacks and system crashes.
- Use a reliable antivirus: Installing a trustworthy antivirus program protects your computer from malware and data loss.
- Maintain regular backups: Create a filebackup to retrieve data easily in case of system crashes or malfunctions.
How to back up MLV files effectively
If you prefer easier operating steps and more flexible backup options, try AOMEI Backupper Standard, which is better than Windows features.
Key features of AOMEI Backupper Standard:
- Enable to back up files, folders, partitions, disks, or systems to an internal/external hard drive, USB stick, Network, or Cloud drive.
- Create incremental backups to back up only changed files, effectively conserving storage space.
- By scheduling backups, you can ensure the continuous protection of your valuable data.
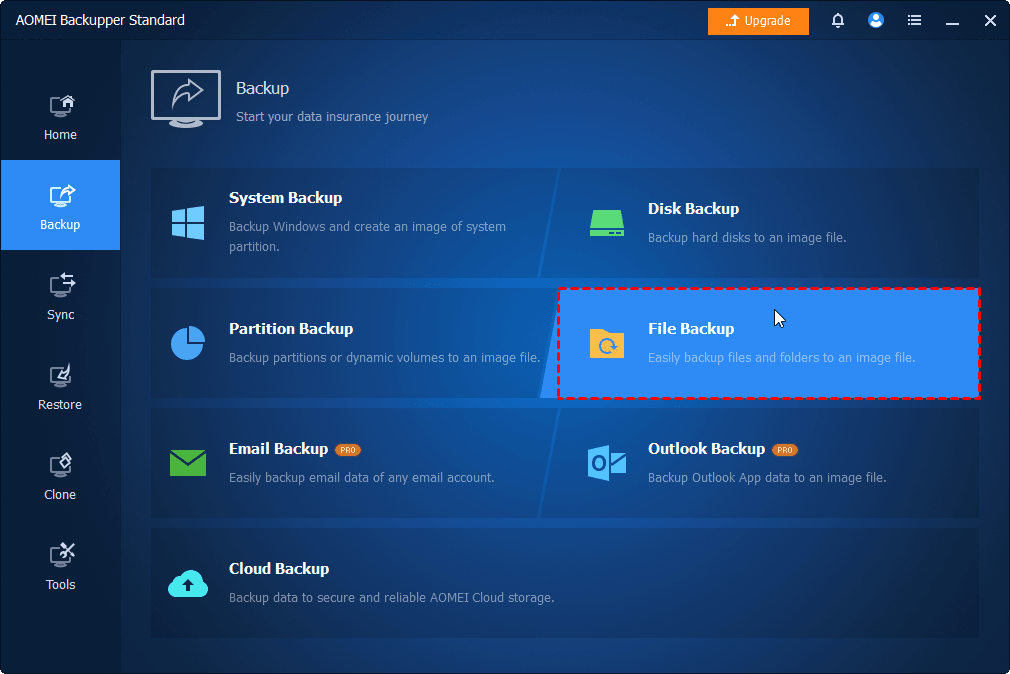
Step 1. Launch AOMEI Backupper on your Windows PC. Under the Backup tab, select the File Backup option.
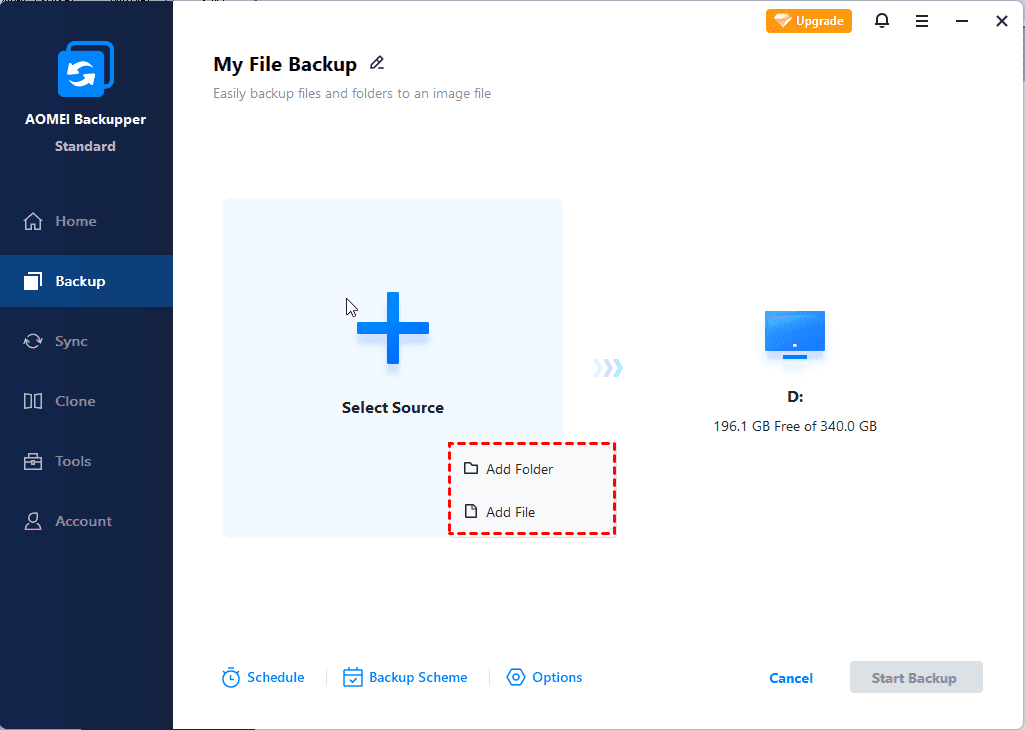
Step 2. Click Select Source > Add Folder/Add File to add the folder or MLV videos you prefer to back up.
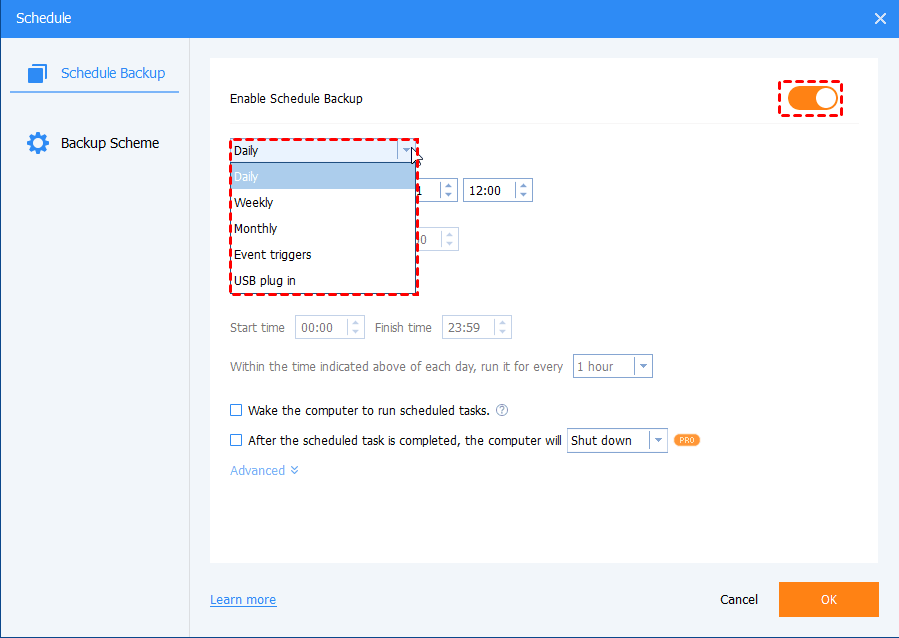
Step 3. Click Schedule Backup to enable Daily, Weekly, Monthly (By Date), Event triggers, etc., based on your needs. Then, click the Start Backup button.
Conclusion
What is an MLV file? How to recover deleted MLV videos? You can get the corresponding answers from the above content. The best way is to try to recover deleted MLV files using AOMEI FastRecovery, which is an excellent tool with a high success rate to recover deleted files.
