




How to Recover Files from a USB Drive using CMD
The right CMD command to recover files from USB depends on what happened. Use Attrib to reveal hidden files or Windows File Recovery to scan for deleted ones. This guide also covers a graphical option and when to run CHKDSK

By Ivy Updated on November 12, 2026


If you need a CMD command to recover files from USB, start by what happened to the files. Use attrib if they’re still on the USB drive but hidden. If you deleted them, use winfr.exe - Microsoft’s Windows File Recovery.
After an accidental deletion, stop saving files to the USB drive. New data can overwrite the space the deleted files occupied. Have another drive ready for the recovered copies. If you prefer to select the USB drive and browse scan results in a window, AOMEI FastRecovery offers a graphical option.
Which Recovery Method Should You Use?
Before recovery, you need to know whether your files are hidden or deleted.
|
🧩 Your Situation |
✅ Where to start |
🎒 What you need |
|---|---|---|
|
Files are hidden |
Use attrib command |
Access to the USB drive |
|
Files were deleted and you want to use CMD |
Try Windows File Recovery |
Some comfort with commands |
|
Files were deleted and you prefer a graphical interface |
Try AOMEI FastRecovery |
A separate drive for setup and recovery |
|
Windows reports a file system error |
Run CHKDSK |
A copy of important files before repair |
Open This PC in File Explorer and confirm the USB drive letter by checking its capacity. The examples below use E: for the USB flash drive and C: for another drive. Replace these with your own letters.
Two CMD Commands to Recover Files from USB
Here are two CMD commands to recover files from USB: With attrib, you’ll inspect file attributes before changing them. With winfr.exe, you’ll choose a scan mode based on the USB drive’s file system.
Method 1: Show Hidden Files on USB with Attrib
Try the Attrib command if the USB drive opens and you suspect the files are hidden. It reads the attributes so you can see what Windows is hiding before you change anything.
Step 1. Open Command Prompt from the Start menu. Then, run the attrib E:\* /d command to list the attributes of files and folders at the root of the USB drive (E:).
Step 2. Look for a file or folder you recognize. An H beside an item means it's Hidden; an S means it's a System item.
To remove the Hidden attribute from a folder, enter:
attrib -h "E:\foldername"
To clear both System and Hidden:
attrib -s -h "E:\foldername"
These examples target one folder. If specific files inside it are hidden too, check their attributes and apply the appropriate command to those files.
Method 2: Recover Deleted Files from USB with Windows File Recovery
Windows File Recovery (winfr.exe) is another CMD command to recover deleted files from USB . It offers two scan modes, /extensive for FAT32 or exFAT drives, and /regular for recently deleted files on a healthy NTFS volume, plus filters to narrow the results.
Step 1. Open the Microsoft Store, search for Windows File Recovery, and install it on your PC. In File Explorer, right-click the USB drive and choose Properties to see its file system.
Step 2. Open Command Prompt as administrator. Type the following command to recover deleted PDFs and Word files on an exFAT USB drive:
winfr E: C: /extensive /n *.pdf /n *.docx
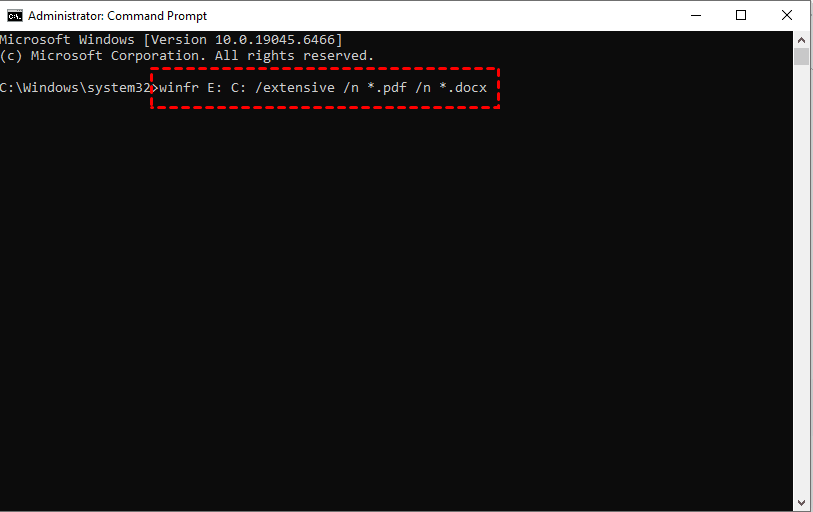
Here, E: is the USB drive to scan and C: is the separate drive for the recovered files. /n *.pdf searches for PDFs. /n *.docx searches for Word files.
Enter Y when prompted to continue. Wait until the scan finishes. It will create a Recovery_... folder on the destination drive to save the recovered files. Open it and check that the pages you need are present and readable.
How to Recover Deleted Files from USB without CMD
AOMEI FastRecovery offers a more reliable way to recover them without CMD. Its graphical interface makes the process easier. You can browse the scan results and pick only what you want, not everything.
 AOMEI FastRecovery
- 🧩 Scenario matching: Pick the mode that fits - Deleted File Recovery handles deleted files well.
- ⚡ Two scan modes: Quick Scan looks for deleted files quickly, while Deep Scan searches more thoroughly.
- 📂1,000+ file types: Recover deleted or lost documents(DOCX, XLSX, PDF), images (JPG, PNG, GIF), videos (MP4, MOV, AVI), and more.
- 🔎 Flexible browsing: Browse by Type or Path, then use search or sort to narrow the results.
- 🎁 Free recovery: The free edition offers thumbnail previews and lets you recover up to 500 MB of data.
 100% Secure
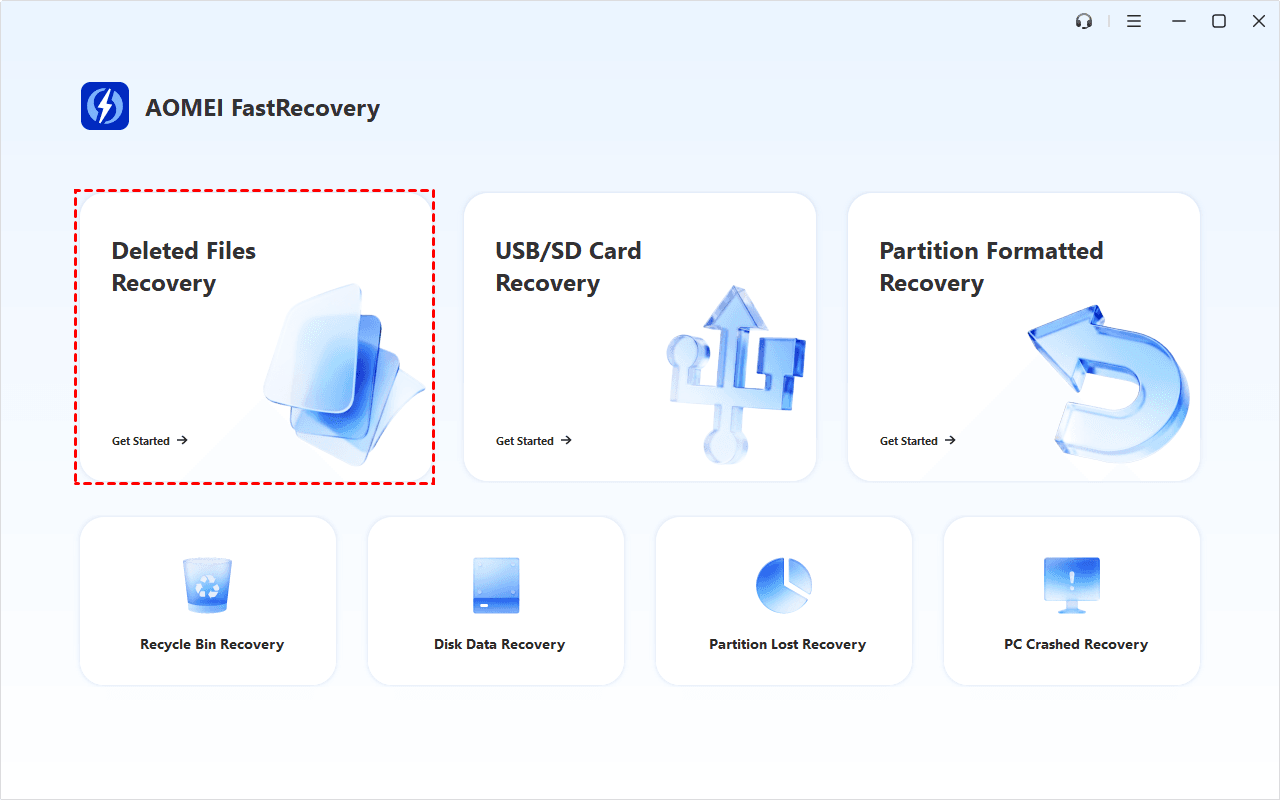
Step 1. Open AOMEI FastRecovery after installing and choose Deleted Files Recovery.
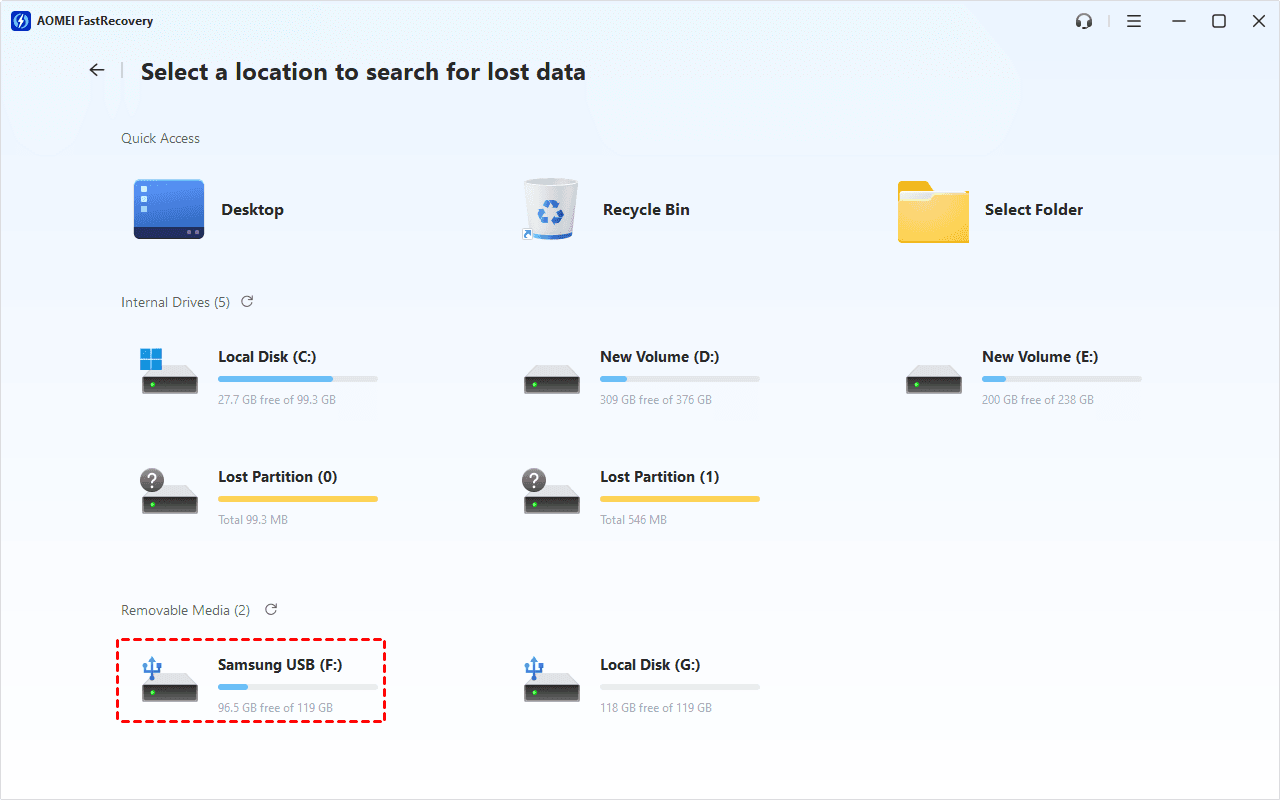
Step 2. Select the USB drive containing deleted files and click Scan. Quick Scan starts by default.
Step 3. Browse the results by Type or Path, expand a directory, or click the column headers to sort the results, making it easy to find deleted files by date, type, name, and more. Or just search for the filename directly.
Step 4 (optional). If the files are missing after Quick Scan, click Deep Scan to search more thoroughly.
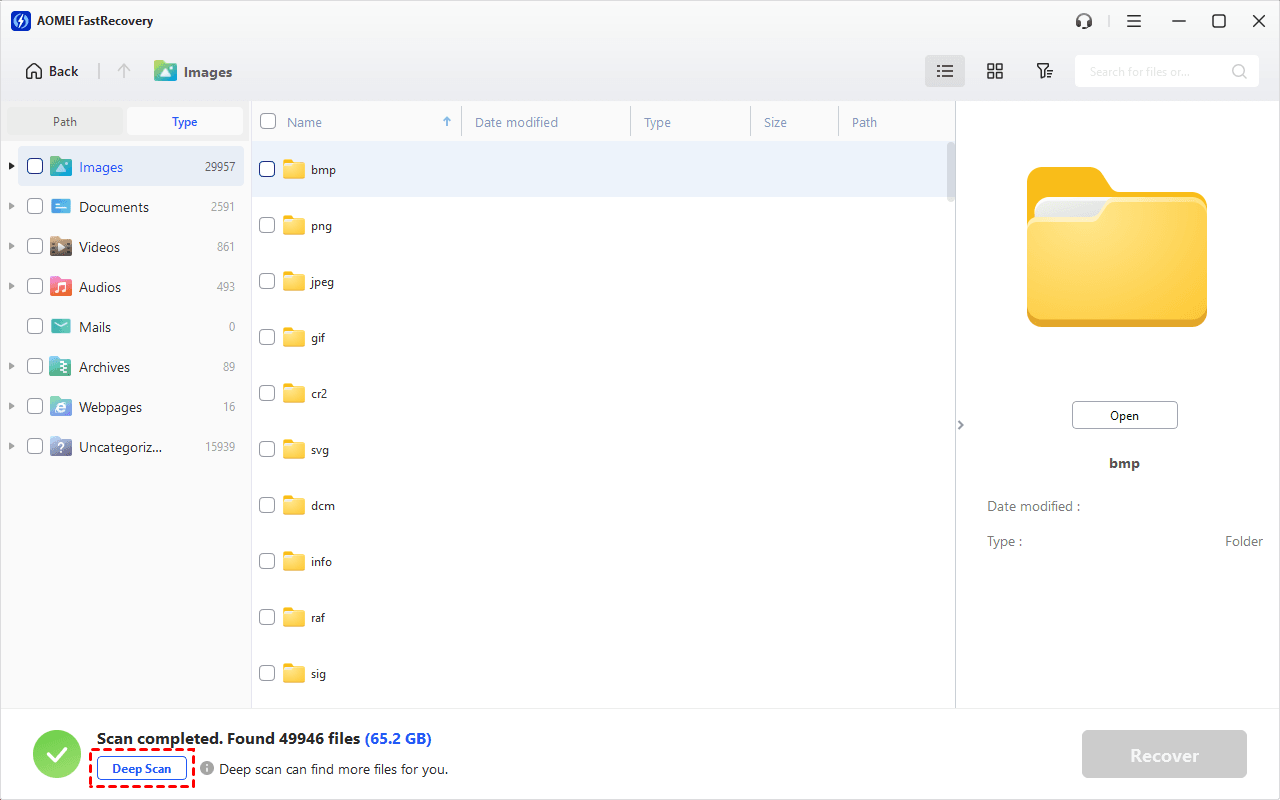
Step 5. Select the files you want and click Recover. Save them to a different drive, such as a drive on your PC. A second folder on the USB drive still writes to the source.
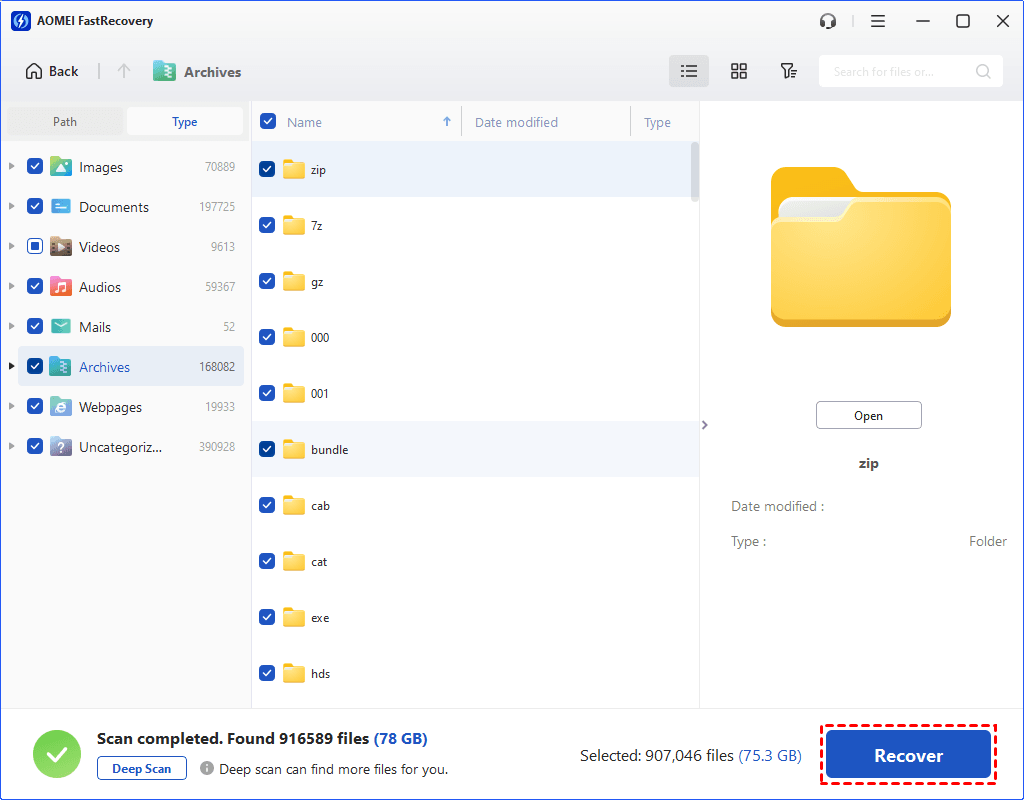
- The free edition can recover up to 500 MB. Recovering more requires an upgrade.
- To recover individual files, for example, recovering deleted JPEGs, expand Images under Type and select JPEG.
When to Use CHKDSK on a USB Drive
If the USB drive stays connected and Windows reports a file system error, open Command Prompt as administrator, then run chkdsk E: and press Enter. Replace E: with your USB drive letter. This checks the volume and displays a status report.
If the report shows errors, copy any readable files to another drive first, and prioritize recovering what matters most before repairs. The /f switch writes changes to the USB drive. On FAT volumes, those changes can affect file allocation data. If Windows asks you to format the drive, cancel the prompt while you still need files from it.
Conclusion
This article covers two CMD commands for recovering files from USB drive, plus a graphical option, AOMEI FastRecovery, if you're not comfortable with CMD.
Open them from the drive where you saved them. Check a document through its last page, or open a photo at full size to confirm it displays correctly. Keep those copies on the separate drive while you decide whether to repair or reuse the USB stick.

 as a preferred
source on Google