How to Use DISM to Clone Disk or an Easier Tool
Click on this post to learn how to use DISM to clone a disk. For users unfamiliar with the command lines, there is also reliable cloning software for easier disk cloning.
By Jonna Updated on June 20, 2025
What Does the DISM Command Do?
DISM(Deployment Image Servicing and Management) is a powerful command-line tool built into Windows systems. It is primarily used to mount, modify, repair, and service Windows images, including the ones used for Windows Setup, Windows Recovery, and Windows PE (Preinstallation Environment). DISM can also be used to capture and apply Windows images, which is why people look to use it for disk clone. Here are some of the commonly used DISM commands:
|
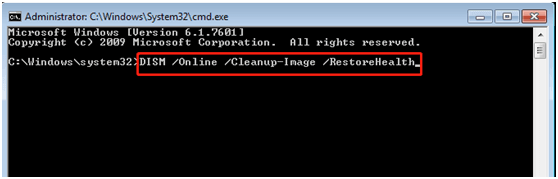
dism /online /cleanup-image /restorehealth |
Repairs the health of the system image, often used for fixing corruption or errors in the system image. |
|
dism /Get-ImageInfo |
Retrieves detailed info about a Windows image. |
|
dism /get-wiminfo |
Displays information about a Windows Imaging Format (WIM) file, like the different images within it. |
|
dism /Capture-Image |
Captures an image of a disk or partition to a file. |
|
dism /apply-image /imagefile /index |
Applies a captured image to a disk or partition. |
If you are wondering how to use DISM to clone a disk, below is a full guide. But it should be noted that DISM is not a reality disk cloning software, and cloning a disk with it can be a bit tricky, especially for users unfamiliar with the command-line interface. Luckily, there are easier ways to clone a disk, like using professional disk cloning software. This guide will explore both methods, explain how to use DISM to clone a disk, and also offer an easier, more user-friendly alternative.
Best clone software for easier cloning of a disk to another disk
How to Use DISM to Clone Disk
Cloning a disk using DISM isn't as straightforward as simply copying data. However, if you know the right commands and follow the process, it can be done effectively. Below is a step-by-step guide on how to use DISM for copying disk.
Step 1. Prepare Your Disk
Before using DISM clone drive commands, ensure your computer is set up for the operation:
- Backup Data: Always create a backup of your important files. Cloning a disk is a critical operation, and there’s always a small risk of failure.
- Check Disk Space: Ensure the target disk is larger than the source disk to accommodate the cloned data. If the target disk is smaller, the operation may fail.
- Connect Both Disks: Connect both your source and target disks. The source disk is the disk you want to clone, and the target is where the clone will be copied.
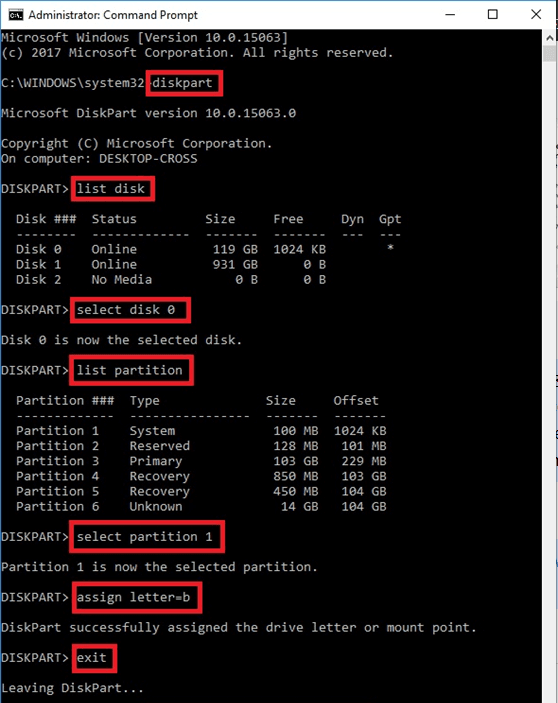
- You can also need to make sure that the source disk's partitions are allocated drive letters. Open Command Prompt and run the following commands:
diskpart
list disk
select disk x (replace x with the specific letter of the hard disk)
list partition
select partition n (replace n with the partition letter)
assign letter=b (Assign a drive letter to the partition, like b)
exit
Step 2. Capture an Image of the Source Disk
In order to use DISM for disk clone, you need to create a WIM (Windows Imaging Format) image of the source disk. Here's how to do it:
- Open the Command Prompt as Administrator.
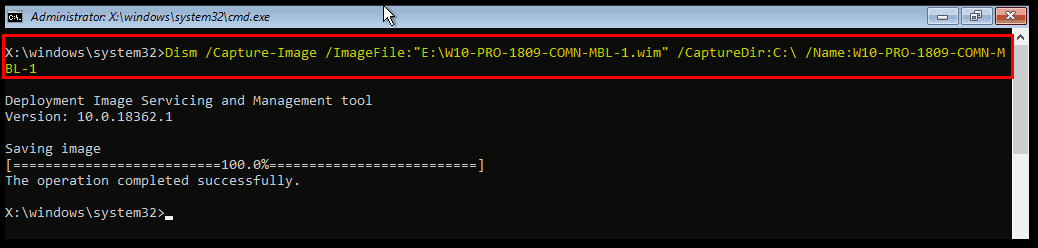
- Use the following command to capture the image of the source disk:
dism /Capture-Image /ImageFile:C:\path\to\save\backup.wim /CaptureDir:C:\ /Name:"Windows Backup"
▶Replace C:\path\to\save\backup.wim with the actual path where you want to save the image file.
▶Replace C:\with the source disk partition you wish to capture.
▶The /Name:"Windows Backup" parameter specifies a name for the disk image.
Step 3. Save the Captured Disk Image to Another Location
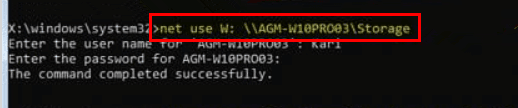
It is recommended to save your image to an external drive or a network location. Here we take a network location as an example: net use W: \\PC_Name\ShareName.
- Enter your network credentials if needed, then copy the partitions to your network share with the following command:
md N:\Images\
copy C:\my-windows-partition.wim N:\Images\
copy C:\my-system-partition.wim N:\Images\
Step 4. Apply the Image to the Target Disk
Once the image is captured, you can apply it to the target disk. This is the actual cloning process:
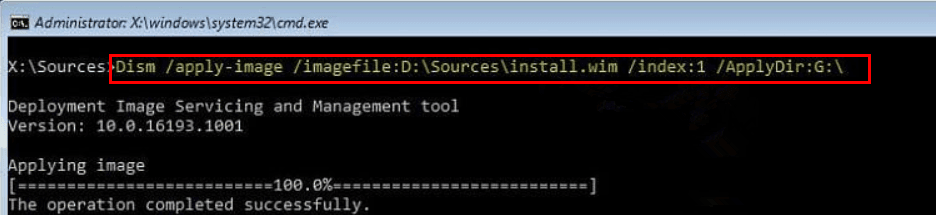
- Run the following command to apply the image to the target disk:
dism /Apply-Image /ImageFile:C:\path\to\backup.wim /Index:1 /ApplyDir:D:\
▶Replace C:\path\to\backup.wim with the path to your image file.
▶Replace 1 with the index of the image in the WIM file (usually 1).
▶Replace D:\ with the letter of the target disk/partition.
- After applying the image, DISM will begin the process of transferring the data from the source disk to the target disk.
Step 5. Check the Disk for Errors
After the image is applied, you should verify that the disk has been cloned correctly. To ensure the health of your system image and confirm the clone operation was successful, run the following command:
dism /online /cleanup-image /restorehealth
Easier Way to Clone Disk - Professional Disk Cloning Software
While using DISM Clone Disk works for advanced users comfortable with command-line tools, it is not the most intuitive option for many. A much easier and more efficient way to clone a disk is by using professional disk clone software, like AOMEI Cloner.
This tool is renowned for its reliability, ease of use, and comprehensive features, making it the ideal choice for anyone who needs to perform HDD to HDD/SSD cloning or SSD to SSD/HDD cloning. This tool offers Disk Clone to clone the entire disk, including OS, boot sectors, partitions, and files, System Clone to clone just your operating system to a new drive, and Partition Clone to copy specific partitions. And it comes with many highlighted features:

- Sector by sector clone - This ensures that every bit of data on the source disk is copied, including your operating system, apps, and settings.
- Intelligent clone - It allows skipping unused space and bad sectors on source disk, making it easy to clone larger drive to smaller SSD or clone hard drive with bad sectors.
- Automatic resizing - It automatically resizes partitions during the cloning process, especially helpful if you're cloning to a larger drive.
- Clone MBR and GPT disks - It supports both MBR and GPT partition styles, and enables you to clone MBR to GPT or vice versa.
- Hot cloning - It runs disk cloning in a running computer, ensuring that your data is cloned quickly and accurately with minimal downtime.
If you want to avoid the complexities of DISM disk clone commands, follow the steps below to clone a disk simply and quickly with AOMEI Cloner:
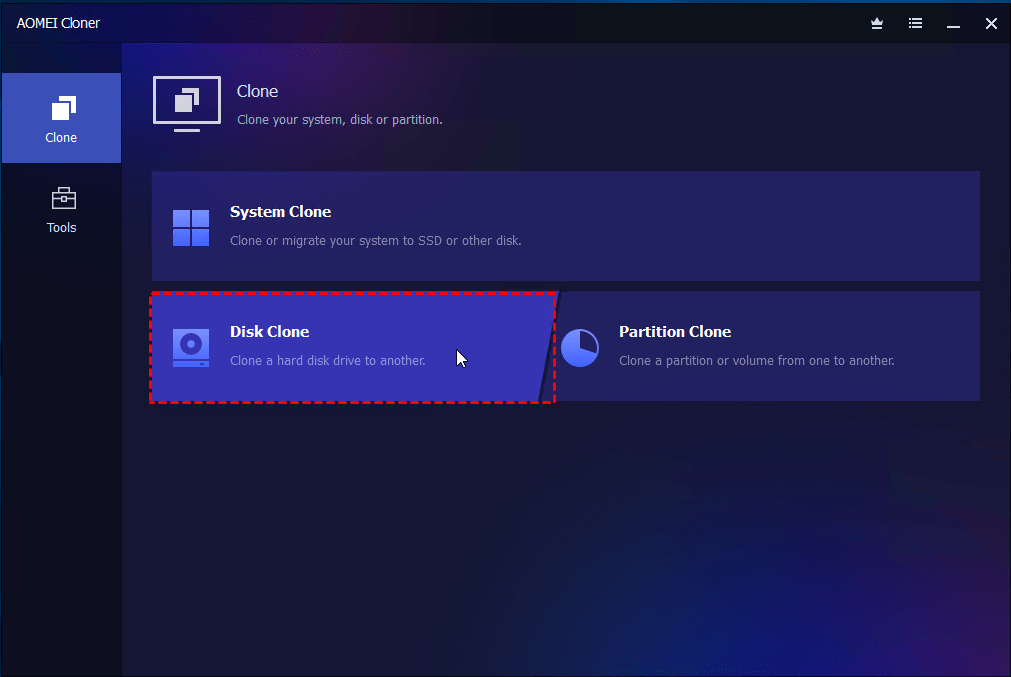
Step 1. Download and run AOMEI Backupper on your computer, select the Clone option from the left menu, and choose Disk Clone.
Step 2. Then, choose the source disk (the disk you want to clone) from the list of available drives.
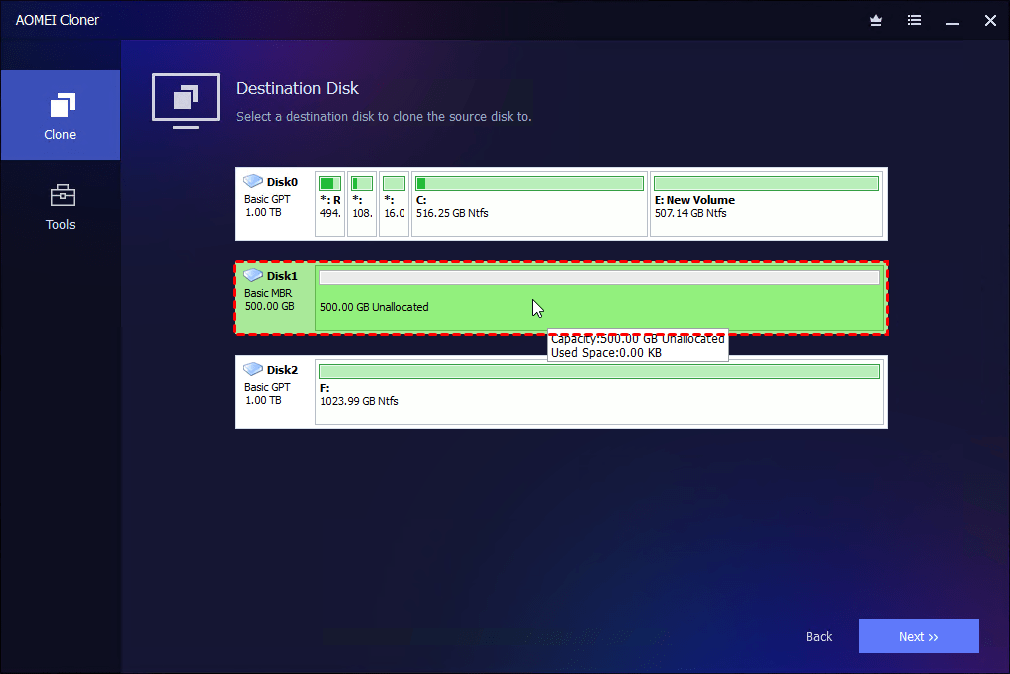
Step 3. Choose the new destination disk where you want the data cloned.
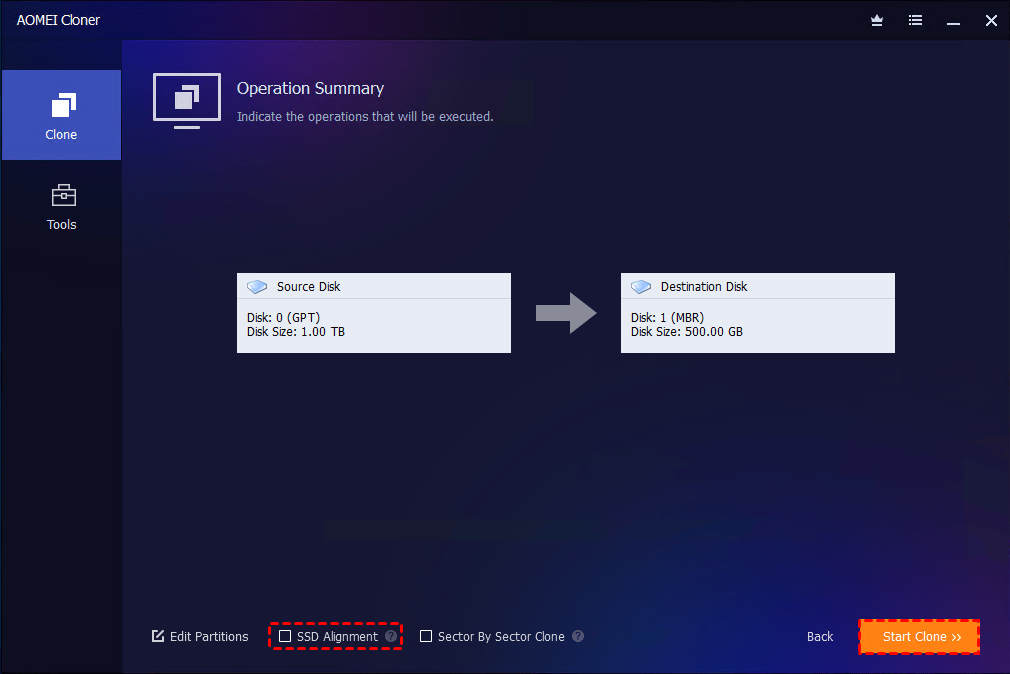
Step 4. Enable SSD Alignment if the destination is an SSD. Use Edit Partitions to resize partitions automatically to fit the new disk. Do not tick Sector By Sector Clone if the target disk is smaller than the source disk.
Step 5. Click Start Clone to begin the cloning process right now.
FAQs on DISM Disk Cloning
Is it better to clone or image a hard drive?
It depends on your needs. Cloning is ideal if you want to directly copy everything, including the operating system, applications, and data, to a new disk. Imaging, on the other hand, is useful for creating a backup that can be restored later. Cloning is usually faster, while imaging is better for long-term storage and backup.
What is the difference between disk clone and partition clone?
Disk clone vs partition clone, disk clone usually copies everything from one disk to another, including the operating system, all partitions, and all files; while partition clone clones only specific partitions, leaving other partitions on the source disk untouched.
How do I clone a local disk?
To clone a local disk, follow the steps in the guide above, using either DISM or a tool like AOMEI Cloner. The key steps are selecting the source and target disks and then initiating the cloning process.
Summary
Whether you choose to use DISM to clone disk or prefer the ease of a professional disk cloning software, such as AOMEI Cloner, you can efficiently transfer all your data to a new disk.
For most users looking to upgrade their drives, avoid data loss, and ensure a bootable clone, professional cloning tools like AOMEI Cloner provide a faster, safer, and more intuitive experience. Its one-click options, SSD optimization, and intelligent partition resizing make cloning your disk seamless. Also, you can use this utility to copy only Windows to SSD.