How to Clone C Drive to Larger SSD Without Reinstalling Windows
Cloning your C drive to a larger SSD boosts your storage and performance. Follow this simple guide to clone your system with AOMEI Cloner and keep all your files intact.
By Jonna Updated on March 16, 2026
As your storage needs grow, you may find that your current SSD or HDD is running out of space, leading to performance issues and system slowdowns. Upgrading to a larger SSD can resolve these issues and significantly improve your computer's speed and efficiency. However, reinstalling Windows and transferring all your files manually can be time-consuming and risky.
A better solution is to clone your C drive to a larger SSD, which allows you to migrate your operating system (OS), applications, settings, and personal files seamlessly without data loss. This article will provide a step-by-step guide to cloning your C drive, explain why this method is beneficial, and answer common questions related to the process.
🌟To check more C drive replacement scenarios, please refer to this complete guide: Replace C Drive with SSD.
How to Move C Drive to a Bigger SSD
Cloning C drive to SSD means creating an exact copy of your existing system disk and transferring it to a new SSD. This ensures that your Windows operating system, installed software, and personal files remain intact, eliminating the need for a fresh installation.
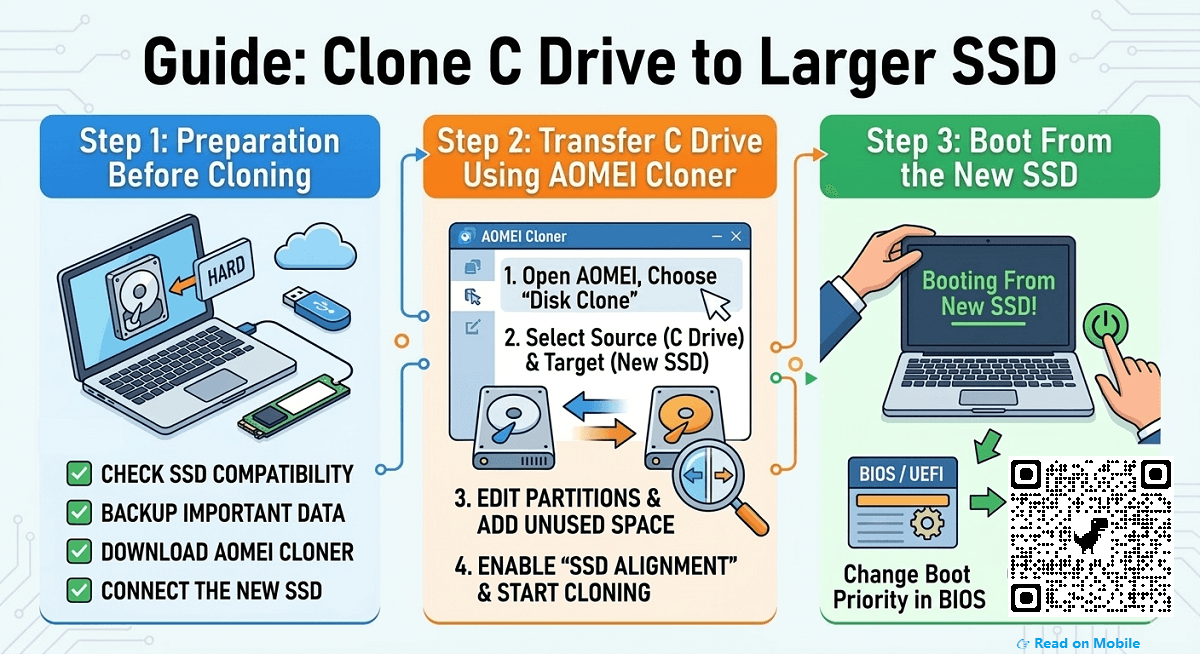
Step 1: Preparation Before Cloning
Before proceeding with the cloning process, follow these essential preparations:
✅ Check SSD Compatibility
- Make sure the new SSD matches your PC’s interface (SATA, NVMe, or PCIe).
- If using a laptop, confirm that it supports SSD upgrades.
✅ Backup Important Data
While cloning preserves data, it’s always best to back up essential files before starting.
✅ Download Reliable Cloning Software - AOMEI Cloner
Windows does not offer built-in disk cloning features, so third-party software is required. AOMEI Cloner is a powerful, easy-to-use cloning tool that ensures a smooth migration process.

- System Clone & Disk Clone: Easily migrate Windows and all data to a larger SSD.
- SSD Alignment: Optimizes SSD performance and lifespan.
- Intelligent Clone: Clones only used sectors, making it possible to migrate from a larger HDD to a smaller SSD.
- Sector-by-Sector Clone: Creates an exact 1:1 copy, even for corrupted disks.
- Bootable Media Creation: Allows offline clone in case of boot failures.
✅ Connect the New SSD
- If your PC has an extra M.2 or SATA slot, install the SSD internally.
- If not, use a SATA-to-USB adapter or NVMe enclosure for external connection.
Step 2: Transfer C Drive to New SSD Using AOMEI Cloner
Now that you've prepared your system, follow these steps to clone C drive to new SSD efficiently:
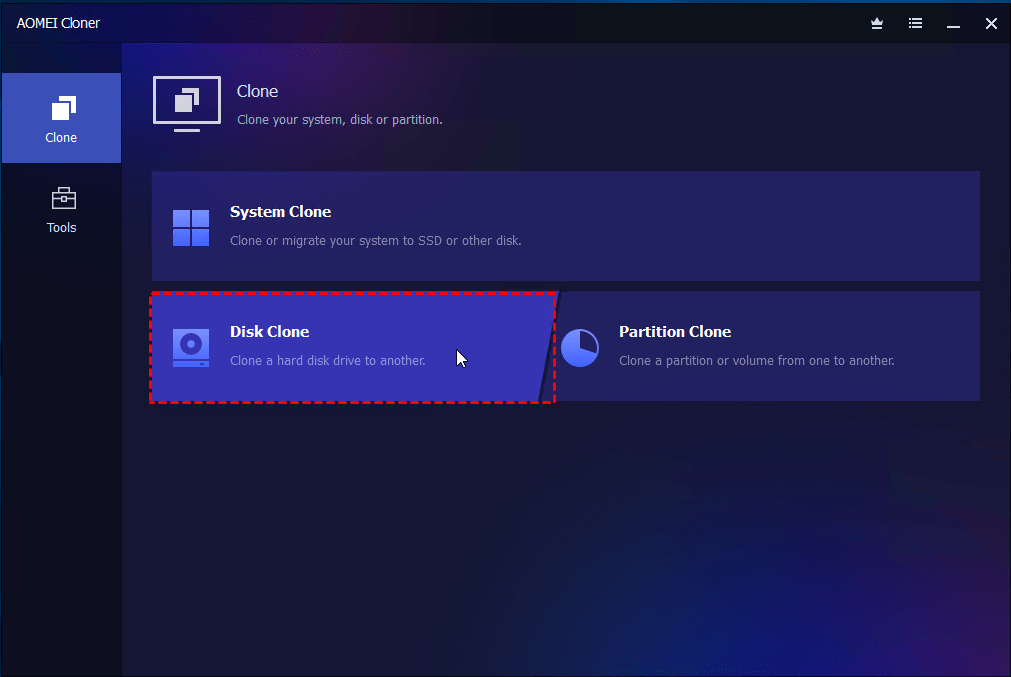
1. Launch AOMEI Cloner & Select Cloning Mode
- Open AOMEI Cloner.
- Click Clone → Disk Clone (for entire disk migration) or System Clone (for OS-only migration).
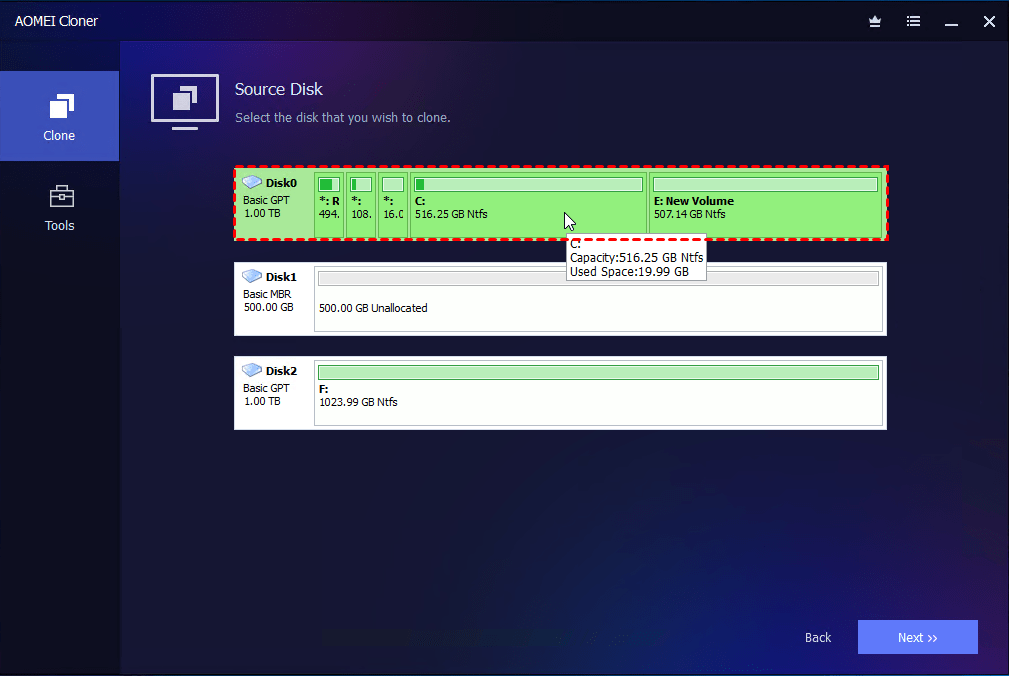
2. Select the Source Disk and Destination SSD
- Choose your current C drive (system disk) as the source.
- Choose the larger SSD as the target.
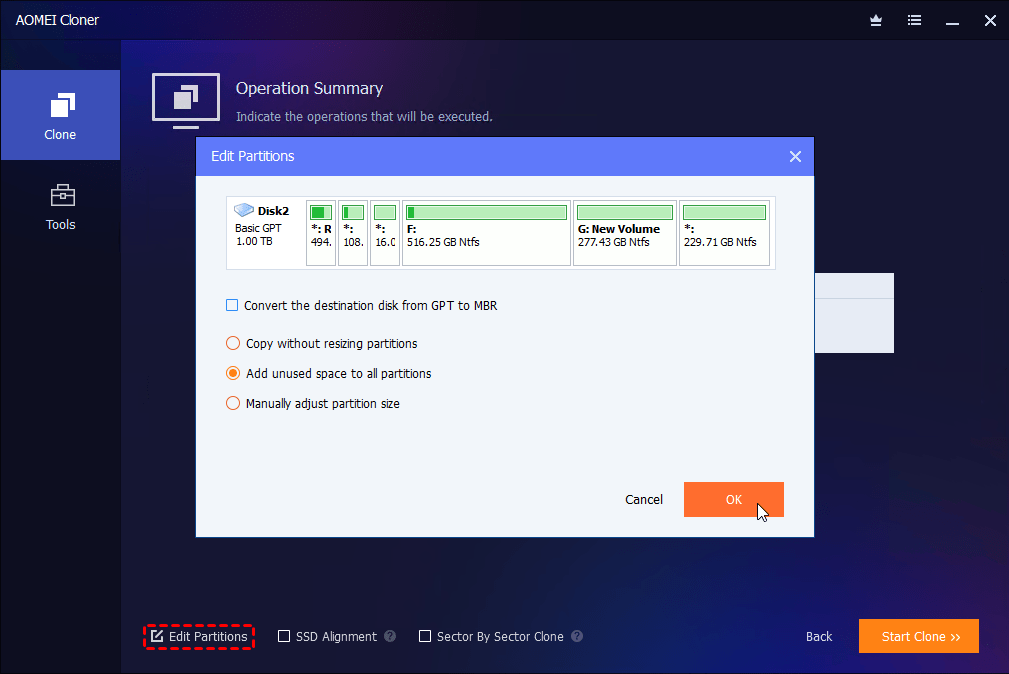
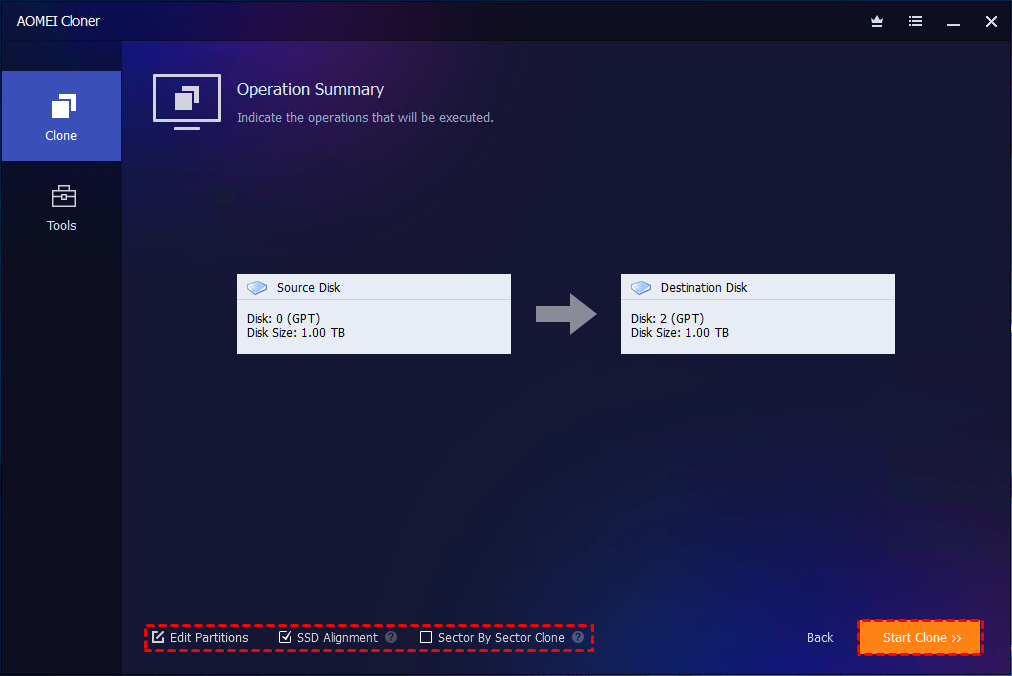
3. Extend Partition and Optimize SSD Performance
- Click Edit Partitions > Add unused space to all partitions to make full use of the space on the larger SSD.
- Enable SSD Alignment to boost SSD performance and prolong its lifespan.
4. Start Cloning Process
- Click Start Clone and wait for the process to complete.
- Cloning time depends on the size of the data and the speed of the SSD.
Step 3: Boot from the New SSD
After copying C drive to SSD, you need to ensure that your computer boots from the new SSD.
✅ Restart Your PC & Enter BIOS
- Press F2, F12, DEL, or ESC during startup to enter the BIOS/UEFI settings.
✅ Change the Boot Order
- Locate the Boot Priority section.
- Set the new SSD as the primary boot drive.
✅ Save Changes & Restart
- Press F10 to save settings and reboot.
Why Clone C Drive to Larger SSD?
Upgrading to a larger SSD by cloning your C drive offers several advantages:
💾 Increased Storage Space: No more "low disk space" warnings—a larger SSD allows more applications and files.
🚀 Improved Performance & Speed: SSDs drastically reduce boot time and enhance system responsiveness.
🔄 Seamless Upgrade Without Data Loss: Unlike fresh installations, cloning retains all data, settings, and applications.
🛡️ Safer & More Efficient Process: Cloning eliminates the risks of software incompatibility and lost data.
⏱️ Time-Saving & Hassle-Free: No need to reinstall Windows or transfer files manually—everything works instantly.
FAQs About Cloning C Drive to Larger SSD
1. Will cloning my C drive erase my existing data?
No, cloning preserves all files and system settings. However, any existing data on the target SSD will be overwritten.
2. Can I clone a C drive to an SSD of a different size?
Yes, you can clone to a larger SSD without issues. If cloning to a smaller SSD, use AOMEI Cloner to only copy used sectors.
3. How long does the cloning process take?
Cloning speed depends on the amount of data and the SSD interface (SATA vs. NVMe). Typically, it takes 30 minutes to an hour.
Conclusion
Cloning your C drive to a larger SSD is the best way to upgrade your system without losing data or reinstalling Windows. Using AOMEI Cloner, you can migrate your OS, applications, and personal files seamlessly, ensuring improved storage capacity and performance.
By following the steps outlined above, you can efficiently clone C drive to M.2 SSD or SATA SSD with zero downtime and maximum reliability.