
How to Clone MBR to GPT Without Losing Data [Complete Guide]
Cloning MBR to GPT is essential when upgrading to a modern storage system that supports UEFI boot mode and larger disk sizes. This guide will walk you through the entire process.
By Lily Updated on May 12, 2025
Use Cases for Cloning MBR to GPT
Cloning MBR to GPT isn’t just a technical preference—it’s often a necessity driven by hardware upgrades, system compatibility, and performance goals. Here are the most common scenarios where cloning from MBR to GPT makes sense:
1. Upgrading to a Larger Drive: MBR limits drives to 2TB, but modern HDDs/SSDs often exceed this. Cloning to GPT lets you use all available space.
2. Switching to UEFI Boot: If upgrading your motherboard or installing Windows on UEFI, cloning MBR to GPT ensures compatibility and enables Secure Boot and faster startups.
3. Migrating Your OS Safely: Cloning an MBR drive to GPT avoids a risky in-place conversion and ensures a smooth boot on the new drive.
Prepare for Cloning from MBR to GPT
Before you begin the process of cloning MBR to GPT, here’s what you need to do to set yourself up for a successful and error-free cloning experience.
1. Confirm UEFI Compatibility
Cloning to a GPT disk typically requires your system to support UEFI boot mode. Here’s how to check:
- Restart your computer and press a specific key (like F2, Del, or F12)to enter the BIOS/UEFI setup menu.
- Go to Security or Boot tab and look for a "Secure Boot" or "UEFI/Legacy" switch. If either of these options is present, your motherboard supports UEFI.
2. Check Your Windows Version
Only 64-bit version of Windows can boot from a GPT disk. Make sure your system is 64-bit before cloning:
- Go to Settings > System > About.
- Check under "Device Specifications" for System type (32-bit or 64-bit).
💡 Note: If your system is 32-bit, cloning to GPT is not recommended—you’ll encounter boot issues.
3. Prepare the Target GPT Disk
To receive the cloned data, your target disk needs to be properly set up:
- Physically install the new SSD or HDD (use SATA, NVMe, or USB as needed).
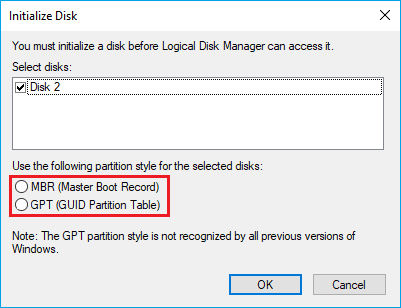
- Open Disk Management, right-click on the new disk and select Initialize Disk. Select GPT and click OK.
4. Choose the Right Cloning Tool
Not all disk cloning tools support cloning from MBR to GPT, so pick one that explicitly offers this capability. AOMEI Cloner is one of the best choices.

- It allows you to clone OS only, clone the entire disk or a particular partition.
- It fully supports MBR and GPT disks. You can clone MBR disk to GPT or clone GPT disk to MBR without any obstacles.
- It includes an Edit Partitions feature to maximize disk space or convert the destination disk’s partition style. You can also enable SSD Alignment for better performance.
- The cloning process will run in the background, so you can use other programs at the same time.
Download and install AOMEI Cloner on your PC now!
5. Back Up Your Entire System
Even though cloning is designed to preserve your data, things can go wrong. Always back up your entire system to avoid potential data loss.
How to Clone MBR Disk to GPT Disk Safely
Once you are prepared, follow the steps below to clone MBR to GPT. Take cloning MBR HDD to GPT SSD as an example.
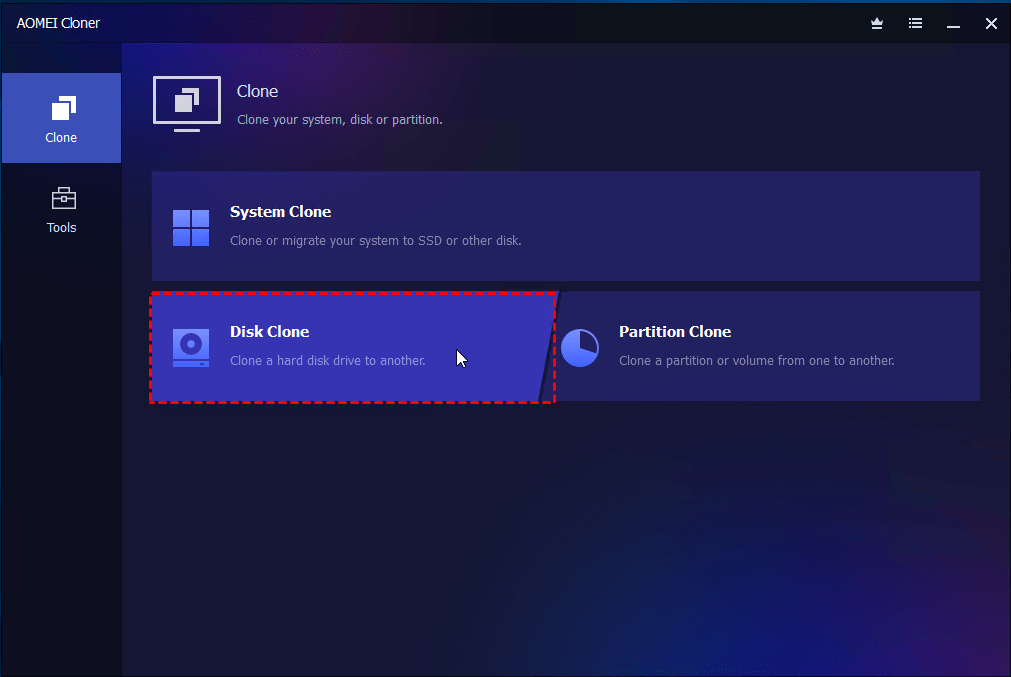
Step 1. Launch AOMEI Cloner and go to Clone → Disk Clone.
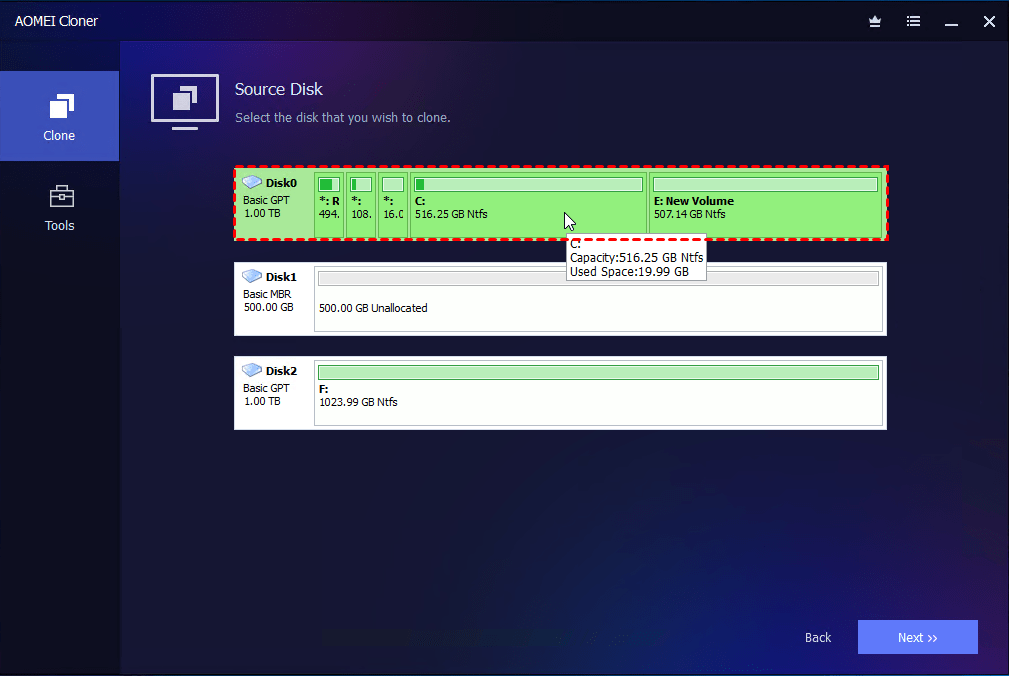
Step 2. Select the MBR HDD as Source Disk and the GPT SSD as Destination Disk.
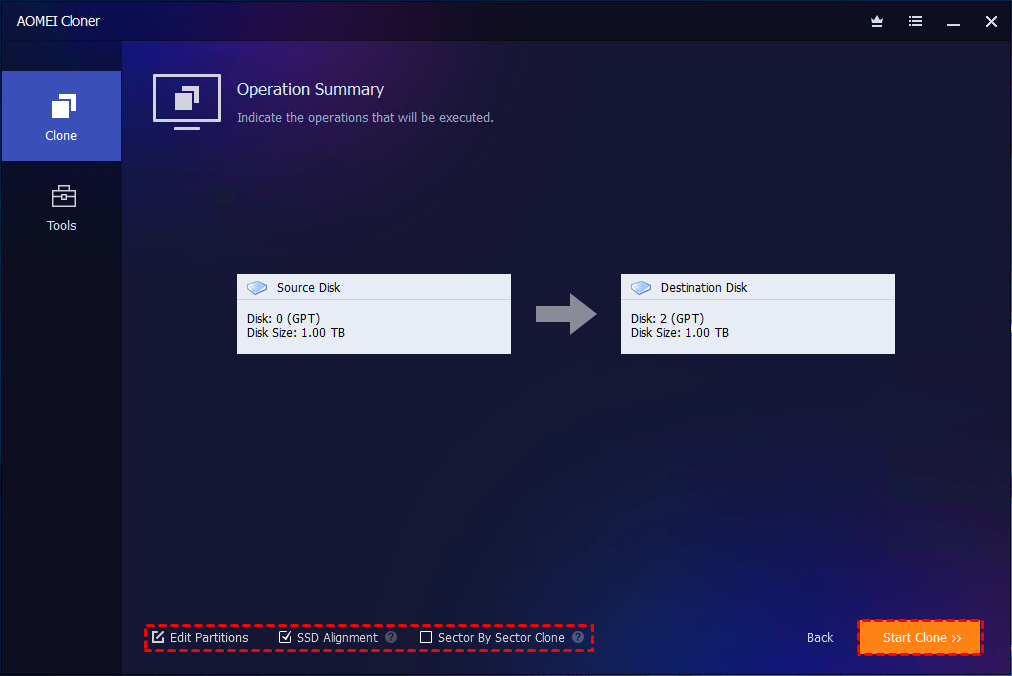
Step 3. Configure the cloning settings as necessary:
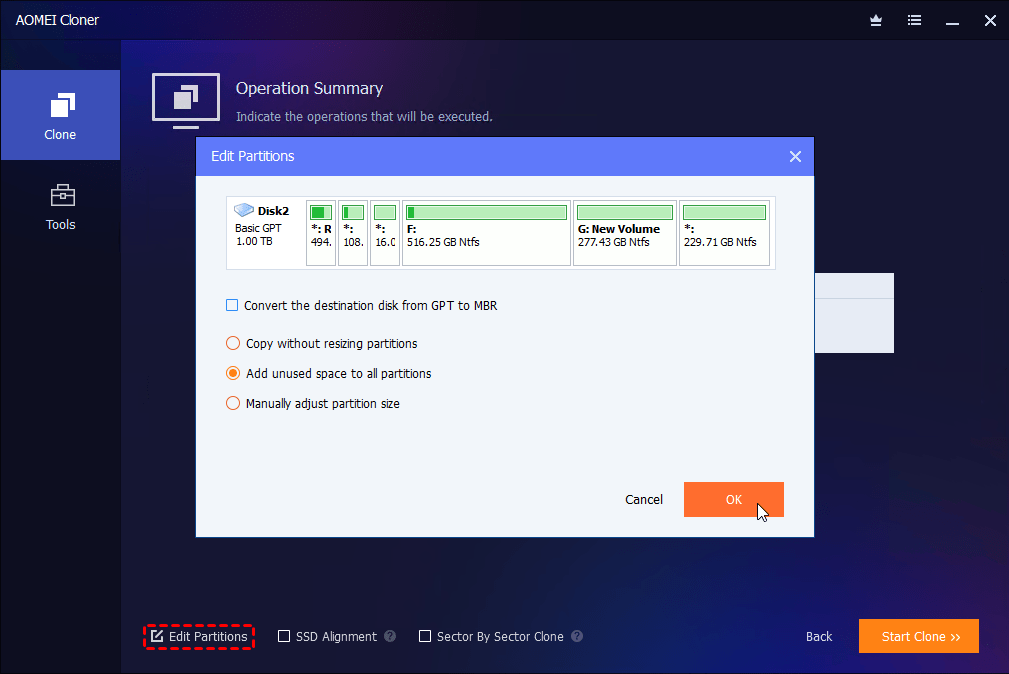
- Edit Partitions: Adjust partition size or convert partition style of the destination disk.
- SSD Alignment: Use this option to improve the read and write speed of the target SSD as well as prolong its service life.
- Sector By Sector Clone: Copy both used and unused space on the source disk. Destination drive must be the same size or larger to use this option.
Step 4. Confirm your settings and click Start Clone. The cloning process can take anywhere from dozens of minutes to several hours, depending on disk size, speed of your drives, and USB or SATA interface.
Boot from the Cloned GPT Disk
After cloning is complete, follow these steps to boot from the GPT disk:
1. Restart your computer and enter the BIOS/UEFI setup (usually by pressing DEL, F2, or F10 at startup).
2. Go to the Boot tab and switch boot mode to UEFI if it’s not already enabled.
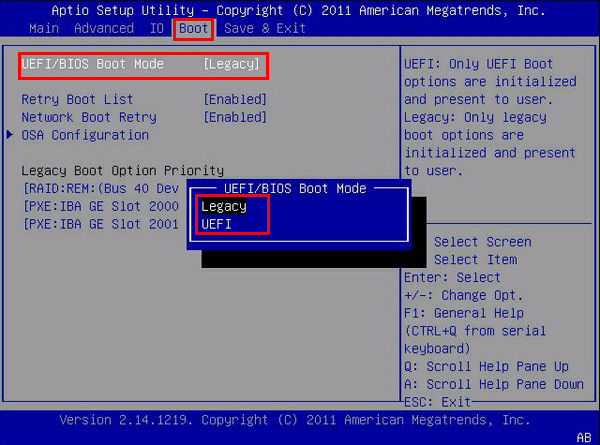
3. Set the GPT disk as the primary boot drive.
4. Press F10 to save changes and exit. If everything was done correctly, your system should boot normally from the GPT disk. The Windows environment and all your files should look identical to your original MBR drive.
Verdict
Cloning MBR to GPT is one of the safest and most efficient ways to modernize your system, especially when paired with UEFI boot mode and larger drives. By carefully following each step—from preparation to post-clone boot configuration—you can avoid pitfalls and enjoy the benefits of GPT without starting from scratch.
AOMEI Cloner is the best assistant for cloning MBR disk to GPT disk. It ensures a smooth boot after cloning. What’s more, it supports all brands of HDD or SSD. You can use it to clone HDD to Samsung SSD, WD SSD, Kingston SSD, etc. Go for it now!
