
Fixed: Windows 11 Keeps Installing Outdated AMD Drivers [4 Methods]
With 4 effective methods, you can easily prevent Windows 11 keeps installing outdated AMD drivers, along with step by step instructions. Be sure to create a full system image for safety.
By Ivy Updated on March 11, 2026
Many users are surprised to find Windows repeatedly replacing AMD graphics drivers. This behavior is not a bug - it is the result of how Windows Update is designed to manage hardware compatibility and system stability. Scroll down to learn moreand get quick solutions!
Why Windows 11 Keeps Installing AMD Drivers Automatically?
Windows Update operates as a centralized driver distribution platform. When your PC checks for updates, Microsoft compares your hardware IDs with its online driver catalog. If it finds a driver version it considers more stable, secure, or compatible, Windows automatically downloads and installs it, even if you already installed a newer driver manually from AMD.
Usually, AMD display drivers are often classified as automatic drivers, which install silently and cannot be declined through standard Windows Update settings. These usually include critical GPU drivers.

However, compared to the Official AMD driver versions, Microsoft’s drivers are typically outdated, lacking performance optimizations and support for AMD Adrenalin software features, particularly resulting in poor gaming stability and sluggish creative workloads. Meanwhile, some users may experience issues, such as black screens, flickering displays, random system crashes, and broken multi-monitor configurations
How to Check If Windows 11 Overwrite Your AMD Drivers
If your system feels unstable, performance has dropped, or AMD features suddenly disappeared, Windows may already be replacing your drivers. Fortunately, you can confirm this with a few simple checks.
#1: Identify the Installed AMD Driver Version
You can try to check the AMD driver version in Device Manager and compare it with the driver version in AMD software. If the two versions do not match, Windows has replaced your AMD driver.
Step 1. Right-click Start menu and select Device Manager.
Step 2. Expand Display adapters. Double-click your AMD GPU to open the Properties window, go to the Driver tab, write down the Driver Version and Driver Date.
Step 3. Open AMD Adrenalin Software. Go to Settings > System > Software & Driver. Compare if the two versions match.
#2: Event Viewer Signs of AMD Driver Replacement
Event Viewer also shows recent display driver installation activity, allowing you to keep driver replacements.
Step 1. Press Win + R to open the Run window. Type eventvwr.msc and press Enter.
Step 2. Navigate to Windows Logs and System. In the right panel, click Filter Current Log.
Step 3. In the Event sources dropdown list, scroll and select:
- DriverFrameworks-UserMode
- Kernel-PnP
- WindowsUpdateClient
This allows you to see recent display driver installation activity.
#3: Typical Symptoms Users Experience
When Windows overwrites AMD drivers, the system usually becomes unstable and inconsistent. You may experience the following issues:
- Black screens: The display may go completely black after boot, sleep, or driver updates.
- Stuttering: Games and desktop animations lag due to missing performance optimizations.
- Radeon Software errors: You may see messages like Radeon Software and Driver versions do not match, Resolution and refresh rate changes, etc.
How to Stop Windows 11 from Installing AMD Drivers (4 Methods)
Once you’ve confirmed Windows is replacing the AMD driver, you must stopthisbehavior at the system level. The following 4 solutions are reliable and effective.
Method 1: Disable Driver Updates in Group Policy
This method prevents Windows Update from installing driver packages entirely, ensuring your AMD driver remains untouched. This applies to prevent driver installation for all devices.
Step 1. Press Win + R, type gpedit.msc, press Enter.
Step 2. In the Group Policy window, navigate to: Computer Configuration >Administrative Templates >Windows Components >Windows Update.
Step 3. In the right panel, double-click Do not include drivers with Windows Updates and check Enabled. Click Apply >OK and restart your computer.
Method 2: Disable Driver Update using Registry
This method works even if the Group Policy Editor is unavailable.
Step 1. Press Win + R, type regedit, and press Enter. In the Registry Editor window, navigate to:
HKEY_LOCAL_MACHINE\SOFTWARE\Policies\Microsoft\Windows\WindowsUpdate
Step 2. In the right panel, right-click blank space and select New >DWORD (32-bit) Value. Name it: ExcludeWUDriversInQualityUpdate.
Step 3. Double-click the new registry key and set the Value data to 1. Click OK and restart your computer.
Method 3: Stop Automatic Driver Update in Device Installation Settings
You can also adjust your Device Installation Settings to choose between automatic or manual driver updates, allowing you to take full control over your GPU driver updates.
⚠️Warning: For critical driver updates, Windows Update may ignore Device Installation Settingsfor system stability reasons. You must employ more advanced methods like Group Policy, Registry edits, or Device Installation Restrictions.
Step 1. Open Control Panel and click Devices and Printers.
Step 2. Under Devices, right-click your PC and select Device installation settings. Close the Control Panel.
Step 3. Select No and click Save Changes. Restart your computer to apply them.
🔥Method 4: Set Device Installation Restrictions (for Specific Driver)
This method blocks Windows from modifying your GPU driver, even outside Windows Update. Be sure to update the driver (without internet) and find the hardware ID of your device.
Step 1. Download the latest AMD drivers and save them to your computer. Then, disconnect the internet and update the driver in Device Manager.
- Right-click the device you want to update and click Update Driver.
- Click Browse my computer for drivers.
- Locate and install the AMD driver manually.
Step 2. Open the Device Manager again. Expand Display adapters, double-click your AMD GPU to open the Properties window.
Step 3. Under the Details tab, select Hardware Ids from the Property dropdown menu.
Step 4. You’ll see a list of values. Copy the first value, which is the primary identifier for your AMD GPU.
Step 5. Open Group Policy Editor (gpedit.msc). Navigate to: Computer Configuration >Administrative Templates >System >Device Installation >Device Installation Restrictions.
Step 6. Double-click Prevent installation of devices that match any of these device IDs and change the status to Enabled.
Step 7. Check Also apply to matching devices that are already installed as well.
Step 8. Click Show to add the hardware ID and click Apply > OK. Restart your PC.
Create a Full System Image for Secure Rollback
Modifying Group Policy, the registry, etc., is considered a high-risk activity, as they are system-level settings and may cause system instability, driver & hardware issues, software compatibility problems, and more.
Failing to prevent Windows 11 from persistently installing AMD drivers will also cause system instability. Regardless, it is advisable to create a full system image in order to restore the computer to an earlier state.
The free backup software AOMEI Backupper Standard can assist with this task. It offers a clean and intuitive interface, along with a comprehensive suite of backup features to ensure continuous data protection.
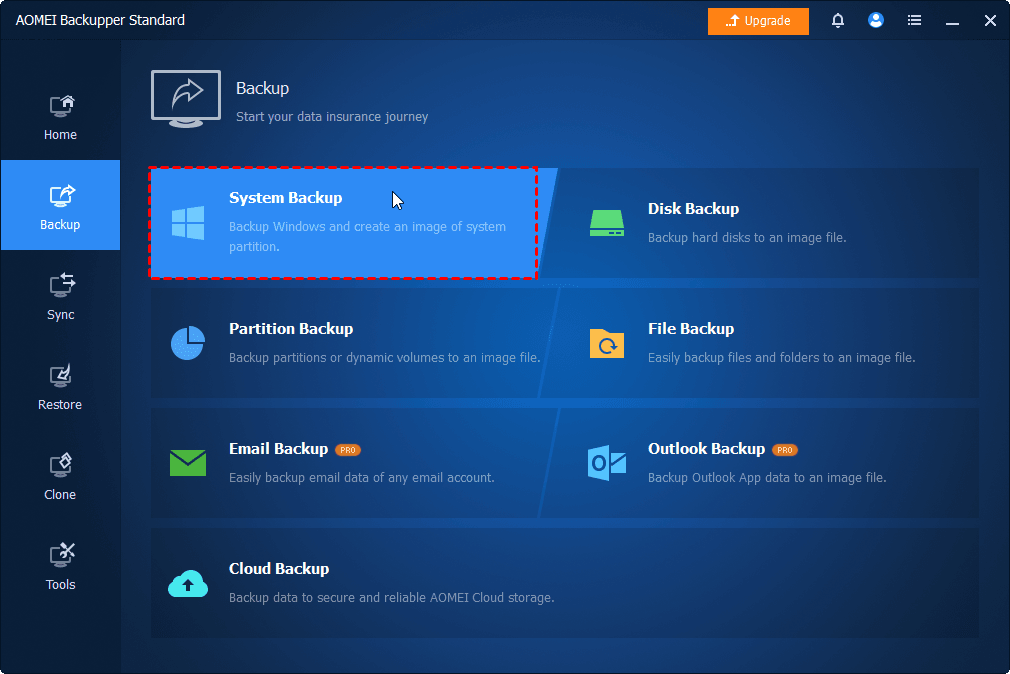
Step 1. Open AOMEI Backupper Standard. Click Backup on the left panel, then choose System Backup.
Step 2. The software will select all the boot partitions automatically. Click the PC icon > Local Drive/Network Drive/NAS to add a new destination. Or select the current location (if it exists).
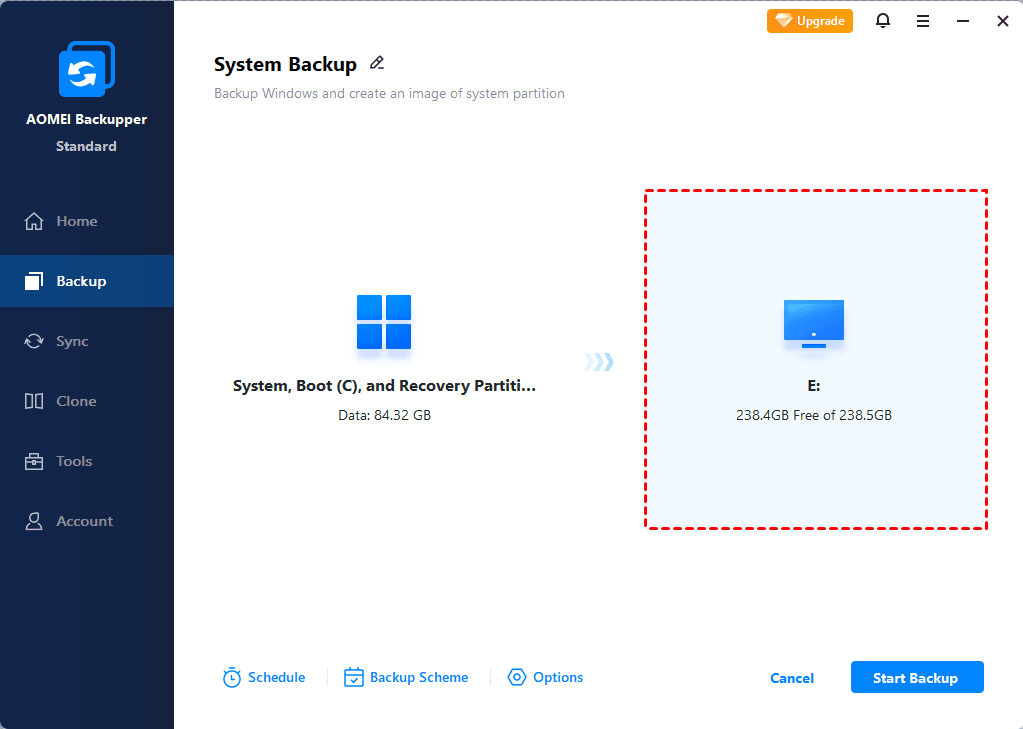
Step 3. Enable Weekly, Monthly (By week), Monthly (By date), or Event triggers to schedule backup and click Start Backup. Optionally, click Options or Backup Scheme to review or change what you want.
📍📍📍Notes:
✅ Options: Include compression, splitting, backup only used sectors of file system, VSS, etc., to minimize the image file size automatically and avoid any interruption.
✅ Backup Scheme: Incremental backup is enabled by default. You can also change it to differential backup and enable automatic backup cleanup to delete old backups automatically.
Final Thoughts
Windows 11 keeps installing AMD drivers, which may cause a series of issues, from slow overall performance to a lack support for AMD Adrenalin software features, black screens, random system crashes, etc. Luckily, you can stop this using group policy, registry, etc.
But any improper action may cause system instability, driver & hardware issues, software compatibility problems, and more. It’s advisable to create a full system backup for secure rollback in the event of a failure.
