
How to Use Sysprep on Windows 11 to Prepare for Deployment
Learn to prepare and deploy standardized Windows 11 images using Sysprep. Plus, explore a top-rated alternative tool to simplify and enhance your deployment process.
By Lily Updated on December 2, 2025
Why Run Sysprep in Windows 11?
Sysprep (System Preparation Tool) strips away machine-specific information, resets system identifiers, and prepares Windows to boot as a fresh installation on new hardware. Below are the key reasons why Sysprep is a critical part of modern Windows 11 deployment workflows.
✅ Generalizes the System for Deployment
✅ Resets the Security Identifier (SID)
✅ Removes User-Specific and System-Specific Data
✅ Enables the Out-of-Box Experience (OOBE)
✅ Reduces Deployment Time and Increases Consistency
How to Run Sysprep in Windows 11
Now learn how to run Windows 11 Sysprep to prepare your system for imaging, deployment, or transfer to new hardware. You can use either the graphical interface or command line.
Step 1. Prepare Your Windows 11 Machine
Before running Sysprep, make sure your system is ready:
- Remove or reinstall problematic Windows Store apps that may block Sysprep.
- Uninstall any software that injects services or modifies system components.
- Disable or pause Windows Updates during the process to avoid failures mid-operation.
- Ensure the system is not part of Active Directory if you plan to generalize it.
- Back up your system in case Sysprep fails or the generalized image becomes corrupted.
Step 2. Run Sysprep
👉 Run Sysprep Windows 11 Using the GUI
1. Press Win + R, type %windir%\System32\Sysprep and press Enter to open the Sysprep directory.
2. Double-click sysprep.exe to open the System Preparation Tool window.
3. In the Sysprep window:
- Choose Enter System Out-of-Box Experience (OOBE).
- Check Generalize.
- Set Shutdown.

4. Click OK. Sysprep will process and shut down the PC.
👉 Run Sysprep Windows 11 via Command Line
1. Press Win + S, type cmd, right-click Command Prompt, and choose Run as administrator.
2. Type the following commands and press Enter after each line:
cd \Windows\System32\Sysprep
sysprep /oobe /generalize /shutdown

● /oobe – Enables Out-of-Box Experience on next boot
● /generalize – Removes hardware-specific data and resets SID
● /shutdown – Turns off the machine when Sysprep finishes
Step 3. Create a Generalized Windows 11 Image
1. Create a bootable USB drive from another computer.
2. Boot the reference computer from the bootable USB drive. Then select Repair your computer → Troubleshoot → Advanced options → Command Prompt.
3. In the Command Prompt window, type the following commands and press Enter after each line:
- diskpart
- list volume (Please note the drive letter of the Windows installation drive. It may change under WinPE.)
- exit
- dism /capture-image /imagefile:D:\Win11_Generalized.wim /capturedir:D:\ /name:"Windows 11 Image"

● /capture-image: Creates a new Windows image file (WIM) from a specified directory (usually a drive with an installed Windows system).
● /imagefile: Specifies the location and filename of the WIM image to be created.
● /capturedir: Specifies the source directory to capture.
● /name: Assigns a descriptive name to the image within the WIM file.
4. Boot the reference computer normally and copy the WIM file to an external drive or network location. Then use the bootable USB drive again to deploy the system image to other computers. Learn more from Microsoft website.
Best Alternative Tool for Windows 11 Deployment
When it comes to deploying Windows 11 to multiple computers, AOMEI Backupper Technician is a reliable choice.

- Backup System Image: Generate a full backup of the reference PC, capturing its operating system, installed applications, and boot information.
- Prepare Bootable Media: Create a bootable USB, CD, or DVD to run imaging operations without including the Security Identifier (SID).
- Network Image Deployment: Use AOMEI Image Deploy (AID) to simultaneously roll out or recover a system image to multiple PCs via the local network.
- Flexible Deployment Scale: Select the number of computers to image in a single session, optimizing both deployment time and network performance.
Download AOMEI Backupper and follow the steps below to deploy Windows 11 to multiple computers:
Step 1. Prepare the Target Computers
1. Network Verification: Ensure all client (target) computers are located on the same network segment as the master (source) computer.
2. PXE Boot Compatibility: Confirm that every target computer supports network boot functionality.
3. Disk Configuration: Before deployment, verify that the intended system drive has the same disk sequence number across all clients. For consistency, remove any secondary or non‑target disks, leaving only the primary destination disk for the image deployment.
Step 2. Capture Windows 11 Image without SID
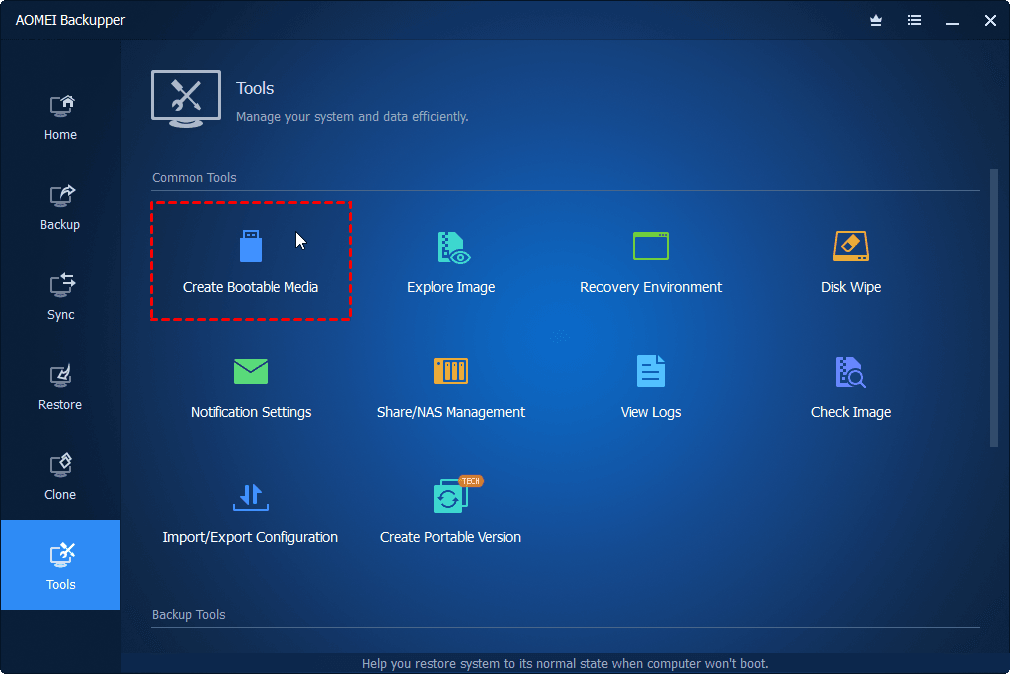
1. Insert a USB drive into your master PC. Run AOMEI Backupper and click Tools > Create Bootable Media to create a bootable USB drive.
2. Run Windows 11 Sysprep using GUI or command line as mentioned above.
3. Boot your master PC from the bootable USB drive.
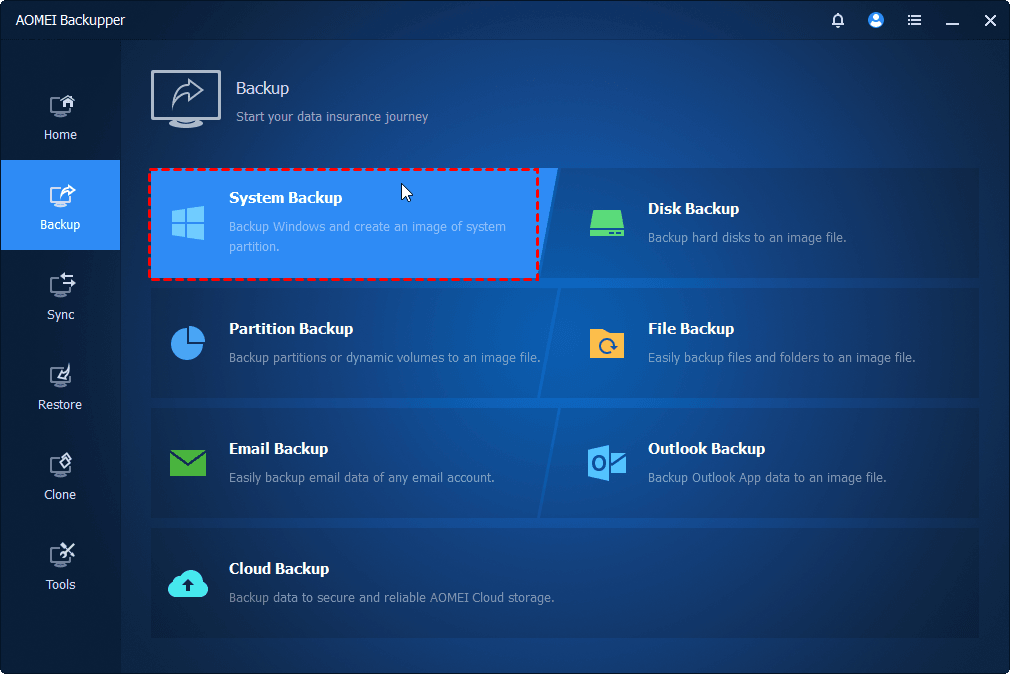
4. When AOMEI Backupper loads up, click Backup > System Backup.
5. Choose a network shared folder or NAS path to save the system image and click Start Backup.
Step 3. Deploy Windows 11 to Multiple Computers
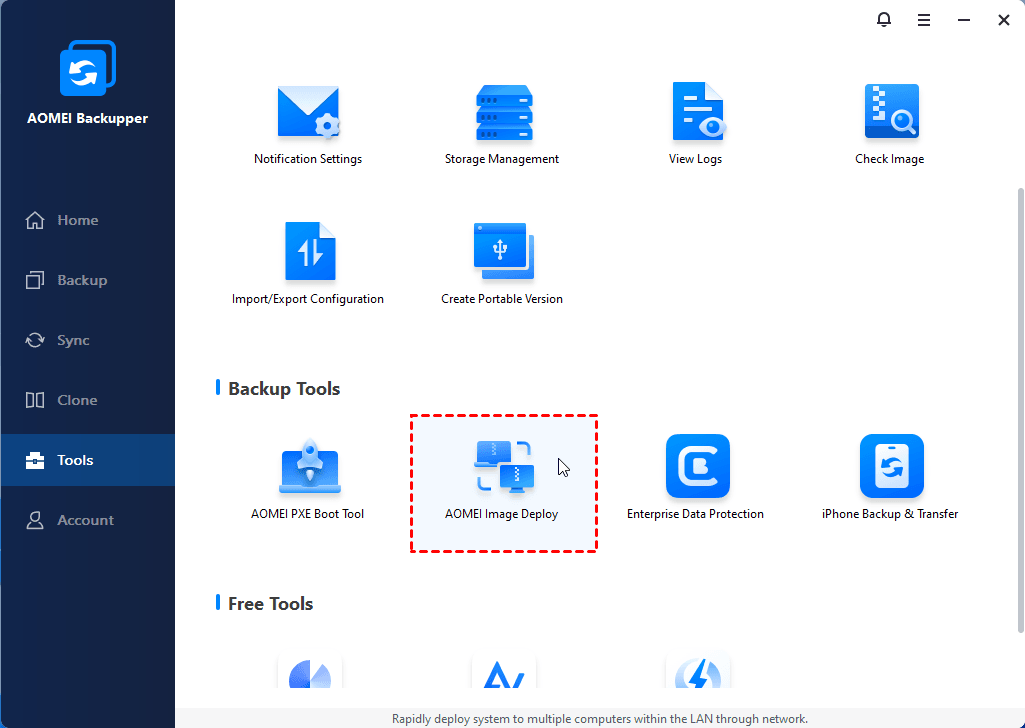
1. Boot your master PC normally. Launch AOMEI Backupper and navigate to Tools > AOMEI Image Deploy to start the deployment utility.
2. In the AID window, choose Create bootable WinPE ISO or WIM automatically (create a bootable ISO/WIM file of your system) or Create bootable WinPE ISO or WIM manually (add custom drivers into WinPE). Then click Next.
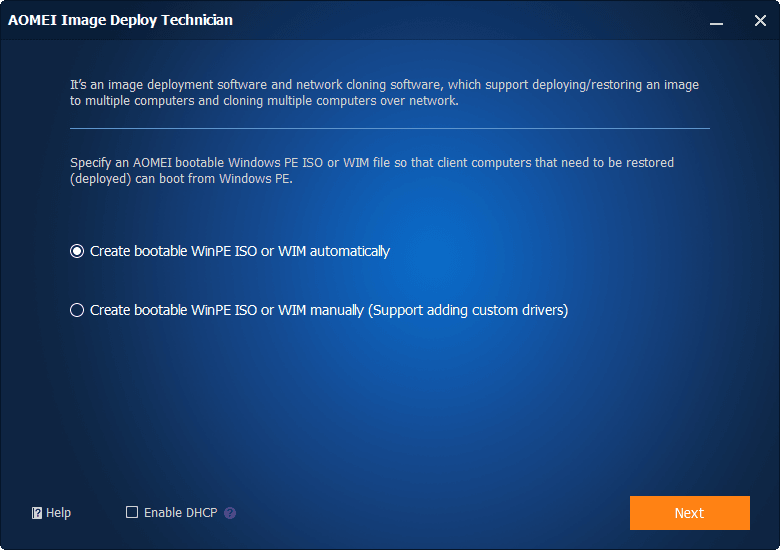
Note: There must be a DHCP server in the LAN. Check Enable DHCP if there is no.
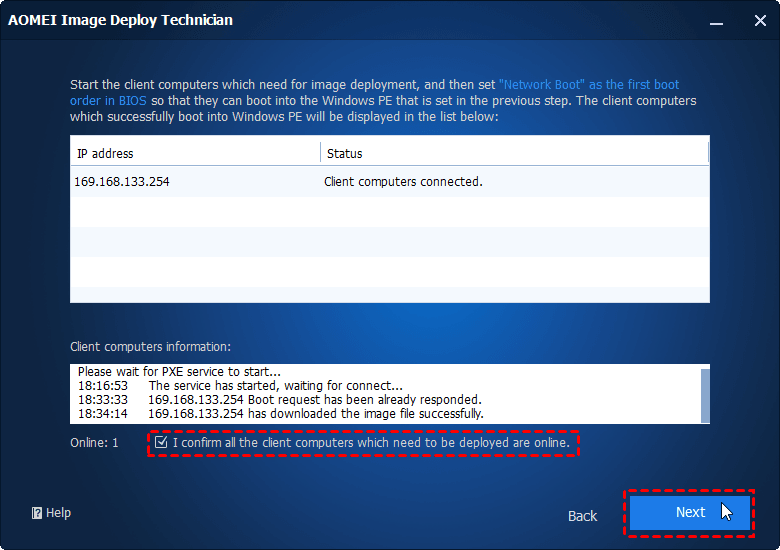
3. Once the WinPE environment is created, power on each client computer and initiate a network (PXE) boot to connect to the master PC.

4. You can check the client computers’ status in AID. When all client computers show "Client computers connected", check I confirm all the client computers which need to be deployed are online. Then click Next.
5. Select the system image backup file and choose the client computers for OS deployment.
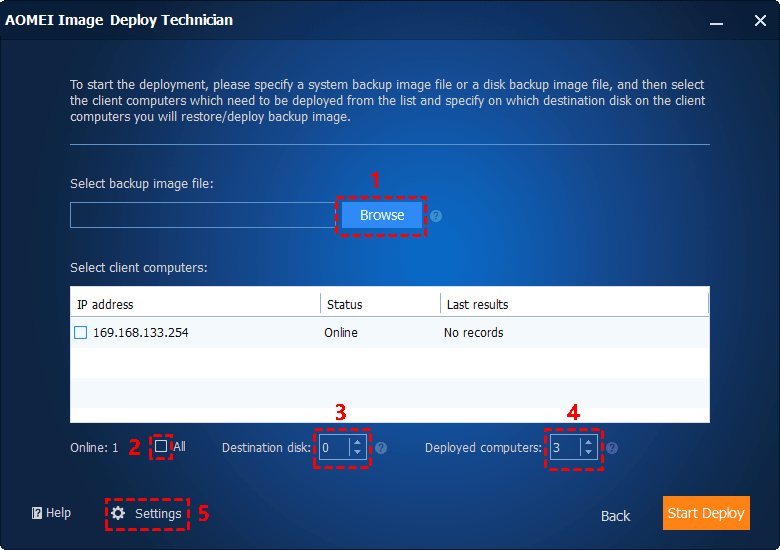
5.1. Click Browse > Add Network Location > enter the network path to select your system image file.
5.2. Select the client computers you need or click All to select all connected computers.
5.3. Input the destination disk number. If you keep only one disk in all client computers, the disk number should be 0.
5.4. Define how many target computers to image at once. Note that a larger batch size may reduce deployment speed due to network bandwidth constraints.
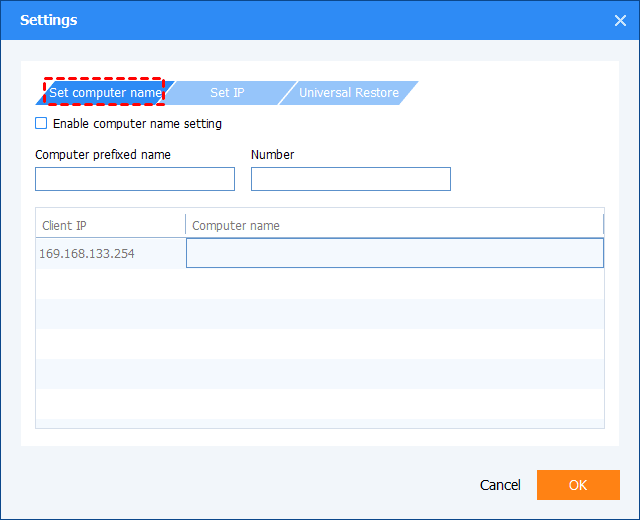
5.5. Click Settings to do more configurations and click OK to save settings.
- Set computer name: Set a prefixed name for the computers to be deployed.
- Set IP: Click it to preset IP address.
- Universal Restore: Choose it to deploy system to computers with different hardware.
6. Review your deployment settings and click Start Deploy to begin. You can also configure whether the client computers should shut down or restart automatically once the deployment finishes.
Conclusion
Now you know how to use Sysprep in Windows 11 to generalize and deploy Windows images. Traditional deployment workflows can be time-consuming, especially when managing many devices. That’s where solutions like AOMEI Image Deploy shine.
Besides the AOMEI Image Deploy tool, AOMEI Backupper offers many other useful features, such as system/disk/partition/file backup & restore, and real-time sync. Try it now to discover more!
