
How to Clone M.2 SSD with Only One Slot: A Complete Guide
With the right tools and a clear approach, you can easily clone your M.2 SSD even with only one available slot. In this article, we’ll walk you through everything you need to know about cloning your M.2 SSD in such a situation.
By Lily Updated on April 16, 2026
Cloning an M.2 SSD is an efficient way to upgrade your storage or back up important data without the hassle of reinstalling your operating system and software. However, the task becomes slightly more complex when your computer only has one M.2 slot.
This guide will help you understand how to clone an M.2 SSD with only one available slot, providing you with a step-by-step approach to ensure the process goes smoothly. Whether you are upgrading to a larger SSD or simply want to back up your current data, we’ve got you covered.
🌟 To check more M.2 SSD cloning scenarios, please refer to this complete guide: Clone M.2 SSD.
Tips for Cloning an M.2 SSD with Only One Slot
Before learning how to clone NVMe SSD with only one slot, it's essential to prepare properly. The following tips will help ensure that the cloning procedure goes as smoothly as possible, minimizing the risk of mistakes.
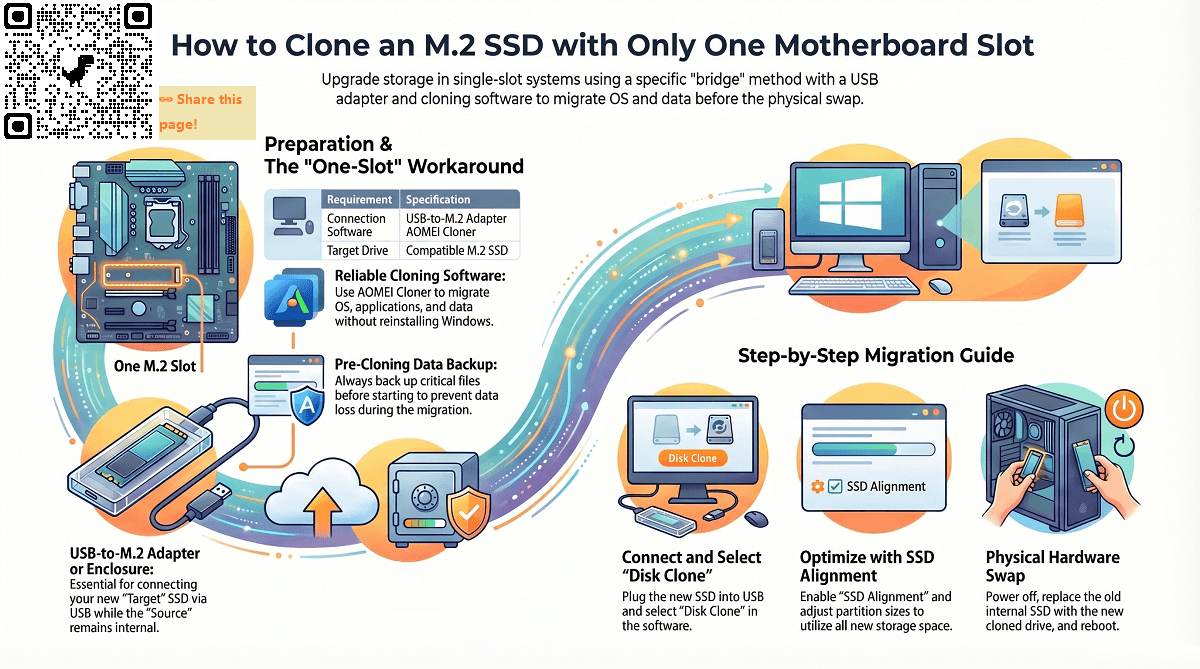
1. Use a USB-to-M.2 Adapter or External Enclosure
Since your system has only one M.2 slot, the first thing you’ll need is a way to connect your second M.2 SSD. A USB-to-M.2 adapter or an external M.2 enclosure is crucial. This allows you to connect the second SSD via a USB port, essentially turning it into an external drive you can clone.
2. Choose Reliable Cloning Software
Selecting the right disk cloning software is critical. Software like AOMEI Cloner offers an intuitive interface and efficient cloning capabilities. This tool will allow you to clone your entire drive, including the operating system, applications, and data, to the new SSD without issues.

- OS Migration: Migrate your OS to a new SSD or HDD without reinstalling Windows.
- Disk Upgrade or Replacement: Clone entire disk to upgrade or replace a hard drive.
- Bootable Media Creation: Make a bootable device to clone hard drive from WinPE, avoiding system interference and making the process more efficient.
- Wide Compatibility: Support various disk brands (Samsung, Intel, WD, etc.), disk types (HDD, SDD, SSHD, etc.), disk interfaces (SATA, NVMe, etc.).
3. Ensure SSD Compatibility
It’s important to verify that the target SSD is compatible with your system. Check the physical size, interface (SATA or NVMe), and other specifications to make sure the SSD will work properly once you’ve completed the cloning process.
4. Backup Your Data
Although cloning is typically safe, it’s always recommended to back up any important files before proceeding. This precaution ensures you won’t lose any critical data if something goes wrong during the cloning process.
These tips will help ensure the cloning process is efficient and that your data is safe throughout.
Step-by-Step Guide: How to Clone M.2 SSD with Only One Slot
Once you’re prepared, the cloning process itself is fairly straightforward. Learn how to clone M.2 SSD to larger M.2 SSD below, even when you only have one available slot.
Step 1: Set Up Your Equipment
Before you begin, gather everything you’ll need:
- USB-to-M.2 adapter or external M.2 enclosure to connect the second SSD.
- Both the source M.2 SSD (the drive you're cloning from) and the target M.2 SSD (the drive you're cloning to).
- Download and install AOMEI Cloner on your computer.
A reliable disk clone software can help you easily clone system, disk, partition with secure boot.
Once you have everything in place, you can move on to the next step.
Step 2: Connect the SSDs
1. Insert your source M.2 SSD into the M.2 slot on your motherboard. (If the source M.2 SSD is already installed on your motherboard, skip this step.)
2. Use the USB-to-M.2 adapter or external enclosure to connect the second M.2 SSD to your computer via a USB port.
At this point, both SSDs should appear in Disk Management or File Explorer. If you don’t see them, double-check the connections or restart your computer.
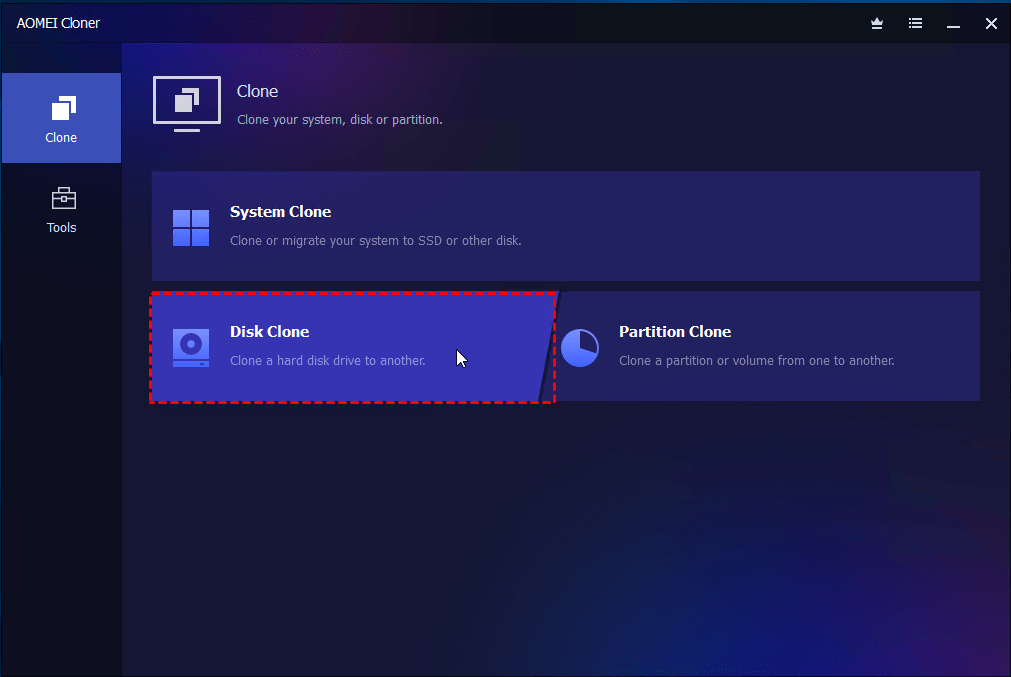
Step 3: Launch the Cloning Software
1. Open AOMEI Cloner. Select Disk Clone from the Clone menu to begin the cloning process.
2. In the software, choose your source M.2 SSD and the target larger M.2 SSD respectively.
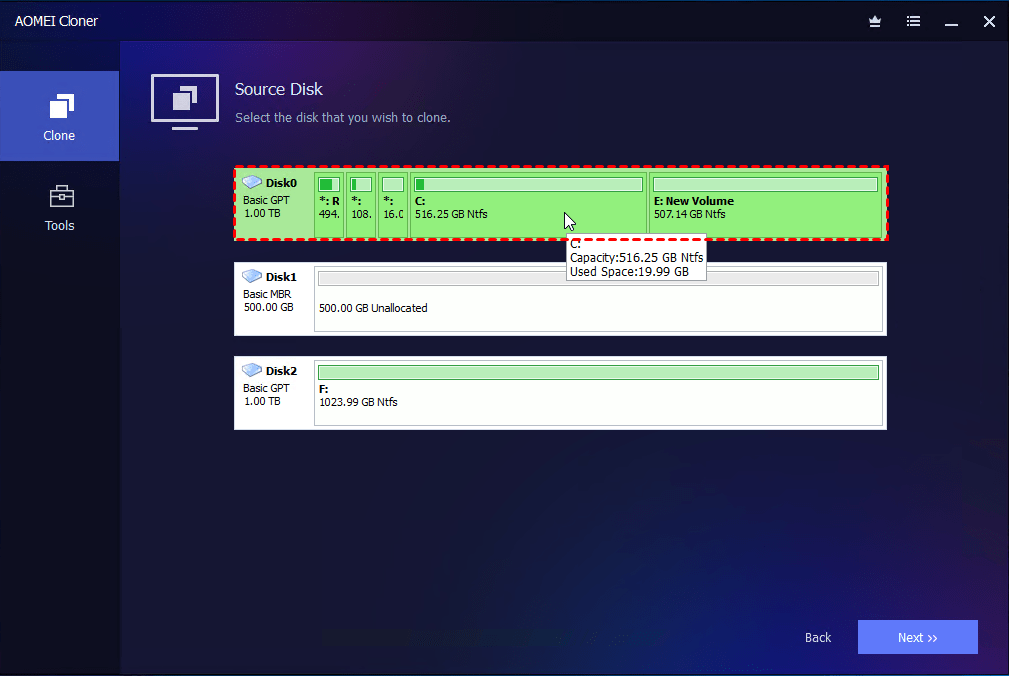
Take a moment to ensure that you’ve selected the correct drives before proceeding to avoid any accidental data loss.
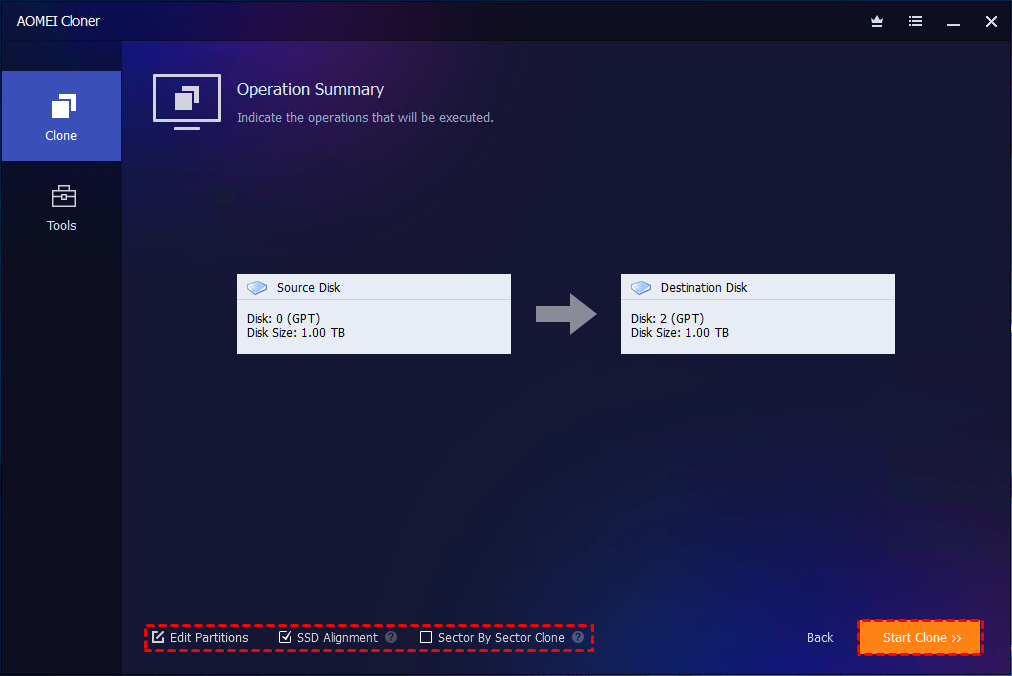
Step 4: Configure More Settings and Start the Cloning Process
1. To make full use of the storage space on the larger M.2 SSD, click Edit Partitions and select Add unused space to all partitions or Manually adjust partition size.
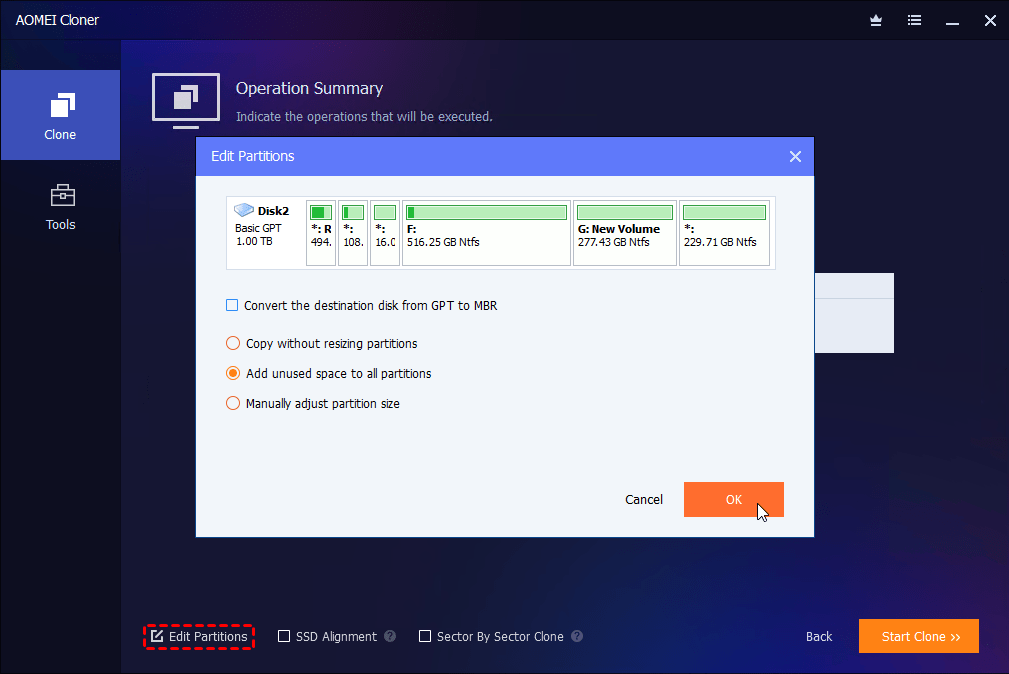
2. To improve the target M.2 SSD performance, it is highly recommended to check the SSD Alignment option. Once you’ve confirmed your settings, click Start Clone to initiate the process.
Step 5: Wait for the Cloning to Complete
The cloning process could take anywhere from 20 minutes to a few hours, depending on the size of your data and the speed of your drives. Be patient and let the software do its work.
During the cloning process, the software will show a progress bar so you can track the status. Once the cloning process is complete, click Finish. At this point, the data from your source SSD has been fully copied to your target SSD.
Step 6: Swap the SSDs (If Upgrading)
If you're upgrading to a new SSD, it’s time to swap the old drive with the newly cloned SSD:
1. Power off your computer.
2. Replace the old source SSD with the newly cloned target SSD in the M.2 slot.
3. Turn your computer back on, and it should boot from the new SSD with all your data and settings intact.
If you're not upgrading, you can keep both SSDs connected, and the new one will serve as a backup or additional storage.
FAQs about Cloning M.2 SSD with Only One Slot
1. How to clone M.2 SSD to larger drive on one slot laptop?
To clone M.2 SSD to larger drive on one slot laptop, follow these steps:
- Connect the new M.2 SSD via a USB-to-M.2 enclosure or adapter.
- Use reliable cloning software to copy your current SSD to the new one. Adjust partition size with the cloning software during cloning.
- After cloning, shut down your laptop, replace the old SSD with the new one, and boot from it.
2. Which cloning software for M.2 SSD single slot?
To find the best cloning software for M.2 SSD single slot, look for features like:
- Disk clone and system clone support
- Intelligent sector cloning (copy only used space)
- Bootable clone capability
- Compatibility with NVMe and SATA M.2 SSDs
AOMEI Cloner can help you clone M.2 SSD with only one slot easily.
3. Can I clone NVMe M.2 SSD without adapter?
No, you can’t clone NVMe M.2 SSD without adapter if there’s only one slot. However, there’s a workaround to transfer data to the new M.2 SSD with only one slot:
- Create a bootable USB drive.
- Create a disk image of the old M.2 SSD and save the image to an external drive or a network location.
- Replace the old M.2 SSD with the new M.2 SSD.
- Boot your computer from the bootable USB and restore the disk image to the new drive.
Conclusion
Cloning an M.2 SSD with only one available slot is entirely feasible with the right approach and tools. By using a USB-to-M.2 adapter or external enclosure, and reliable cloning software like AOMEI Cloner, you can easily clone your SSD and transfer all your data seamlessly. Whether you’re upgrading your storage or creating a backup, this guide provides all the information you need to complete the process confidently and without error.
