
[Top 2 Ways] to Auto Sync to External Hard Drive in Windows
Learn how to auto sync to external hard drive with easy methods using free software or a built-in Windows tool to protect your files automatically.
By Lily Updated on November 18, 2025
Keeping your files updated across devices shouldn’t be a daily chore—and that’s exactly where automatic syncing comes in. Setting up auto sync to external hard drive ensures that every important document, photo, project, or work file is quietly protected in the background without any manual copying.
In this guide, you’ll learn the most effective ways to automatically sync files to external hard drive in Windows 11/10.
Best tools to auto sync to external hard drive
When it comes to automating file syncing, choosing the right tool can make a huge difference in speed, reliability, and ease of use. Below are two of the most effective solutions for setting up auto sync to external hard drive.
1. AOMEI Backupper Standard
AOMEI Backupper Standard is one of the most popular free sync tools for Windows users. It provides a clean interface, powerful scheduling options, and works perfectly with external HDDs and SSDs.

- Synchronize multiple folders at once to get more done in less time.
- Automatic sync on one-time, daily, weekly, monthly, or event-trigger schedules.
- Supports syncing from PC to USB flash drives, external hard drives, NAS, and network locations.
Download AOMEI Backupper now to try it out!
2. File History
File History is Microsoft’s native solution for automatically syncing personal files to an external drive. Although limited compared to third-party software, it’s simple, lightweight, and doesn’t require installation.
- Automatically syncs user folders (Documents, Pictures, Desktop, etc.)
- Incremental backups to save storage space
- Restores previous versions of files
How to sync files to external hard drive automatically
Now I’ll show you how to automatically sync files to external hard drive in Windows 11/10 with two tools mentioned above one by one.
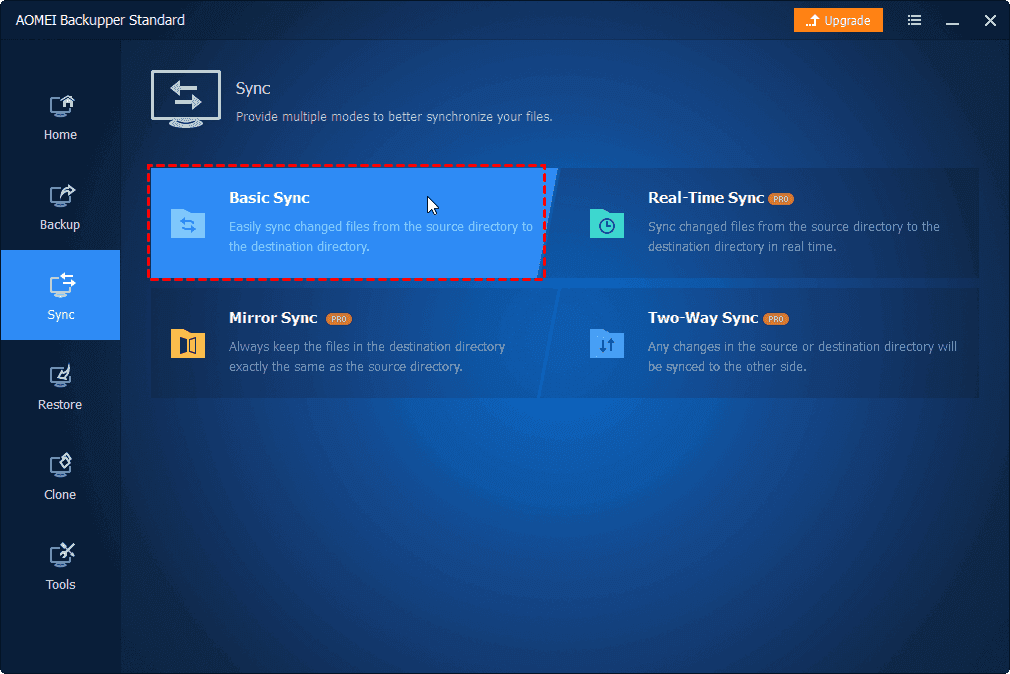
Method 1: Using AOMEI Backupper
Step 1. Connect your external hard drive to your computer. Open AOMEI Backupper and click Sync > Basic Sync.
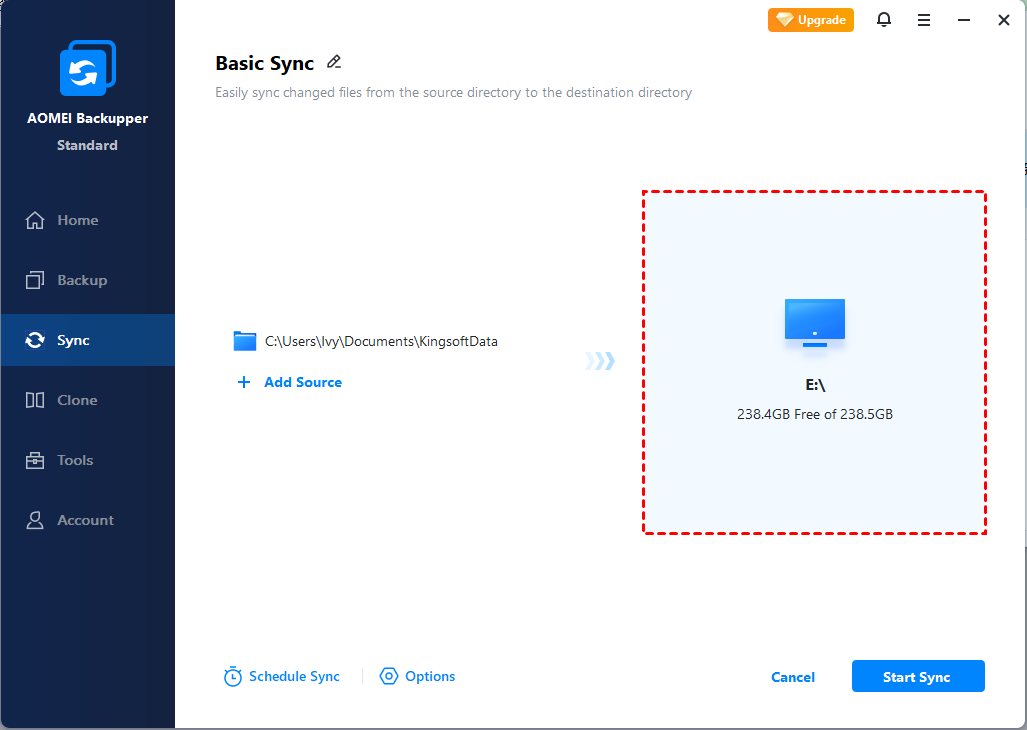
Step 2. Click Select Source and select the folder(s) you want to sync.
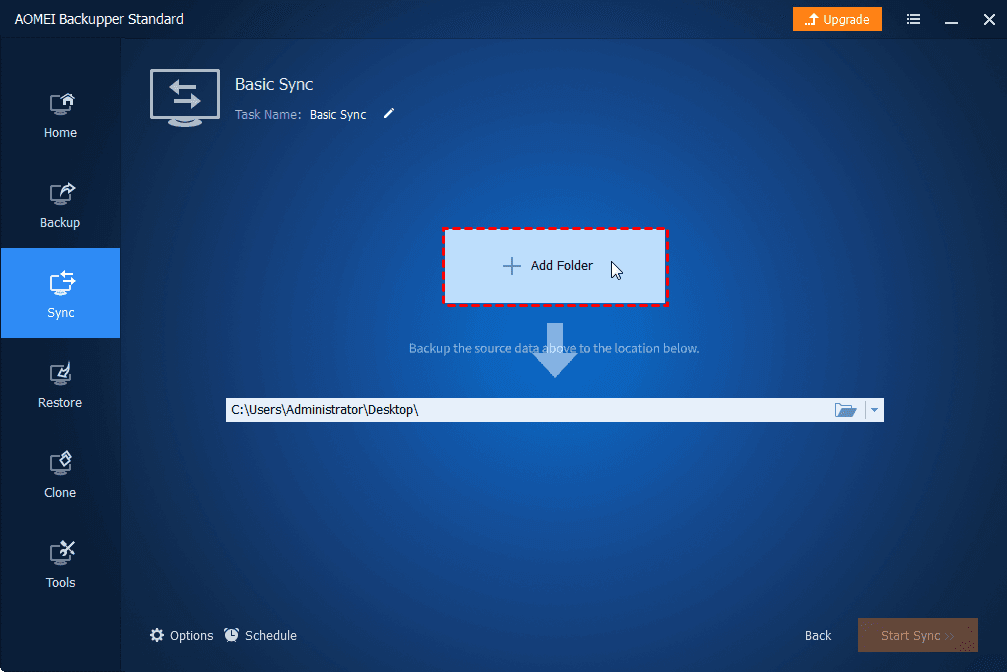
Step 3. Click the destination box and select your external hard drive (or a folder on it) as the target location.
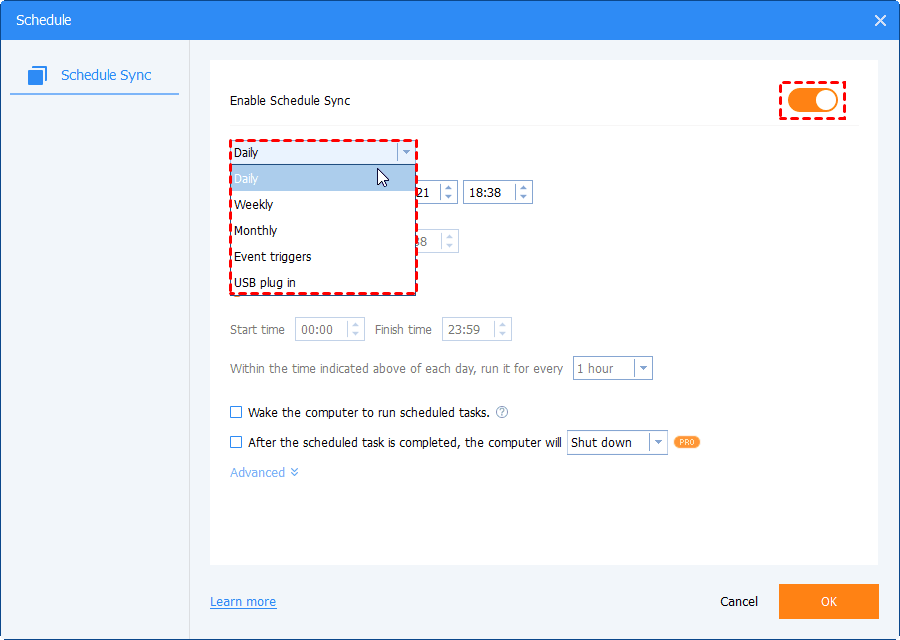
Step 4. Enable Schedule Sync and choose One Time, Daily, Weekly, Monthly, or Event triggers. Once you’ve selected your preferred schedule, click OK.
Step 5. Click Start Sync. Select Add the schedule and start sync now to execute the task immediately or select Only add the schedule to let it run at the scheduled time.
Method 2: Using File History
Step 1. Plug your external hard drive into the computer.
Step 2. Open File History.
- In Windows 11, type and search File History in the Windows search bar, then click Open.
- In Windows 10, go to Control Panel > File History.
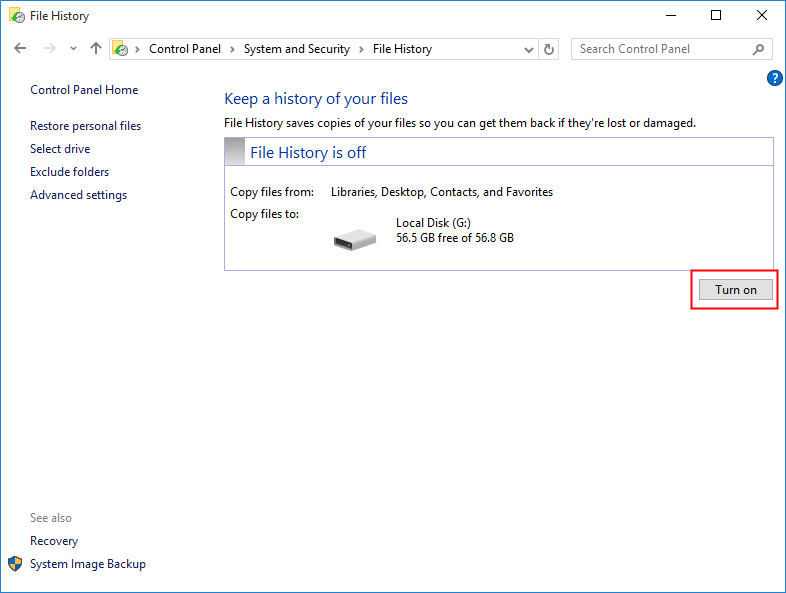
File History will automatically choose your connected external drive for backups.
Step 3. By default, File History copies files from Libraries, Desktop, Contacts, and Favorites. To prevent certain default folders from being backed up, click Exclude folders from the left panel to leave them out.

Step 4. Click Advanced settings to customize your backup schedule and storage.
- Save copies of files: Set your backup frequency from every 10 minutes to once a day (the default is every hour).
- Keep saved versions: Choose how long to keep old file versions, from one month up to forever (the default).

Step 5. Confirm your settings and click Turn on to save copies of your files for the first time.
✍ Notes:
● File History only supports external hard drives in NTFS format.
● To add specific folders you want to backup in File History, please open File Explorer, right-click on the folder and select Include in Library.
Best practices for reliable auto sync
Setting up auto sync to external hard drive is only effective when the process runs smoothly and consistently. Following these best practices will ensure your files stay protected:
1. Keep the External Drive Connected During Scheduled Tasks
If your sync task is scheduled for a specific time, make sure your external hard drive is plugged in and recognized by the system. Missed connections can prevent the sync from running and lead to outdated data copies.
2. Use a Stable USB Port or Docking Station
Loose or unstable ports can cause unexpected disconnects during syncing. Use a high-quality USB cable and plug your drive into a stable USB port—preferably on the back of a desktop PC or a primary port on a laptop.
3. Avoid Syncing Too Many Large Files at Once
Syncing extremely large folders in one batch can slow down the process or cause timeouts. Break massive directories into smaller, manageable groups if possible, especially for the first sync.
4. Combine Sync with Regular Backups
Auto sync protects your files by keeping copies updated, but it does not replace full backups. Pair your sync routine with occasional system backups or image backups for complete protection.
5. Monitor Storage Space on the External Drive
A near-full external drive can interrupt sync operations. Regularly check the remaining capacity and clean up unnecessary files or upgrade to a larger drive when needed.
Conclusion
Setting up auto sync to external hard drive is one of the simplest and most reliable ways to protect your files without constant manual effort. Both AOMEI Backupper and File History help ensure your important data stays up to date and safely stored.
For the most stable and customizable syncing experience, AOMEI Backupper remains the recommended solution. What’s more, it’s all-around backup and restore software for Windows 11/10/8/7. Try it now to discover more!
