
How Do I Sync Files Between Computer and Flash Drive Easily?
Learn how to sync files between computer and flash drive automatically using the best free file sync tool. Follow step-by-step instructions below.
By Lily Updated on November 4, 2025
Keeping files updated across multiple devices can be a hassle — especially when you rely on a flash drive to move data between computers. In this guide, you’ll learn how to sync files between computer and flash drive automatically and effortlessly. By the end, you’ll have a smooth, hands-free way to keep your USB drive and PC perfectly in sync.
Can I Sync Files Between Computer and Flash Drive via Copy and Paste?
📑Quick answer: Yes, you can sync files between computer and flash drive manually using copy and paste, but it’s not a true synchronization method — it’s more of a one-time transfer. If any files are later modified, added, or deleted on your computer, those changes won’t automatically reflect on the flash drive unless you manually copy everything again.
Manual syncing might work fine for occasional use or small file sets, but for regular updates or large folders, it’s inefficient. A better option is to use file sync software that automatically detects changes and keeps both locations consistent.
Best Free File Sync Software for Windows 11/10/8/7
If you are looking for the best free file sync tool to help you sync files between computer and flash drive, AOMEI Backupper Standard is worth trying.
🎯 Sync More, Wait Less: Synchronize multiple folder pairs at once to get more done in less time.
🎯 Set It and Forget It: Automatic sync with custom schedules, ensuring your files are always up-to-date, automatically.
🎯 Sync Anywhere You Need: Keep your files in sync across all your devices—from internal and external drives to network locations and popular cloud services.
Download AOMEI Backupper now to try it out!
How to Transfer Files from PC to USB Stick Step by Step
In this part, you’ll learn how to copy computer files to flash drive automatically using AOMEI Backupper. Follow the steps below:
Step 1. Plug your USB flash drive into the computer’s USB port. Make sure it’s recognized by Windows.
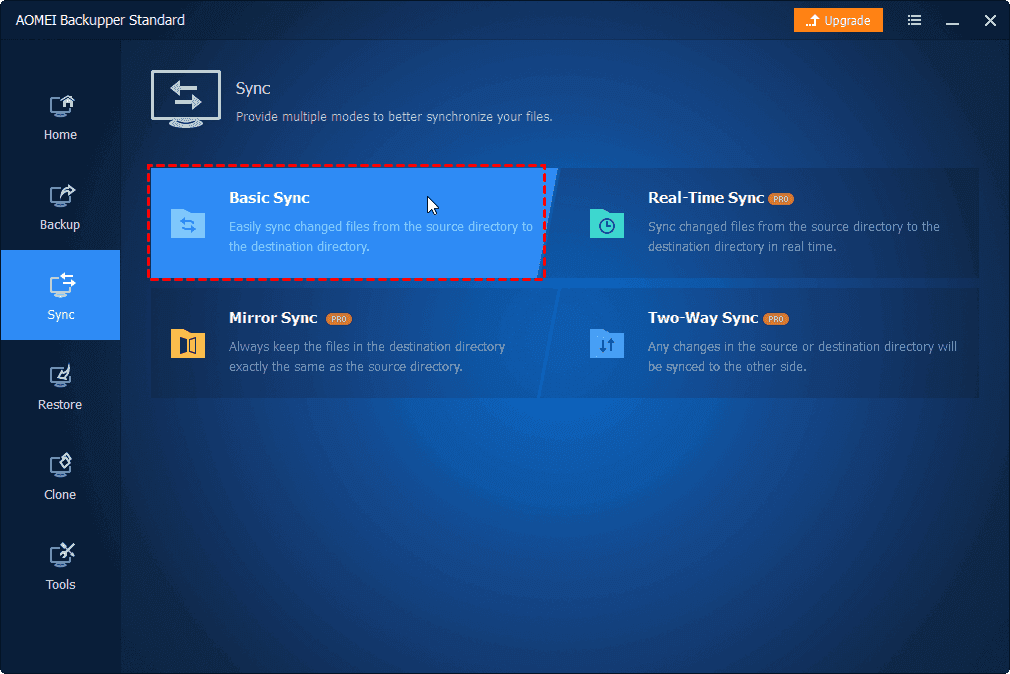
Step 2. Open AOMEI Backupper and click Basic Sync under the Sync section.
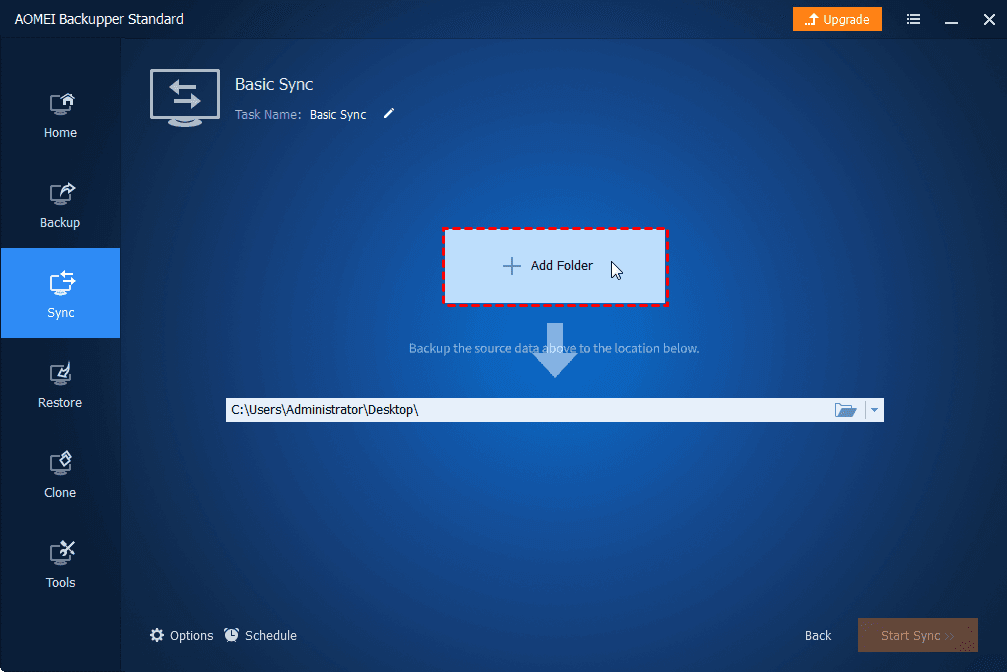
Step 3. Click Select Source and choose the folder(s) on your PC that you want to transfer. You can add multiple folders if needed — for example, Documents, Pictures, or Work Projects.
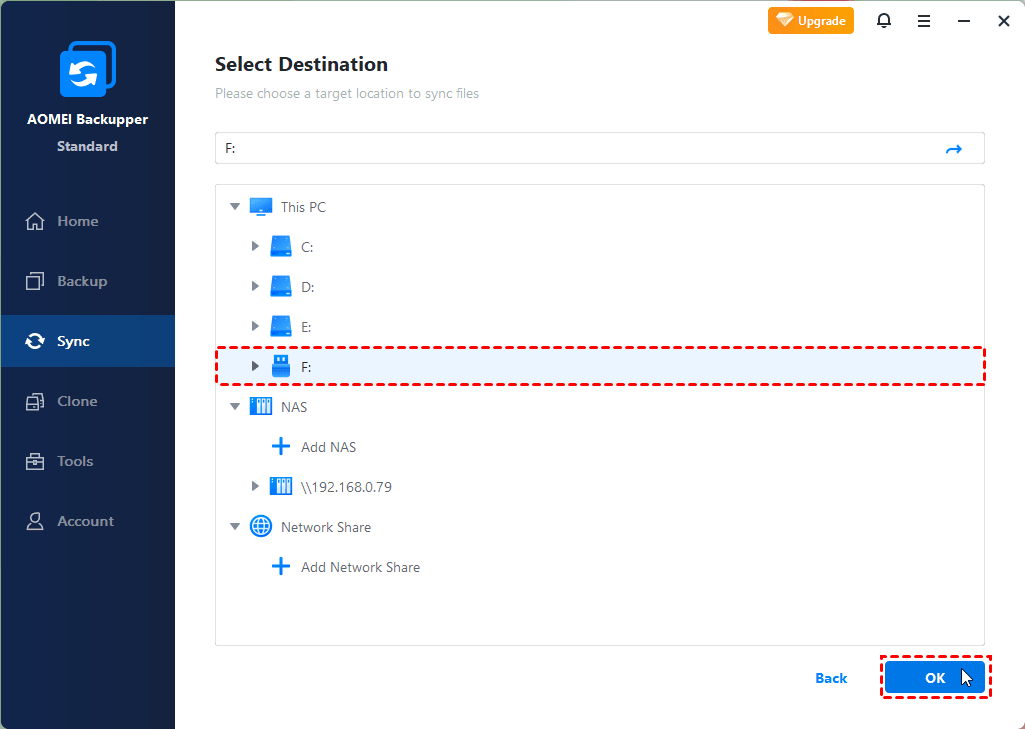
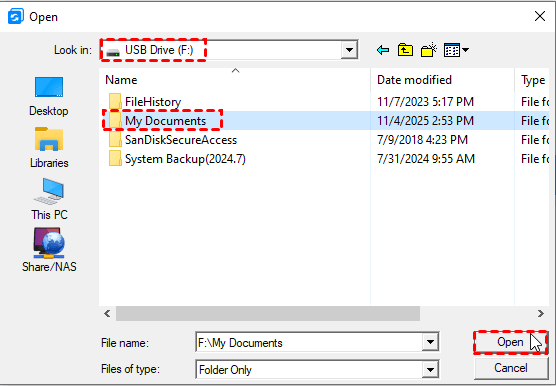
Step 4. Click the destination box > select your USB drive under This PC and click OK.
Step 5. Click Schedule Sync > Event triggers. Then choose USB plug in under Event Type. This ensures the sync task runs automatically when the program detects the USB drive is connected.

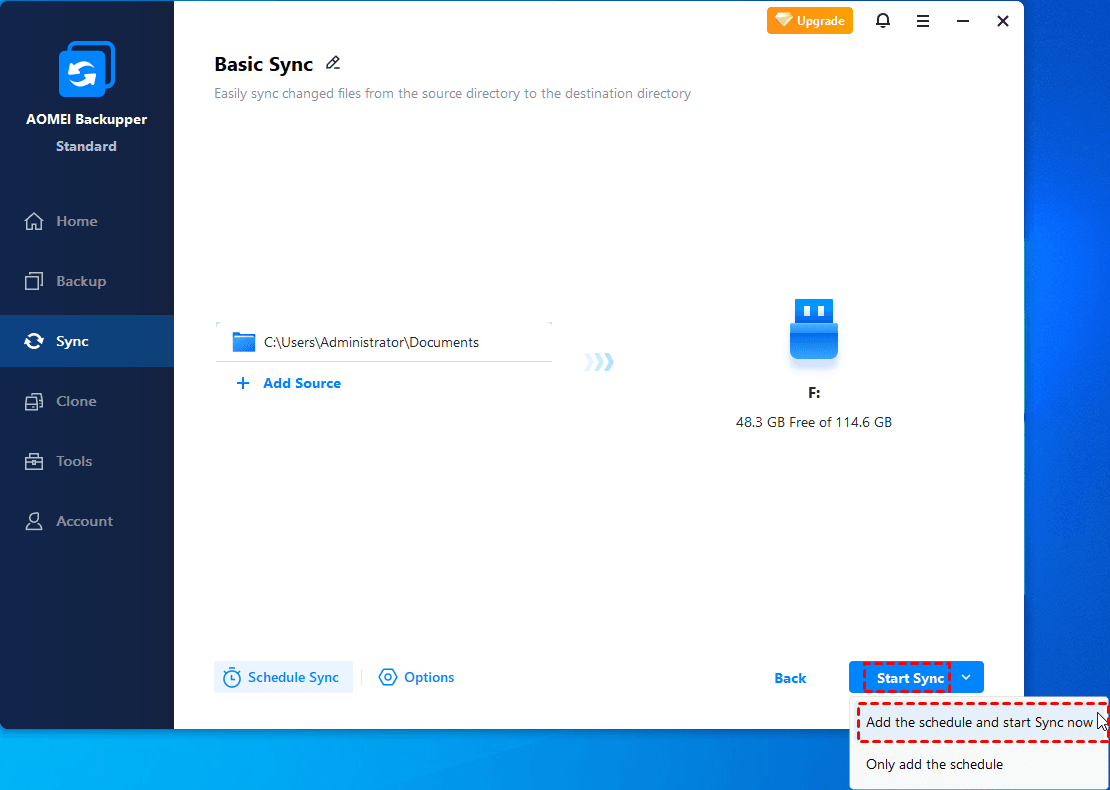
Step 6. Click Start Sync > Add the schedule and start sync now to begin transferring files from your PC to the USB stick.
Step 7. Once complete, you can safely eject the drive by clicking Safely Remove Hardware in Windows.
Bonus: How to Transfer Files from USB Stick to Computer
To transfer files from USB stick to computer, follow these steps:
- Insert your USB drive and run AOMEI Backupper. Click Sync > Basic Sync.
- Click Select Source and choose the folder(s) on your USB drive.
- Click the destination box and choose a local folder on your PC to receive the synced data.
- Enable Schedule Sync as necessary and click Start Sync to begin transferring files from USB to PC.
Tips to Ensure a Smooth File Sync Process
Syncing files between computer and flash drive may seem simple, but small mistakes—like unplugging too soon or using inconsistent folder paths—can cause incomplete or corrupted transfers. Follow these best practices to ensure every sync runs smoothly and safely.
1. Use Consistent Folder Structures
Keep your source and destination folders organized with clear names. For example, use “Work_Files” or “Photos_2025” instead of random or duplicate folder names. This helps your sync tool locate and update the right files every time.
2. Always Safely Eject Your Flash Drive
Never remove the USB stick while syncing is in progress. Wait until the process finishes, then use the “Safely Remove Hardware” option in Windows. This prevents data corruption or file loss.
3. Verify File Integrity After Syncing
Occasionally open a few files on your USB drive to confirm they work correctly after syncing. This helps detect any transfer issues early, especially for large documents or media files.
4. Use the Same USB Port Each Time
Windows sometimes assigns different drive letters when you plug your USB stick into another port. This can confuse your sync software. To avoid reconfiguring paths, try using the same port every time.
Conclusion
Syncing files between computer and flash drive isn’t just about convenience—it’s about maintaining consistency, portability, and data safety. While manual copy-and-paste methods work for occasional transfers, an automated solution like AOMEI Backupper Standard makes the process effortless.
With scheduled syncs, you can ensure that every change on your PC is mirrored on your flash drive. What’s more, AOMEI Backupper supports various sync sources and destinations. For example, you can use it to sync OneDrive to an external hard drive. Why not give it a shot?
✍You May Also Like
4 Free Tools| Sync Files to External Hard Drive in Windows 11/10
3 Free Ways to Sync Folders in Windows 11 [Between Drives or PCs]
