



How to Transfer Music from iPad to Computer: Top 3 Ways
Want to transfer music from your iPad to your computer – with or without iTunes? Learn how to move purchased and non-purchased songs to PC or Mac safely.

By Lily Updated on August 17, 2026


If your iPad is running out of storage, you have purchased a new computer, or you simply want to keep a backup of your favorite songs, you may need to transfer music from iPad to computer. However, moving music from an iPad is not always as straightforward as transferring photos or videos.
Is iTunes Enough for Transferring iPad Music?
iTunes has traditionally been Apple's solution, but it has some limitations. For example, iTunes mainly supports transferring purchased music back to an authorized computer. Songs downloaded from other sources or copied from CDs may not be transferred in the same way. In addition, iTunes is not convenient when you want to move music to someone else's computer.
Fortunately, there are several ways to copy music from iPad to computer. In this guide, we'll cover three practical solutions for Windows PC and Mac users.
Part 1. How to Transfer Music from iPad to Computer without iTunes
If you want more flexibility than iTunes provides, AOMEI FoneBackup is a convenient option for Windows users. Mac users can also use AirDrop to transfer music wirelessly between Apple devices.
Method 1. Transfer Music from iPad to PC with AOMEI FoneBackup
AOMEI FoneBackup is an iOS data management and transfer tool designed for Windows PCs. It allows you to transfer different types of iPhone, iPad, and iPod touch data, including music.
 AOMEI FoneBackup
- Transfer selected songs: Transfer your entire music collection or choose only specific songs.
- Transfer non-purchased songs & purchased: Move music from different sources instead of being limited to iTunes purchases.
- Flexible destination: Save your iPad music directly to your computer, USB flash drive, or external hard drive.
- Simple operation: The transfer process only requires a few clicks.
 100% Secure
Here's how to transfer songs from iPad to computer with AOMEI FoneBackup.
Step 1. Launch AOMEI FoneBackup and connect your iPad to the Windows PC with a USB cable. Unlock your iPad and tap Trust if prompted.
Step 2. In the program's main interface, select Phone Transfer from the left panel and choose iPhone to PC. Click Get Started.
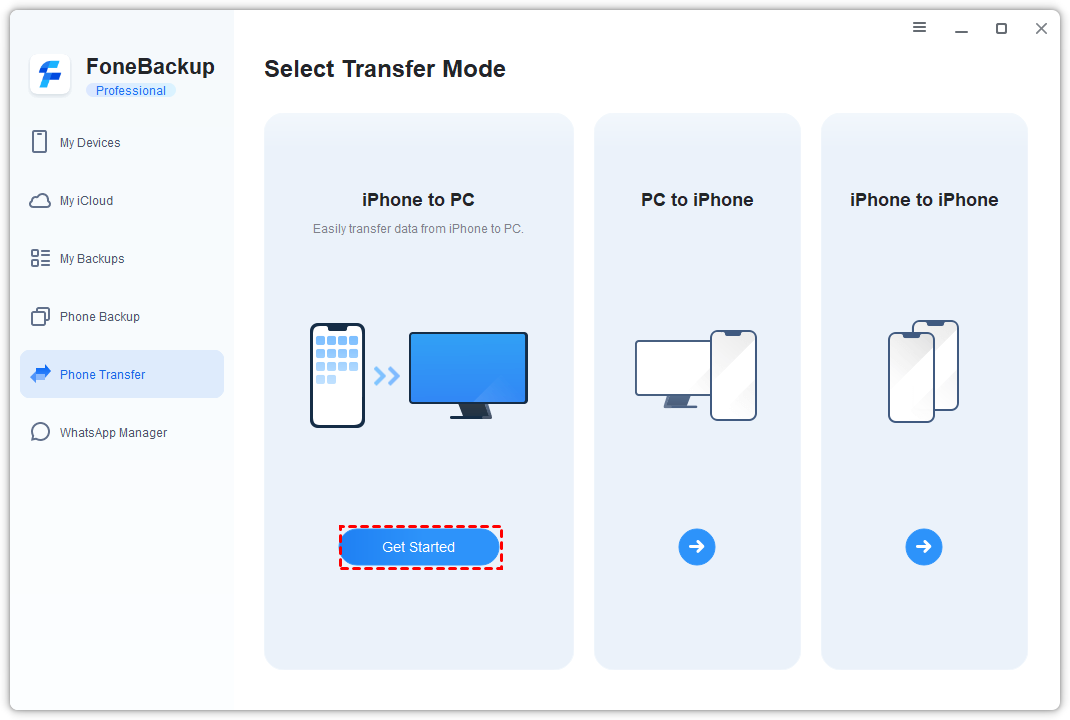
💡 Note: To transfer music from computer to iPad without erasing your existing data, choose PC to iPhone.
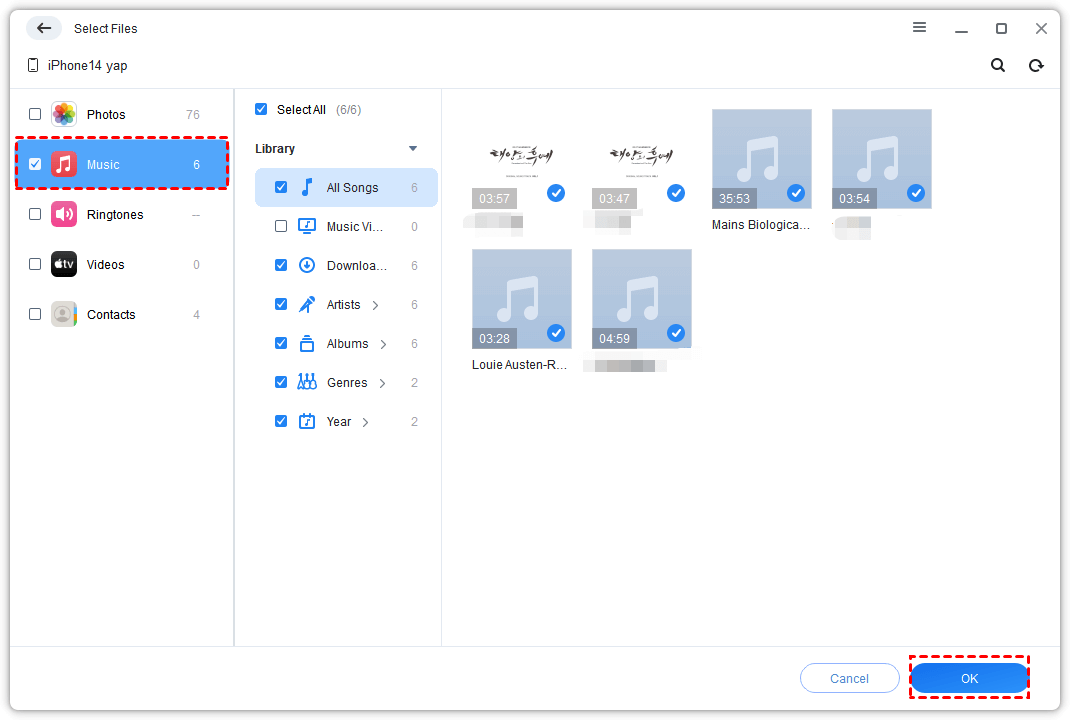
Step 3. Click the Music icon and select the music you want to move from your iPad. Click OK to confirm your selection.
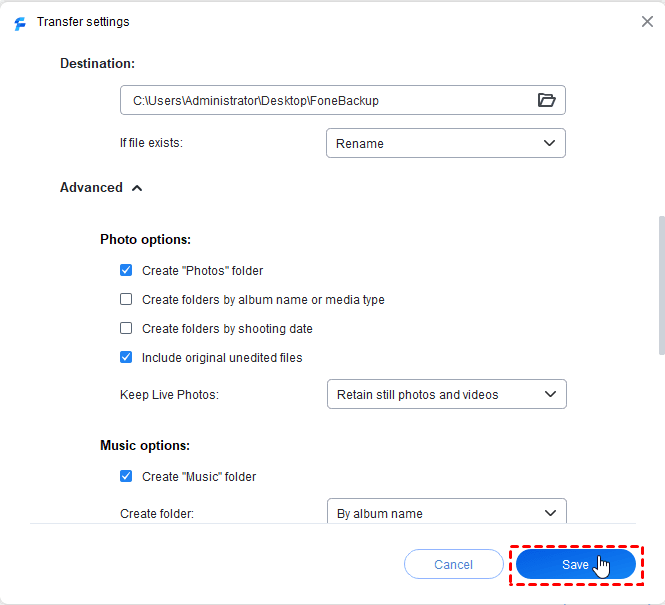
Step 4. If necessary, select Transfer Settings to choose a different destination folder or drive. Then click Save.
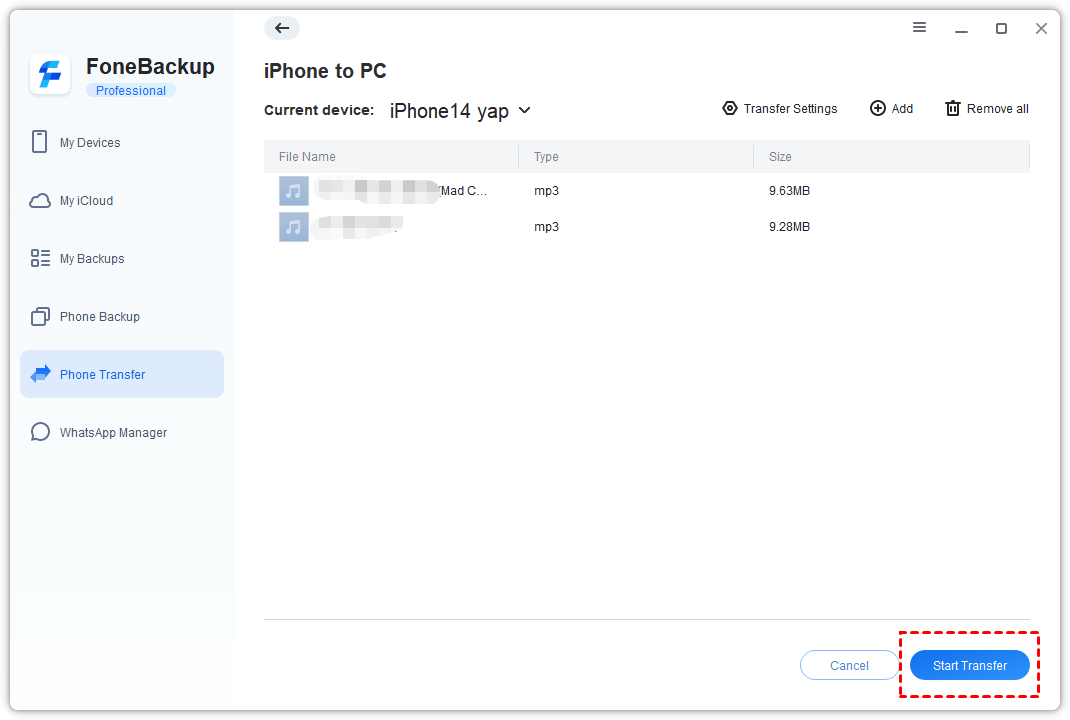
Step 5. Click Start Transfer. Wait until the transfer finishes, then click OK to close the completion window.
Step 6. You can now open the destination folder on your PC and check the transferred music files.
Method 2. Wirelessly Transfer Music from iPad to Mac with AirDrop
If you want to transfer music from iPad to computer and your computer is a Mac, AirDrop provides a wireless option. It works between compatible Apple devices without requiring a USB cable.
Before you begin, make sure Wi-Fi and Bluetooth are enabled on both your iPad and Mac. AirDrop should also be configured to allow your devices to discover each other.
- On your iPad, open Settings > General > AirDrop. Then select the appropriate AirDrop receiving option.
- On your Mac, open Finder and select AirDrop from the left sidebar. Make sure AirDrop is enabled and your Mac can receive files.
Then follow these steps to transfer music from iPad to Mac.
Step 1. Open the Music app on your iPad and locate the song you want to share.
Step 2. Tap the three-dot button next to the song and select Share Song.
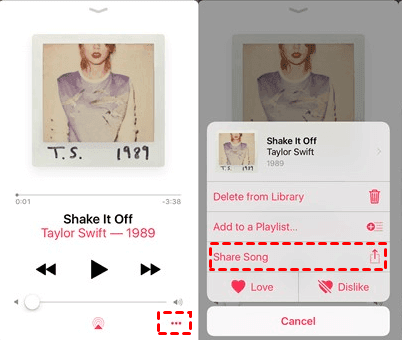
Step 3. Choose AirDrop from the sharing options and select your Mac.
Step 4. On your Mac, click Accept when the AirDrop request appears.
💡 Note: AirDrop is useful when you only need to send a small number of compatible music files wirelessly. However, it may not be the best choice for transferring a large music library.
Part 2. How to Transfer Music from iPad to Computer with iTunes
If your music was purchased through Apple and you want to transfer those purchases to a computer, iTunes can still be useful.
This method is primarily intended for transferring purchased content associated with your Apple account. It may not work as expected for music obtained from CDs, third-party downloads, or other sources. Follow these steps to transfer purchased music from iPad to computer with iTunes.
Step 1. Download and install the latest compatible version of iTunes on your Windows computer.
Step 2. Open iTunes and connect your iPad to the computer using a USB cable. Unlock your iPad and tap Trust if prompted.
Step 3. In iTunes, select Account > Authorizations > Authorize This Computer and sign in if required.
Step 4. Select File > Devices > Transfer Purchases from [your iPad name].
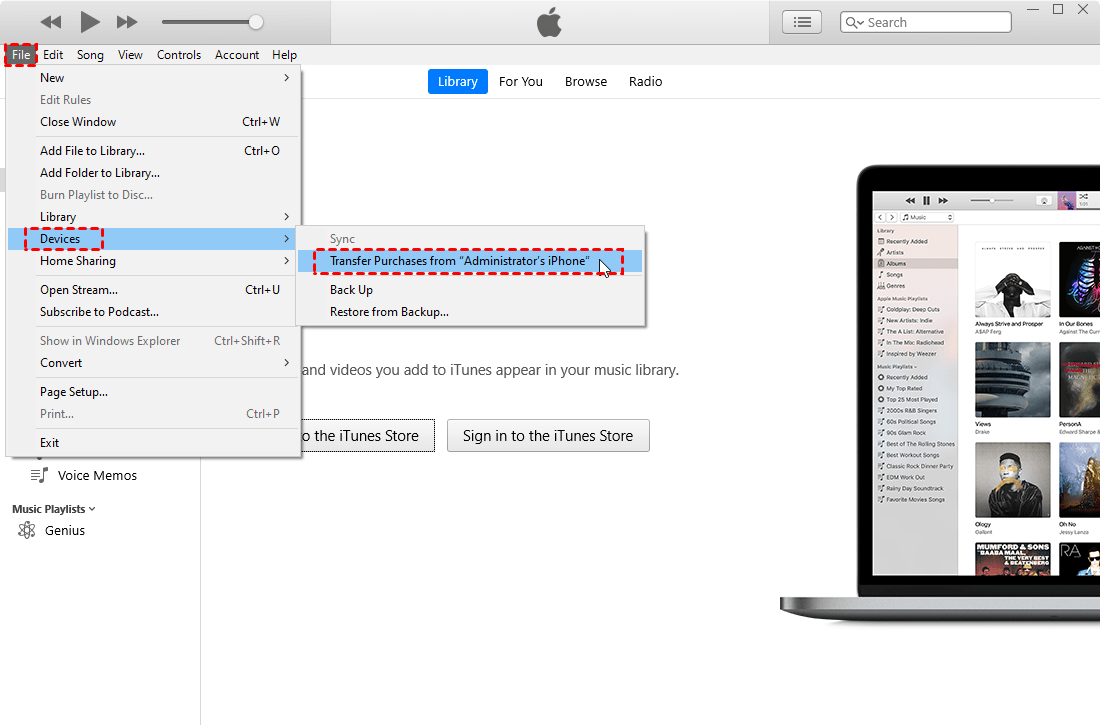
Step 5. After the transfer is complete, open Recently Added in your iTunes library to locate the transferred purchases.
Step 6. Select a song and click the Download button if you want to download a local copy to the computer.
💡 Note: If you don't see the Download button, right-click the song and select Show in Windows Explorer to locate the music file on your PC.
Which Method Should You Choose?
The best way to transfer music from iPad to computer depends on the type of music you have and the computer you're using.
|
Method |
Windows PC |
Mac |
Purchased Music |
Non-Purchased Music |
Wireless |
|
AOMEI FoneBackup |
Yes |
No |
Yes |
Yes |
No |
|
AirDrop |
No |
Yes |
Depends on content |
Depends on content |
Yes |
|
iTunes |
Yes |
Limited/legacy use |
Yes |
Limited |
No |
- For Windows users: AOMEI FoneBackup is a flexible choice if you need to transfer selected or multiple songs from an iPad to a PC.
- For Mac users: AirDrop is convenient when you want to wirelessly share compatible music files.
- For purchased music: iTunes can transfer purchases associated with your Apple account.
FAQs About Transferring Music from iPad to Computer
1. Can I transfer music from iPad to PC without iTunes?
Yes. Windows users can use AOMEI FoneBackup to transfer music from an iPad to a PC without relying on iTunes. It can transfer selected music and supports songs from different sources.
2. Can I transfer non-purchased music from iPad to computer?
Yes, but the available method matters. iTunes is mainly designed to transfer purchased content, while a dedicated iOS transfer tool such as AOMEI FoneBackup provides more flexibility for non-purchased music.
3. Can I transfer music from iPad to another computer?
Yes. AOMEI FoneBackup can be useful when you want to transfer music to a different Windows computer rather than the computer previously synchronized with your iPad.
4. How do I transfer music from iPad to Mac?
You can use AirDrop to wirelessly share compatible music files from an iPad to a Mac. Make sure Wi-Fi, Bluetooth, and AirDrop are enabled on both devices before starting the transfer.
Conclusion
There are several ways to transfer music from iPad to computer, but the right option depends on your music library and computer.
If you're using Windows and want to transfer purchased or non-purchased songs with greater flexibility, AOMEI FoneBackup is a convenient choice. Mac users can use AirDrop for wireless sharing, while iTunes remains an option for transferring purchased music.
Besides transferring music, AOMEI FoneBackup is also specialized iPhone backup software. You can use it to backup contacts, photos, videos, messages, and more. Just give it a shot!

 as a preferred
source on Google
as a preferred
source on Google