
3 Easy Methods of iPod Music Transfer [2026 Guide]
Need to get music off your old iPod? This guide covers 3 iPod music transfer methods - iTunes, AOMEI FoneBackup, and Windows Explorer. Step-by-step and beginner-friendly.
By Kelsey Updated on May 14, 2026
Got an old iPod sitting around with years of carefully curated playlists? Maybe you want to back up your music before the hard drive gives out, or you want to listen on your computer instead. Whatever the reason, iPod music transfer doesn't have to be a headache.
iPods are great little devices; they hold tons of music, play videos, and store photos. But getting that music off the iPod and onto a computer? That can be trickier than it should be. Apple doesn't exactly make it easy. This guide walks you through three methods that actually work. Whether you want to use iTunes, a dedicated transfer tool, or just Windows Explorer, you'll find a way that fits your comfort level.

Method 1. Transfer iPod Music to Computer with iTunes
iTunes can transfer music from your iPod to your computer, but it's not exactly straightforward. The key is to stop iTunes from automatically syncing, otherwise, it might wipe your iPod instead of copying from it.
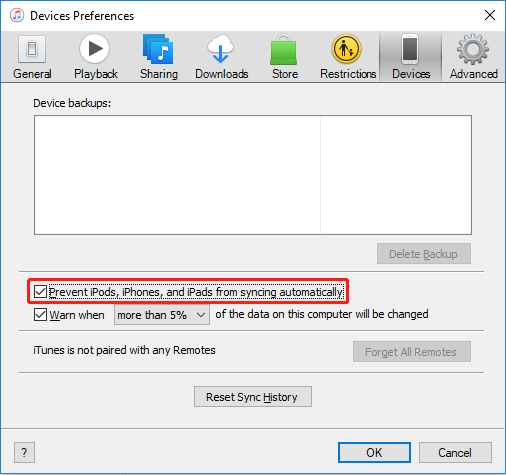
First, turn off auto-sync:
Step 1. Open iTunes on your computer. Don't connect your iPod yet.
Step 2. On Windows, go to Edit > Preferences. On Mac, go to iTunes > Preferences.
Step 3. Click the Devices tab. Check the box that says "Prevent iPods, iPhones, and iPads from syncing automatically." Click OK.
Now transfer your music:
Step 1. Connect your iPod to the computer with a USB cable. Open iTunes if it doesn't open automatically.
Step 2. Click the Music icon in the top-left menu (or under "Library").
Step 3. Choose whether to transfer your entire music library or just selected playlists, artists, or albums. Click Apply.
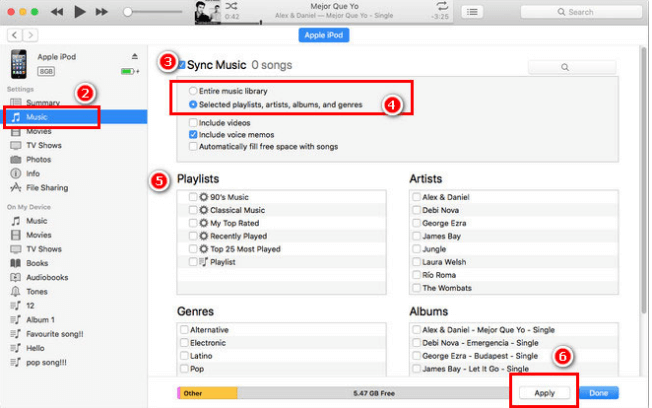
Step 4. iTunes will copy the music from your iPod to your computer. By default, files are saved in the iTunes folder on your C drive (usually under Music/iTunes/iTunes Media/Music).
-
This method is kind of clunky. It works, but it's easy to sync the wrong way and lose data accidentally. If you want something simpler, try Method 2.
Method 2. Transfer iPod Music to Computer with AOMEI FoneBackup
If you'd rather skip iTunes entirely, AOMEI FoneBackup is a solid choice. It's a free tool built specifically for moving music (and other files) between Apple devices and computers.

- No data loss: It copies music from your iPod, it doesn't sync or erase anything.
- Fast transfer: Move 1000 songs in just a few minutes.
- Pick what you want: Preview your music and select only the songs you need.
- Works with any iPod, iPhone, iPad: No Apple ID restrictions.
- Also transfers photos, videos, contacts: Same simple process.
Step 1. Download and install AOMEI FoneBackup on your Windows PC. Connect your iPod with a USB cable. When prompted on your iPod, tap "Trust This Computer" and enter your passcode if needed.
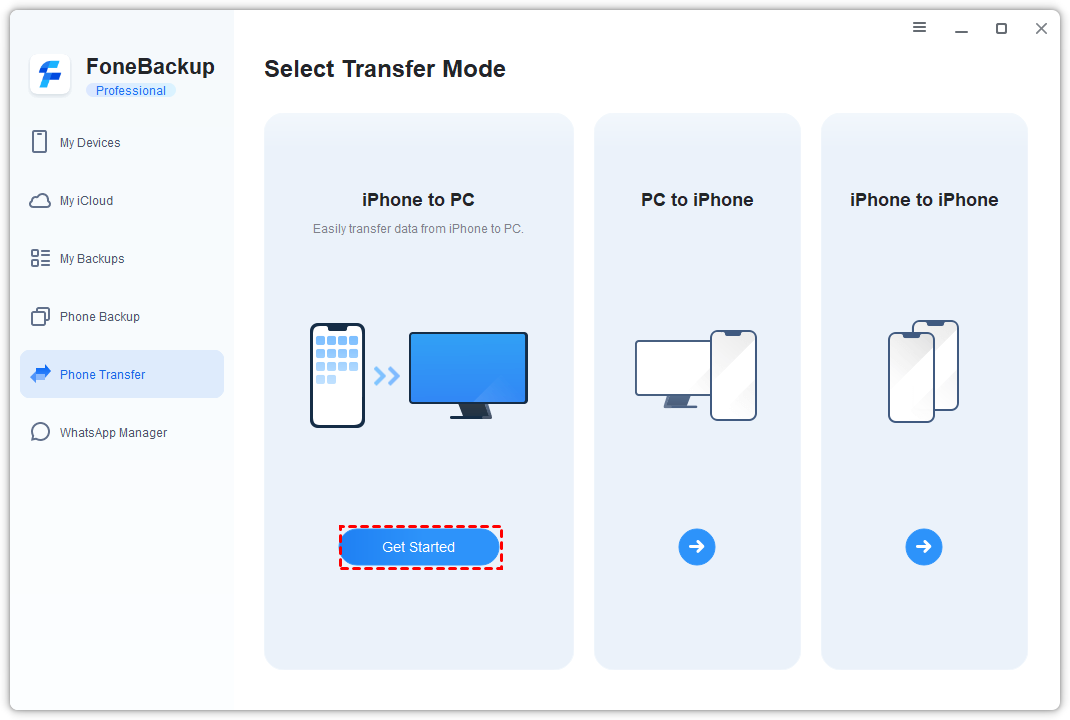
Step 2. Open AOMEI FoneBackup. On the home screen, click Phone Transfer, then choose iPhone to PC and tap Get Started.
Step 3. Click the Music icon. You'll see a preview of all the songs on your iPod. Select the ones you want to transfer.
Step 4. Choose a folder on your computer to save the music. Click Start Transfer.
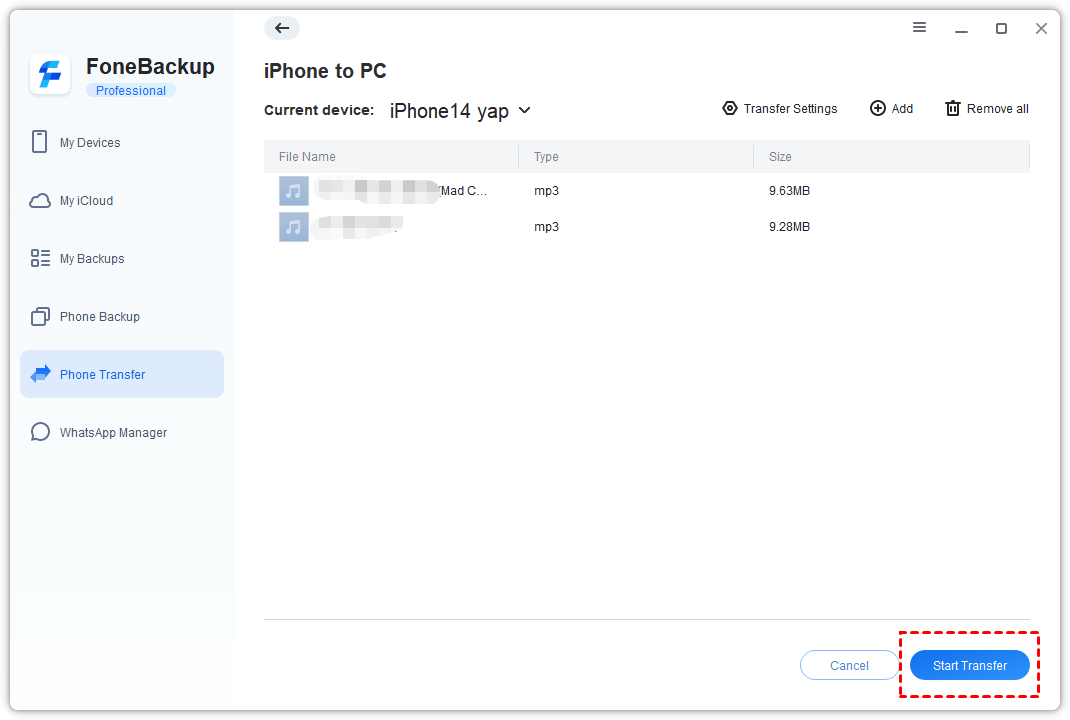
Step 5. Wait a few minutes—done. Your music is now on your computer, ready to play.
AOMEI FoneBackup can also transfer music from PC to iPod, or even between two iPods/iPhones. Handy if you ever need to go the other way.
Method 3. Move Music from iPod to PC with Windows Explorer
If you're comfortable digging into files, you can sometimes copy music directly from your iPod using Windows Explorer. This method works best on older iPods that show up as external drives.
🔍What you need:
-
A Windows PC
-
An iPod that appears as a drive in File Explorer (older models work best)
Step 1. Connect your iPod to the computer with a USB cable. Open File Explorer.
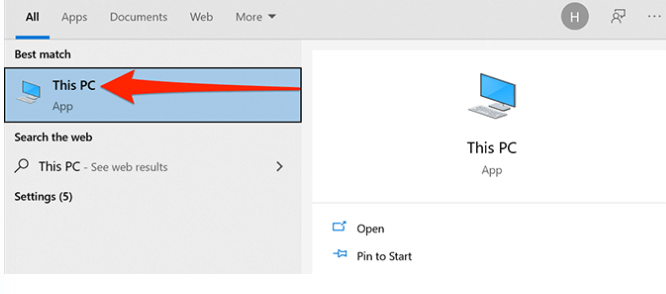
Step 2. Look for your iPod under "This PC" or "Devices and drives." Click to open it.
-
The music files might be hidden. Go to the View tab at the top of File Explorer and check the box for "Hidden items." You should now see the files.
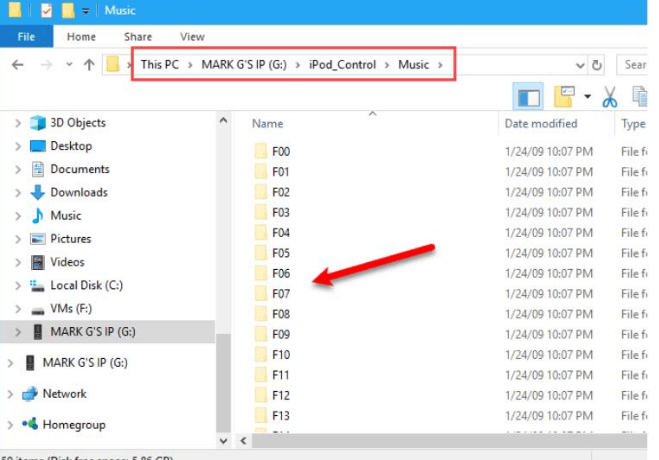
Step 3. Navigate through the folders until you find your music. On older iPods, music is usually stored in an "iPod_Control" folder, then a "Music" subfolder. The files might have strange names (like F01, F02), but they're your songs.
Step 4. Select the music files you want, right-click, and choose Copy. Navigate to a folder on your computer, right-click, and choose Paste.
This method is hit-or-miss, especially on newer iPods. If your iPod doesn't show up as a drive, stick with Method 1 or 2.
Conclusion
So, how to handle iPod music transfer in 2026? You've got options. iTunes works if you're patient and careful. Windows Explorer is worth a shot on older devices. But for most people, especially if you want a fast, reliable, no-data-loss experience, AOMEI FoneBackup is the way to go. Give it a try and get your music off that iPod without the headache.