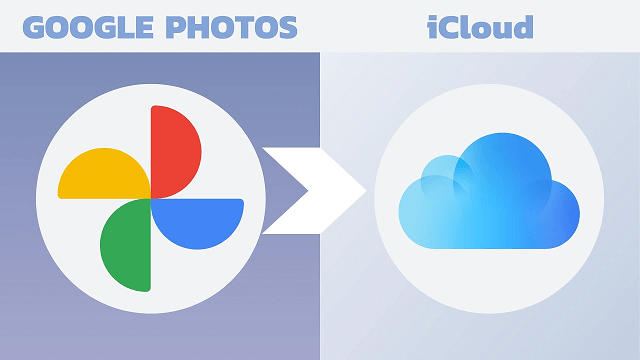
3 Easy Ways to Transfer Photos from Google Photos to iCloud
Learn how to transfer photos from Google Photos to iCloud with 3 easy methods. Use Google Takeout, do it directly on iPhone, or try the faster AOMEI FoneBackup way.
By Kelsey Updated on May 14, 2026
With cloud storage becoming the go‑to for managing files, plenty of users find themselves needing to move their photo collections between platforms. Google Photos and iCloud are two of the biggest names out there, but shifting your memories from one to the other can feel like a headache if you don't know where to start.
The good news? It's totally doable. This guide walks you through three reliable ways to transfer photos from Google Photos to iCloud, whether you're working from a PC, a Mac, or just your iPhone. Let's get those photos where they belong.
Part 1. How to Transfer Photos from Google Photos to iCloud on PC
If you've got a computer handy, this is the most straightforward route. You'll download your photos from Google, then upload them to iCloud.
Preparation: Download Photos from Google Photos to PC
Google Takeout is Google's own tool for exporting your data. It's perfect for grabbing your entire photo library in one go.
Step 1. Go to Google Takeout and sign in with your Google account. By default, Google Photos will be selected—if it's not, check the box next to it.
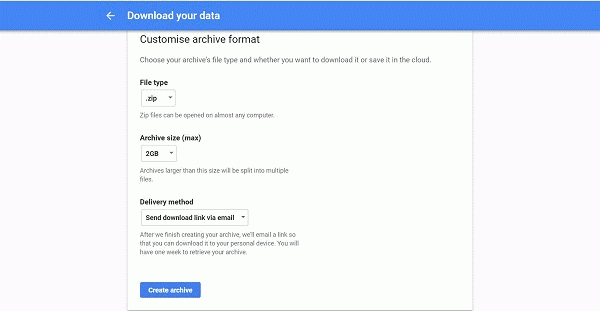
Step 2. Click "Next step". Choose your preferred file type (ZIP is usually best) and maximum archive size (like 10GB or 50GB). Google will split your library into multiple files if needed.
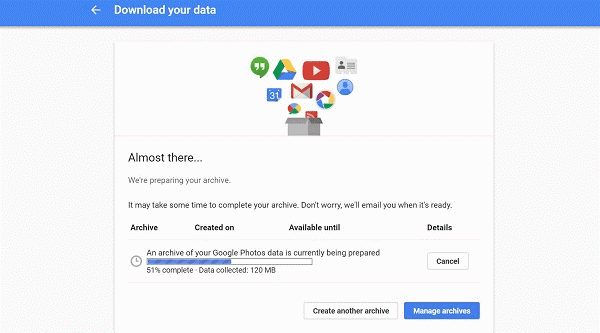
Step 3. Click "Create export". Google will start compiling your photos. You'll get an email when it's ready, this can take from minutes to hours, depending on your library size.
Step 4. Download the archive(s) to your computer and extract the files. You'll find all your photos neatly organized in folders.
Way 1. Upload Google Photos to iCloud via iCloud Web
Once your photos are safely on your PC, uploading them to iCloud is simple.
Step 1. Go to iCloud.com and sign in with your Apple ID. Click "Photos".
Step 2. Click the upload icon (a cloud with an upward arrow) at the top of the page.
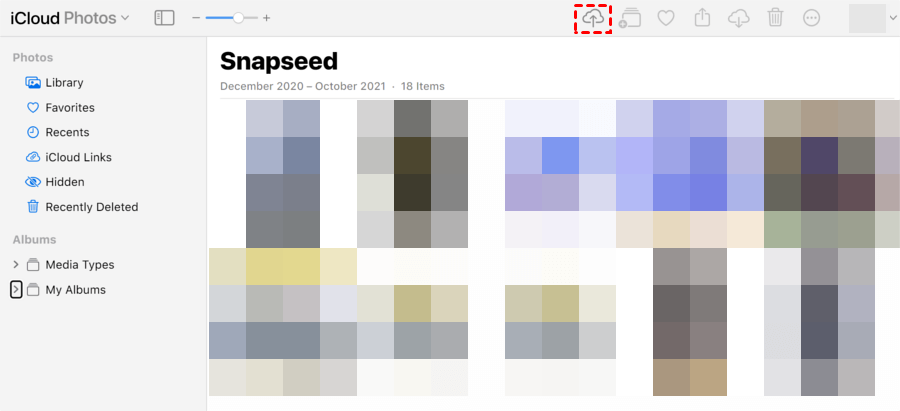
Step 3. Browse your computer and select the photos you downloaded from Google Takeout. Click "Open" to start uploading. Done.
Way 2. Faster Way to Upload Photos to iCloud via AOMEI FoneBackup
For a more streamlined experience, especially if you're dealing with thousands of photos, AOMEI FoneBackup is a solid choice. It's a Windows tool that lets you manage iCloud content directly, with no manual uploading through a browser.
- Fast. Transfer a large batch of photos in seconds.
- Direct iCloud management. Upload, download, or delete iCloud photos from your PC.
- No data loss. Your photos stay intact during the process.
- Wide compatibility. Support all iOS versions and all models of iPhone, iPad, and iPod.
Step 1. Download and install AOMEI FoneBackup on your PC. Launch the software.
Step 2. Click "My iCloud" on the home screen. Sign in with your Apple ID and click "Manage iCloud".
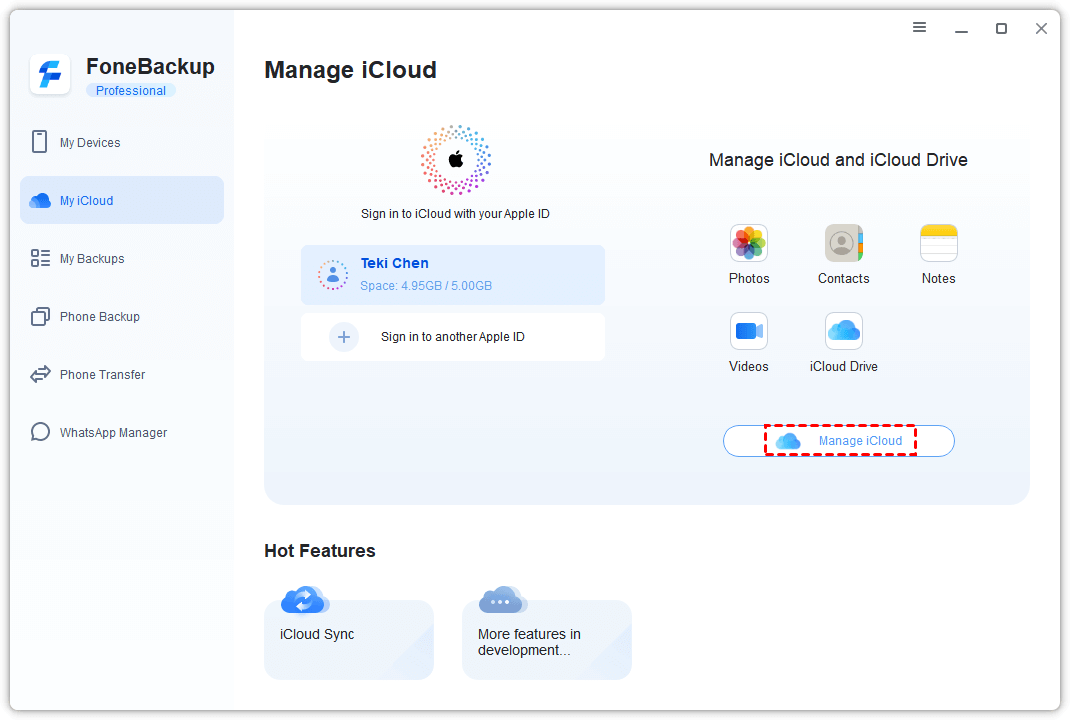
Step 3. Click "Photos". You'll see your iCloud photo library. Click the upload button (usually an upward arrow icon).
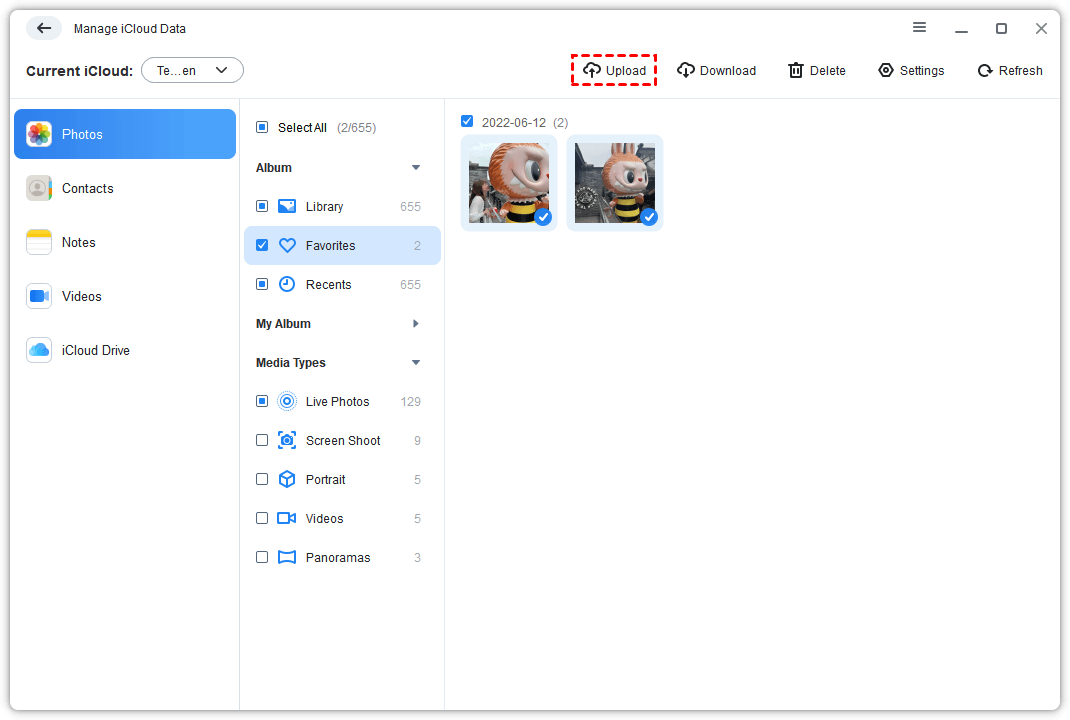
Step 4. Browse your computer and select the photos you exported from Google Takeout. Click "Open" to add them.
Step 5. The upload starts immediately. Once finished, your photos are safely in iCloud.
AOMEI FoneBackup also supports iCloud sync, letting you transfer data between iCloud accounts in one click, handy if you're merging libraries.
Part 2. How to Transfer Photos from Google Photos to iCloud on iPhone
Prefer to work entirely on your iPhone? No problem. You can move photos directly using the Google Photos app and your device's built‑in settings.
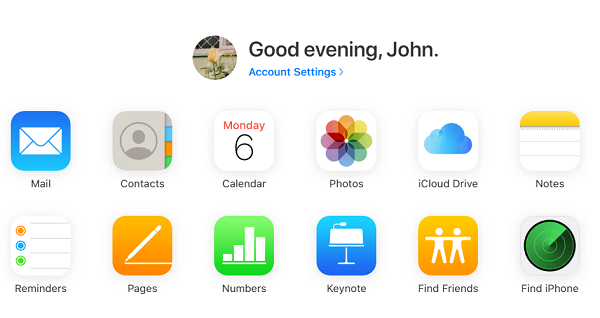
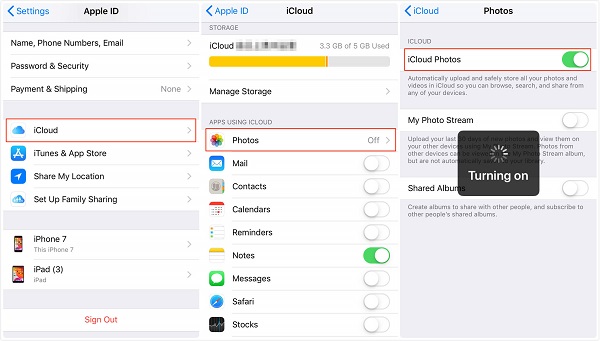
Step 1. On your iPhone, go to Settings > tap your name > iCloud > Photos. Make sure "iCloud Photos" is toggled on. This ensures any photos saved to your device will automatically sync to iCloud.
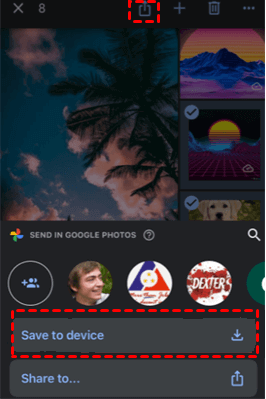
Step 2. Open the Google Photos app on your iPhone. Sign in if needed. Navigate to your library and select the photos you want to transfer.
Step 3. Tap the "Share" icon (the square with an upward arrow). Scroll down and choose "Save to Device" (or "Save Image"). The photos will download to your iPhone's camera roll.
Step 4. Because iCloud Photos is enabled, any new photos added to your camera roll will automatically sync to iCloud. Open the Photos app to confirm they've appeared.
-
This method works best for smaller batches. For massive libraries, the PC methods above are more efficient.
Bonus: Backup iPhone Photos to Computer via AOMEI FoneBackup
Cloud storage is great, but having a local backup adds an extra layer of security. AOMEI FoneBackup also lets you back up your iPhone photos directly to your PC, fast and hassle‑free.
How to Backup iPhone Photos with AOMEI FoneBackup:
Step 1. Connect your iPhone to your PC with a USB cable. Tap "Trust This Computer" when prompted.
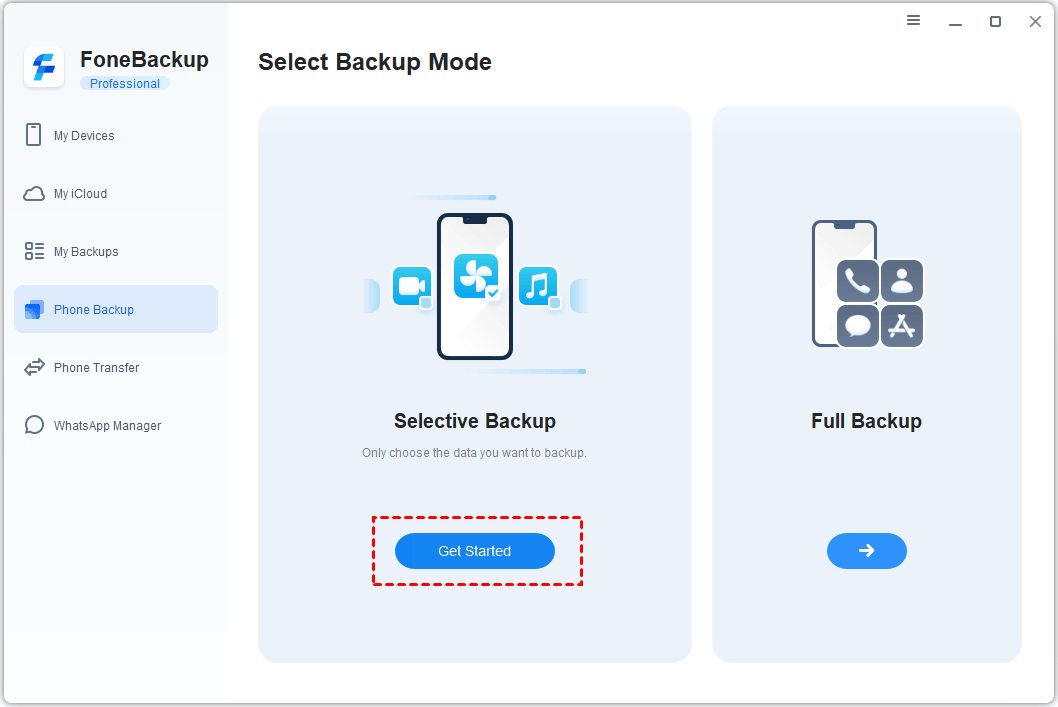
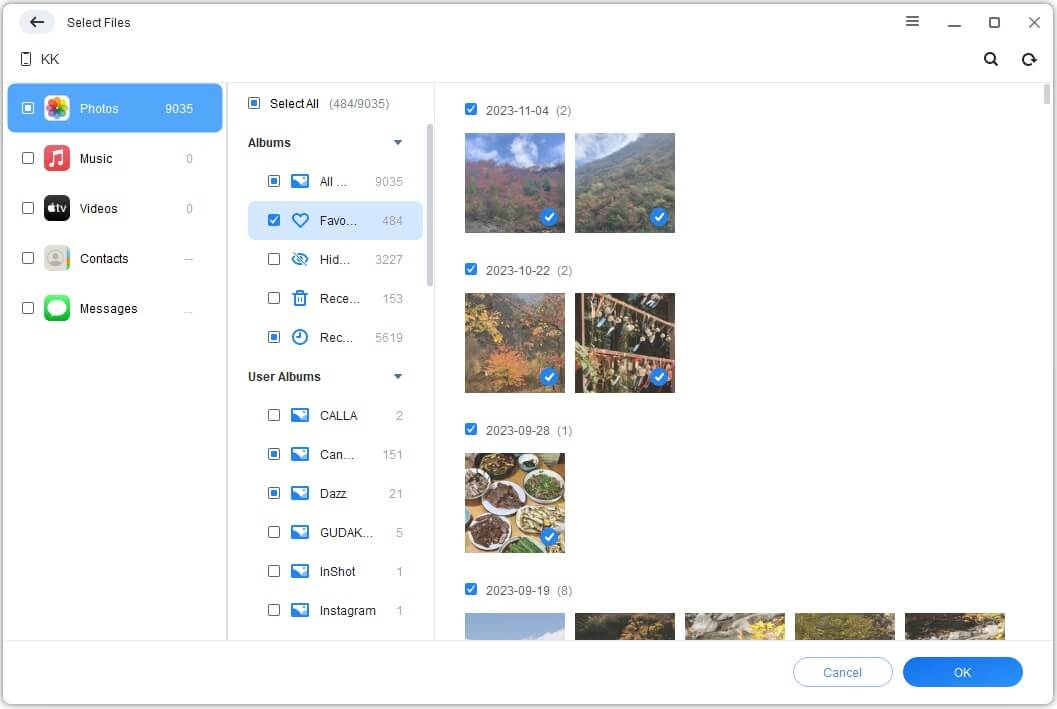
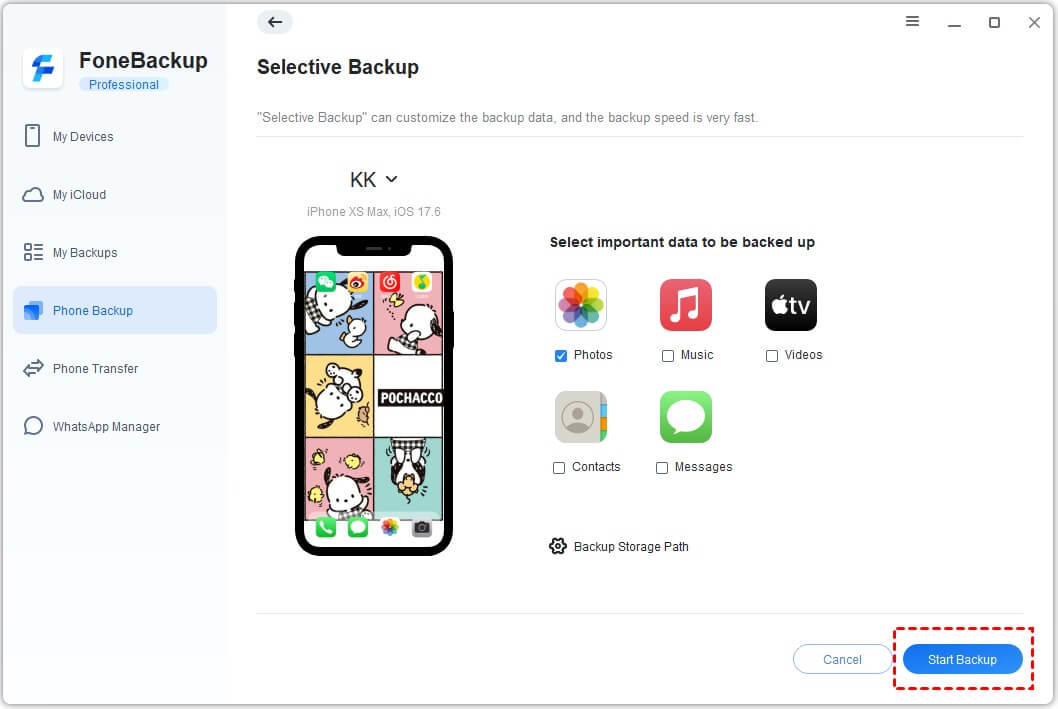
Step 2. Open AOMEI FoneBackup. Click "Phone Backup" in the left menu, then choose "Selective Backup" and click "Get Started".
Step 3. Click the "Photos" icon. You'll see a preview of all your photos. Select the ones you want to back up (or click "Select All"). Click "OK".
Step 4. Choose a backup storage location by clicking "Backup Storage Path". Pick a folder on your PC or external drive.
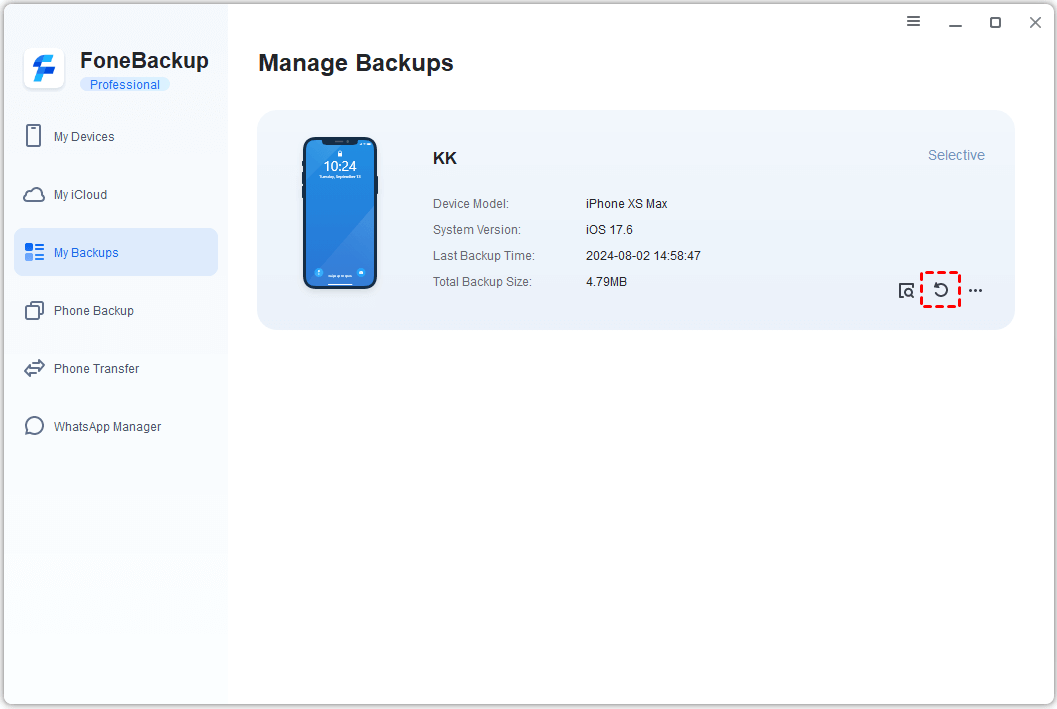
Step 5. Click "Start Backup". The process will finish in minutes. When done, you can view, restore, or manage your backup in the "Backup History" screen.
AOMEI FoneBackup also supports full backups and selective restores, perfect for keeping your photo library safe.
Conclusion
Moving your photos from Google Photos to iCloud doesn't have to be a chore. Whether you prefer the comprehensive approach of Google Takeout, the direct‑to‑iPhone method, or the speed of a dedicated tool like AOMEI FoneBackup, there's a method here that fits your workflow. And once your memories are safely in iCloud, consider a local backup with AOMEI FoneBackup for extra peace of mind.