




Can't Transfer Photos from PC to iPhone? 4 Ways to Fix It
Having trouble transferring photos from your PC to your iPhone? This guide explains why File Explorer can be tricky and shows you 4 safe ways to move your pictures without losing any data.

By Lily Updated on August 6, 2026


Can't Transfer Photos from PC to iPhone? Here's Why
You connect the iPhone, open it in File Explorer, and can see the DCIM folder. Copying iPhone pictures to the computer works, yet dragging a photo back to the phone produces a forbidden symbol. If you can’t transfer photos from PC to iPhone this way, the behavior is usually a Windows limitation rather than a damaged cable or photo.
File Explorer treats a connected iPhone mainly as a camera device. It can read photos and videos stored in DCIM, but it does not provide normal two-way file access to iOS storage. Therefore, the computer won't let you transfer photos to iPhone by pasting them into DCIM. Changing folder permissions does not unlock this unsupported operation.
To add pictures from a Windows PC, use software that communicates with iOS correctly or send the files through an online service. The options below preserve the photos already on the phone.
Method 1. Transfer Photos from PC to iPhone with AOMEI FoneBackup
AOMEI FoneBackup is a Windows data-management tool designed for transfers between a PC and an iPhone or iPad. For anyone who wants to drag and drop photos from PC to iPhone without iTunes, it offers the most direct workflow in this guide.
 AOMEI FoneBackup
- Multiple Data Categories: It can move photos, videos, music, contacts, and other supported data.
- Selective Transfer: The transfer adds selected pictures instead of replacing the current photo library.
- Original Quality Preservation: All transferred files maintain their original resolution, format, and data integrity without compression or alteration.
- Compatible with all iOS devices and versions.
- Works with Windows 11/10/8/7.
 100% Secure
Steps to Drag and Drop Photos from PC to iPhone
Step 1. Download and install AOMEI FoneBackup on the Windows PC, then launch it.
Step 2. Connect the iPhone with a USB cable. Unlock it, tap Trust, and enter the passcode if prompted.
Step 3. In AOMEI FoneBackup, select Phone Transfer in the left pane. Under PC to iPhone, click Get Started.
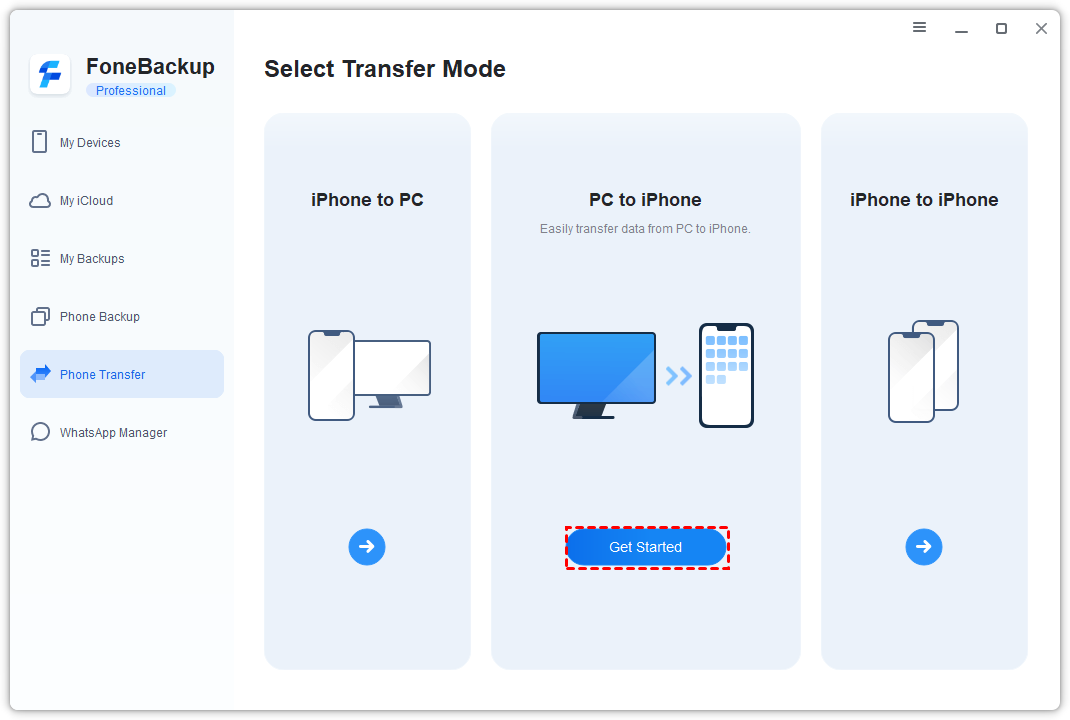
✍Tip: If you want to transfer photos from iPhone to PC, select iPhone to PC instead.
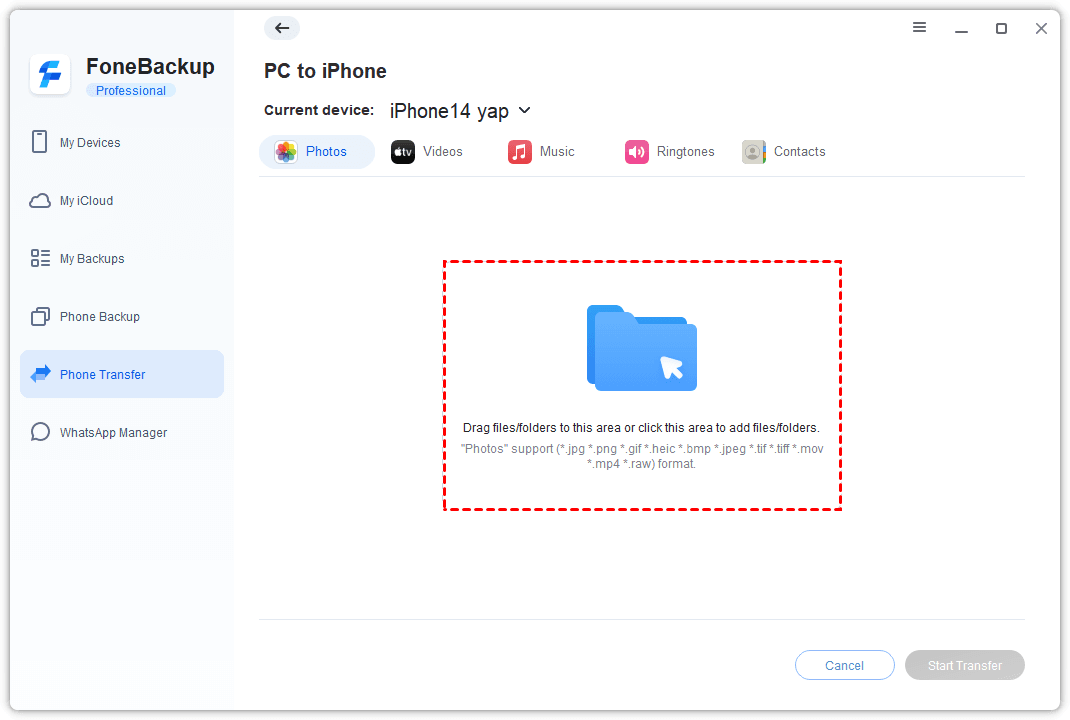
Step 4. Click the Photos icon and drag the desired pictures into the transfer window. Alternatively, click the blue folder and browse to the photos on the PC.
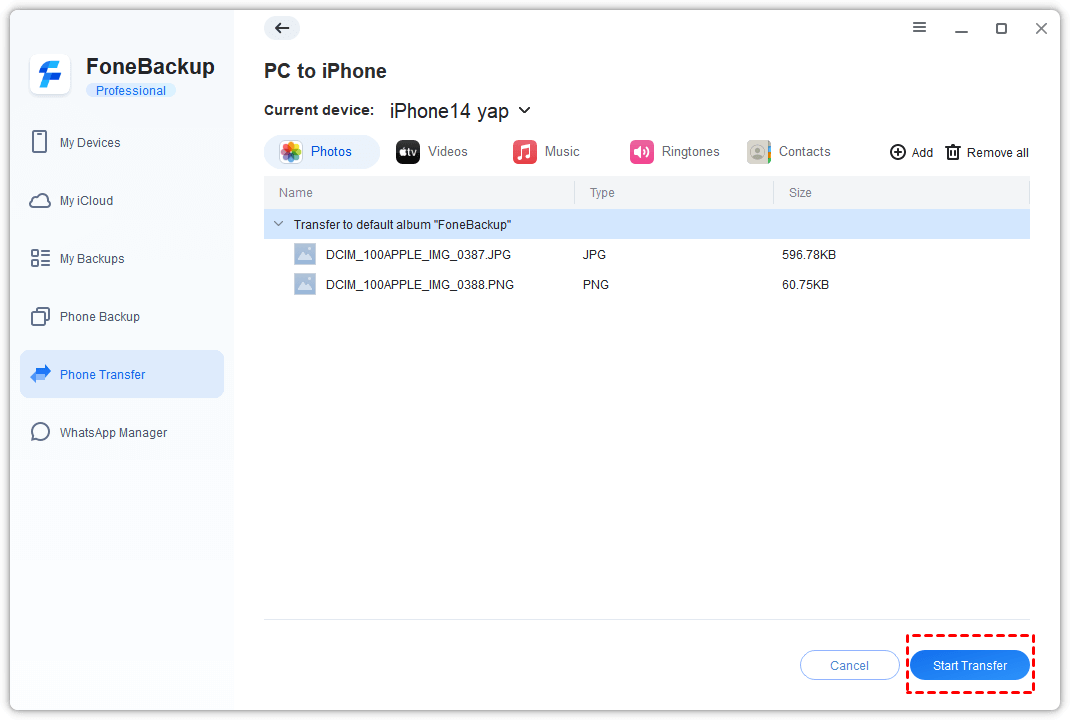
Step 5. Review the selected files and click Start Transfer. Keep the iPhone connected until the process finishes.
Step 6. Open the Photos app on the iPhone and confirm that the imported pictures are available.
Method 2. Send a Few Photos by Email
Email is convenient when you only need one or two smaller images and do not want to install software. The mail provider's attachment-size limit makes it unsuitable for a large album, high-resolution bursts, or many videos.
Step 1. On the PC, create a new email addressed to yourself.
Step 2. Click the mail service's Attach option and add the pictures.
Step 3. Send the message, then open the same email account on the iPhone.
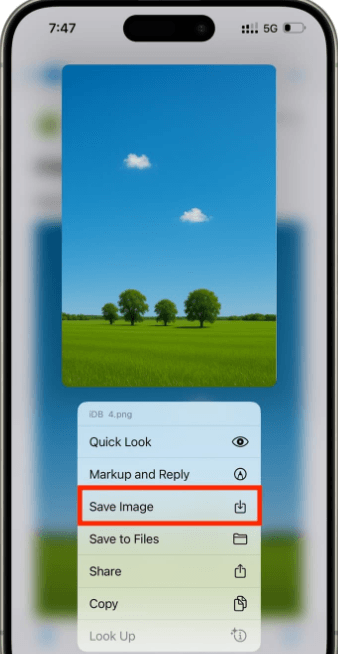
Step 4. Open each attachment, hold the picture, and select Save Image.
Method 3. Use an AirDrop-Like Wireless Transfer Tool
There is no AirDrop for Windows, but browser-based or cross-platform tools can transfer photos over a local network. Some popular options include Snapdrop, SHAREit, and Xender. Here, we use Snapdrop as an example:
Step 1. Connect the PC and iPhone to the same trusted Wi-Fi network. Then access the Snapdrop website on both devices.
Step 2. On the PC, select the iPhone as the receiving device and choose the photos.
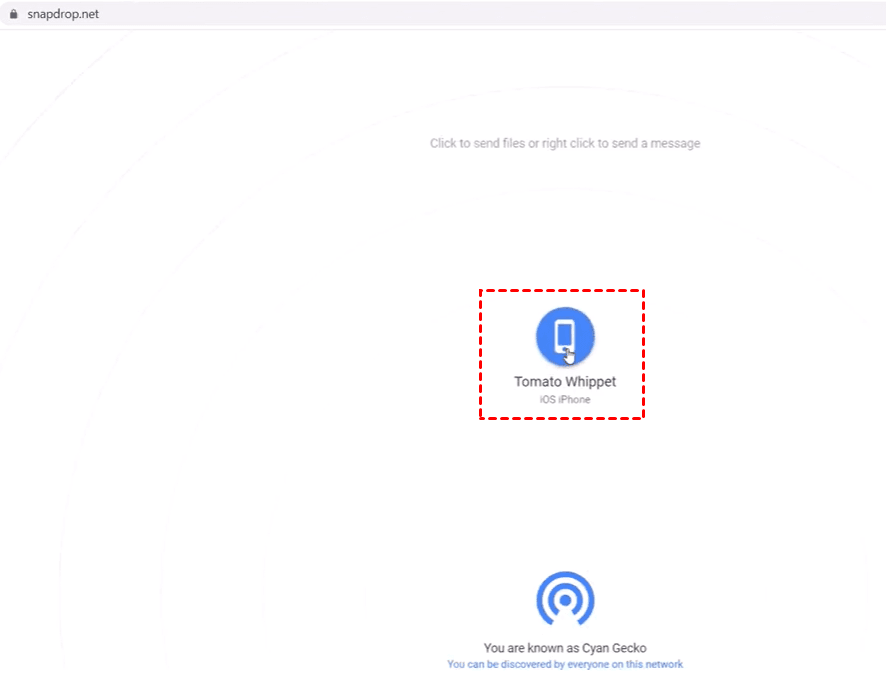
Step 3. On your iPhone, tap Save > Download to save the received pictures to the Downloads folder on your iPhone.
Step 4. Save images to the Photos app.
- Open your Downloads folder in the Files app.
- Tap the three-dot icon in the top right corner > Select. Then tap each image you want to save.
- Tap the Share icon at the bottom > Save [Number] Images to save images to the Photos app.
Method 4. Transfer Photos from PC to iPhone Through Cloud Storage
A cloud service is another practical way to transfer photos from PC to iPhone without iTunes. Google Drive, Google Photos, Dropbox, and OneDrive can make uploaded pictures available on the iPhone. This method needs enough cloud space and may take time when the connection is slow. Let’s take Google Photos as an example:
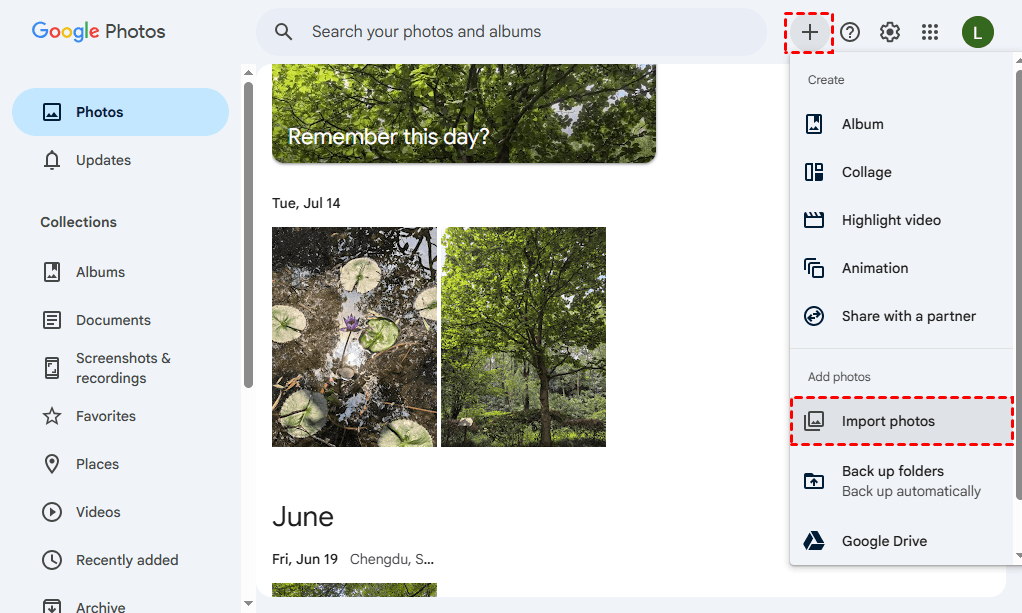
Step 1. On the PC, visit photos.google.com and sign in.
Step 2. Click the plus icon in the upper-right corner and choose Import photos. Then choose the photos you want to transfer. Wait until the upload completes.
Step 3. Open photos.google.com on your iPhone. Sign in with the same Google account.
Step 4. Tap the three-dot icon in the upper-right corner > Select photos to select the photos you want to download.
Step 5. Tap the three-dot icon > Download. Then tap Download in the pop-up to download selected photos to the Downloads folder on your iPhone.
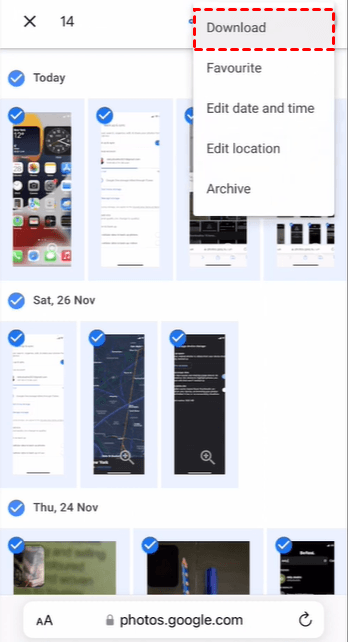
Step 6. Save images to the Photos app as you do in method 3.
Troubleshooting When the iPhone Is Not Detected
The File Explorer limitation explains why you cannot paste photos into DCIM, but a separate connection issue may prevent transfer software from seeing the phone. Try these checks before repeating the transfer:
- Reconnect and unlock the iPhone. Disconnect the cable, unlock the device, reconnect it, and respond to the trust prompt.
- Try another USB port or cable. Avoid a loose cable, charge-only cable, or unpowered hub.
- Restart both devices. A restart can clear a stalled USB or device-service session.
- Check available iPhone storage. The transfer cannot finish if the phone lacks space for the selected originals.
- Transfer a smaller batch. If a very large selection stops, test with several photos to isolate a file or connection problem.
FAQs About PC-to-iPhone Photo Transfers
1. Why can't I drag photos into the iPhone DCIM folder?
Windows File Explorer can read media from an iPhone's DCIM folder but does not support writing PC files into it. Use AOMEI FoneBackup, cloud storage, email, or a compatible wireless transfer tool instead.
2. Can I transfer photos from PC to iPhone without iTunes?
Yes. AOMEI FoneBackup provides a USB-based method, while email, cloud services, and AirDrop-like tools provide wireless alternatives.
3. Why do transferred photos not appear immediately?
First confirm that the transfer completed and that the iPhone has free storage. Then reopen Photos and check the Library or Recents view. For cloud services, make sure the image was downloaded to the device rather than only viewed online.
Conclusion
When you can’t transfer photos from PC to iPhone through File Explorer, the issue is usually not a missing permission: Windows does not support copying files into the iPhone's DCIM folder. AOMEI FoneBackup offers a direct USB transfer with drag-and-drop selection, while email, wireless transfer tools, and cloud storage work well for smaller or cable-free jobs. Choose the method that matches the number of photos, your connection, and your privacy needs.
Besides photo transfer, AOMEI FoneBackup allows you to backup your iPhone with a few clicks. Download it now to discover more!

 as a preferred
source on Google
as a preferred
source on Google