
What is Windows 11 USB tool and How to Make it?
What is Windows 11 USB tool and how to make it? It may not be easy work for all users. This guide will show you the full steps to get it done in different ways.
By Hedy Updated on May 29, 2026
What is Windows 11 USB tool?
The Windows 11 USB tool (officially known as the Media Creation Tool) is a free utility provided by Microsoft that allows you to create bootable installation media. It is primarily used to perform a clean install of Windows 11, upgrade a PC, or repair a system that won’t boot.
Essentially, the tool downloads the necessary Windows 11 installation files and "flashes" them onto a USB flash drive (which must be at least 8GB).
🚩 Core functions:
🔹 Create installation media: It turns a standard USB drive into a bootable device that can start a computer independently of the hard drive.
🔹 ISO download: It can download the Windows 11 Disk Image (ISO file) directly, which can then be burned to a DVD or used in a virtual machine.
🔹 In-place upgrade: While less common for the USB version, the tool can be used to trigger an upgrade on the current machine while keeping files and apps intact.
Why do you need a Windows 11 USB tool?
A Windows 11 USB tool (often referred to as installation media) is a fundamental utility that acts as an external "brain" for a PC when the internal operating system is compromised or missing.
While modern systems have built-in recovery partitions, an external USB tool is necessary for several critical scenarios:
1. Clean installations
When setting up a new PC or a custom-built machine, there is no pre-existing operating system on the drive. A bootable USB provides the environment needed to format the drive and install a fresh copy of Windows from scratch.
2. System recovery and repair
If the internal Windows files become corrupted to the point where the computer won't boot (e.g., a "Blue Screen of Death" loop), the built-in recovery tools often fail along with the OS. A USB tool allows you to bypass the broken internal system and access an independent set of repair tools, such as:
► Command prompt for manual file surgery.
► System image recovery to roll back to a healthy state.
► Startup repair to fix the Boot Configuration Data (BCD).
3. Version control and updates
Sometimes, the standard Windows Update process fails due to software conflicts. A USB tool allows for an "In-place Upgrade",which forces the system to update to a specific build of Windows 11 while keeping files intact, effectively bypassing the standard update delivery system.
4. Partition management
Outside of the active operating system environment, a bootable USB can be used to manage disk partitions. Since you cannot modify or delete the partition that Windows is currently running on, booting from a USB allows you to shrink, expand, or change partition styles (like MBR to GPT) without technical locks.
5. Malware remediation
For deep-seated infections like rootkits that hide while Windows is running, booting from a clean USB tool ensures the malware is inactive. This allows security tools to scan the "cold" drive without the virus being able to defend itself or hide its processes.
How to make a Windows 11 USB tool and use it for Windows 11 installation
Before you begin making a bootable Windows 11 USB, please ensure your system meets the following requirements for a seamless setup:
🔻 Stable internet connection: A reliable and steady network is required to download the installation files without interruption.
🔻 Sufficient storage: Ensure your primary drive has enough available space to accommodate the temporary installation data.
🔻 USB flash drive: You will need an empty USB drive with a minimum capacity of 8GB.
Any existing data on the USB drive will be erased during this process, so please back up your files beforehand.
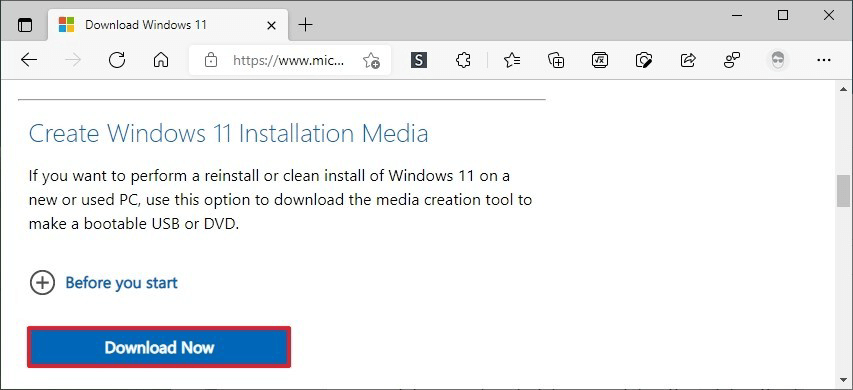
Part 1. Download Windows 11 media creation tool
Step 1. Insert the prepared USB into your computer and download the files to begin to create Windows 11 bootable USB.
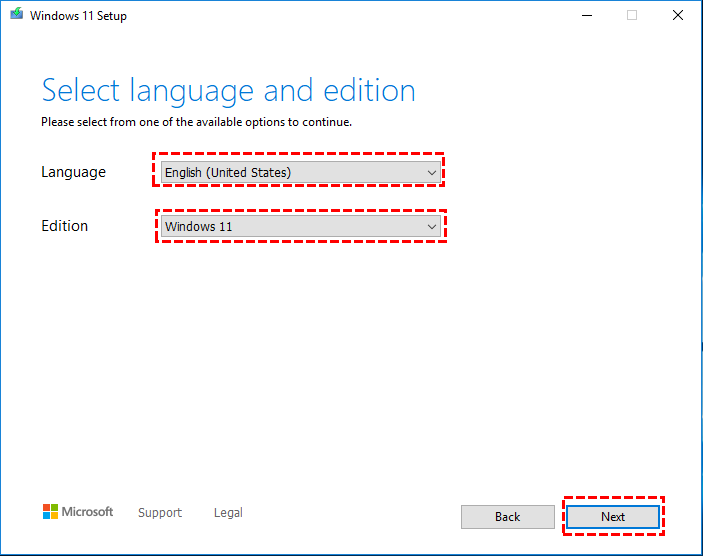
Step 2. When the download is finished, click and perform the tool, select the language and Windows 11 edition, and click "Next".
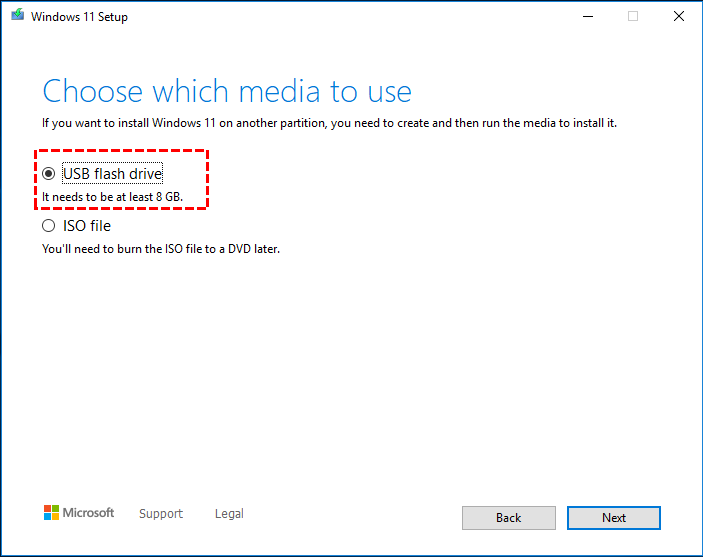
Step 3. In the "Windows 11 Setup" window, choose the "USB flash drive" option and select "Next".
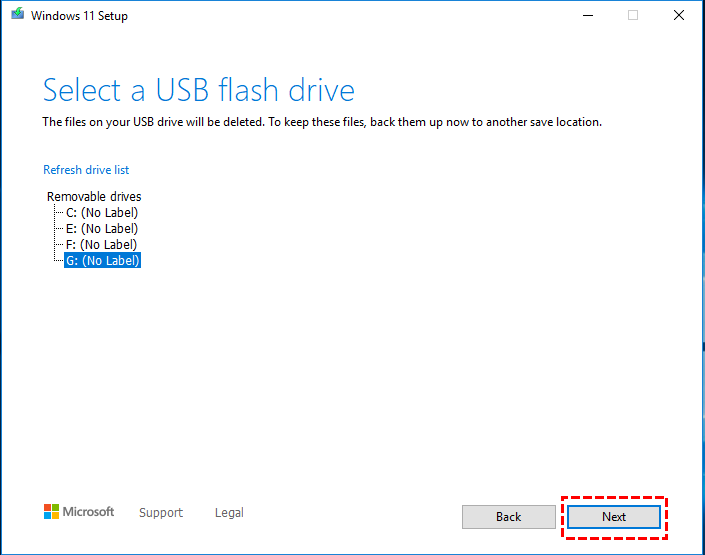
Step 4. Select the USB flash drive and start the download process.
Wait for a while. A Windows 11 installation media creation tool will be successfully created. Now, you can follow the next part to use the Windows 11 installation USB to install Windows 11.
Part 2. Install Windows 11 with media creation tool Windows 11
Step 1. Connect the USB to your computer and restart it. After entering the BIOS/UEFI interface, move the USB to the first in the boot sequence list.
Step 2. Reboot the device to make it boot from the USB.
Step 3. Then you will see the Windows 11 installation interface. Adjust the settings and click the "Next" button.

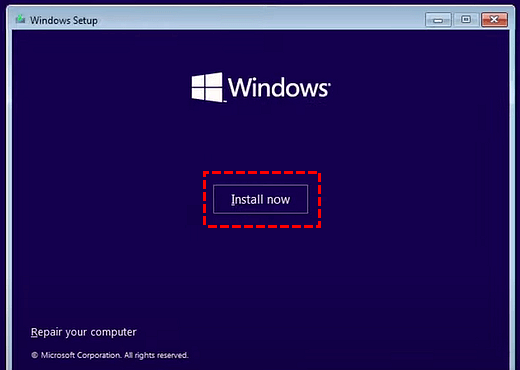
Step 4. Click the “Install now” button.
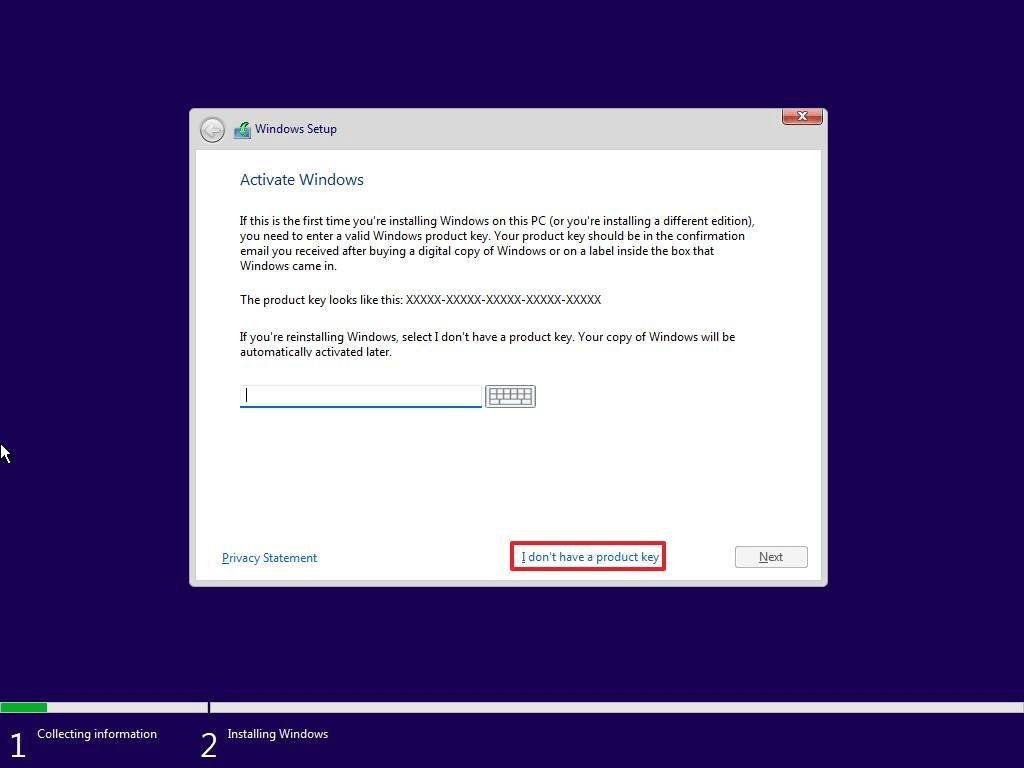
Step 5. You can enter the product key if you have one. Or you can directly select “I don’t have a product key”.
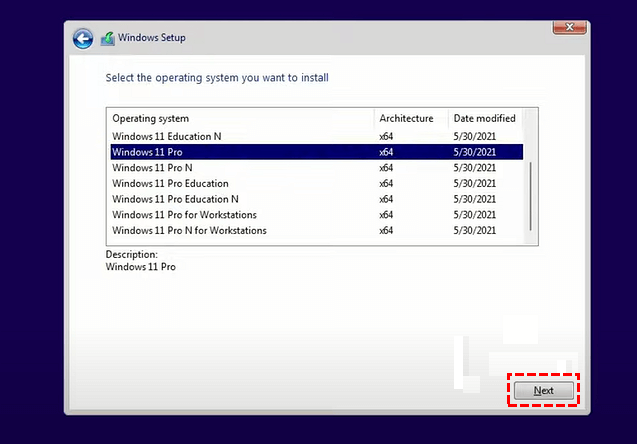
Step 6. Choose an OS edition you want to install and click “Next”.
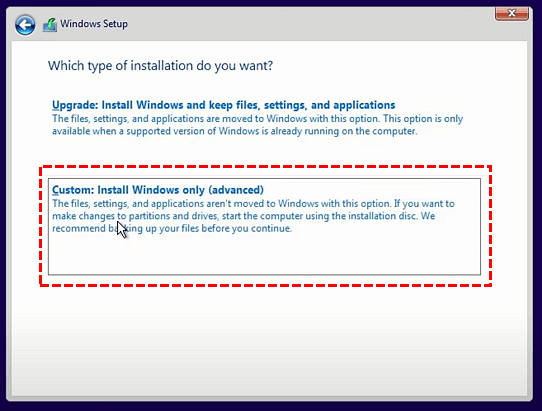
Step 7. Accept the License Term and click “Next”, and then choose “Custom: Install Windows only (advanced)” in the next window.
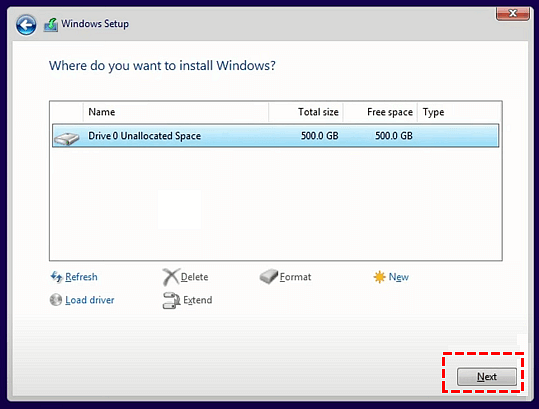
Step 8. Select the target disk to install Windows 11 OS with clicking “Next”.
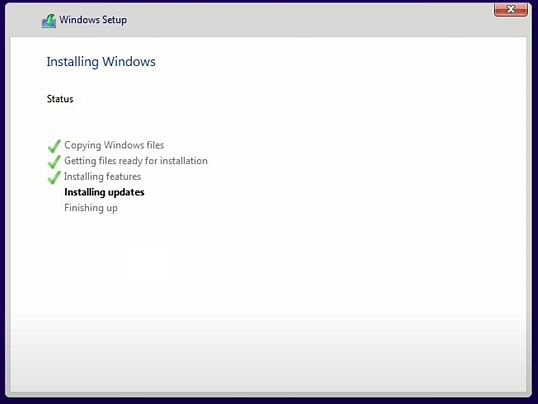
Step 9. Wait for the process to finish. Then the computer will reboot.
How to make a portable Windows USB tool
Despite its growing popularity, many users remain hesitant to make the jump to Windows 11. This "wait-and-see" approach is often driven by strict hardware requirements, a reluctance to abandon a familiar interface, or the perceived hassle of a traditional OS upgrade.
Fortunately, AOMEI Partition Software offers a seamless solution to these hurdles. Its standout feature, “Windows To Go Creator,” enables users to install Windows 11 directly onto a USB flash drive or external hard drive. This allows you to:
✔️ Test-drive Windows 11 on any compatible machine without overwriting your current setup.
✔️ Bypass hardware limitations by running the OS from an external source.
✔️ Maintain portability, carrying your personalized workspace wherever you go.
Beyond Windows 11, the software is fully compatible with Windows 10, 8.1, 8, and 7—and can even be used to run Windows on a Mac. It’s the ideal tool for those who want to explore the future of Windows while keeping their original system safely intact.
A safe and reliable disk partition management tool that helps you migrate OS to SSD or HDD, reorganize disk space, and improve overall PC performance.
Step 1. Plug the USB into the computer and wait for it to be detected by your device. If it failed, you can refer to the solutions.
Step 2. Launch the installed AOMEI Partition Software. Click “Tools” > “Windows To Go Creator” as the picture shows.

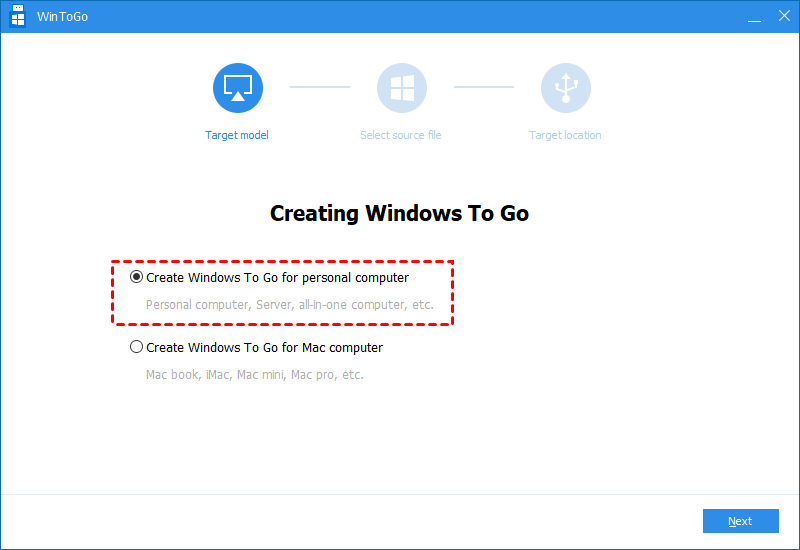
Step 3. Click “Create Windows To Go for personal computer” and choose “Next”.
Note: If you are a Mac computer user, you can choose the second option “Create Windows To Go for Mac computer”.
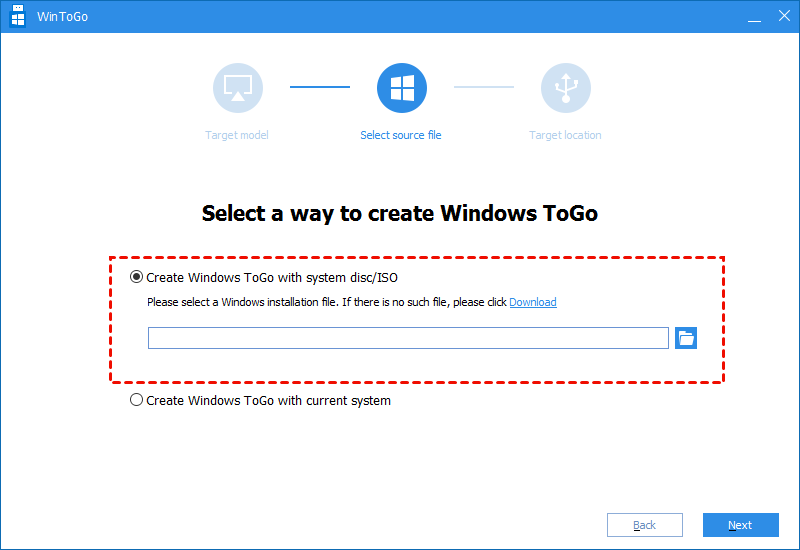
Step 4. Select “Create Windows To Go with system disc/ISO”. Usually, the Windows 11 ISO file will be detected automatically. If not, you can click the folder icon to select the target file manually. Then click “Next”.
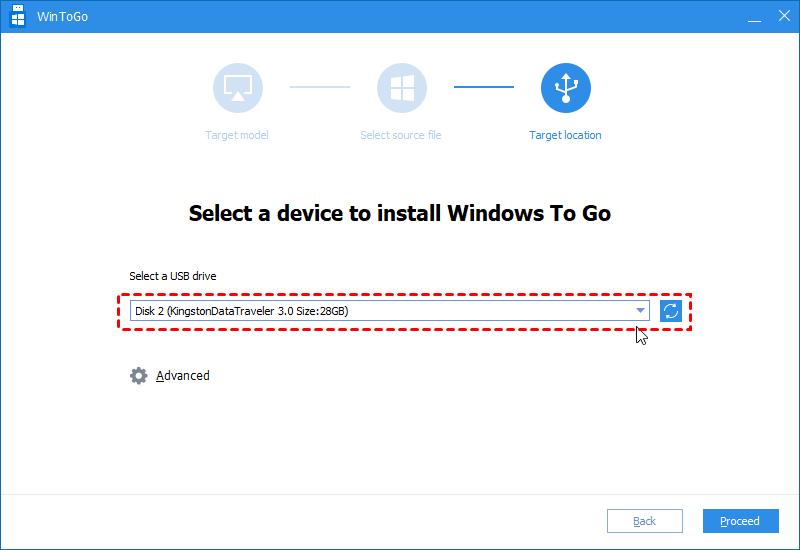
Step 5. Choose the USB drive as the target and select the “Proceed” button to continue.
Step 6. You will be noticed that all data on the USB will be wiped. Choose “Yes”. Then you can unplug the USB and try to boot it on another computer. If you do not know how to boot, you can continue following the steps below.

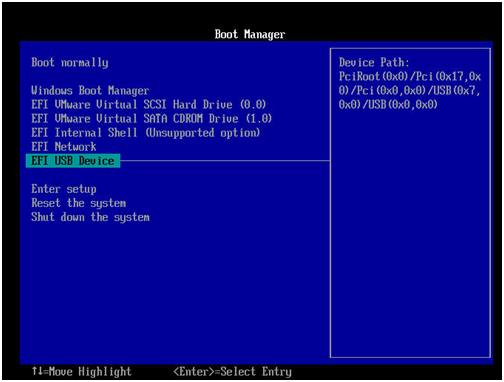
Step 7. Insert the Windows 11 To Go USB drive into your computer. Boot the device and press a specific key to enter BIOS/UEFI.
Note: The pressing key to enter BIOS/UEFI differs from computer brands. You can search for relevant information on its official website.
Step 8. Choose USB Device and press the “Enter” key to boot from the Windows 11 bootable USB.
FAQs
🔎 What is the difference between a Windows 11 Media Creation Tool and a "Windows To Go" USB?
The Media Creation Tool creates a bootable installer to set up Windows on a PC. Windows To Go creates a fully functional, portable version of Windows that runs directly from the USB drive.
🔎 Will creating a Windows 11 installation USB delete the files currently on my flash drive?
Yes. Creating an installation USB will format the drive, permanently deleting all existing files. Always back up your data to another location before starting the process, as the drive will be wiped completely.
🔎 What are the minimum hardware requirements for the USB flash drive itself?
You need a USB drive with at least 8GB of capacity. For faster installation speeds, a USB 3.0 or 3.1 drive is highly recommended, though older USB 2.0 drives will technically work.
🔎 How do I make my computer boot from the USB instead of the internal hard drive?
Restart your PC and tap the BIOS/Boot Menu key (e.g., F12, F2, or Del). Select the USB drive from the list. Alternatively, use Advanced Startup in Windows settings to choose "Use a device".
Conclusion
The Windows 11 USB tool (Media Creation Tool) creates bootable media to install, upgrade, or repair Windows. It is essential for clean installs, bypassing corrupted systems, and malware remediation. Users can create an installer using Microsoft’s official utility or build a portable workspace via "Windows To Go".Both methods require an 8GB+ USB drive, which will be formatted during the process.