




How to Recover Data from a Formatted USB Flash Drive
To recover data from a formatted flash drive, first consider whether formatting or later use overwrote the files. Choose a visual scan, Microsoft’s command-line tool, or a suitable File History backup for recovery.

By Ivy Updated on October 13, 2026


Your USB flash drive now opens as an empty drive, but the documents, photos, or videos you needed were there before you clicked Format.
Don’t worry, a quick format doesn’t necessarily erase every file’s contents. Recovery may still be possible, depending on what formatting changed and whether new data has overwritten the old files. Stop saving anything to the USB, and don’t format it again.
If you're looking for how to recover data from a formatted flash drive, you have a few methods: AOMEI FastRecovery for a visual scan, Windows File Recovery for a command-line alternative, or File History if you backed your files up there. Start by identifying which situation fits your drive.
Can Your Formatted USB Files Still Be Recovered?
Yes, a quick formatted USB may still contain recoverable file data. Formatting rebuilds file system information so the drive can store new files. Windows may show an empty drive even though some old file contents remain.
A full format writes zeros across the volume, which makes recovery much harder. So pay attention to how the USB was formatted, not just how long the format took.
If you copied new files onto the USB afterward, some old files may be partially or completely overwritten. That doesn’t establish that every old file is gone, but it does make complete recovery less likely.
You also can’t reverse formatting by switching the drive back to its previous file system. The practical goal is to extract surviving files to another drive. For more on that distinction, see undo a formatted drive.
Which Method Should You Use?
Use the quick guide below to choose a route. You don’t need to try every method in order.
| 🧩 Your situation | ✅ Suitable method | 🔑 Key requirement |
|---|---|---|
| USB was quick-formatted and remains readable | Consider using AOMEI FastRecovery | File data must still exist |
| You prefer a free Microsoft utility | Try Windows File Recovery | USB has a drive letter; commands are required |
| Your File History backup includes the missing files. | Restore from File History backup | A suitable backup already exists |
If the USB keeps disconnecting or looks physically damaged, stop running more scans and seek professional assessment.
If Windows only asked you to format the USB, cancel it. That's not the same as a format that already happened. Same goes if you only deleted a few files, check: recover deleted files from USB drive.
How to Recover Data from a Formatted Flash Drive
Once you know which situation fits, scroll down to the matching method and follow the steps to recover data from a formatted flash drive.
Method 1: Recover Data from Formatted USB Drive with AOMEI FastRecovery
👍 Best for: Scan a readable, formatted USB and select the files you want through a visual interface.
AOMEI FastRecovery is easy-to-use USB data recovery software that can recover documents, photos, videos, and other files lost after formatting.
 AOMEI FastRecovery
- ♻️ Partition formatted recovery: Automatically runs a Deep Scan to find remaining files on the formatted USB.
- 🔎 Find files quickly: Browse by Type or Path, or combine search, filters, sort, and thumbnails previewsto narrow results.
- 💾 Flexible destination: Save files to another USB drive, external disks, memory cards, or anywhere else with space.
- 📚 1000+ Data Types: Recover deleted files, from documents to images, videos, audios, archive files, and more.
- 💰 Free Tier: Recover data up to 500MB for free. Need more? Upgrade for unlimited recovery.
 100% Secure
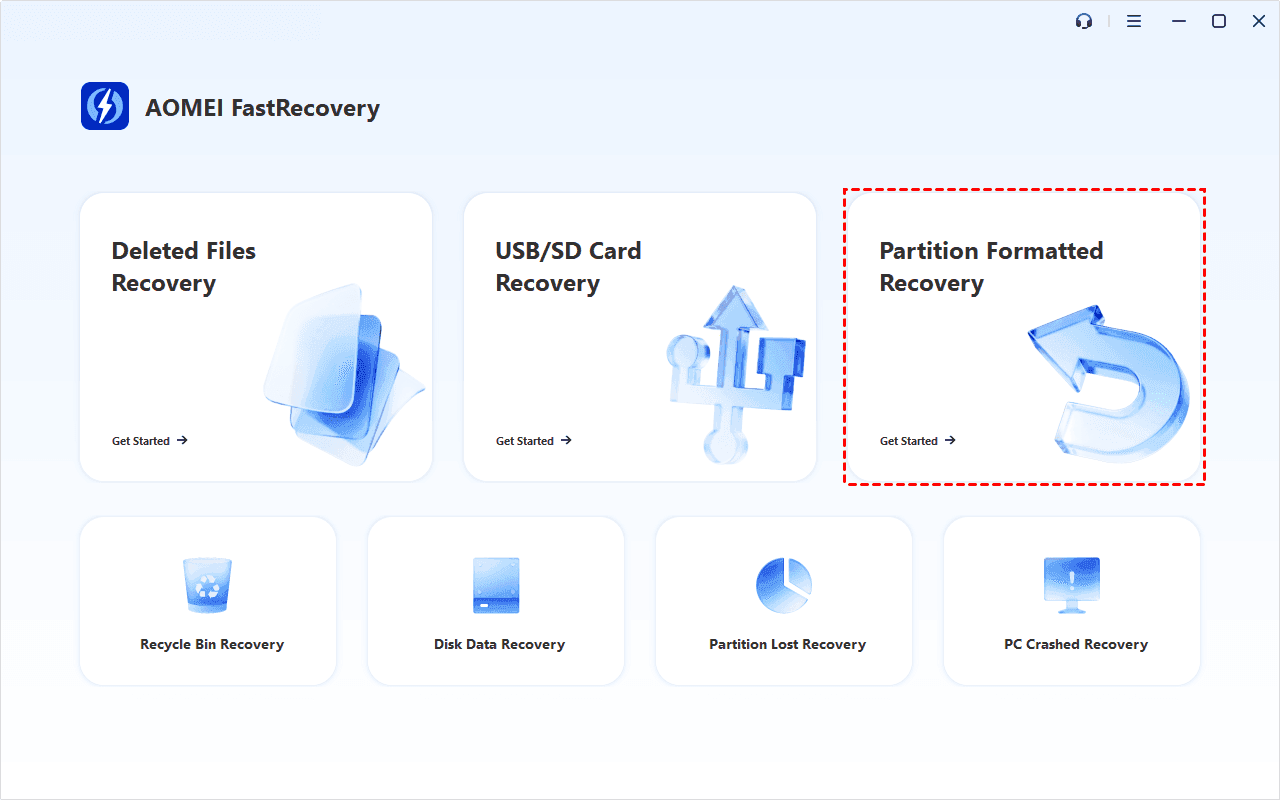
Step 1. Download and install AOMEI FastRecovery on your computer, not the formatted USB. Prepare another drive with enough free space for the recovered files. Open this software and select Partition Formatted Recovery.
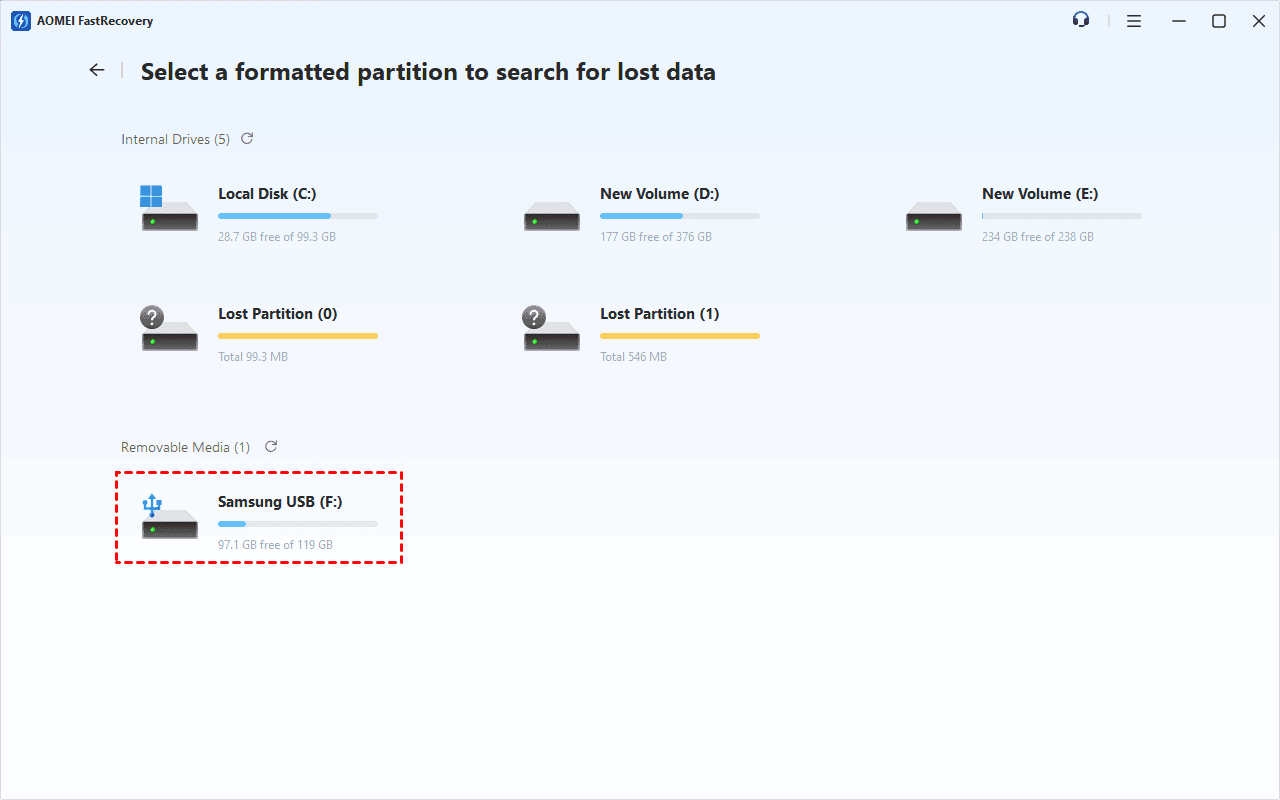
Step 2. Select the USB drive and click Scan. This scenario starts Deep Scan by default.
Step 3. On the scanned results window, browse files by Type or Path. Search by filename or extension, filter the size, or sort to narrow the list.
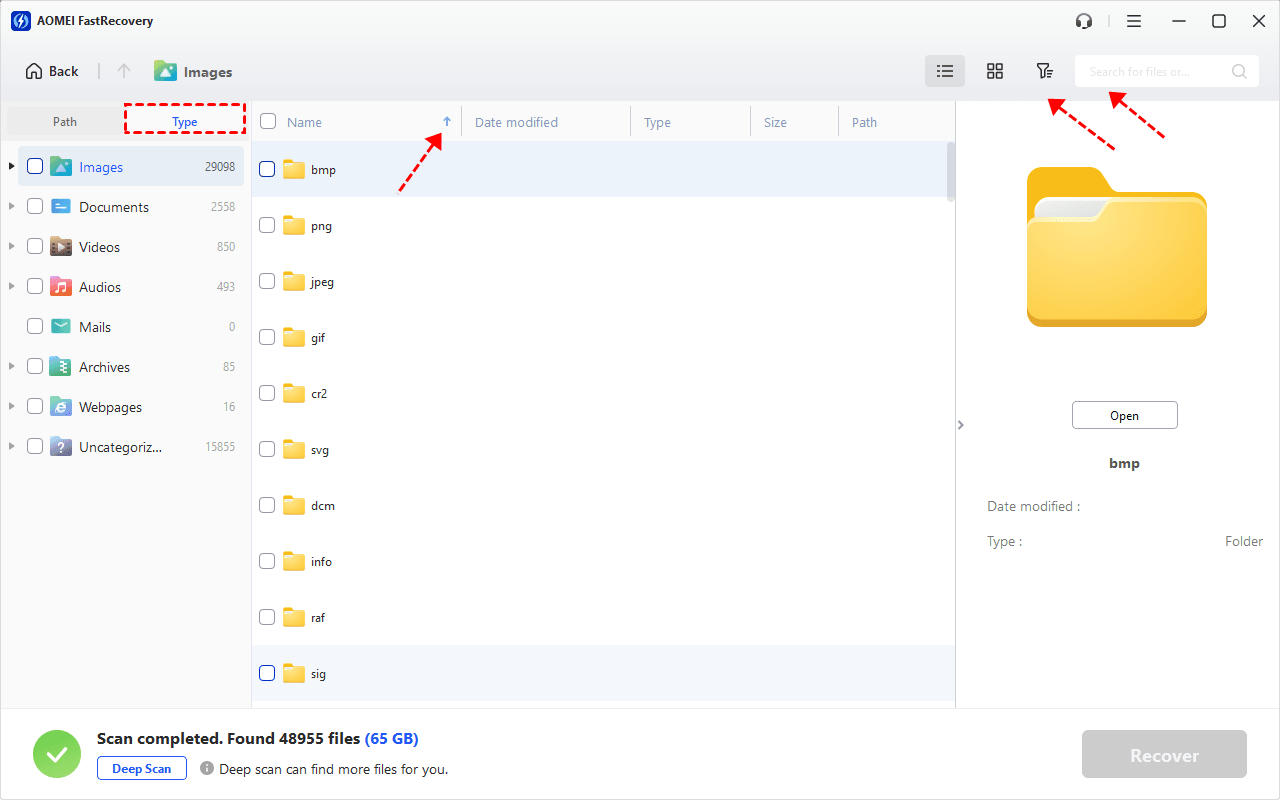
Step 4. Select the files you need and click Recover. Choose a folder on your computer or another physical drive as the destination. Don’t save recovered files back to the USB you’re scanning.
The free edition can recover up to 500MB. Recovery beyond that allowance requires an upgraded edition.
Method 2: Scan the USB with Windows File Recovery
👍 Best for: Users who want a free tool and the formatted USB drive has a drive letter.
Windows File Recovery provides a command-line option: it searches local storage for lost files and saves the results to another drive. In addition, Microsoft recommends Extensive mode for a formatted NTFS, FAT, or exFAT volume.
Step 1. Search and install Windows File Recovery from Microsoft Store, then open it. Then, in File Explorer, right-click the USB drive and select Properties to check its file system.
Step 2. For example, if the USB is E: and the destination is D:, enter:
winfr E: D: /extensive
Replace both letters with your actual drives. To limit the search to PDF and Word documents, use:
winfr E: D: /extensive /n *.pdf /n *.docx
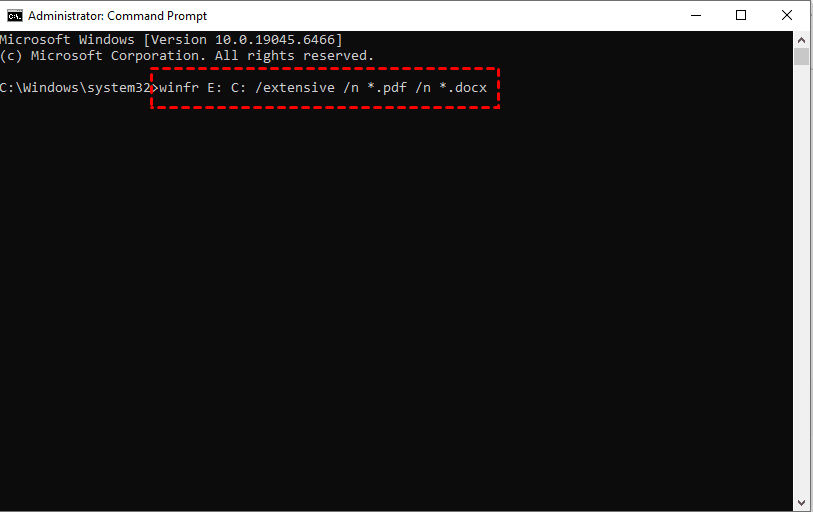
Enter Y when prompted. After recovery finishes, open the Recovery_ folder on the destination drive and check the files.
Method 3: Restore USB Files from File History Backup
👍 Best for: Retrieve File History backup if your files are there and backed up before formatting.
File History saves copies of your files so you can restore an earlier version and get them back. This method only works if the missing files were actually included in an existing File History backup.
Step 1. Connect the drive containing your File History backup. Then, open File Explorer, locate the original folder, right-click the folder and select Restore previous versions.
Step 2. In the Properties window, choose a version from before the files were lost. Expand Open and select Open in File History to check its contents.
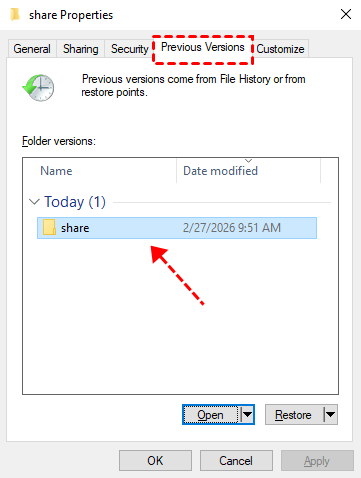
Step 3. If the required files are present, expand Restore and choose Restore to.... Save them to a folder on your PC or another drive.
If no suitable version is available, File History cannot retrieve those files. For a stable, readable USB, consider using AOMEI FastRecovery or Windows File Recovery.
Check Your Recovered Files Before Reusing the USB
Finding a filename in scan results isn’t the same as recovering a file. Open the saved copies from the destination drive:
- For documents and spreadsheets, check important pages, worksheets, and embedded content.
- For photos, open the full image and look for missing or damaged areas.
- For videos, play several sections, including near the end.
Keep the original USB untouched until you’ve checked the files you need. If a recovered file won’t open, some of its contents may be missing or overwritten; another scan cannot recreate bytes that no longer exist.
If the USB repeatedly disconnects, shows the wrong capacity, or has physical damage, stop scanning and seek professional assessment. A recovery service may address hardware problems, but it cannot reverse a completed overwrite.
FAQs
What if I don’t know whether it was a quick format?
Check the formatting tool and settings if you remember them. Elapsed time alone isn’t reliable proof. If the USB is stable and readable, a scan can show what files it finds, but an empty result does not establish which formatting option was used.
Can CMD recover files after formatting a USB?
Windows File Recovery can run from a command line. ATTRIB only changes attributes of existing files, while CHKDSK repairs file system errors. Neither reverses a completed format, and repair commands can modify the USB.
Conclusion
To recover data from a formatted flash drive, restore a suitable File History backup if it contains the missing files, or scan a readable USB for surviving data. For a visual recovery workflow, start with AOMEI FastRecovery and save the your files to another drive.
After recovery, you can reuse this USB drive, but you'll need to format it first. If you want to format USB without losing data, that guide walks you through it.

 as a preferred
source on Google
as a preferred
source on Google