How to Use TeraCopy on Windows Server
This article will show you how to use TeraCopy on Windows Server for file transfer, and present another easier way for disk-to-disk data migration.
By Jonna Updated on June 20, 2025
Overview of TeraCopy
TeraCopy is a lightweight yet powerful utility designed to copy and move files faster and more securely than the built-in Windows File Explorer. It is optimized to increase transfer speeds, especially for large files or batches, by using dynamic buffers and asynchronous copy to minimize seek times. This tool is especially helpful when dealing with unstable connections or large volumes of data. That's why many users choose to use TeraCopy on Windows Server for data migration. Some key features of TeraCopy on Windows 11/10 or Windows Servers include:
- Fast File Transfers: Uses dynamically adjusted buffers to reduce seek time.
- Pause and Resume: Pause transfers when needed and resume without restarting the process.
- Error Recovery: In case of copy errors, TeraCopy will try several times and then skip the bad file without terminating the entire transfer.
- File Verification: It verifies files after they are copied to ensure they're identical.
- Shell Integration: Seamlessly integrates into the Windows Explorer.
In the following, let’s take a look at how to run TeraCopy on Windows Server easily and get an alternative to TeraCopy for quick data transfer when TeraCopy is not working/copying/responding.
How to Use TeraCopy on Windows Server for File Transfer
Using TeraCopy on your Windows Server for data transfer from one drive to another is straightforward, but taking advantage of its advanced features requires some familiarity with the workflow. Here's how to set up and use it efficiently:
Step 1. Download and install TeraCopy on Windows Server. The software works with most versions, including Windows Server 2003, 2008, 2012, 2016, 2019, and 2022.
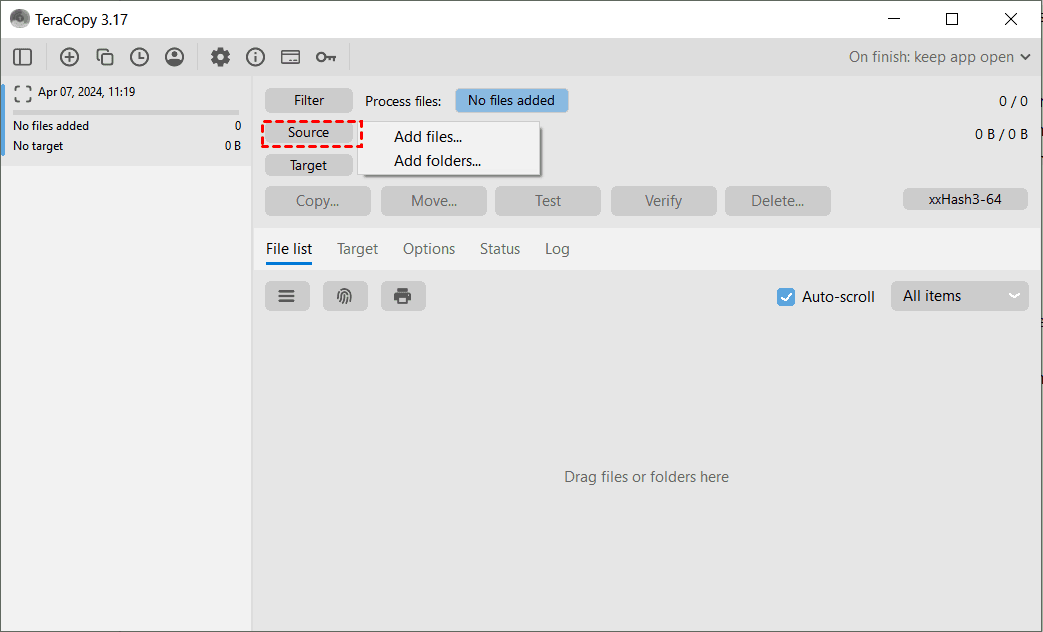
Step 2. Click on Source > Add files or Add folders to add the files or folders you wish to transfer. You can also drag and drop files directly into the TeraCopy window. This is especially helpful when transferring files from mapped drives or external storage.
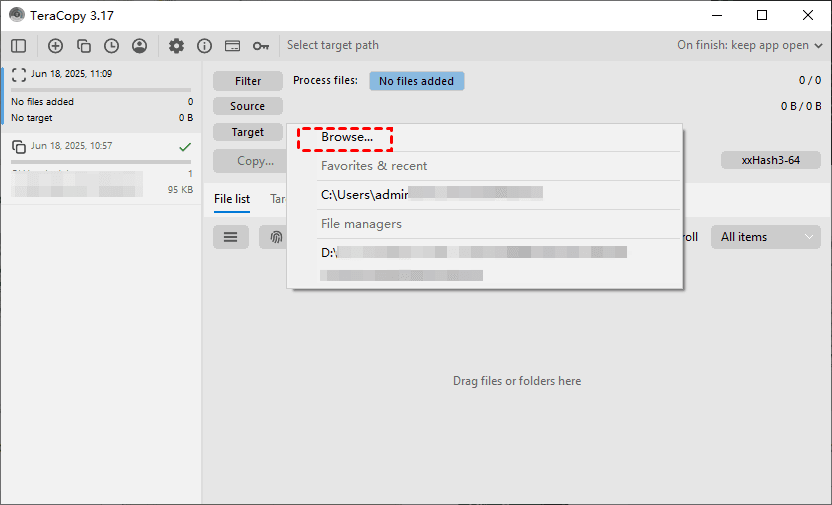
Step 3. Click on Target > Browse to select where the items should be migrated.
Step 4. Hit the Copy or Move button, depending on your need. TeraCopy will begin the transfer and display real-time progress with file speed and time remaining.
If TeraCopy encounters a corrupted or locked file, it will log the error and continue transferring the remaining items. You can later retry or skip failed transfers manually.
Step 5. Once done, you can click Verify to check data integrity if needed.
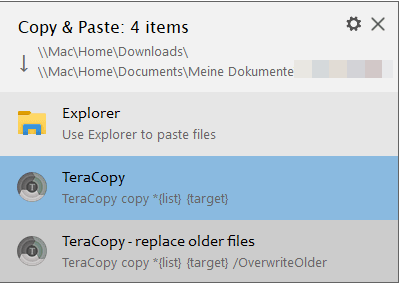
TeraCopy also integrates with Windows Server File Explorer, allowing you to use it directly from the context menu. You can go to the source files/folders > right-click on them and select Copy > navigate to the destination path > right-click on a blank space to select Paste > select TeraCopy in the popup list to start the data transfer.
Copy Files from One Drive to Another with Disk Cloning
Sometimes, file-by-file copying isn't the most efficient option - especially when you're transferring a large dataset. And if you need to migrate an entire system to another drive, a simple copying or moving operation may cause the system to be unable to function. In such cases, disk cloning might be your best solution. That's where the professional disk clone software, AOMEI Cloner, comes into play.
The Disk Clone function of AOMEI Cloner helps to duplicate an entire drive, including boot sectors and all other partitions. This method is perfect for:
- Migrating an entire Windows Server system drive to a new drive.
- Creating an exact replica of a hard disk for backup.
- Moving entire system environments to another drive without reinstalling or starting from scratch.

- One-Click Migration - Transfer all data from one drive to another with one click.
- System Clone - Migrate only the Windows operating system to a new drive, like cloning Windows Server 2016 to SSD, and make sure bootability.
- Partition Clone - Copy only a specific partition to another disk, instead of an entire hard drive.
- Bootable Media Creation - Create a bootable USB or CD/DVD to boot into the WinPE when your system is crashed.
- Wide Compatibility - Support both Windows Server operating systems (Windows Server 2025/2022/2019/2016/2012/2008/2003, etc) and Windows PC operating systems (Windows 11/10/8/7/Vista/XP).
Here is how to utilize the TeraCopy alternative, AOMEI Cloner for disk-to-disk data transfer:
- Note: If you want to copy to an external hard drive, like a new HDD or SSD, please connect it to your computer in advance.
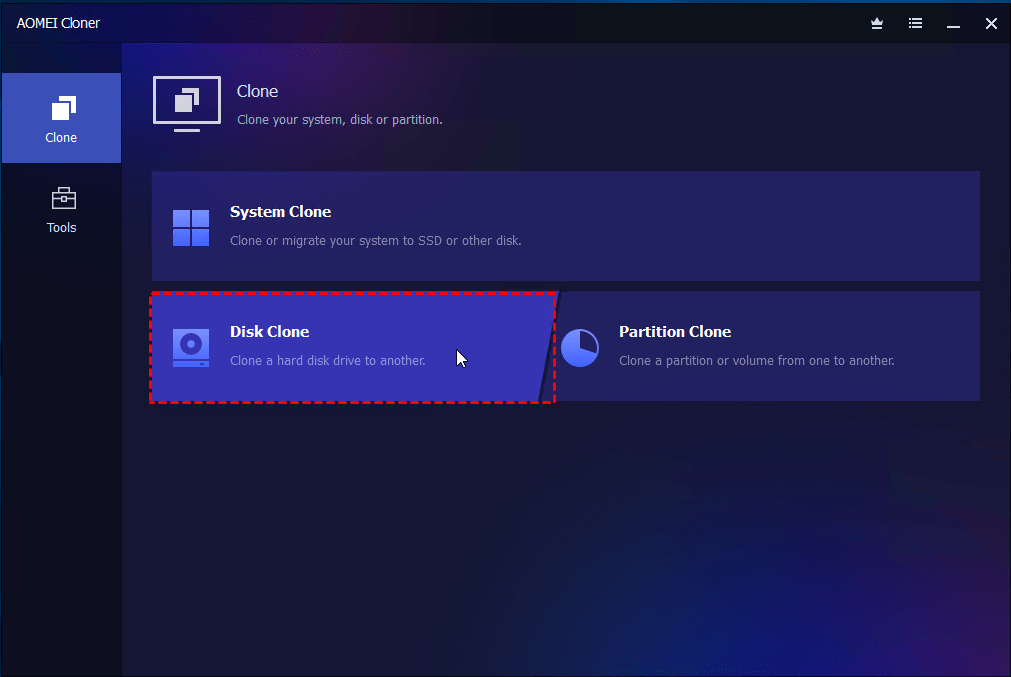
Step 1. Download and install AOMEI Cloner. Open this software, select Clone from the sidebar, and then choose the Disk Clone option for entire disk migration.
Step 2. Select your current disk that contains all files and system data you wish to transfer.
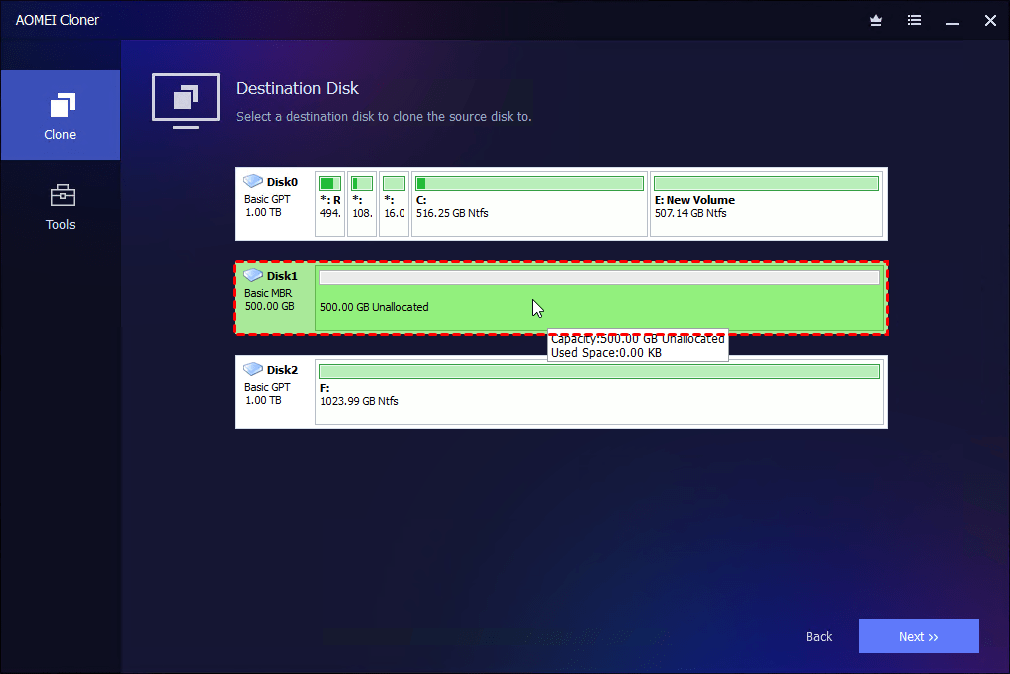
Step 3. Choose the new drive where everything will be transferred.
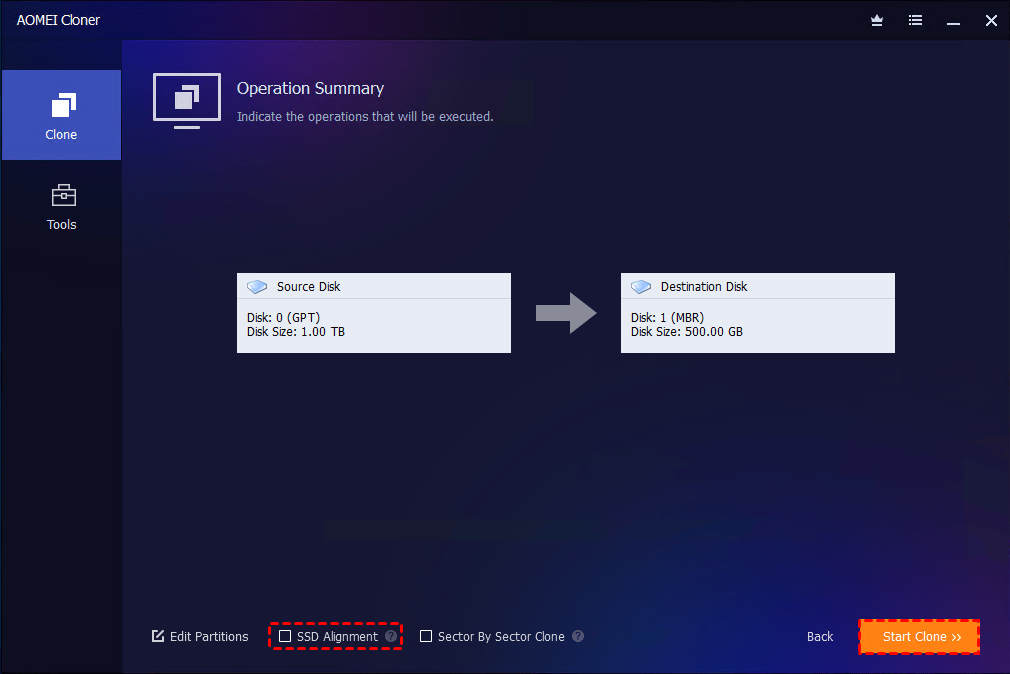
Step 4. If cloning to an SSD, check the SSD Alignment option to enhance speed and lifespan. Finally, click on Start Clone.
- Notes: The AOMEI Cloner offers two cloning methods - Intelligent Clone (default) and Sector By Sector Clone.
- The former clones only the used space, thus it allows you to clone from a larger drive to a smaller drive.
- The latter clones all sectors on the source disk, even if it is blank or it's logically bad, to the destination disk. So it requires that the destination drive is equal to or larger than the source drive.
FAQs about TeraCopy on Windows Server
#1. Is TeraCopy faster than Windows copy?
Yes, in most cases. TeraCopy optimizes the copy process using dynamically adjusted buffers and asynchronous copying to speed up file transfers, especially with large files.
#2. Why is TeraCopy so slow?
Sometimes, TeraCopy can slow down or TeraCopy not working may happen due to the following reasons:
- File verification is turned on.
- The disk is heavily fragmented or slow.
- You're copying over a weak network.
- Antivirus software interferes with the transfer.
- Network drives are unstable or slow.
#3. Does TeraCopy delete files?
No. TeraCopy doesn't delete files during copy operations unless you explicitly choose the Move function. Even then, it only deletes the original file after successful transfer to ensure safety.
Summary
In a word, running TeraCopy on Windows Server is simple and convenient for file transferring. While TeraCopy is great for transferring folders and individual files, it’s not suitable for entire disk cloning. For that, a tool like AOMEI Cloner steps in perfectly.
Whether you're migrating the entire system drive to a new HDD/SSD or transferring only OS to another drive, AOMEI Cloner can help you perform a bootable clone without losing data.