
How to Run Samsung Data Migration from a Bootable USB
This walkthrough explains how to perform Samsung data migration from a bootable USB. AOMEI Cloner, one of the best cloning utilities, can simplify the task for you.
By Lily Updated on May 9, 2025
Can I run Samsung Data Migration from a bootable USB?
Upgrading to a new Samsung SSD should be simple — but if your current system won’t boot or you want a safer, offline migration, you might run into a common question: Can I run Samsung Data Migration from a bootable USB?
Officially, no — Samsung Data Migration software is designed to run within a fully booted Windows environment, not from a bootable USB or recovery environment like Windows PE. So, what can you do instead? Please keep reading.
Best cloning tool to run Samsung SSD clone from a USB
Since Samsung Data Migration not working from a bootable USB, the best solution is to use a powerful third-party cloning tool. AOMEI Cloner is our top recommendation.

- Bootable USB Support: It allows you to create a full WinPE bootable USB drive easily, so you can clone your system even if Windows won't start.
- Full Disk and Partition Cloning: You can clone your entire hard drive or specific partitions — perfect for flexible upgrades.
- SSD Optimization: It automatically aligns partitions for enhanced SSD performance and extended lifespan.
- Universal Compatibility: It works flawlessly with all SSD brands, including Samsung, Crucial, WD, Kingston, etc.
Don’t hesitate to download AOMEI Cloner!
How to clone HDD to Samsung SSD via a bootable USB
If you want to migrate your old HDD to a new Samsung SSD without booting into Windows or your computer just fails to boot, AOMEI Cloner lets you clone directly from a bootable USB. Here’s exactly how to do it:
What You Need:
▶Samsung SSD (large enough to hold all data from HDD)
▶USB flash drive (8GB or larger recommended)
▶USB-to-SATA adapter (for connecting SATA SSD) or NVMe enclosure (for connecting NVMe SSD)
Step 1: Prepare for Cloning
1. Connect the Samsung SSD to your computer via the USB-to-SATA adapter or the NVMe enclosure you prepared.
2. Insert the USB drive to your computer.
3. Backup files on your Samsung SSD and USB drive. Both of them will be overwritten during the process.
Step 2: Create a Bootable USB Drive
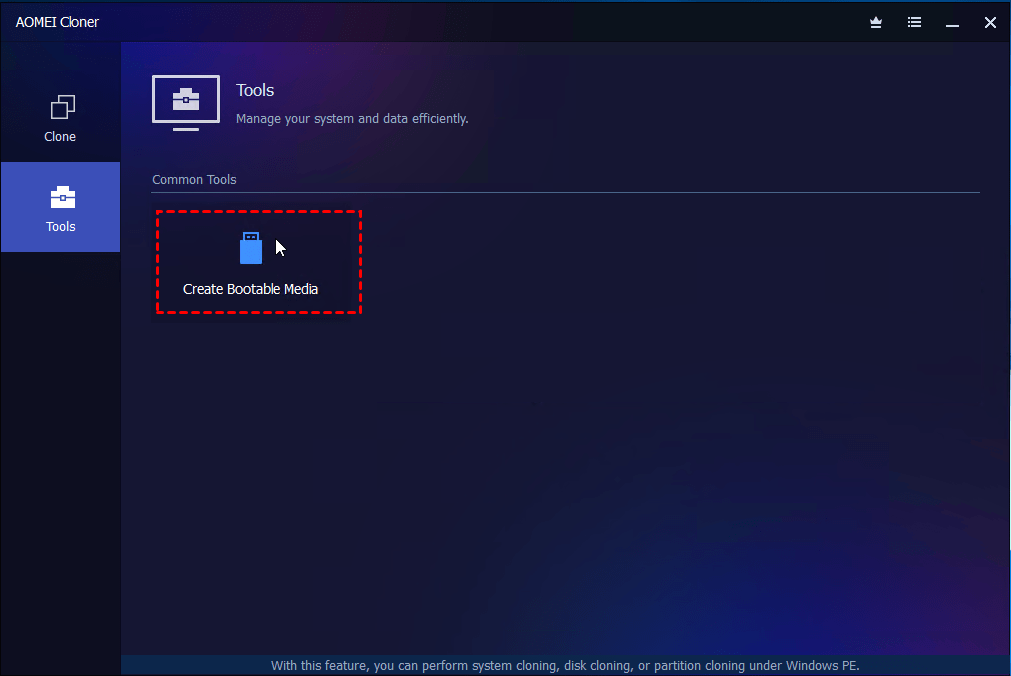
1. Install and launch AOMEI Cloner. Then click Tools and select Create Bootable Media.
Note: If your computer fails to boot now, you can install AOMEI Cloner on another working computer to create a bootable USB drive.
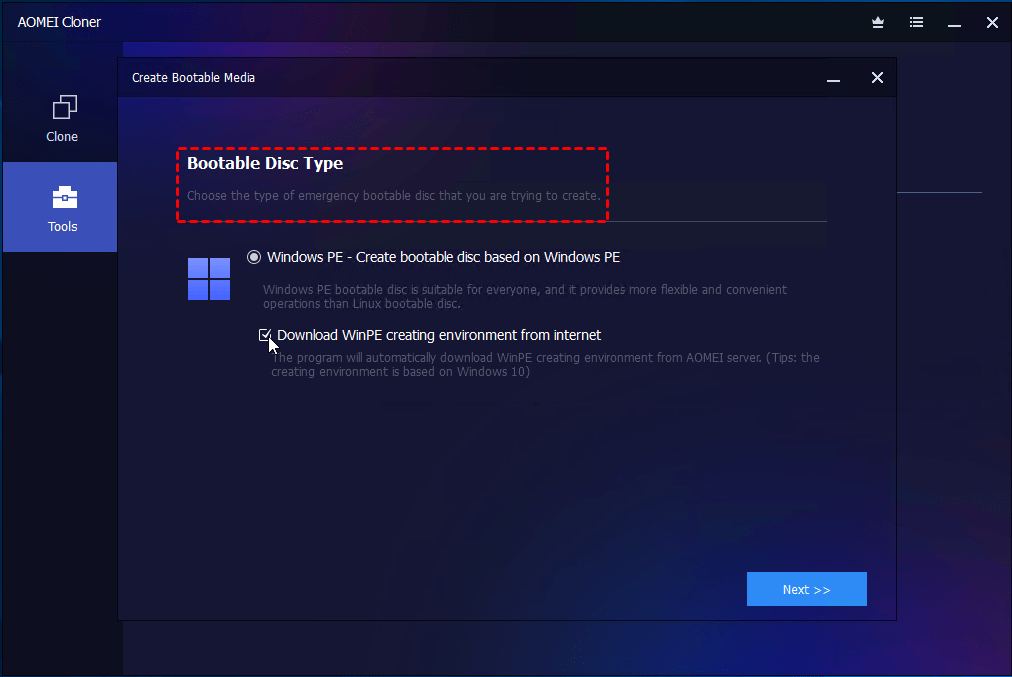
2. Choose Windows PE as the bootable media type and click Next.
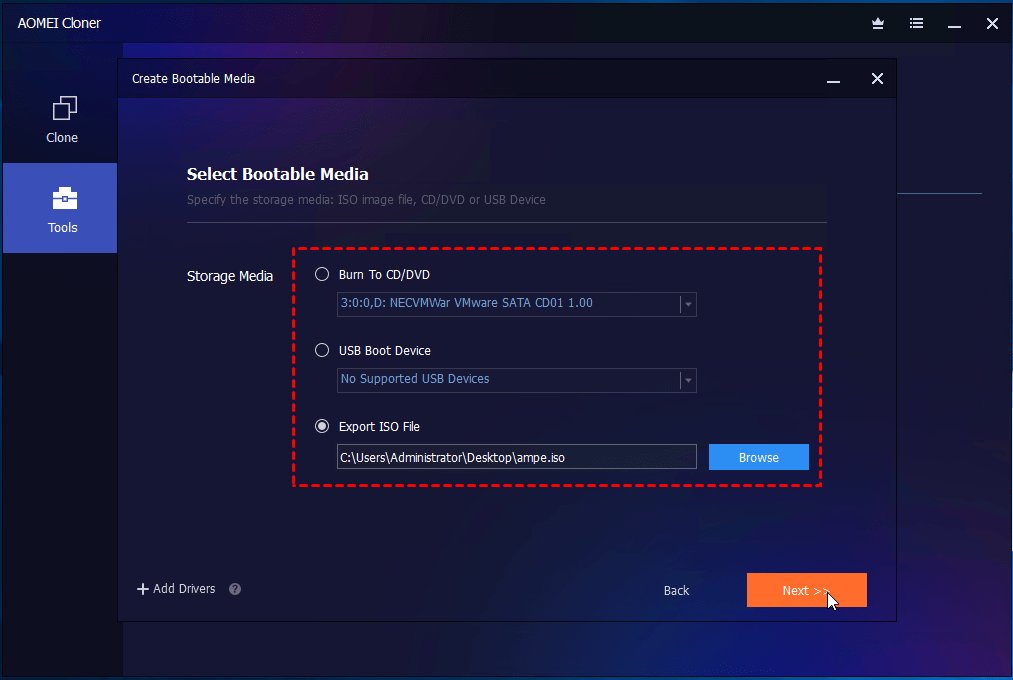
3. Select USB Boot Device and click Next.
4. The software will prompt you that the USB drive will be formatted. Click Yes to begin bootable media creation.
Step 3: Boot From the USB Drive
1. Restart your computer and enter the BIOS (usually by pressing Del, F2, or F12 at startup).
2. Set the USB drive as the first boot device.
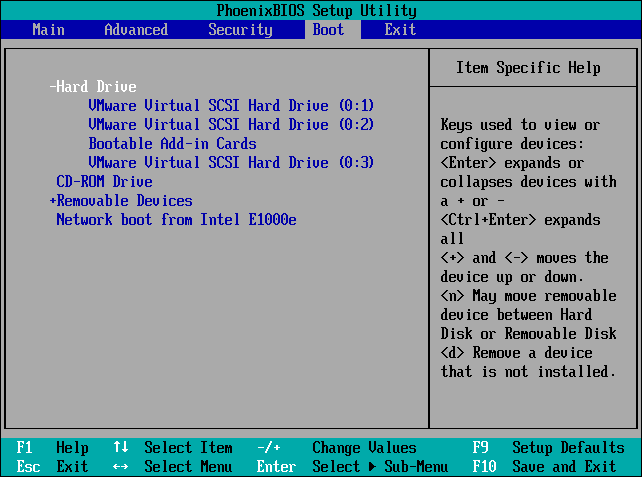
3. Press F10 to save changes and reboot.
Step 4: Clone Your HDD to the Samsung SSD
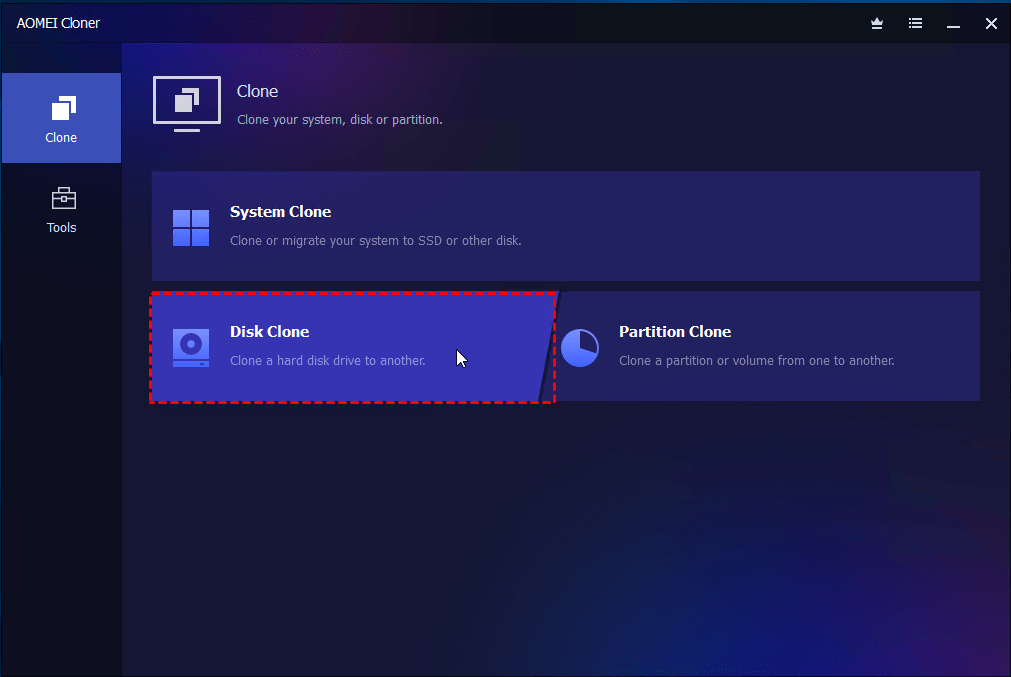
1. AOMEI Cloner will load automatically after booting. In the main interface, select Clone > Disk Clone.
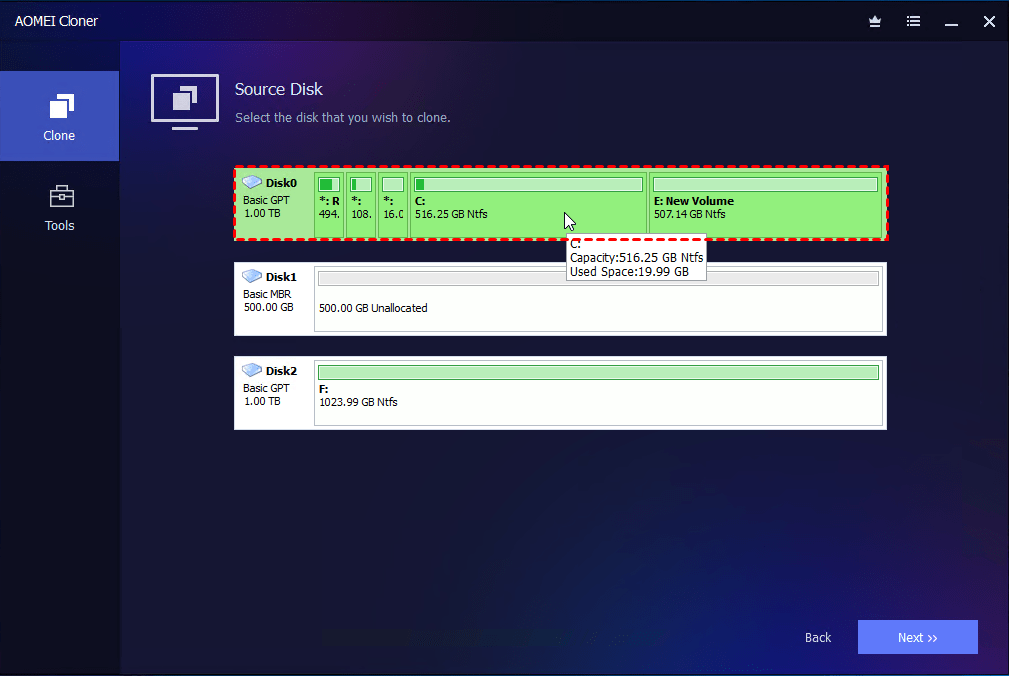
2. Choose your source disk (the old HDD) and your target disk (the new Samsung SSD) respectively.
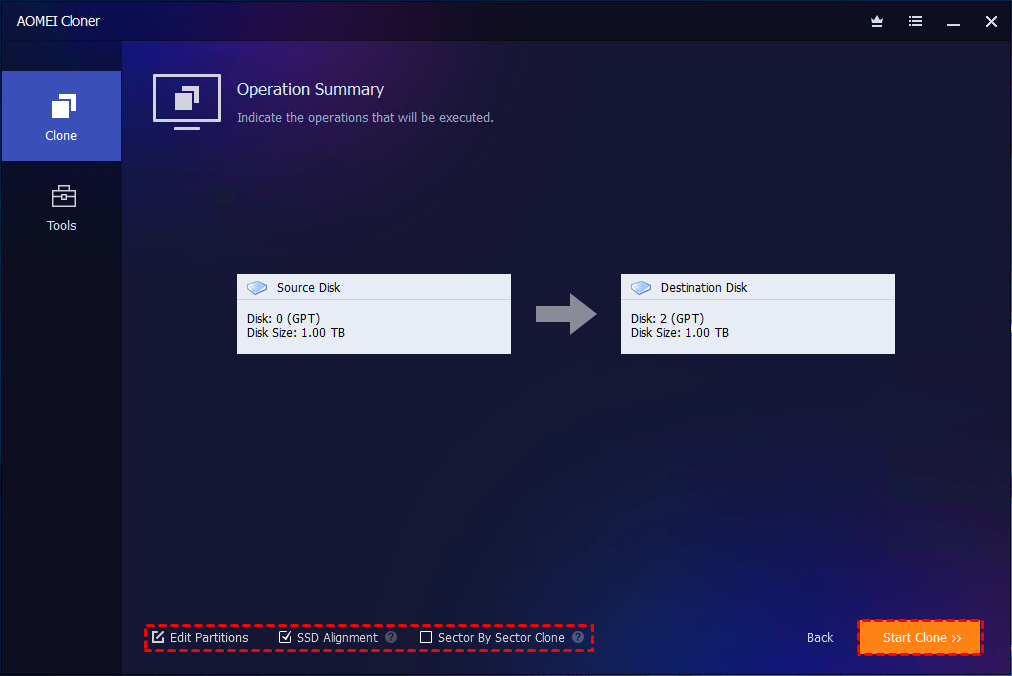
3. Check the option SSD Alignment to optimize Samsung SSD performance and extend its lifespan. Click Start Clone and let the process run. Depending on the size of your drive, it may take a while.
Step 5: Boot from Your New Samsung SSD
1. Once cloning is complete, shut down the computer and disconnect the bootable USB drive.
2. Choose one way to boot from the cloned Samsung SSD according to your situation.
👉Situation 1: You are replacing SATA HDD
- For a desktop, disconnect the old HDD and connect the Samsung SSD to the same SATA cable and power cable. For a laptop, remove the old HDD and install the Samsung SSD in the same hard drive bay.

- Power on your computer — you should now boot from the SSD with all your files and settings intact!
👉Situation 2: You are adding an M.2 SSD
- Install the M.2 SSD into the motherboard’s M.2 slot.
- Power on your computer and press F2, F12, DEL, or ESC at startup to enter BIOS/UEFI.
- Go to Boot Priority and select the Samsung M.2 SSD as the first boot device.
- Press F10 to save and exit. Your computer should boot successfully from the cloned SSD.
Supplement: Is creating a bootable USB worth it?
Absolutely — creating a bootable USB for Samsung data migration is worth the effort, especially if your system isn’t stable or won’t boot into Windows.
Benefits of Using a Bootable USB
- Bypass System Errors: You can clone your drive even if Windows won’t start or is experiencing major issues.
- Safer Data Migration: Running outside the OS avoids background programs interfering with the cloning process.
- Flexibility: You can upgrade or recover multiple computers with a single bootable USB.
Are There Any Downsides?
While creating a bootable USB is very useful, it does require a few extra steps — like preparing the bootable media and adjusting BIOS settings. However, with tools like AOMEI Cloner, the process is simple enough even for beginners.
Conclusion
While Samsung’s official software doesn’t support direct USB booting, you can perform Samsung data migration from a bootable USB using a powerful cloning tool – AOMEI Cloner. It lets you clone your old HDD to a new Samsung SSD without booting into Windows quickly and safely. If you want to move only OS to the Samsung SSD, you can make use of the System Clone feature. Don’t hesitate to try it out!
A reliable disk clone software can help you easily clone system, disk, partition with secure boot.
