
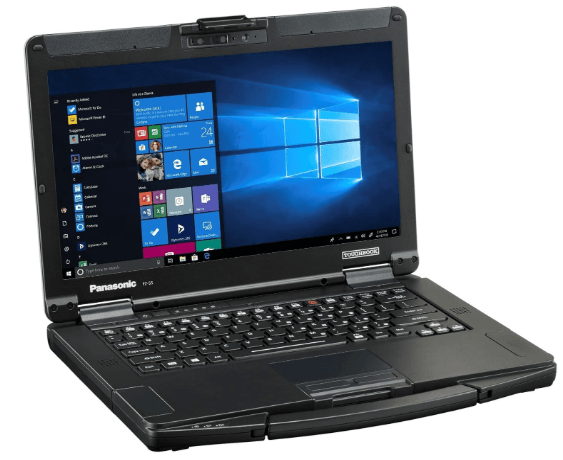
Panasonic Toughbook SSD Upgrade: Guide for a Faster Machine
Upgrading the SSD in your Panasonic Toughbook can breathe new life into your rugged device. This guide walks you through everything to perform the upgrade and optimize performance.
By Lily Updated on July 11, 2025
Is Your Panasonic Toughbook Upgradeable?
Toughbooks are known for their rugged design and long life cycles, but not all models have the same internal layout or storage support. Before diving into a Panasonic Toughbook SSD upgrade, it's essential to determine whether your specific model supports an SSD replacement or upgrade.
Each model has different upgrade potential:
- Older models like the CF-19 Mk1 to Mk5 typically use 2.5" SATA HDDs, which can be replaced with 2.5" SATA SSDs.
- Mid-range models such as the CF-31 or CF-53 also use 2.5" SATA interfaces but may have tighter internal layouts.
- Newer models like the CF-54 Mk3 or later often support M.2 SATA or even M.2 NVMe SSDs, depending on the configuration.
Also, keep in mind BIOS limitations—some older Toughbooks might not recognize high-capacity SSDs (over 1TB) or NVMe drives without firmware updates.
What You Need for Panasonic Toughbook SSD Upgrade
Before cracking open your rugged laptop, make sure you have the right tools, parts, and preparation to ensure a smooth upgrade. Here’s a checklist of what you’ll need to get started:
1. New SSD
Choose the correct type:
- 2.5" SATA SSD (e.g., Samsung 870 EVO or Crucial MX500) for most CF-19, CF-31, CF-53 models.
- M.2 SATA or NVMe SSD (e.g., WD Blue SN570 or Samsung 970 EVO Plus) for newer models like CF-54.
2. Phillips-head screwdriver: Most Toughbook models use standard screws, but some models have tamper-resistant ones.
3. Plastic pry tool: Helpful for opening the casing without scratching the surface.
4. USB enclosure or SATA-to-USB cable: Useful for cloning your existing drive.
5. Download disk clone software
Specialized disk clone software – AOMEI Cloner is one of the most user-friendly and powerful disk cloning tools available for all Windows systems.

- Disk Clone: Copies an entire hard drive (including OS, applications, and files) to another drive.
- System & Partition Clone: Migrates OS to a new drive or transfers only selected partitions.
- SSD Optimization: Automatically aligns partitions for SSDs, enhancing performance and longevity.
- Bootable Clone Support: Your Toughbook will boot from the new SSD without a hitch, thanks to AOMEI’s advanced handling of boot partitions and system files.
- Wide Compatibility: Works flawlessly with both SATA and NVMe SSDs—ideal for Toughbook models like CF-19, CF-31, and CF-54.
Download AOMEI Cloner now to try it out!
How to Upgrade SSD in Panasonic Toughbook without Data Loss
Follow this step-by-step guide to do Panasonic CF-19 SSD upgrade without any data loss.
Note: The steps also apply to Panasonic Toughbook CF-53 SSD upgrade and Panasonic CF-54 SSD upgrade. Just make sure the target SSD is compatible with your model.
Step 1: Connect the New SSD to Your Toughbook
Use a USB enclosure or SATA-to-USB cable to connect the new SSD to your Toughbook as an external drive. Once connected, your system should recognize the drive in File Explorer or Disk Management.
Step 2: Clone Your Existing Drive to the New SSD
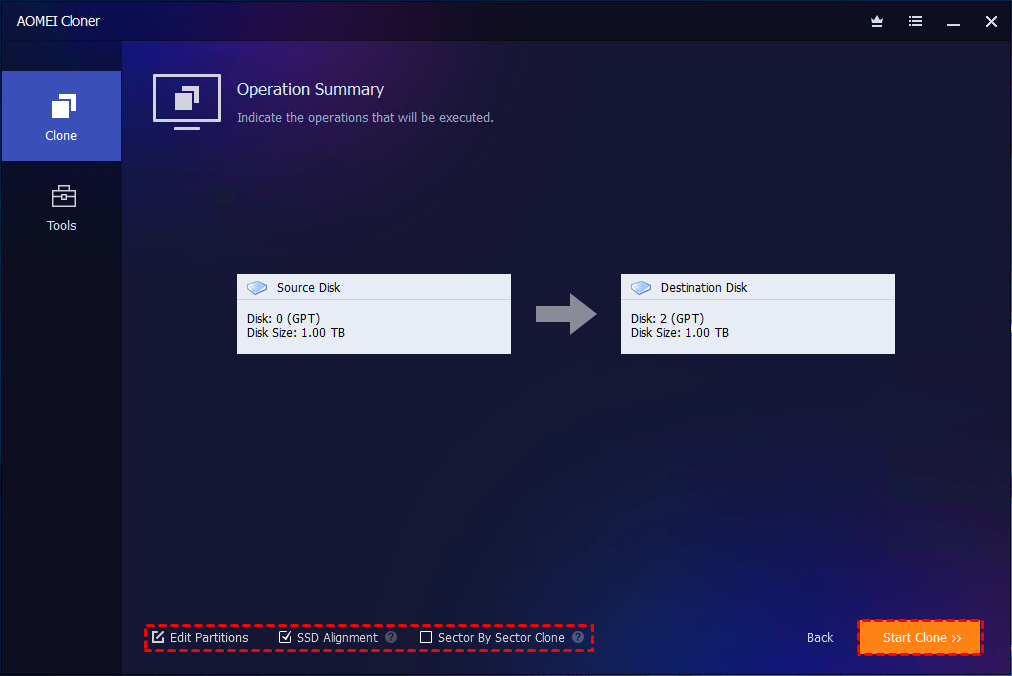
1. Launch AOMEI Cloner and go to Clone > Disk Clone.
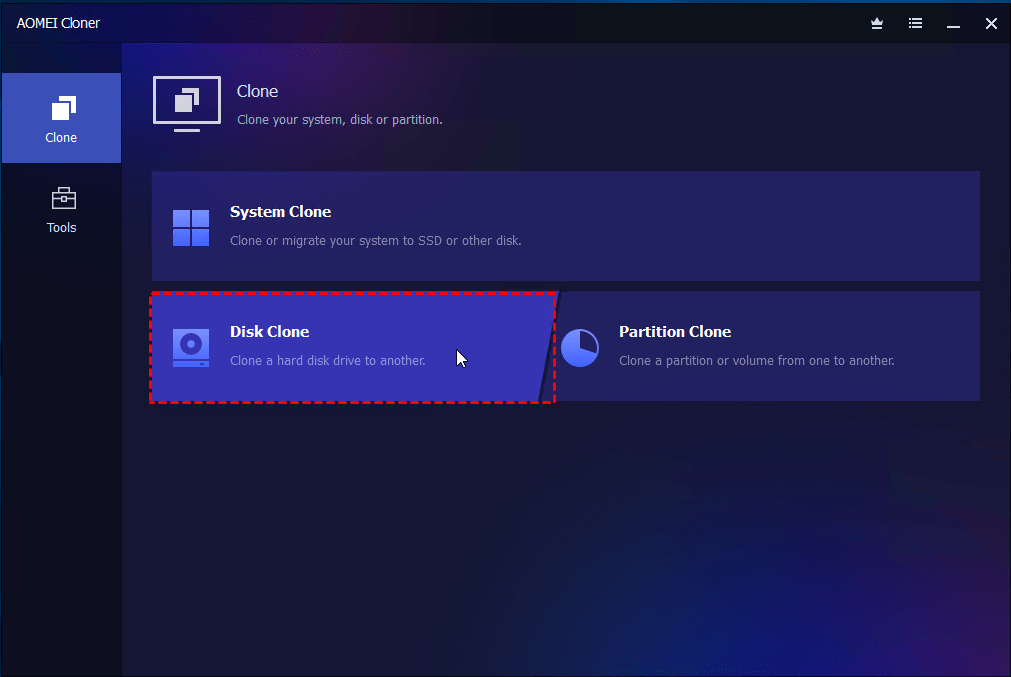
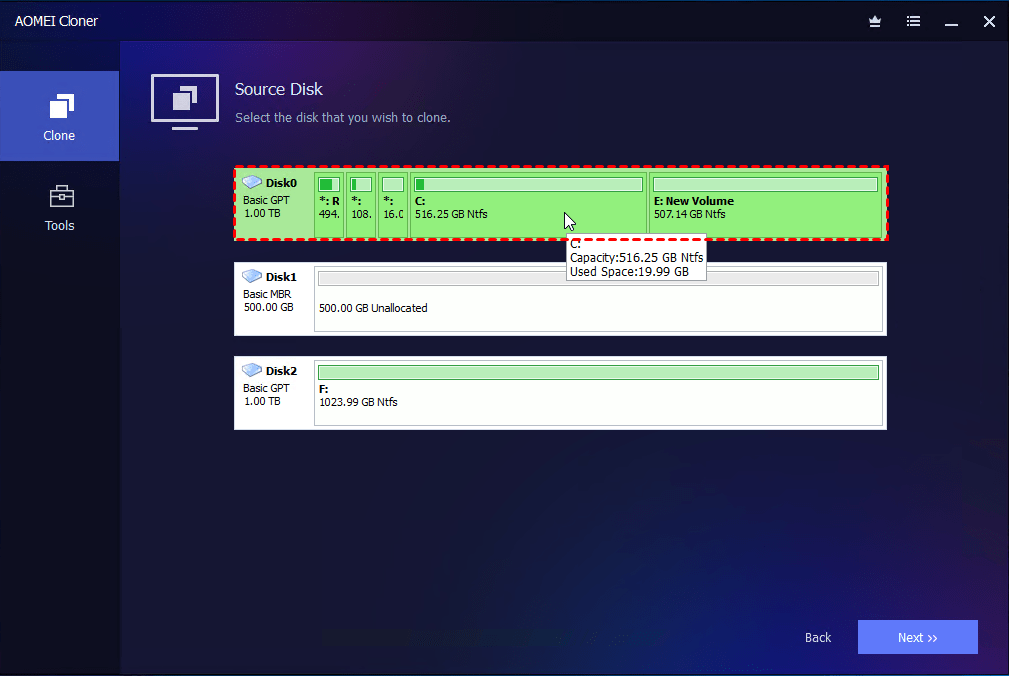
2. Select your current system drive as the source disk and choose the new SSD as the destination disk.
3. Configure cloning options based on your needs.
- SSD Alignment: Enable this to optimize SSD performance and lifespan.
- Sector-by-Sector Clone: Only use this if you need an exact clone, including deleted or empty sectors.
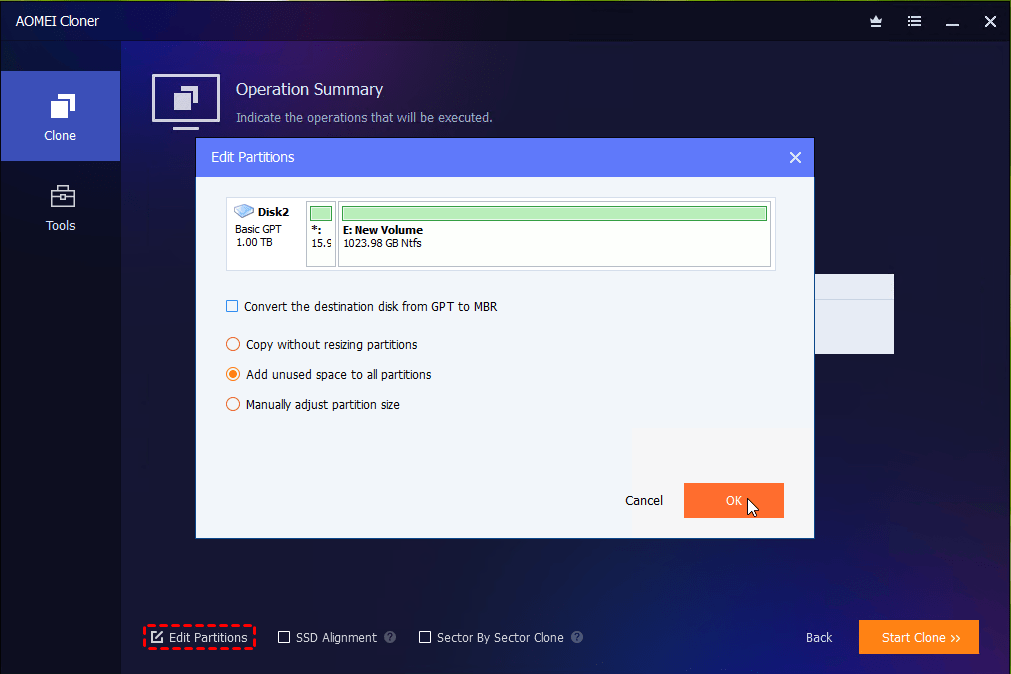
- Edit Partitions: Adjust partition sizes to fit your SSD—this is especially helpful if your new drive is larger.
4. Click Start Clone and wait for the process to complete.
Step 3: Replace the Old Drive with the New SSD
Once cloning is done:
1. Shut down your Toughbook and disconnect all power sources.
2. Open the SSD/HDD compartment (typically located under a service panel).
3. Carefully remove the old drive and insert the new SSD in its place.
4. Reassemble your device and ensure all screws are securely fastened.
Step 4: Boot from the New SSD
1. Power on your Toughbook and enter the BIOS/UEFI (usually by pressing F2 or DEL during startup).
2. Make sure the new SSD is detected and set as the primary boot device.
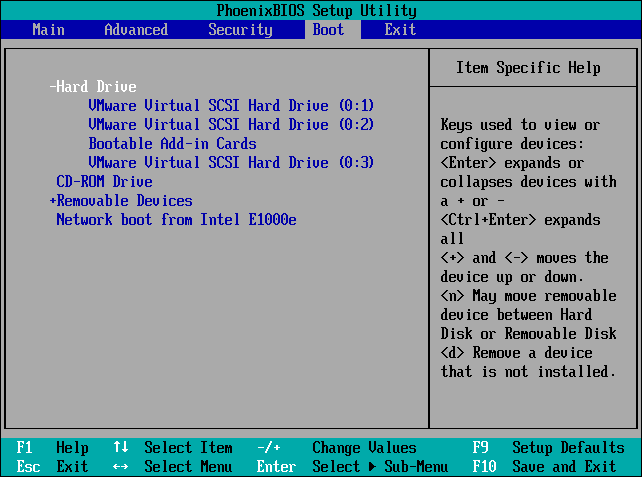
3. Save and exit BIOS. If everything was cloned correctly, your Toughbook should boot up exactly as before—just faster and more responsive.
Post-Upgrade Tips and Performance Optimization
You’ve successfully completed your Panasonic Toughbook SSD upgrade—great job! Now it’s time to fine-tune your system to make the most of your new SSD.
1. Verify SSD Is Recognized and Working Properly
After booting from your new SSD:
- Open File Explorer and check if the drive appears as expected.
- Go to Disk Management (right-click Start > Disk Management) to confirm the correct capacity and partition layout.
- Use tools like CrystalDiskInfo to check SSD health and SMART data.
2. Install or Update Drivers
If you cloned your old drive, most drivers should already be in place—but it’s still a good idea to check for updates.
- Press Win + X and select Device Manager.
- Look for any devices with a yellow exclamation mark (⚠️), indicating a driver issue.
- Right-click the device and select Update driver.
3. Enable TRIM Support
TRIM helps your SSD manage unused data blocks efficiently, keeping it fast over time.
- Open Command Prompt as Administrator and run fsutil behavior query DisableDeleteNotify.
- If the result is 0, TRIM is enabled.
- If it's 1, run fsutil behavior set DisableDeleteNotify 0.
Conclusion
Whether you’re working with a CF-19, CF-31, or CF-54, a Panasonic Toughbook SSD upgrade is a worthwhile investment that extends the life and power of your trusted machine. By using reliable cloning software like AOMEI Cloner, you can complete the upgrade process without losing data or apps. What’s more, it can help you with Samsung clone M.2 to M.2 SSD. Why not give it a shot?
