
How to Clone PCIe/NVMe SSD to Larger SSD [One or Two Slots]
This article describes how to clone PCIe/NVMe SSD to larger SSD using the best SSD cloning software, even with one slot, covering preparations, stepwise guide, and potential issues that may arise during the process.
By Ivy Updated on March 18, 2026
Cloning a PCIe (NVMe) SSD means creating an exact copy of your current drive, including Windows, EFI bootloader, recovery, apps, program files, settings, and personal files, then transferring it to another SSD.
For most users, cloning is the simplest and safest way to upgrade to a new, larger PCIe or NVMe SSD, replace a failing or slow SSD, move Windows to faster NVMe SSD, or simply create backup copies. You'll end up with a faster, larger drive, exactly the same as the old one, without reinstalling Windows, drivers, or applications.

What Do You Need?
Before starting, you must make sure your hardware actually supports a PCIe/NVMe SSD, with enough PCIe lanes (usually x4), and prepare necessary tools.Some motherboards share lanes with SATA or PCIe slots, reducing SSD performance.
#1: Check Motherboard and PCIe Slot Compatibility
✔ Check your motherboard manual or manufacturer’s website and confirm the M.2 slot supports PCIe/NVMe, not just SATA. Look for terms like:
- M.2 PCIe x4
- NVMe supported
- PCIe Gen3/Gen4/Gen5
- Step 2. Check PCIe Lane Allocation
✔ Check for a second slot. Usually, most laptops only have one slot, requiring you to prepare a PCIe M.2 adapter, while Desktops feature multiple M.2 slots that connect directly to the motherboard.
#2: Get a new, larger PCIe SSD.
Cloning requires the new SSD drive to be large enough for all data. Be sure to check the used space of the current drive in File Explorer, usually under This PC, and then get a new, larger SSD. If not, try methods in the C drive full to free up space on the old drive.
#3: Hardware for connecting the second SSD
- Prepare a PCIe M.2 adapter or enclosure if you are using a laptop.
- A screwdriver. Most M.2 SSDs and laptop backplates require a Phillips #0/#00 screwdriver.
- Thermal pad (optional but recommended for NVMe drives).
#4: Backup files to external hard drive. Before making major change, it's necessary to backup files in order to avoid data loss.
#5: Best PCIe SSD Cloner Free Download
AOMEI Cloner is one of the best SSD cloning software that can clone PCIe SSD in Windows 11, 10, 8/8.1, and 7, with just a few steps. It offers 3 cloning solutions alongside a comprehensive suite of backup features, making the process faster and less error-prone.

- 3 Cloning Solutions: System Clone, Disk Clone, Partition Clone. Select as needed.
- Full Migration: Include all data, OS, and boot-related partitions, making cloned drive bootable.
- Intelligent Clone: Clone only the used sectors, skipping bad sectors for faster, smoother cloning.
- SSD Alignment: Optimize SSD to achieve top-tier performance and extend lifespan.
- Edit Partitions: Clone and resize partitions of a new, larger SSD and convert MBR to GPT (with different partition styles).
- SSD Compatibility: Support all branded PCIe SSDs, including Intenso, Samsung, WD, SanDisk, Crucial, etc., and other SSD types like NVMe, M.2, SATA, or IDE.
How to Clone PCIe SSD to Larger SSD
We’ll show you how to clone PCIe SSD using the best PCIe duplicator - AOMEI Cloner, even with only one slot. The key difference is how to connect the new SSD, just select as needed.
Step 1. Connect or Install the New SSD
Before cloning PCIe SSD, you need both SSDs connected at the same time, either internally or externally.
👉 For Desktop with TWO slots: Install NVMe SSD internally
1. Power off your PC completely. Unplug the power cable and press the Power button (5-10s) to discharge remaining power.
2. Open the side panel of the case. Look for the M.2 NVMe slot, usually labeled as: M.2_1, M.2_2, PCIe x4 M.2, NVMe support.
3. Remove the M.2 screw from the standoff and insert the new NVMe SSD at about a 30 or 45 degree angle.
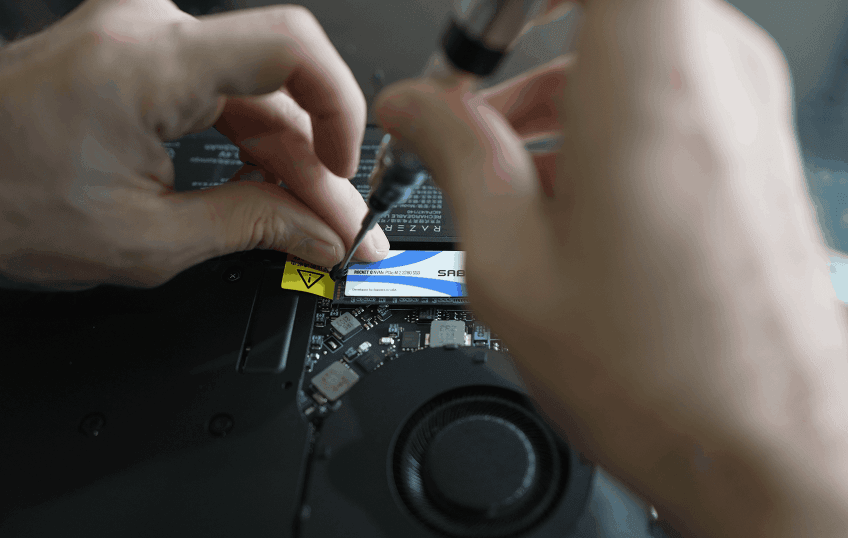
4. Gently push it down and secure it with the screw. Close the case and reconnect the power cable.
👉 For Laptops or Desktops with Only One slot: Connect the new SSD externally
1. Open the PCIe M.2 adapter. Insert the new SSD into the M.2 slot.
2. Connect the adapter to your laptop using the USB port.
3. Wait for Windows to detect the drive. Try another USB port if the drive is not recognized.
Step 2: Initialize the New SSD for Cloning
After connecting, be sure to initialize the SSD first. Otherwise, you cannot use it for cloning.
1. Press Win + R, type diskmgmt.msc, and press Enter.
2. In Disk Management, find the new SSD, showing as Not Initialized. Right-click it and select Initialize Disk.
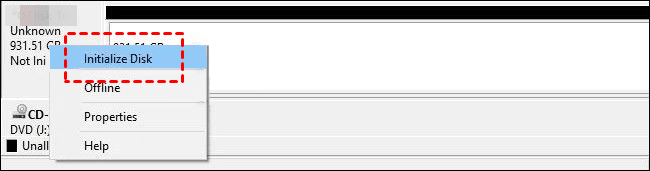
3. Choose GPT and click OK. It’s recommended for NVMe drives and Windows 10/11.
Step 3: Clone PCIe SSD to Larger SSD in 3 Steps
After preparing the new SSD, it’s time to clone PCIe SSD to larger SSD in Windows 10 or 11, which is fully compatible with PCIe SSD.
1. Open AOMEI Cloner after installing, and click Clone > Disk Clone.
2. Then, select the current SSD and new SSD, respectively. Click Next after each selection.
3. Optional to set up the following options and click Start Clone to clone PCIe NVMe SSD.
- Edit Partitions: The Add unused space to all partitions is checked to auto-resize the larger drive. Optionally, click this to confirm and convert MBR to GPT if the new SSD is initialized as MBR instead of GPT.
- SSD Alignment: Accelerate the reading and writing speed of PCIe SSD.
- Sector by Sector Clone: clones all sectors and takes longer. Instead, this software uses intelligent cloning mode to copy only the used sectors and take care of the process.
Whether the target SSD is larger or smaller, you can easily clone PCIe SSD in Windows 11, 10, 8/8.1, and 7. So you don’t need to worry about the cloned SSD won’t boot issues.
Step 4: Verify the Cloned SSD Is Bootable
After cloning, you must make sure Windows can actually boot from the new NVMe SSD - directly change the boot order or swap the two SSDs first.
#1: The New SSD Is Installed Internally
1. Restart the PC, and press F2, Del, F12, Esc, etc., varies by brand access the BIOS/UEFI settings window.
2. Go to the Boot tab, find UEFI/BIOS Boot Mode, and set it to UEFI.
3. Looking for Boot Order, Boot Priority, Windows Boot Manager, or similar, and set your new SSD at the top.
4. At last, press F10 to save changes and restart.
#2: The New SSD Is Connected Externally
Unlike SSDs installed internally, you must first remove the new SSD from the adapter. Then, unscrew the screws securing the laptop and the current SSD to take it out.
Physically swap the two SSDs and reassemble your computer. Afterward, change the boot order in the UEFI/BIOS settings and reboot.
Common Issues in Cloning PCIe SSD
Here are 4 common cloning issues while cloning PCIe SSDs and how to fix them.
NVMe SSD Not Showing Up
If the new NVMe SSD does not appear in Disk Management, you can’t select it, let alone clone PCIe NVMe SSD. The possible cause may be missing NVMe drivers, lack of NVMe support, disabled PCIe lane sharing, NVMe vs. SATA M.2 mismatch, etc.
👉 How to fix it:
- #1: Initialize NVMe SSD as GPT in Disk Management.
- #2: Update chipset and NVMe drivers from the motherboard or manufacturer.
- #3: Enable M.2 slot, PCIe mode (Auto or PCIe, not SATA)in the BIOS/UEFI settings.
- #4: Disable CSM (Compatibility Support Module) for NVMe support.
- #5: Disconnect SATA drives if your motherboard shares lanes with M.2 slots.
- #6: Test your new SSD in a different PC or enclosure.
Cloned SSD Won’t Boot
This is the most common issue after cloning, typically caused by incorrect boot configuration, including incorrect boot order, wrong boot mode, missing ESP, missing bootloader, etc.
👉 How to fix it:
- #1: Set boot mode to UEFI, not Legacy/CSM.
- #2: Ensure the new NVMe SSD is listed as the first boot device.
- #3: Repair the bootloader using bootrec in the Windows recovery environment.
- - bootrec /fixboot
- - bootrec /scanos
- - bootrec /rebuildbcd
- #4: Run Startup Repair if Windows still doesn’t boot.
- #5: Re-clone M.2 NVMe SSD with Sector by Sector Clone mode to be sure the EFI partition is included.
Cloning Frozen or Extremely Slow
Slow or stuck cloning usually indicates performance problems or errors on the source/destination drive. The possible causes are bad sectors, failing SSD, overheating, USB 2.0 speeds, heavy background tasks, etc.
👉 How to fix it:
- #1: Check SSD health using CrystalDiskInfo.
- #2: Improve cooling: use airflow, heatsink, or let the drive cool down.
- #3: Be sure you are connected using USB 3.0/3.1/3.2.
- #4: Close all background apps before cloning.
Partition Size Errors
This happens when the new SSD is larger or smaller than the original drive, causing unallocated space on a larger SSD or boot failure. The possible cause you don’t check options like resize partition, different sector sizes, not enough space to hold all data, etc.
👉 How to fix it:
- #1: Manually extend volume using unallocated space in Disk Management. Be sure to enable it if your cloning software provides it.
- #2: Use a cloning software that supports the intelligent clone feature.
Final Result
For most users, especially those with desktops that offer two M.2 slots, the best method is to directly clone PCIe SSD to larger SSD using disk cloning software- AOMEI Cloner, which delivers the fastest speeds, highest success rate, and fewest issues with bootloaders, drivers, or BIOS settings.
If your device has only one M.2 slot, common in laptops and some compact desktops, then using an M.2 NVMe adapter or enclosure is the practical solution. The new SSD connects externally, allowing you to clone the existing drive before swapping it. While slower, this method ensures you can still upgrade to a larger or faster PCIe SSD without special hardware.
