
Quick Fixes to 0xc00000e After Clone in Windows 11/10
Facing the frustrating 0xc000000e error after cloning your drive? This article outlines three effective fixes and introduces robust cloning software to help you avoid this problem in future migrations.
By Lily Updated on December 24, 2025
Error: 0xc000000e after clone
Hi, yesterday I cloned my old SSD to my new M.2 drive and it seemed to go along without issue and was working fine last night. This morning, I turned the PC on and got a blue screen with ‘Error code: 0xc000000e. You'll need to use recovery tools.’
I have since used a whole manner of different BCD repairs and scans with no success. Any help on this topic would be amazing. I am really stuck."
- Question from tomshardware.com
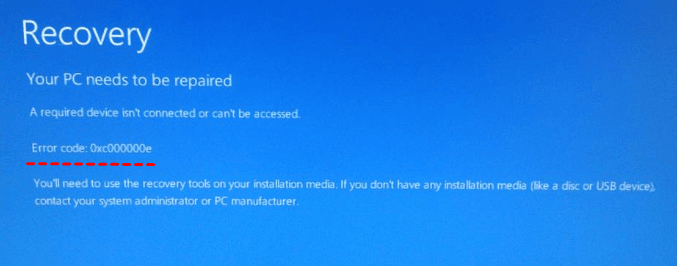
If you encounter “Your PC needs to be repaired 0xc000000e”, it can be caused by:
- Old and new disks connected at the same time
- Incorrect boot priority after cloning
- UEFI/Legacy boot mode mismatch
- Boot configuration data (BCD) is not cloned correctly
- EFI System Partition (ESP) missing or damaged
If the 0xc000000e after clone error persists, try re-cloning your drive with the best disk clone software.
How to fix 0xc000000e after clone on Windows 10/11
After figuring out possible causes, I’ll walk you through how to fix “Your PC needs to be repaired 0xc00000e”. There are three solutions for your reference.
Solution 1: Physical & BIOS Check
1. Disconnect the old drive: If both the original and cloned drives are connected, Windows may experience a signature conflict. So, it is suggested to keep only the cloned drive connected.
2. Verify Boot Priority: Enter your BIOS (press F2, F12, or Del during startup) and ensure the cloned disk is set as the primary boot device.
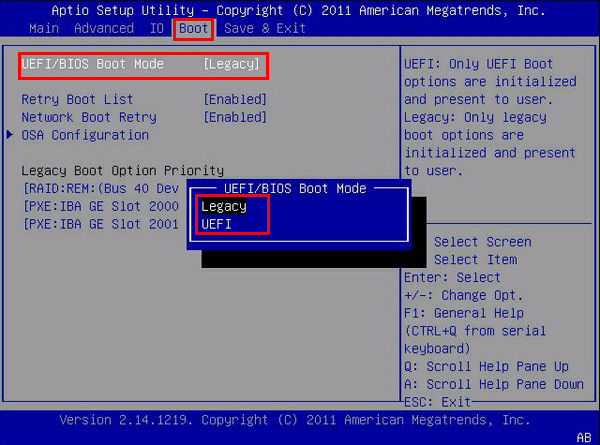
3. Check Boot Mode: Ensure the BIOS mode matches your drive format (e.g., UEFI for GPT drives or Legacy/CSM for MBR).
Solution 2: Rebuild BCD via Command Prompt
1. Boot your computer from a Windows Installation USB or recovery drive.
2. Navigate to Repair your computer > Troubleshoot > Advanced options > Command Prompt.
3. Type the following commands one by one, pressing Enter after each:
- bootrec /fixmbr
- bootrec /fixboot (If you get "Access Denied," run bootsect /nt60 sys first)
- bootrec /scanos
- bootrec /rebuildbcd
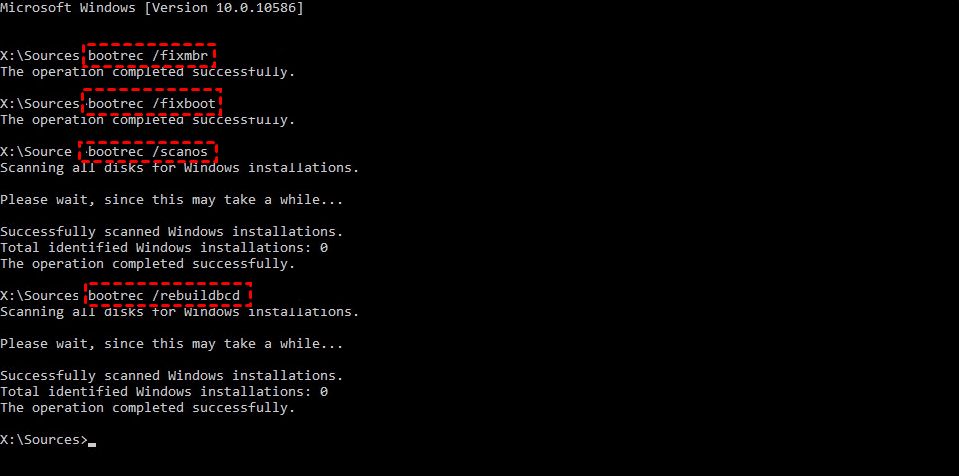
4. (Optional) If you get the message "Total identified Windows installations: 0", it indicates that the system's BCD is corrupted or the Windows installation is not being recognized by the repair tool. Run these commands to fix it:
- bcdedit /export c:\bcdbackup (Creates a backup)
- attrib c:\boot\bcd -h -r -s (Removes read-only and system attributes)
- ren c:\boot\bcd bcd.old (Renames the file so Windows ignores it)
- bootrec /rebuildbcd (Rebuild the BCD again)

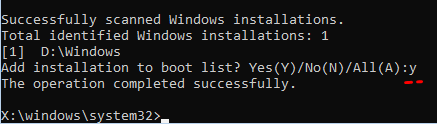
5. When asked to "Add installation to boot list?", type y and press Enter.
6. Exit Command Prompt and shut down your PC. Remove the installation USB or recovery drive and set your computer to boot from the original system disk. It should boot normally.
Solution 3: Run BCDboot Command
If the bootrec commands do not work, use the bcdboot command to force-rebuild the boot files from your Windows directory to your system partition:
1. Open Command Prompt as mentioned in solution 2.
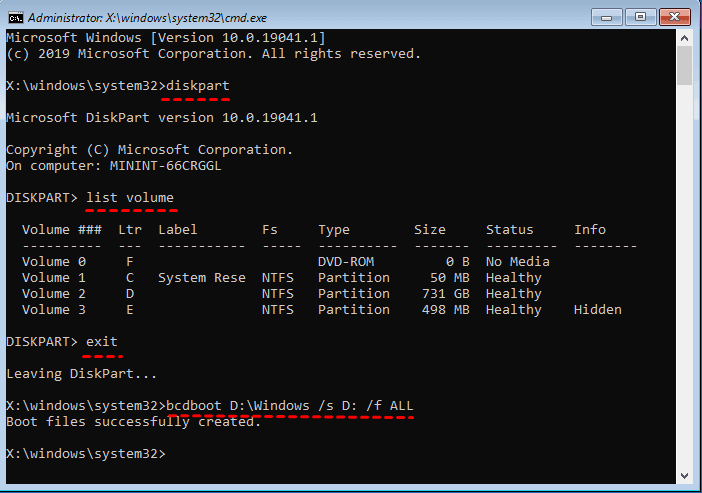
2. Type the following commands one by one, pressing Enter after each:
- diskpart
- list volume (Find your Windows drive letter according to the partition size)
- exit
- bcdboot D:\Windows /s D: /f ALL (Replace D: with your actual drive letter. This command copies all required boot-environment files for BIOS and UEFI to the Windows drive)
💡 Note: If your system uses UEFI, ensure the command targets the EFI System Partition (ESP) instead of the Windows partition to avoid repeated boot errors. You may need to assign a letter for the ESP first.
3. When you see “Boot files successfully created”, close Command Prompt, remove the installation media, and restart your PC.
Recommend: Re-clone your disk using reliable cloning software
If the 0xc000000e after clone error persists despite repairing boot files and checking firmware settings, the most reliable fix is often to re-clone the disk using professional cloning software. AOMEI Cloner comes to help.

- System Clone: Migrates only Windows and boot partitions.
- Disk Clone: Transfers everything from one hard drive to another.
- Intelligent Clone: Automatically copies only used data (perfect for upgrading to a smaller SSD).
- SSD Optimization: Ensures 4K alignment for peak performance and longevity.
- Universal Compatibility: Supports all major drive types (NVMe, M.2, SATA, USB) and disk brands (Samsung, Kingston, WD, Crucial, etc.).
Download AOMEI Cloner now and follow the steps below to clone an HDD to an SSD:
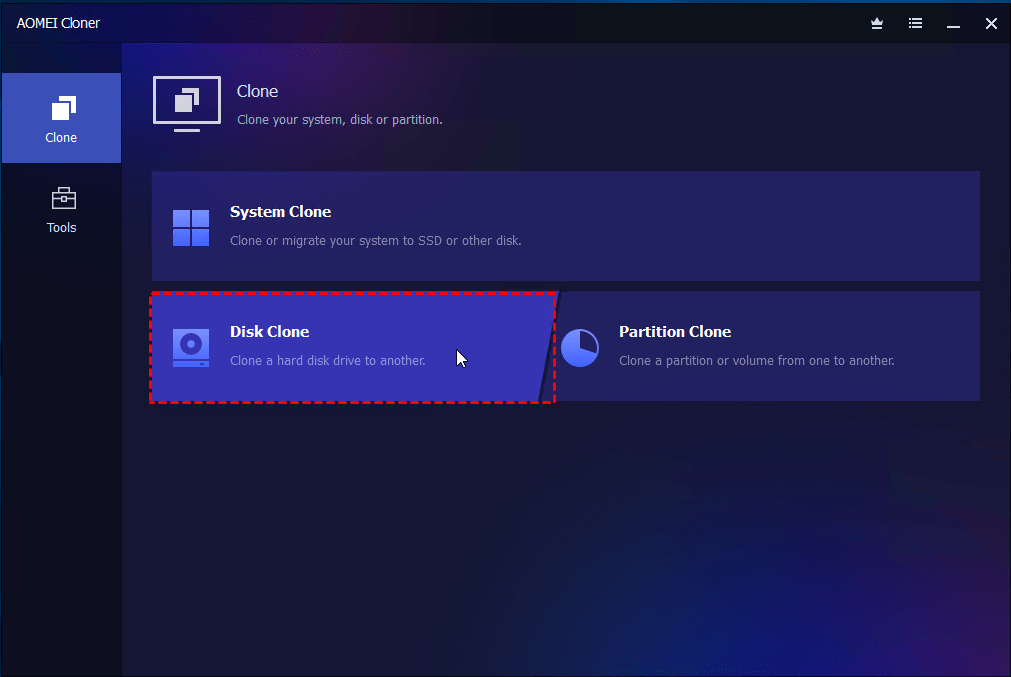
Step 1. Install and open AOMEI Cloner. Click Clone from the left panel and select Disk Clone.
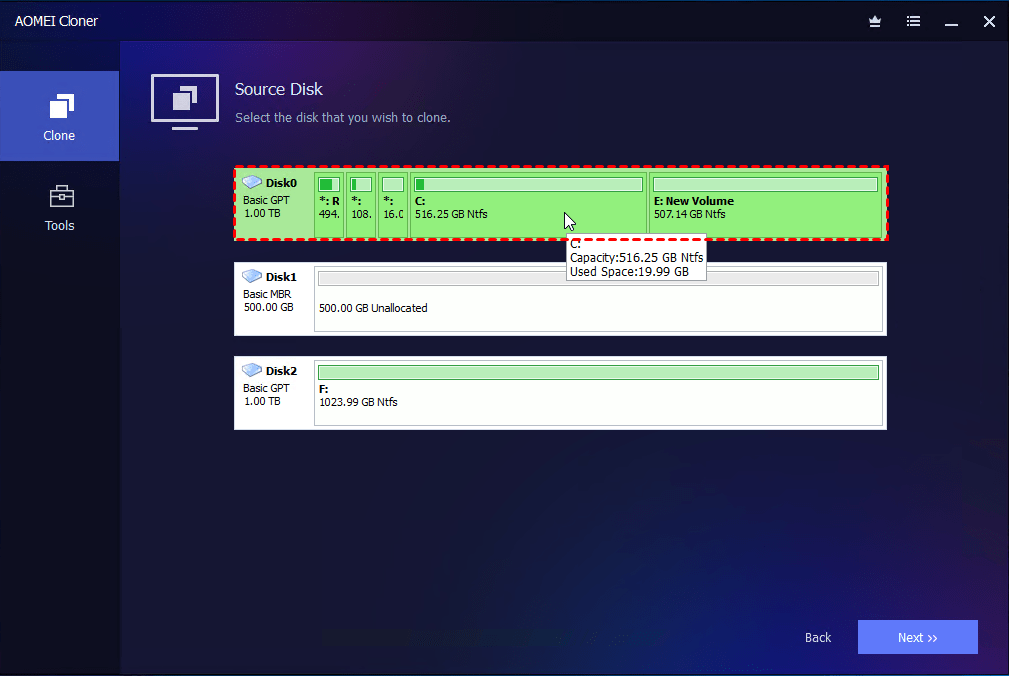
Step 2. Choose the existing hard drive that contains your system and data, then click Next.
Step 3. Choose the target SSD and click Next. Confirm the warning message acknowledging that all data on the SSD will be erased.
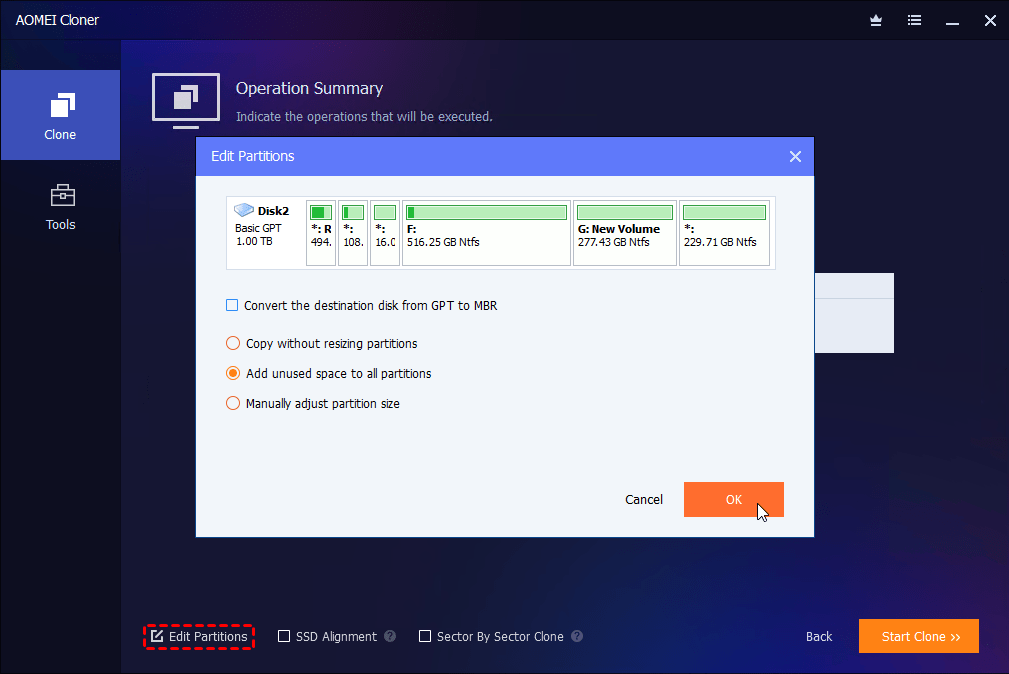
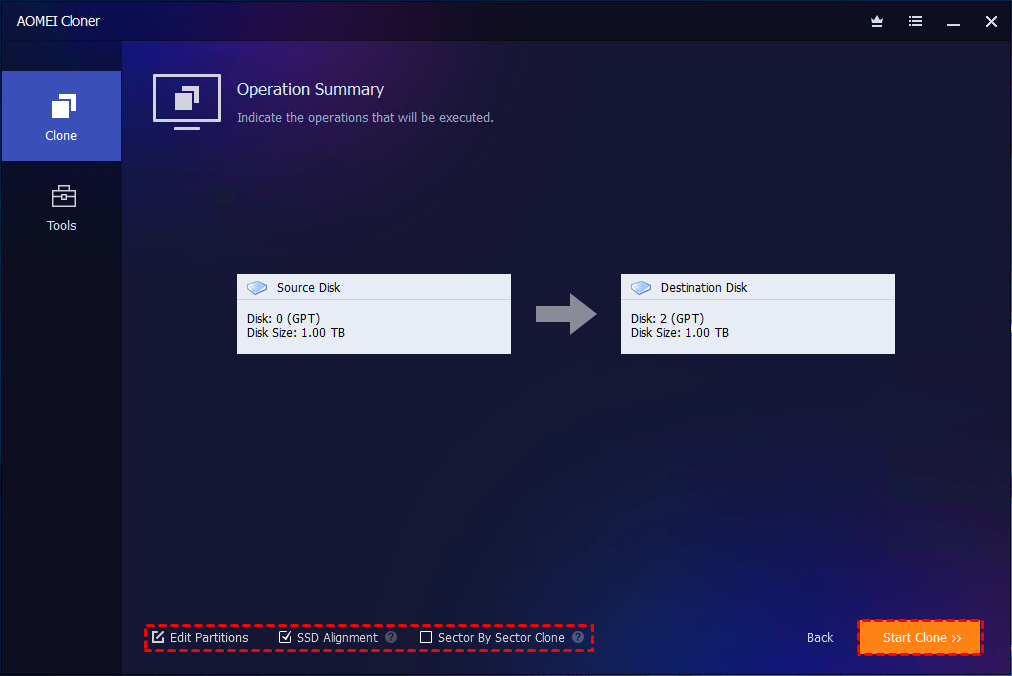
Step 4. (Optional) If the SSD is larger than the HDD, use Edit Partitions to adjust partition sizes and avoid unallocated space.
Step 5. Check SSD Alignment to optimize performance and extend the SSD’s lifespan. Finally, click Start Clone and wait for the process to complete.
Conclusion
The 0xc000000e after clone error is a common but fixable issue that usually stems from boot configuration problems, disk style mismatches, or an incomplete cloning process. You can fix the issue with the solutions described above.
When troubleshooting doesn’t fully resolve the problem, re-cloning the disk using reliable software like AOMEI Cloner is often the most effective and time-saving approach. It enables you to clone USB drives, HDDs, SSDs, and more. Don’t hesitate to try it out!
