
[Full Guide] to Synology Office 365 Backup
Learn how to back up Office 365 with Synology Active Backup and discover the top free Windows backup software.
By Lily Updated on November 28, 2025
What Is Synology Office 365 Backup?
Synology Office 365 backup refers to the process of using a Synology NAS device—powered by its dedicated tool Active Backup for Microsoft 365—to securely back up and protect your organization’s Microsoft 365 (formerly Office 365) data.
With Active Backup for Microsoft 365, you can protect nearly all critical workloads, including:
- Exchange Online: Emails, contacts, calendars, and mailboxes
- OneDrive for Business: Files and folders
- SharePoint Online: Site data, document libraries, and metadata
- Teams Data: Chat files stored in SharePoint and OneDrive
By consolidating these workloads into one backup platform, Synology makes data protection easier, more automated, and more cost-effective.

For users who also want to secure their local PCs alongside their Microsoft data, try this free Windows backup software.
How to Set Up Synology Microsoft 365 Backup Step by Step
Below is a practical, no-fluff walkthrough to get Synology Office 365 backup running using Synology’s Active Backup for Microsoft 365. Follow the steps in order and you’ll have a reliable, local copy of your Microsoft 365 data in no time.
Prerequisites & Checklist
Make sure you have the following ready:
- A Synology NAS with enough free storage for your Microsoft 365 data (estimate size of mailboxes, OneDrive, SharePoint).
- DSM up to date (DSM 7.x recommended).
- Administrator access to the Synology NAS (admin or equivalent).
- A Microsoft 365 Global Administrator account (required to grant app permissions).
- A network connection that allows your NAS to reach Microsoft 365 endpoints (no outbound blocking to Azure/Microsoft services).
- Time on NAS set correctly (NTP) and HTTPS enabled for secure connections is recommended.
Step 1. Update DSM and install Active Backup for Microsoft 365
1. Log into your Synology DSM as an admin.
2. Go to Control Panel > Update & Restore and apply any pending DSM updates.
3. Open Package Center, search for Active Backup for Microsoft 365, and click Install.

4. After installation, launch the package.
Step 2. Activate Active Backup for Microsoft 365
1. A welcome page will appear for the purpose of package activation when Active Backup for Microsoft 365 is launched for the first time. Click the Activate button on the welcome page.

2. Agree to the terms and conditions, and then sign in using your Synology Account.
Step 3. Create a backup task
1. Go to the Task List page and click Create to launch Task Creation Wizard.

2. Select Create a backup task and click Next.
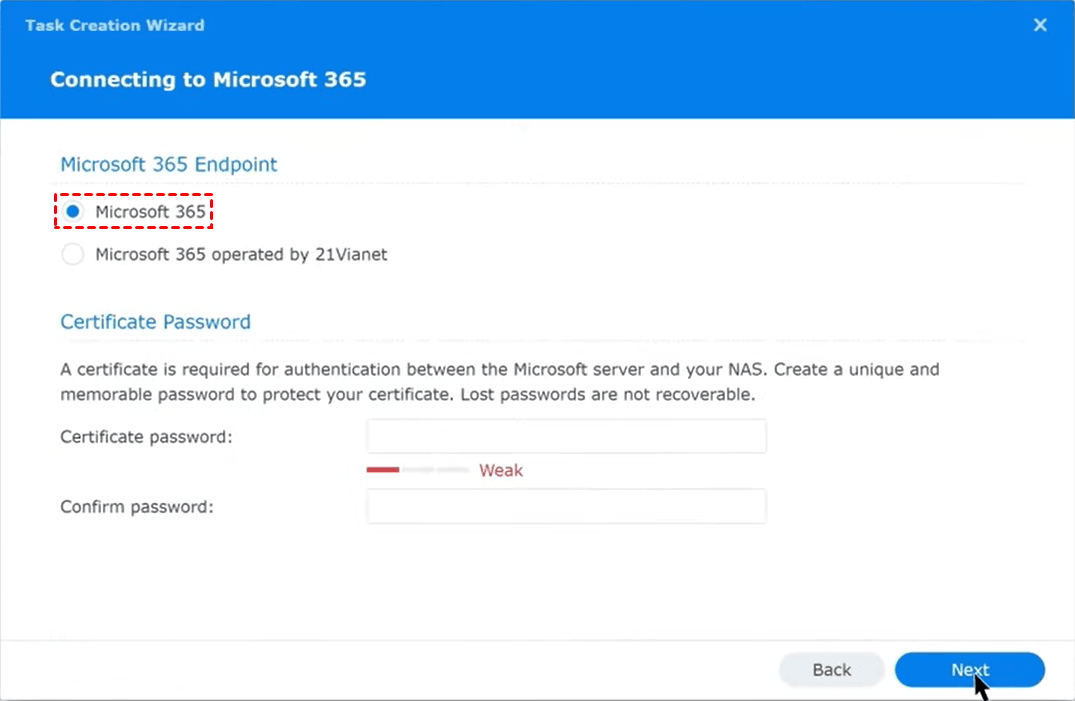
3. Select the Microsoft 365 endpoint type and then set a certificate password.
4. Authorize the backup task (Certificate and application details).
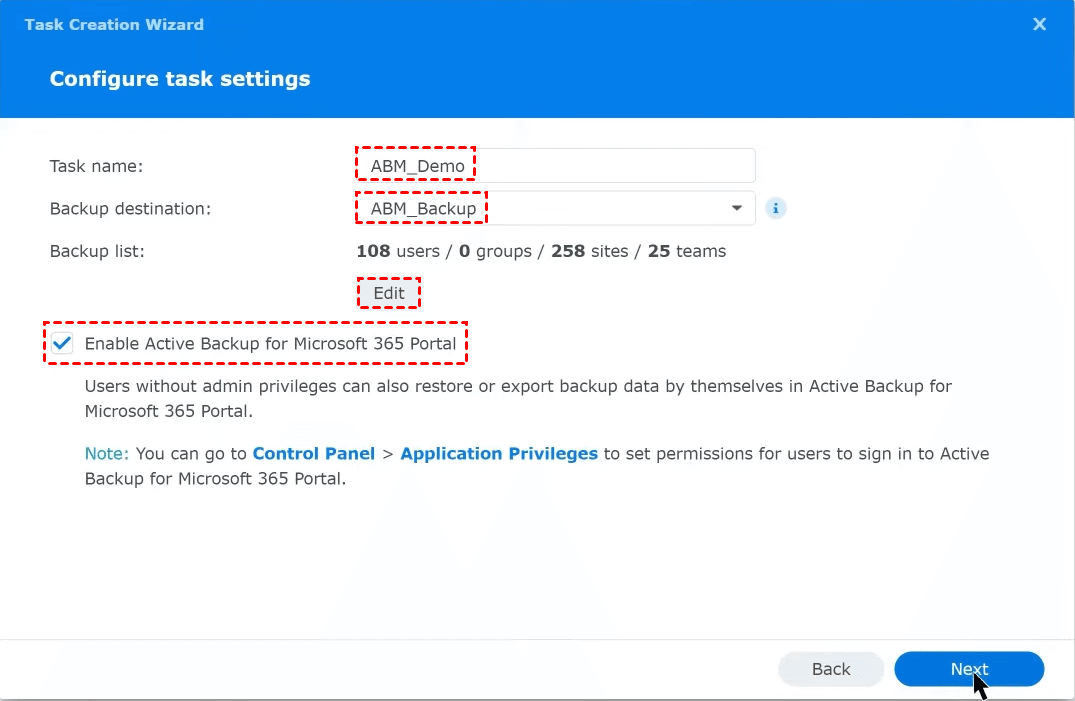
5. Configure the Task name, Backup destination, and Backup list. Enable the Active Backup for Microsoft 365 Portal if needed.
6. Enable services for auto-discovery as needed. With this enabled, new sites, teams, and the selected services of new users/groups can be automatically included in the backup list.
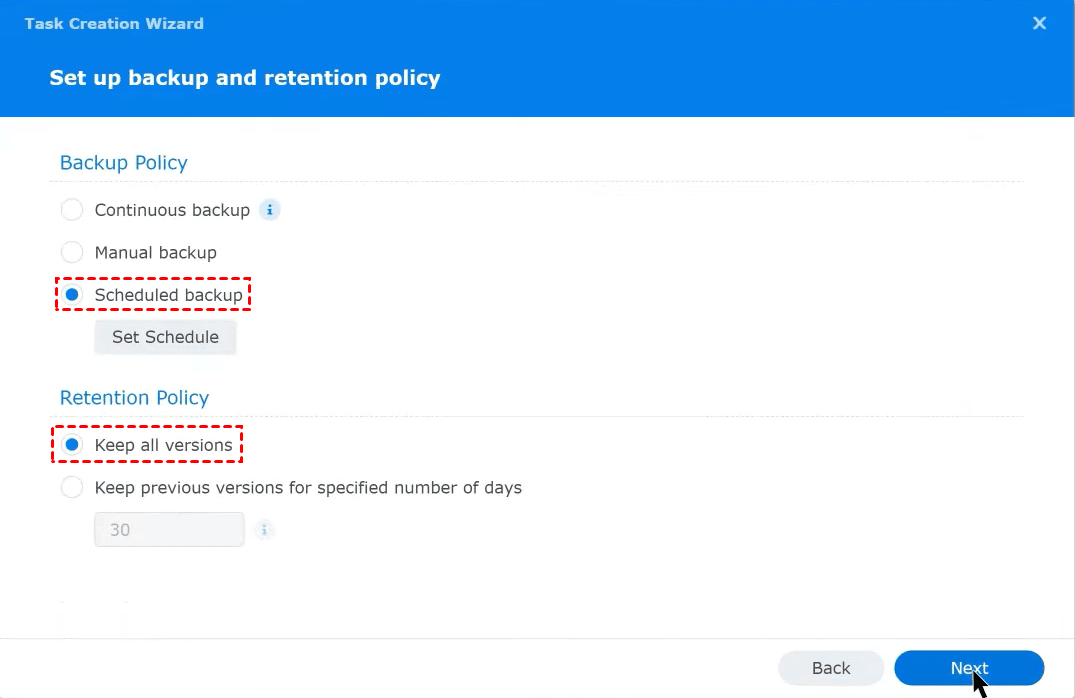
7. Set up backup and retention policies:
👉 Backup policy:
- Continuous backup: Based on the API request rate detected from the last backup, the system dynamically adjusts the backup intervals from one to ten minutes. Data are backed up continuously in an infinite cycle.
- Manual backup: Data are backed up immediately once you manually run the task.
- Scheduled backup: Data are backed up based on the schedule you set.
👉 Retention policy:
- Keep all versions
- Keep previous versions for specified number of days: When a backed-up file is updated to a new version, the previous version will be preserved for the retention period you set.
8. Check the task summary and click Done or Apply to finish the task creation.
Best Practices for Synology O365 Backup
- Keep at least one dedicated volume for backups to reduce contention with other NAS workloads.
- Use snapshots on the NAS in addition to Active Backup for an extra layer against ransomware.
- Enable alerts and regularly review logs; set up email/SMS notifications for failures.
- Plan for growth — monitor backup size trends monthly and expand storage before you run out.
- Secure access — restrict who can access Active Backup on the NAS and enable 2FA for NAS admin accounts.
- Document consent and keep a record of the Azure AD app details and admin who granted consent.
Bonus: Best Free Tool to Backup Your PC to Synology
Besides Microsoft 365 data, there is other important data on the computer that needs to be backed up. If you want a reliable, free way to back up your Windows PC to a Synology NAS, AOMEI Backupper Standard is one of the best choices.

- It supports backing up files, entire disks or partitions, as well as your Windows OS.
- You can save backups to a wide variety of storage destinations: internal/external HDD or SSD, a network share, NAS, and cloud, etc.
- It offers useful backup options: full backup, incremental backup (just changed data), scheduling (automated backups), compression (to save storage space), and more.
Download AOMEI Backupper and follow the instructions below to backup your Windows OS to Synology:
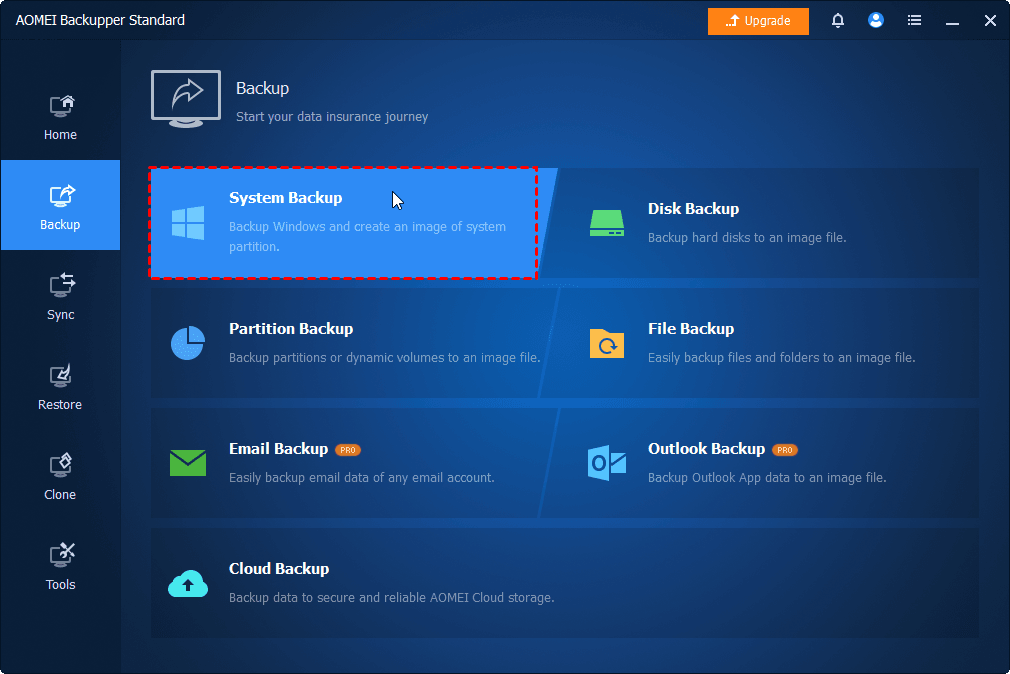
Step 1. Install and run AOMEI Backupper. From the left panel, click Backup, and select System Backup to backup the operating system and boot partitions.
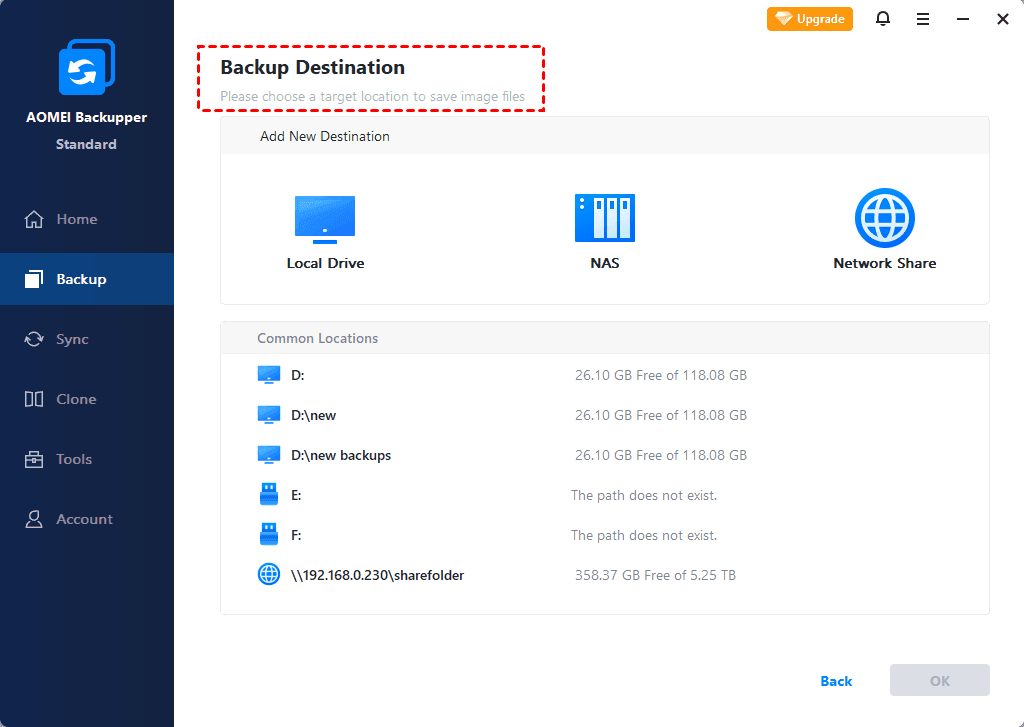
Step 2. Boot-related partitions are selected by default. Click the destination box and select NAS in the Backup Destination window.
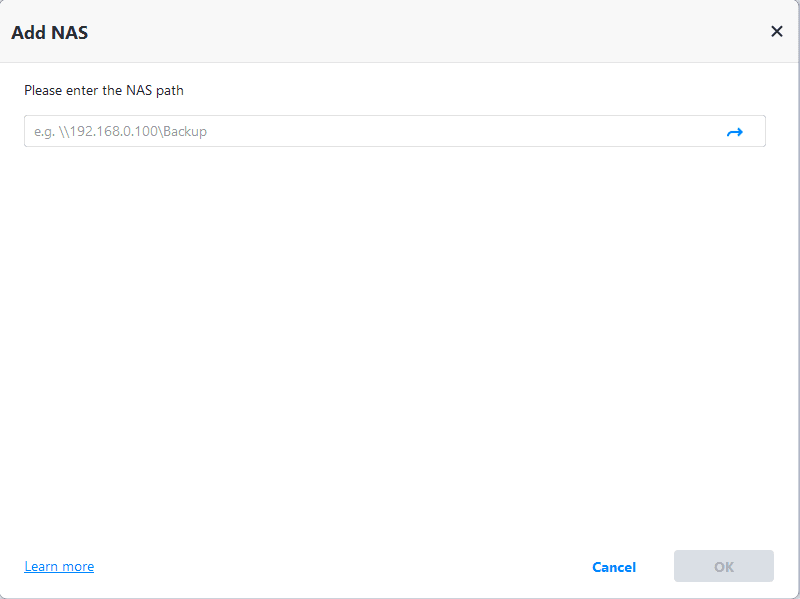
Step 3. On this screen, type your Synology NAS path and click the right arrow. Input username and password if it is required, then click OK.
Step 4. Then, choose one folder on the Synology NAS as the destination path to store the backup image.
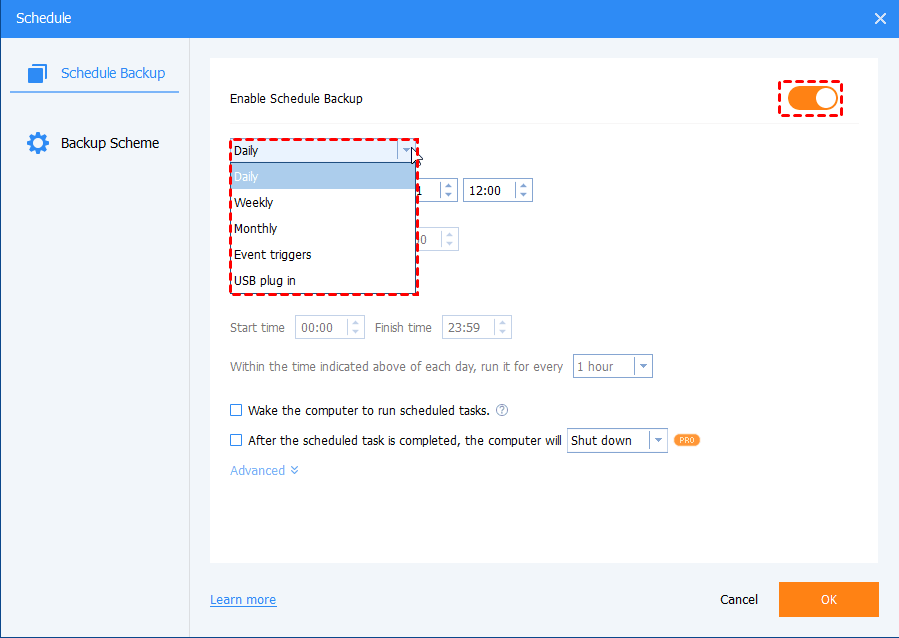
Step 5. (Optional) Click Schedule to enable automatic Windows backup (One Time, Daily, Weekly, Monthly, or Event triggers).
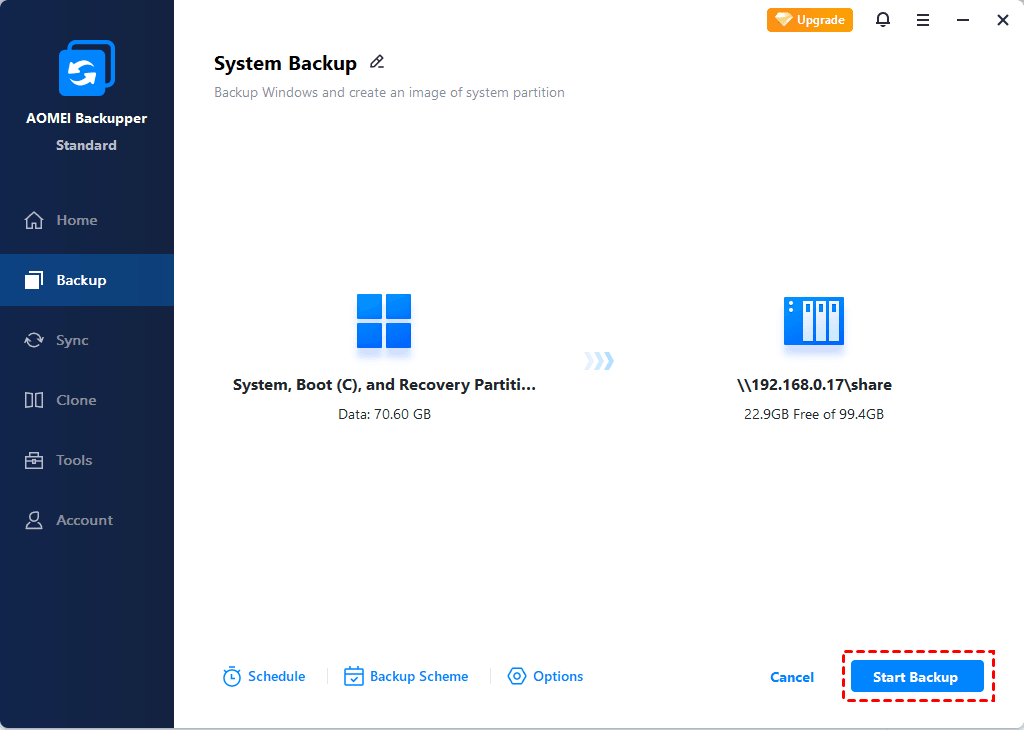
Step 6. Finally, click Start Backup to begin backing up Windows OS to your Synology NAS.
Wrapping Things Up
Synology Office 365 backup effectively protects your data from deletion, ransomware, and user error. With Synology’s Active Backup for Microsoft 365, you gain full ownership of your data, unlimited versioning, granular restore capabilities, and cost-efficient local storage on your NAS.
For users who also want to secure their local PCs alongside their cloud data, AOMEI Backupper Standard offers a powerful, free way to back up Windows systems directly to a Synology NAS. What’s more, it enables you to auto sync files to external hard drive. Why not give it a shot?
