
How to Create Scheduled Task to Copy Files to Another Folder
Learn how to automatically copy files from one folder to another in Windows 11/10/8/7. Two methods are included.
By Lily Updated on November 6, 2025
Manually copying files between folders might seem easy, but doing it every day or week can quickly become tedious and error-prone. Whether you need to back up important documents, sync project folders, or transfer data between drives, automating the process can save you time and ensure consistency. In this guide, we’ll walk you through 2 effective methods to schedule file copy tasks.
👉 Method 1: Create a script to copy files from one folder to another automatically
👉 Method 2: Create a scheduled task to copy files to another folder with sync software🔥
Method 1: Create a script to copy files from one folder to another automatically
If you prefer a built-in and reliable solution, you can automate file copying using Robocopy (a command-line utility) together with Task Scheduler in Windows. This method gives you full control over when and how your files are copied—perfect for users who want to avoid third-party tools.
Step 1. Create a script with Robocopy
1. Search for Notepad and open it.
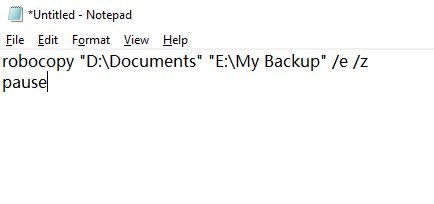
2. Type the following lines in the text file:
robocopy "D:\Documents" "E:\My Backup" /e /z
pause
✍ Notes:
◆ Replace "D:\Documents" with the full path to the folder you want to copy.
◆ Replace "E:\My Backup" with the full path where you want to copy the files.
◆ /e: Copies subdirectories, including empty ones.
◆ /z: Copies files in restartable mode which lets you resume a large transfer if it’s been interrupted.
◆ The pause command is to keep the command window open after the Robocopy operation completes, allowing you to review any output or errors.
3. Press Ctrl + S, name the file with the “.bat” extension (e.g., copytask.bat), select a location you can easily find and click Save.
4. Double-click the batch file to run the command. Check your destination folder and verify that all files copied correctly.
Step 2. Create a scheduled task with Task Scheduler
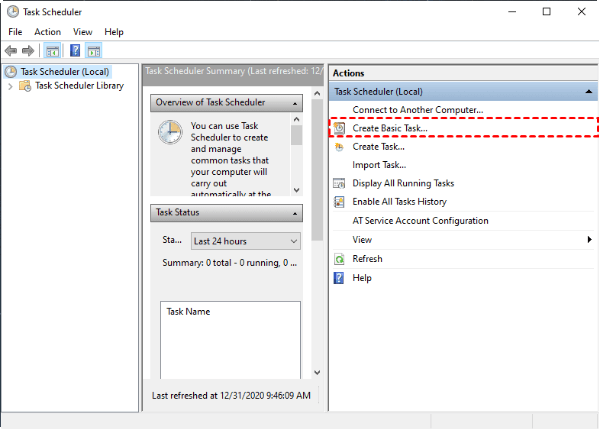
1. Press Win + R, type taskschd.msc, and hit Enter. In the right panel, click Create Basic Task.
2. When the Create Basic Task Wizard opens, give your task a descriptive name like “Daily File Copy” and click Next.
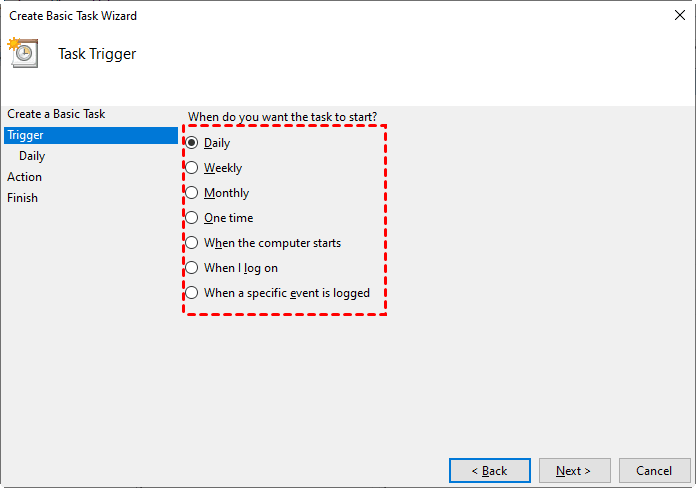
3. Choose when you want the task to run (Daily, Weekly, When I log on, etc.) and click Next. Then specify the exact time or condition and click Next.
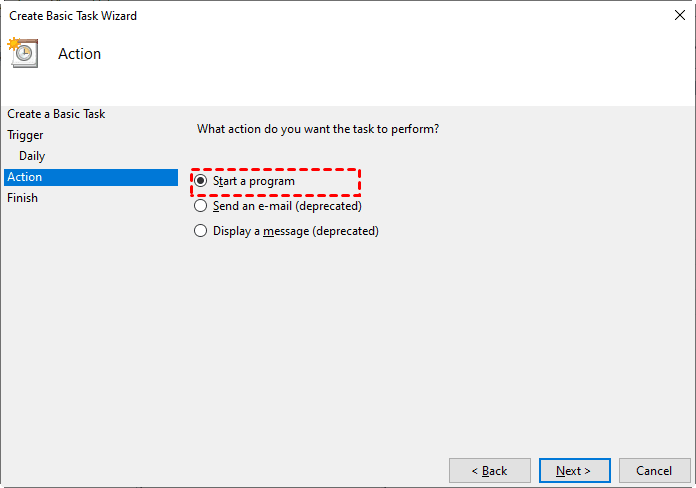
4. Select Start a program and click Next.
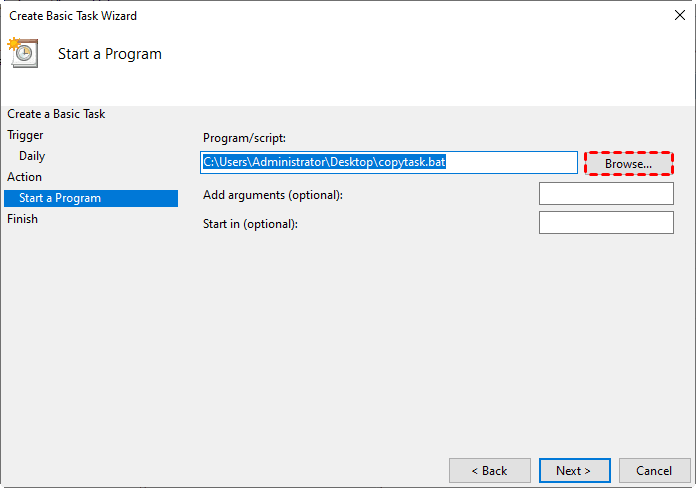
5. Click Browse to locate and select your batch file (copytask.bat) and click Next.
6. Confirm all the settings and click Finish to finish creating this scheduled task.
Method 2: Create a scheduled task to copy files to another folder with sync software
While Task Scheduler and Robocopy work well, they can be tricky for beginners and lack a friendly interface. If you prefer a simpler, more visual approach, AOMEI Backupper Standard is an excellent free tool that lets you schedule automatic file copy or sync tasks with just a few clicks.

- Batch Sync: Sync several folders at once to boost efficiency and save time.
- Scheduled Sync: Automate your syncs on a daily, weekly, or monthly basis. If you want to perform real-time sync, please try higher editions.
- Multiple Destinations: Sync files to internal disks, external HDDs/SSDs, NAS devices, or cloud storage with ease.
- User-Friendly Interface: Enjoy a clean, intuitive design that makes powerful sync tools simple to use.
Download AOMEI Backupper and follow the steps below to automatically copy files from one folder to another:
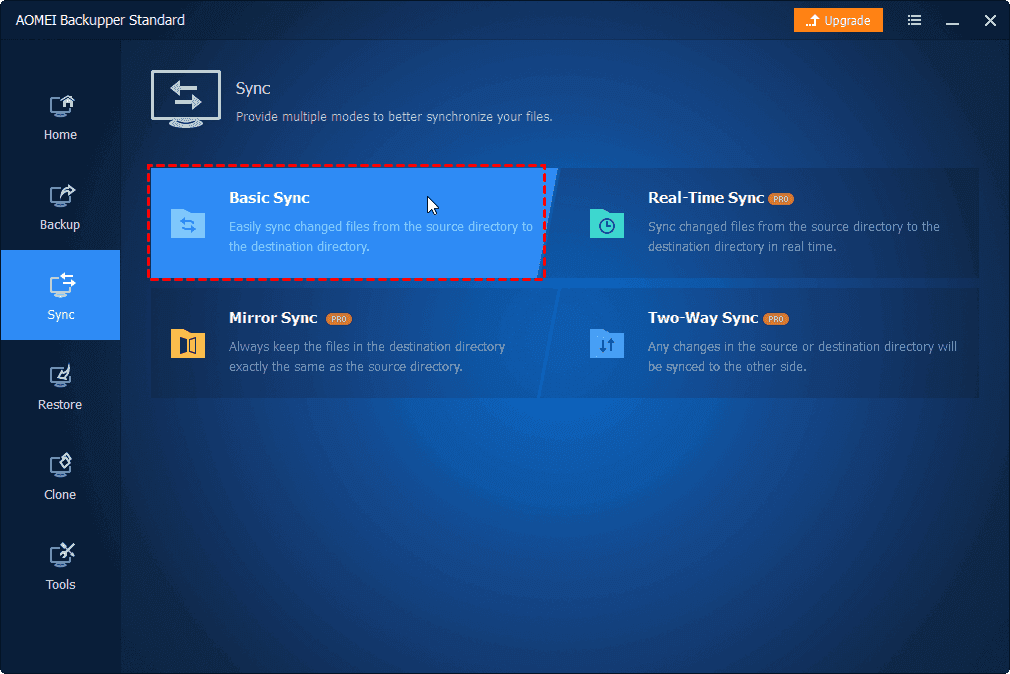
Step 1. Install and launch AOMEI Backupper. From the main interface, click Sync on the left sidebar, then select Basic Sync.
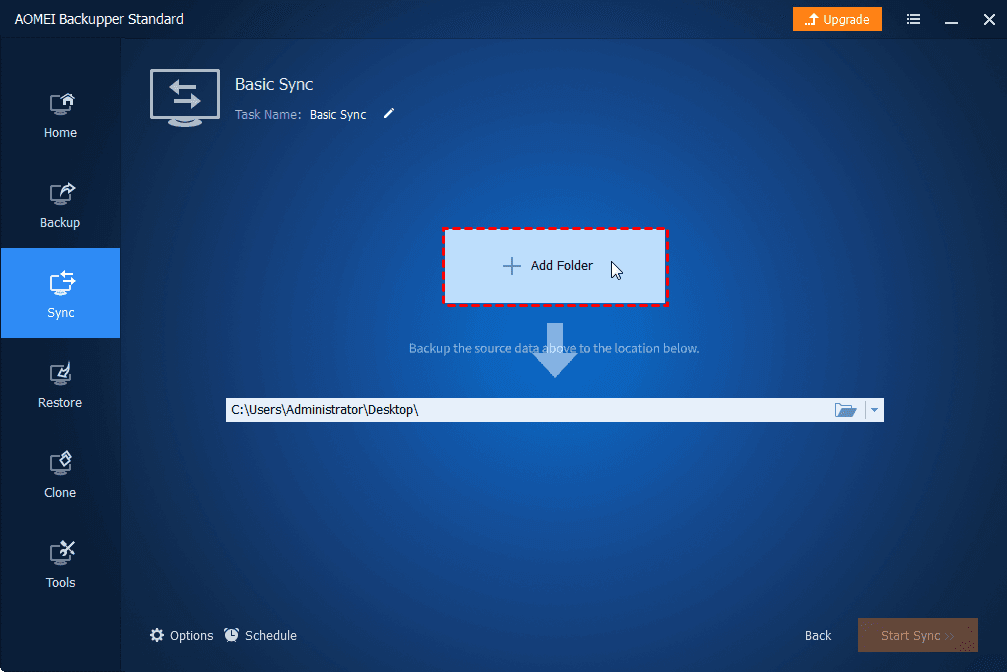
Step 2. Click Select Source to choose the folder you want to copy. Then click the destination box to choose a location to save the copied files.
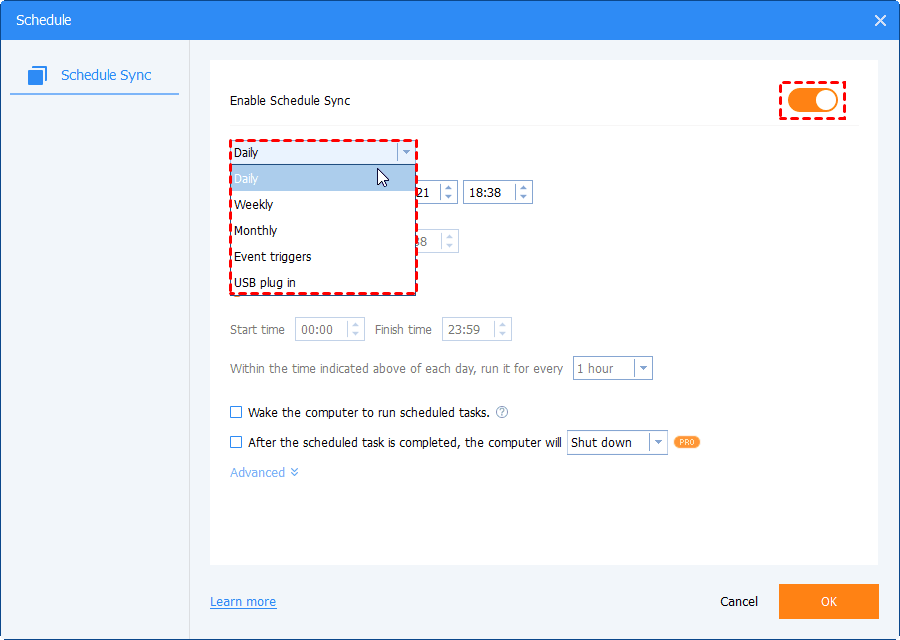
Step 3. Enable Schedule Sync and choose One Time, Daily, Weekly, Monthly, or Event triggers. Once you’ve selected your preferred schedule, click OK.
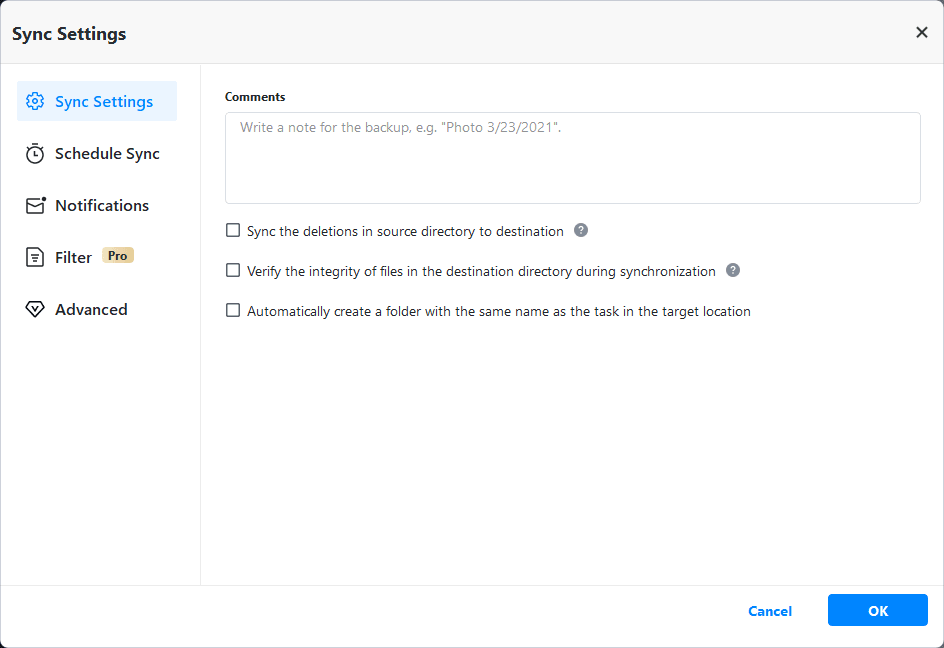
Step 4. (Optional) Click Options to get more sync settings.
- Comments: Leave a note describing your current sync task.
- Notifications: Get email alerts as soon as a task is complete or fails.
- Filter: Add file or folder exclusion as per your need. It’s available in AOMEI Backupper Professional or higher editions.
Step 5. Click Start Sync. Select Add the schedule and start sync now to execute the task immediately or select Only add the schedule to let it run at the scheduled time. AOMEI Backupper will now copy files automatically according to your settings—no manual work required.
FAQs about scheduling automatic file copy
1. Can I schedule a file copy task using only Windows built-in tools?
Yes. You can use Robocopy or Xcopy in combination with Task Scheduler to automate file copy tasks. This method is free and doesn’t require additional software, though it involves writing command-line scripts.
2. Will the scheduled task copy only new or changed files?
Yes. Robocopy supports incremental copying using switches like /MIR (mirror) or /XO (exclude older files). In AOMEI Backupper, this behavior is built-in—only modified or new files are transferred, saving time and storage.
3. Can I copy files to an external hard drive or network location automatically?
Absolutely. Both Robocopy and AOMEI Backupper support copying files to external drives, USB devices, NAS, or shared network folders. Just make sure the target device is connected or accessible at the scheduled time.
To sum up
By setting up a scheduled task to copy files to another folder, you eliminate repetitive manual work, reduce the risk of data loss, and ensure important files are always synchronized between locations. You can use built-in tools like Robocopy with Task Scheduler to automate the process through command-line scripts, or opt for a more user-friendly solution like AOMEI Backupper.
AOMEI Backupper offers intuitive scheduling and flexible sync options. What’s more, it’s all-around backup and restore software for Windows 11/10/8/7. Try it now to discover more!
