
2 Free Ways to Backup C Drive to External Hard Drive
You’ll get two free ways to backup C drive to external hard drive - one is 100% free & native while the other is a faster and smarter backup software - AOMEI Backupper. Scroll down to explore more!
By Ivy Updated on March 25, 2026
Why Backup the Entire C Drive, Not Just Your Files?
Almost every “I lost everything story” ends the same way: I only backed up my photos… I thought Windows was safe. It’s not. When your SSD dies (3 - 5 % chance every year), ransomware hits, or a Windows update goes wrong, you lose everything that File History and OneDrive never save:
- All your programs and games
- Game saves and settings
- Browser passwords and logins
- Windows customizations
- Product keys and licenses
File History only protects your personal folders, which leaves your Windows and apps completely exposed. One full C: drive backup (must do, free, and simple) to external hard drive fixes this. When disaster strikes, you can quickly get back up and running as if nothing happened.
Method 1: Windows Built-in System Image – 100% Free & Native
Windows still includes the classic Backup and Restore (Windows 7)tool, and yes, it still works perfectly in Windows 11. This method lets you create a full system image of your C drive, including Windows, apps, settings, and files. It’s completely free, doesn’t require third-party tools, and is ideal for basic disaster recovery.
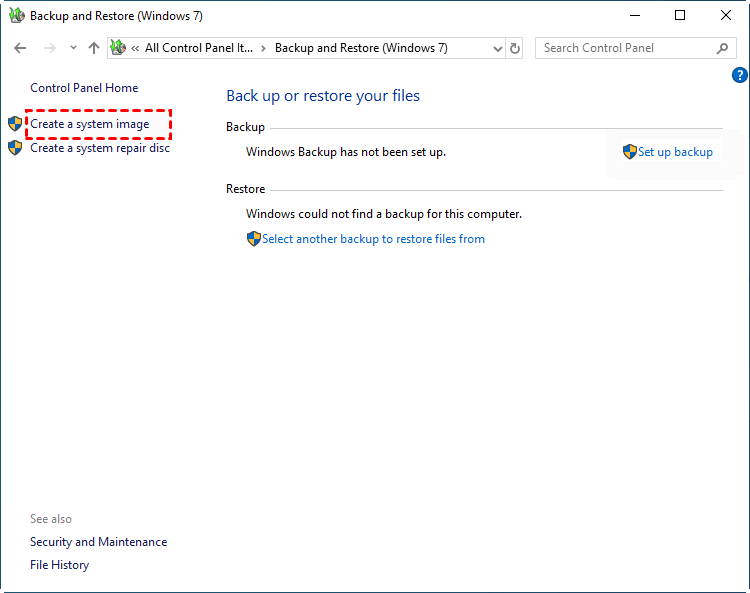
Step 1. Open Control Panel and Backup and Restore (Windows 7).
Step 2. Click Create a system image on the left panel.
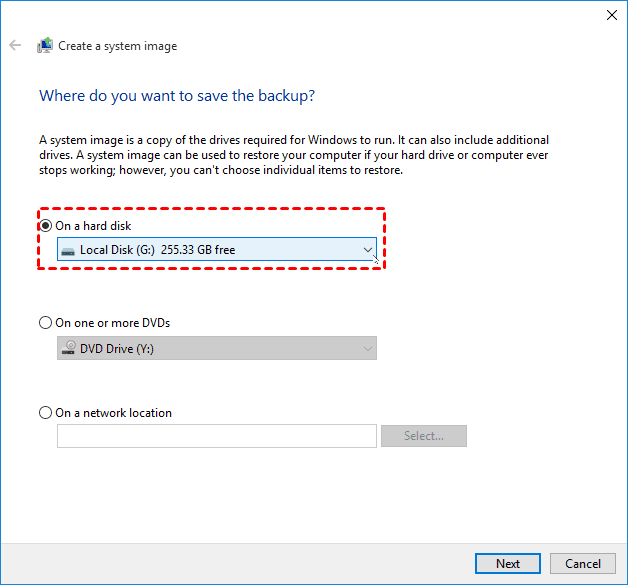
Step 3. Choose where to save the backup - On a hard disk, DVDs, or network location. Click Next.
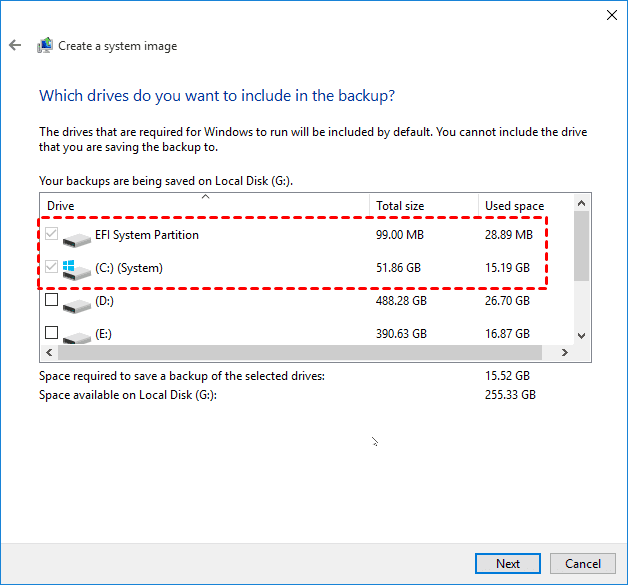
Step 4. It will automatically select the C drive to be backed up. Confirm your backup settings and click Start backup.
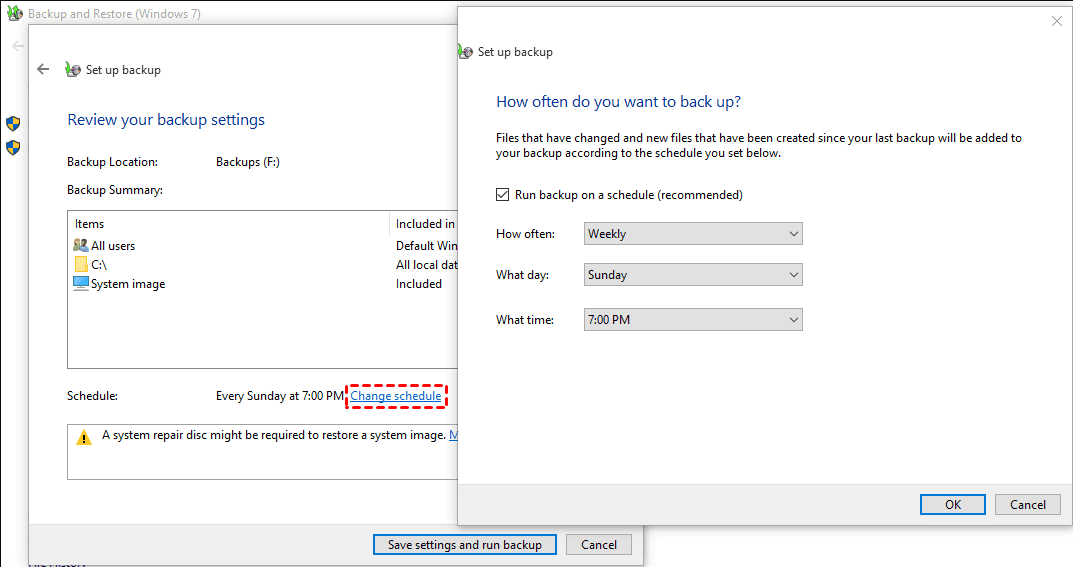
By default, using this method to create a system image does not include scheduled backups. However, it also provides a hidden feature to schedule Windows backup - click Set up backup instead of clicking Create a system image in Step 2.
In this way, it will backup system every Sunday at 7:00 PM automatically and allows you to change schedule at last.
Pros & Cons of Using Windows Built-in System Image
Pros:
- ✔ 100% free and built into Windows- no downloads needed.
- ✔ Creates a full, recoverable image of the entire OS.
- ✔ Works reliably in Windows 10 and Windows 11.
- ✔ Quickly restore to a new drive if the old one fails.
- ✔ Supports external drives and network storage.
Cons:
- ✖ Very slow compared to modern imaging tools.
- ✖ No incremental backups (each image = full size).
- ✖ Can fail if the drive has bad sectors.
- ✖ Only restore to a larger drive.
- ✖ Images cannot be restored to different hardware well.
Method 2: The Best Free Backup Software– AOMEI Backupper Standard
While Windows' built-in system image tool works, modern software like AOMEI Backupper Standard, designed specifically for image-based backup, is faster, smarter, and more reliable, making it ideal for long-term protection.

- Full Backup Types: Include File Backup, System Backup, Disk Backup, and Partition Backup.
- Set-and-forget Backup: Set up continuous backuptriggered by frequency or events.
- Multiple Versioning: Perform a full backup initially, then save time and space with faster incremental backup- save multiple backup versions.
- Smaller & Smarter Backup: Enable compression, splitting, backup only used sectors of file system, VSS, etc., to automatically minimize image file size and avoid any interruptions.
- Flexible Destination: Backup Windows 11 to HDDs/SSDs, external hard drives, USB drives, network drives, etc.
- Bootable Media Creator: Create Windows 11 bootable USB, CD/DVD, or ISO to start Windows, especially when it fails.
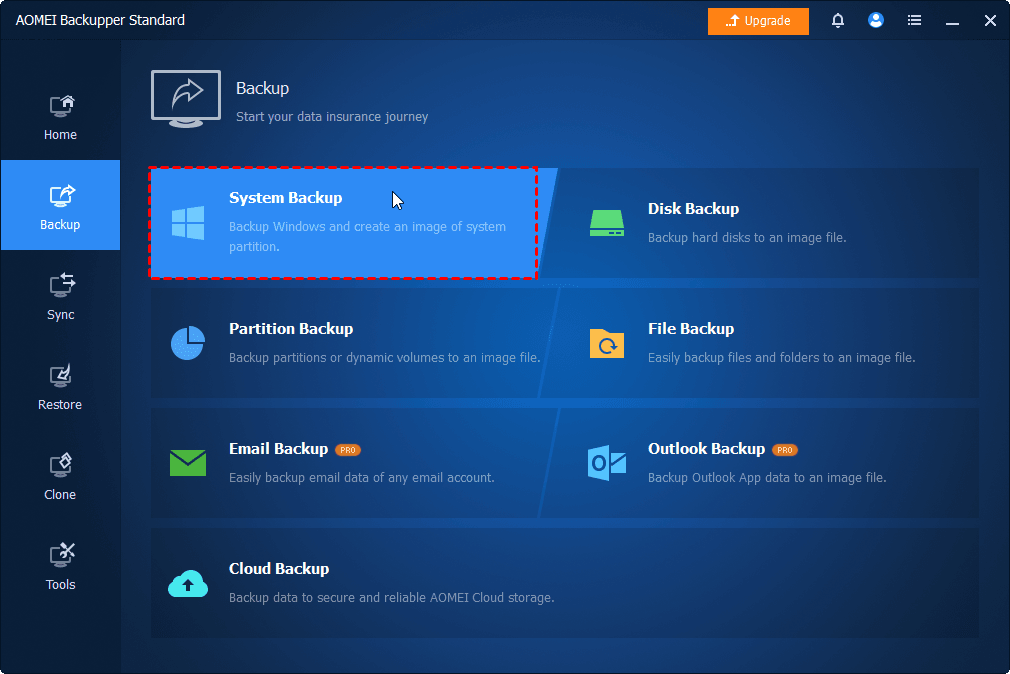
Step 1. Open AOMEI Backupper Standard. Click Backup on the left panel, then choose System Backup.
Step 2. The software auto-selects all required boot partitions. Click the PC icon > Local Drive/Network Drive/NAS to add a new destination. Or select the current location (if it exists).
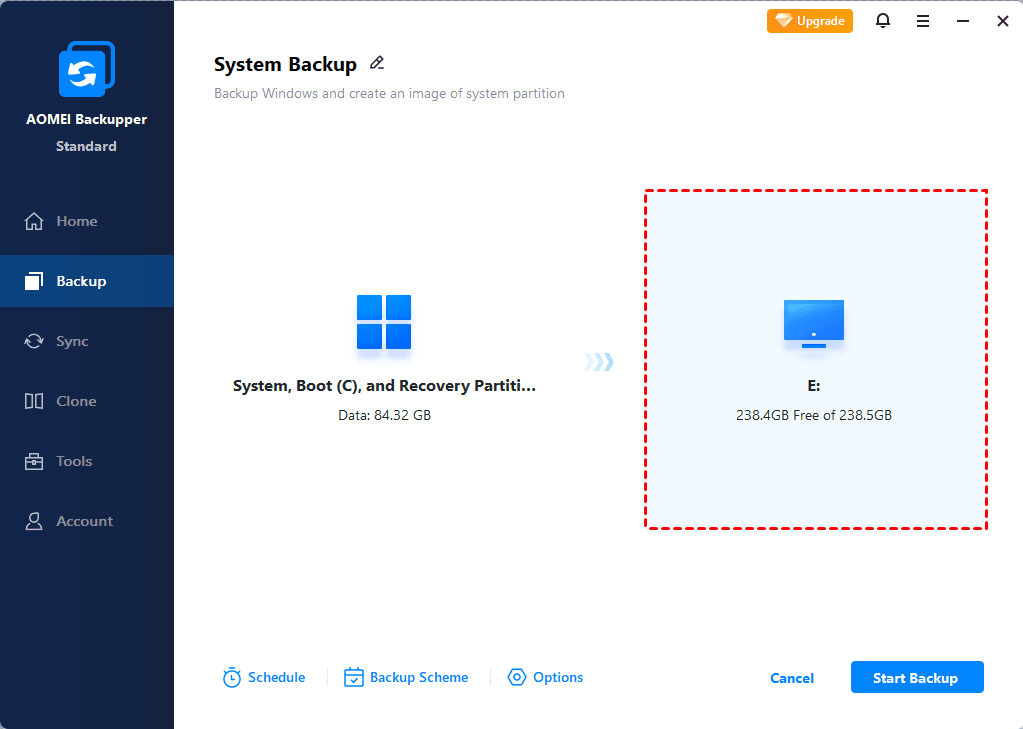
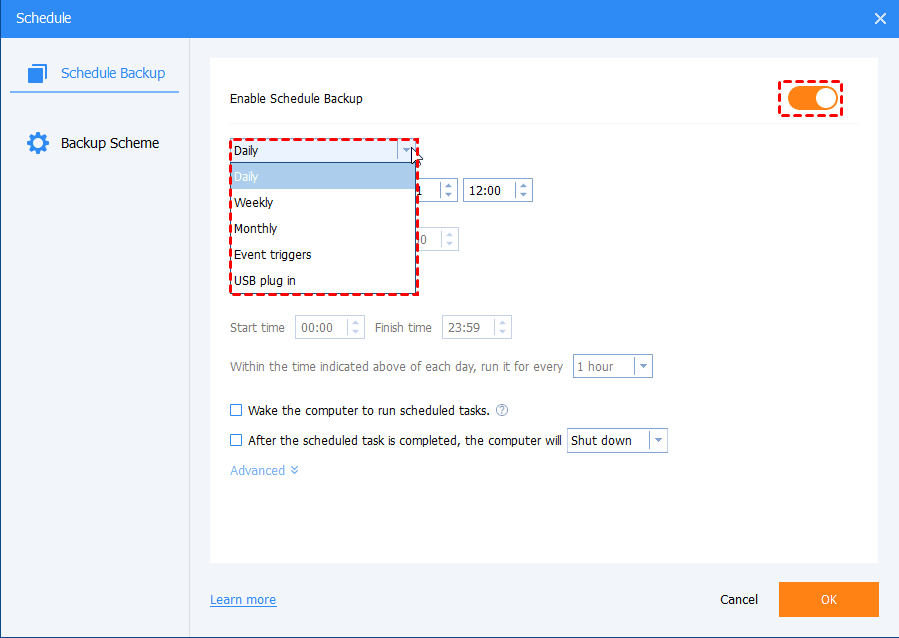
Step 3. Click Schedule and enable it. Select Daily, Weekly, Monthly (By week), Event triggers, etc., from the drop-down menu. Optional: Click Options or Backup Scheme to review or change what you want. At last, click Start Backup.
AOMEI compresses the image, making it faster,and significantly smaller. It also allows you change schedule in the Home tab. Find the backup task, right-click the three-dots icon and select Schedule.

Pros & Cons of using AOMEI Backupper
Pros:
- ✔ Faster backup and restore speed than Microsoft’s tool.
- ✔ Incremental backups for long-term space savings.
- ✔ Bootable rescue media for emergency use.
- ✔ Compress, backup only used sectors of file systems, etc., to further reduce image file sizes.
- ✔ Easy enough for beginners, advanced enough for IT admins.
Cons:
- ✖ Some features (e.g., differential backups, Universal Restore) require an upgrade.
- ✖ Requires installing additional software.
Conclusion
This article provides you with two free methods to backup C drive to external hard drive, from step-by-step instructions to their pros & cons, helping you make an intelligent choice. To be honest, modern backup software like AOMEI Backupper is faster, smarter, and more reliable.
