
How to Use ASUS SSD Secure Erase to Wipe SATA/NVMe SSDs
Want to permanently erase your ASUS SSD and restore its original speed? This article shows you how with secure erase – plus an alternative wiping solution you can use instead.
By Lily Updated on May 13, 2026
Why Perform ASUS Secure Erase?
Performing an ASUS secure erase is one of the most effective ways to completely wipe data from an SSD and restore it to a clean state. Unlike a standard format or simple file deletion, secure erase removes stored data at the firmware level, making recovery extremely difficult or even impossible.
Here are the main reasons users choose to perform ASUS secure erase:
- Selling or disposing of an SSD – Permanently removes sensitive data before transfer.
- Restoring SSD performance – Resets memory cells to improve slowed write speeds.
- Fresh OS installation – Provides a clean slate, avoiding leftover files or conflicts.
- Removing stubborn malware or corruption – Eliminates damaged files, partitions, or persistent threats.
- SSD reconfiguration – Preps the drive for reuse in another system or storage setup.
How to Wipe SSD from BIOS ASUS Step by Step
ASUS motherboards and laptops often include a built-in Secure Erase feature in the UEFI BIOS utility. This feature allows you to wipe an SSD directly from BIOS without installing additional software. Take Samsung 980 Pro as an example. Learn how to perform ASUS secure erase on Samsung 980 Pro below:
⚠️ Important Warning Before You Start
- Data loss is permanent. Wiping the SSD destroys all data, including the OS, files, and partitions. Back up important data before proceeding.
- Not all ASUS BIOS versions have Secure Erase. Modern UEFI BIOS (2015+) includes it; older legacy BIOS may not.
- Secure Erase only works on SSDs (SATA or NVMe) — not HDDs.
- Ensure your SSD is not frozen. Some SSDs lock when connected; we’ll show how to fix that.
Step 1. Restart your ASUS computer. Immediately press F2 or Delete (Del) key repeatedly before the Windows logo appears. You will enter the ASUS UEFI BIOS Utility.
💡Tip: If Windows loads, restart and try again. Disable Fast Boot in Windows if needed.
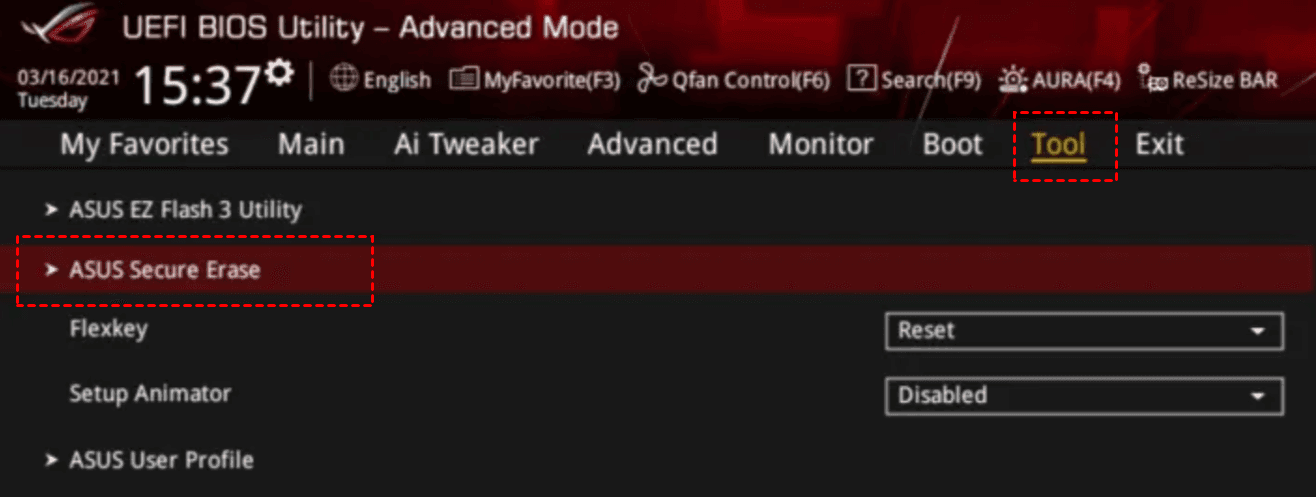
Step 2. Locate the Secure Erase tool. For most ASUS motherboards (2018+):
- Press F7 to switch from EZ Mode to Advanced Mode (if not already there).
- Go to the Tool tab (sometimes called Advanced > Tool).
- Click on ASUS Secure Erase.
💡Tip: If you don’t see Secure Erase, look under Advanced tab → NVMe Configuration or SATA Configuration. Or update your BIOS to the latest version from ASUS support.
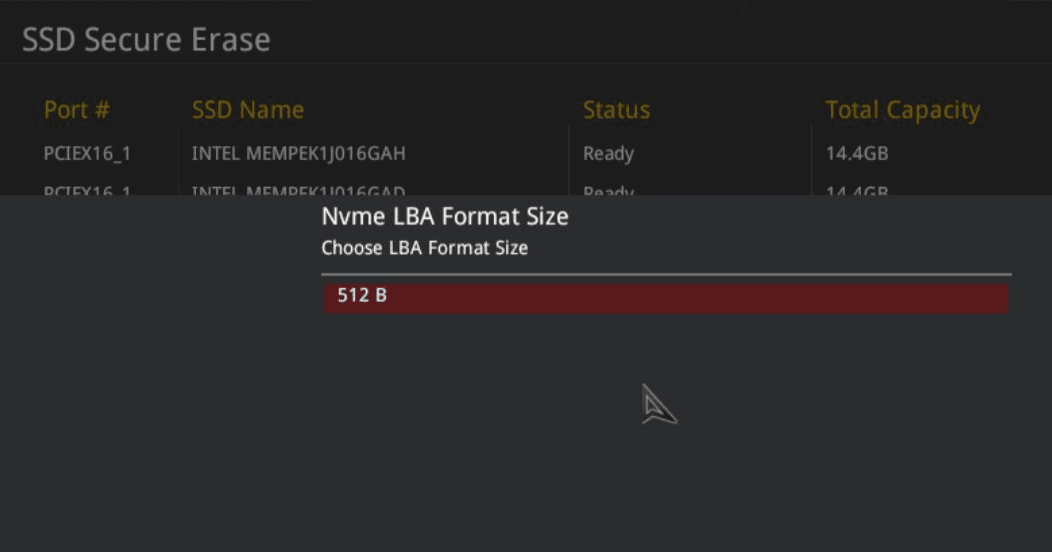
Step 3. In the Secure Erase screen, you will see a list of connected SSDs (SATA and/or NVMe). Check the drive status:
- Frozen – The drive is locked. See Step 4 below.
- Ready – You can proceed to Step 5.
Step 4. (Optional) If the status shows Frozen, you can perform hot-swap to unfreeze it:
- Physically unplug the SSD’s data cable (SATA) or power cable, wait 5 seconds, then plug it back in.
- Press Refresh in Secure Erase. Drive should now show Ready.
- For laptops/NVMe drives: Suspend to RAM (sleep) and wake the PC.
Step 5. Select the Samsung 980 Pro SSD and press Enter. When asked to choose LBA format size, keep the default one.
Step 6. When asked “Secure Erase will delete all partitions in your selected SSD. Do you want to continue?”, click OK.
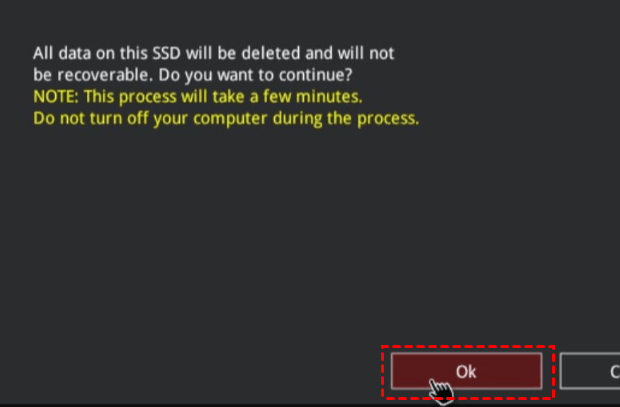
Step 7. When asked “All data on this SSD will be deleted and will not be recoverable. Do you want to continue?”, click OK to begin ASUS secure erase on NVMe SSD.
What to Do After Wiping the SSD
- To reinstall Windows: Insert a USB installation drive → Boot from it (press F8 during startup on ASUS for boot menu) → Install on the unallocated space.
- To use as secondary drive: Boot into Windows → Open Disk Management → Initialize disk → Create new partition.
Best Alternative to Secure Erase an ASUS SSD
If the ASUS BIOS secure erase feature is unavailable or too complicated to use, AOMEI Backupper Professional is an excellent alternative for securely wiping an ASUS SSD in Windows.

- It allows you to wipe the entire disk or a specific partition. You can also wipe free space if needed.
- It supports various disk types, including SATA, NVMe, PCIe, M.2, and U.2 SSDs.
- It provides multiple wiping methods, such as DoD 5220.22-M and Gutmann standards.
- It supports bootable media creation for wiping disks under WinPE.
Download AOMEI Backupper and follow these steps to wipe your ASUS SSD safely:
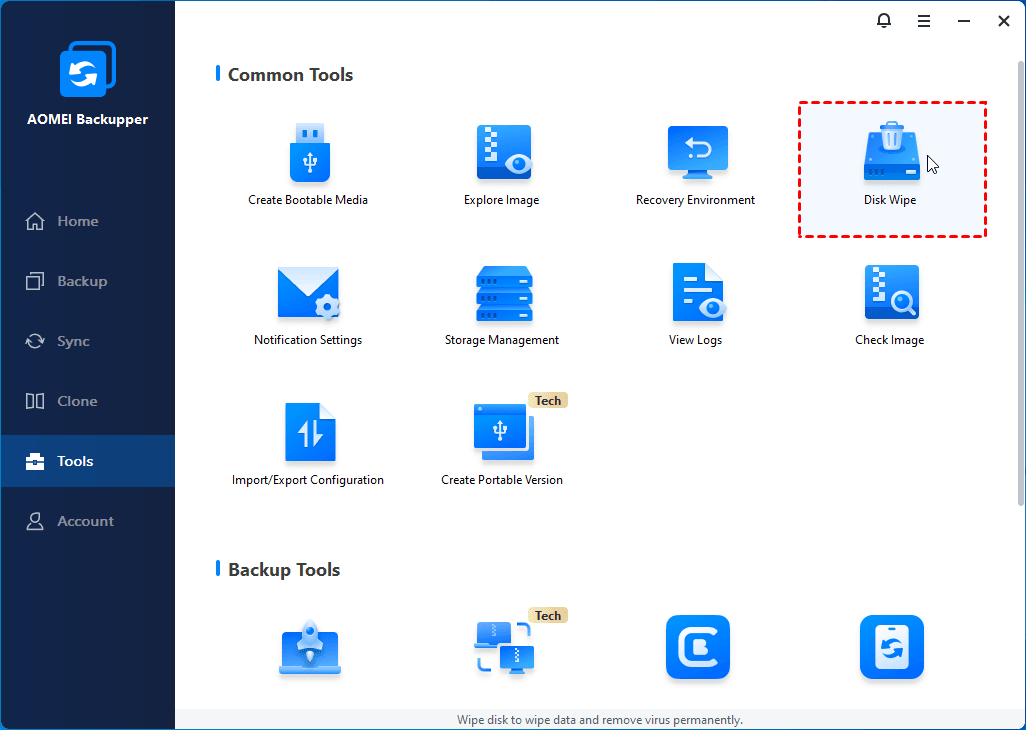
Step 1. Install and launch AOMEI Backupper. From the main interface, click Tools and select Disk Wipe.
Step 2. In the pop-up window, select Wipe disk from the drop-down menu. Then click on the ASUS SSD you want to erase and click Next.
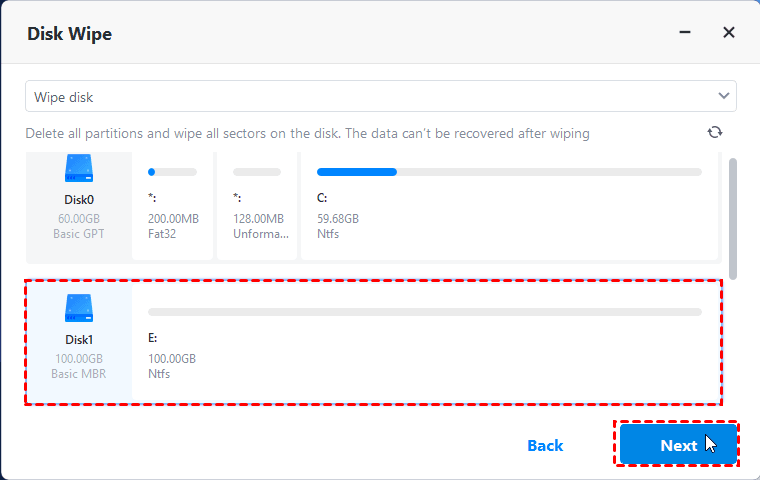
💡Tip: If you choose to wipe a system disk, you’ll be prompted that the operation needs to be executed in reboot mode. Click OK to confirm.
Step 3. Choose a wiping method based on your security needs and click Start to begin the wiping process.
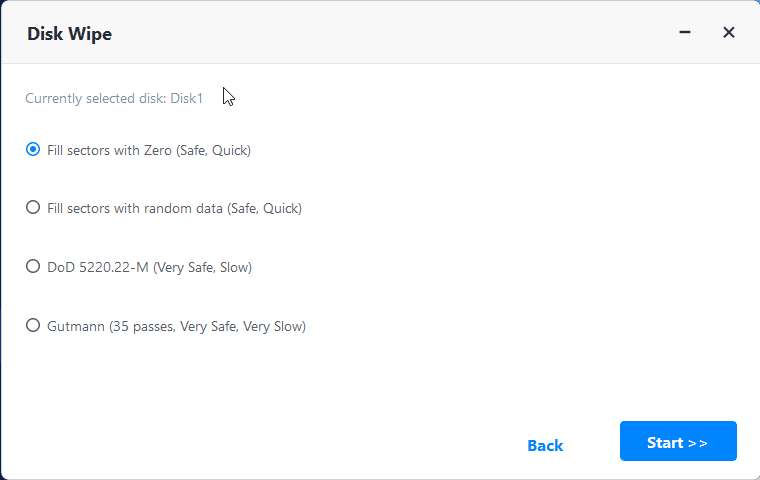
💡Tip: Stronger erasure methods take longer because they overwrite data more times to ensure it is irrecoverable.
Bonus: ASUS Secure Erase VS AOMEI Disk Wipe
Both ASUS Secure Erase and AOMEI Disk Wipe can permanently erase SSD data, but they work differently and are designed for different types of users. The table below compares the two solutions in detail:
|
Feature |
ASUS Secure Erase |
AOMEI Disk Wipe |
|
Working environment |
ASUS UEFI BIOS |
Windows (or AOMEI WinPE) |
|
Ease of use |
⭐⭐⭐ |
⭐⭐⭐⭐⭐ |
|
Supported drives |
Primarily SSDs |
SSDs, HDDs, USB drives, external disks |
|
Supported SSD brands |
Limited by BIOS compatibility |
Supports most SSD brands |
|
Wiping methods |
Built-in ATA Secure Erase |
Quick wipe, full wipe, DoD 5220.22-M, Gutmann |
|
System disk wipe |
Yes |
Yes |
|
Need bootable media |
Sometimes |
Optional |
|
Data recovery prevention |
High |
High |
|
SSD performance restoration |
Excellent |
Excellent |
|
Suitable for |
Advanced users and BIOS-level wiping |
General users and all-around data backup solutions |
FAQs about ASUS SSD Secure Erase
1. Is ASUS Secure Erase safe for SSDs?
In general, yes. Secure erase is an official SSD maintenance operation supported by many SSD manufacturers. However, frequent unnecessary erasing may slightly contribute to SSD wear because SSDs have limited write cycles.
2. Why is my SSD showing a “Frozen” status in ASUS BIOS?
The “Frozen” status is a built-in security protection that prevents accidental disk erasure. You can usually fix this by putting the computer into sleep mode and waking it up again before retrying the secure erase process.
3. Can I recover files after ASUS SSD Secure Erase?
Usually no. Secure erase is intended to permanently wipe data, so recovery is often impossible using standard recovery software. That is why backing up important files beforehand is essential.
Summary
ASUS SSD secure erase is an effective way to permanently wipe data, restore SSD performance, and prepare a drive for reuse or operating system reinstallation. This guide explained how ASUS Secure Erase works step by step.
If the built-in ASUS secure erase feature is unavailable or difficult to use, you can try the best alternative AOMEI Backupper. It supports various storage devices. You can use it to wipe pen drives, HDDs, and SSDs, etc. Why not give it a shot?
