




How to Transfer Media from iPhone to PC without iCloud
Learn how to transfer media from iPhone to PC without cloud storage. Compare 4 practical methods for moving photos, videos, music, and supported app files to Windows.

By Ivy Updated on August 19, 2026


Your iPhone is almost full, and years of photos, videos, and music are taking up most of the space. You want to move them to your Windows PC, but you don’t want to upload everything to iCloud or pay for more cloud storage.
The most practical way to transfer media from iPhone to PC is to use a USB connection.
- Choose AOMEI FoneBackup when you need flexible selection
- Windows Photos for an official photo import
- File Explorer for direct DCIM access
- Apple Devices for files stored inside supported apps
Which iPhone-to-PC Transfer Method Should You Use?
Different tools can access different parts of your iPhone. Choose a method based on where the files are stored and how you want to transfer them.
| ❓ Your situation | 👉 Choose | 💡 Why |
|---|---|---|
| Select photos, videos, or music and choose a PC folder | AOMEI FoneBackup | Offers a guided iPhone-to-PC transfer |
| Import items from the Photos library | Windows Photos | Uses the official Windows import process |
| Copy Camera Roll files directly | File Explorer | Opens the iPhone DCIM folder |
| Export documents or media stored inside an app | Apple Devices | Supports apps that use File Sharing |
Where to start?
- If your main goal is to move photos and videos for free, begin with Windows Photos or File Explorer.
- If you want more control over what gets transferred and where it is saved, consider AOMEI FoneBackup.
Before You Transfer Media from iPhone to PC
A few checks can prevent missing files and interrupted transfers:
- Use a USB cable that supports data transfer, not a charge-only cable.
- Confirm that the PC has enough free storage for the files.
- Unlock your iPhone before connecting it and tap Trust if the iPhone asks whether you trust the computer.
- Keep the iPhone connected until the transfer finishes.
- Do not delete the originals from your iPhone yet.
You do not need to enable or purchase iCloud for the methods below.
Method 1. Transfer Media from iPhone to PC with AOMEI FoneBackup
👍 Best for: Selecting particular photos, videos, or music and saving them to a chosen Windows folder without using cloud storage.
AOMEI FoneBackup is an iPhone backup and transfer tool for Windows PCs. It provides a guided way to preview supported media and transfer selected files to your computer.
- 3 Transfer Modes: iPhone to PC, PC to iPhone, as well as iPhone to iPhone.
- ⚙️Selective Transfer: Choose specific files to transfer instead of entire library. Preview before transferring.
- 📂Flexible storage: Save data on your PC, external drive, USB stick, NAS, etc.
- USB connection: Transfer photos, videos, musics, etc., with a USB cable instead of iCloud.
- 💰 Free boundary: Transfer media up to 30 files per day; unlimited transfer requires an upgrade.
Here is how to transfer iPhone media to a PC:
Step 1. Connect the iPhone to the PC with a USB cable. Unlock the iPhone and tap Trust if prompted.
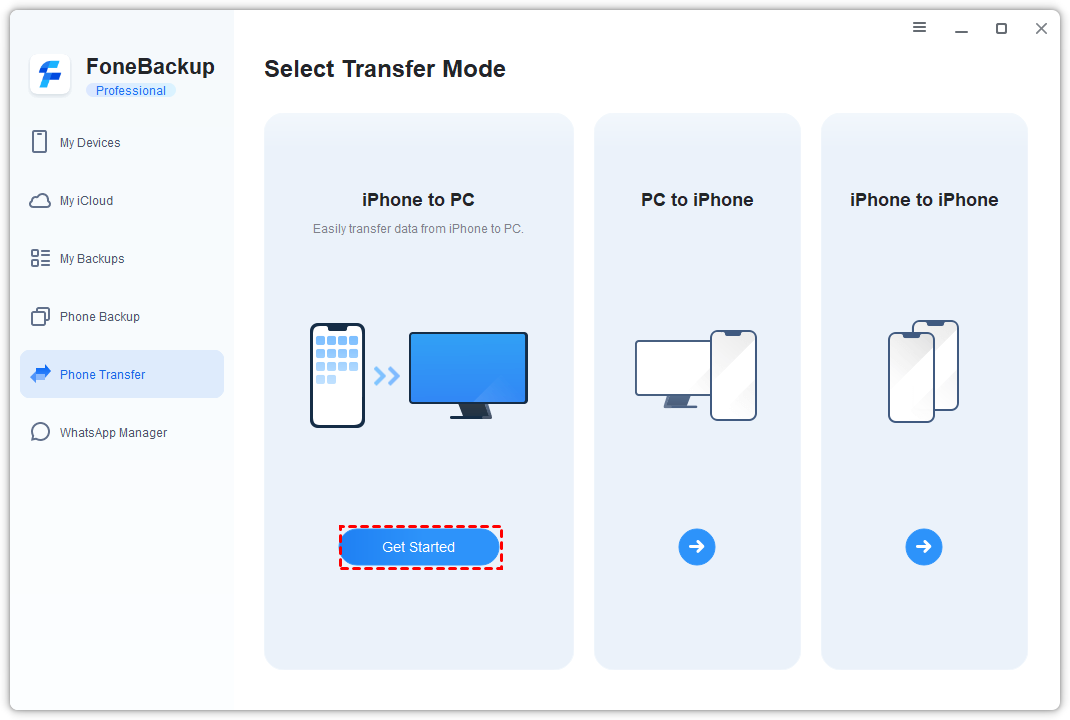
Step 2. Open AOMEI FoneBackup. Select Phone Transfer > iPhone to PC, and click Get Started.
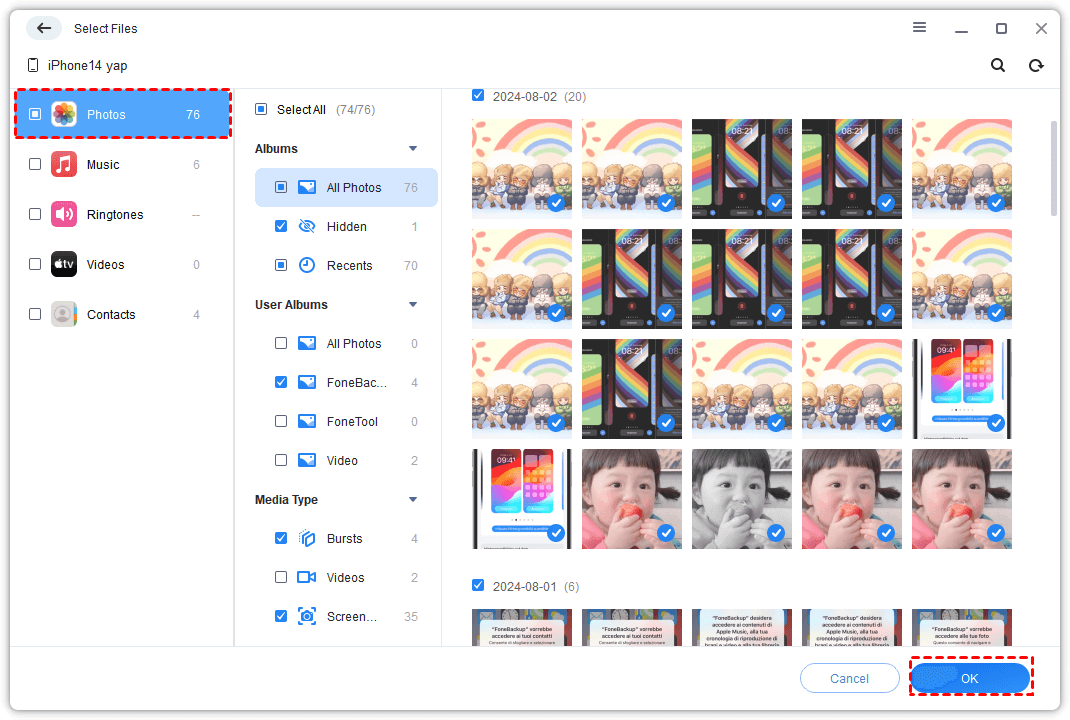
Step 3. Click the Plus icon. Preview the available categories and select the photos, videos, music, or other media you want to move. Click OK.
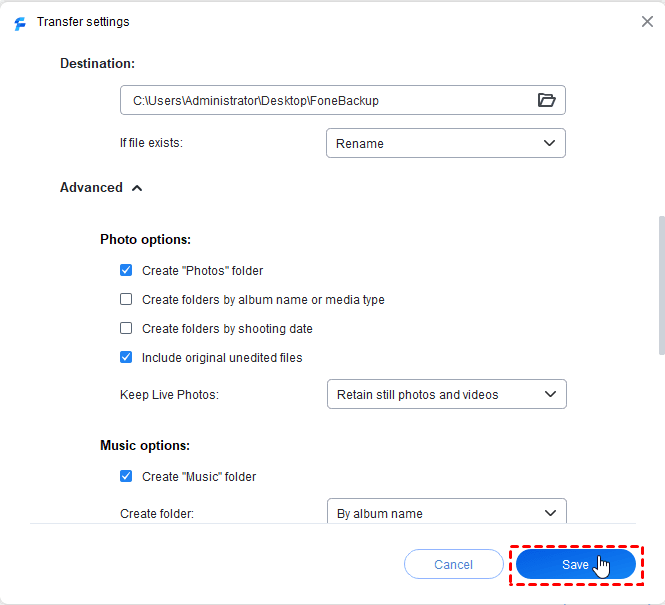
Step 4. Open Transfer Settings and choose a folder on your PC as the destination. Click Save.
Step 5. Click Start Transfer. Leave the iPhone connected until the completion message appears.
Open the destination folder afterward and confirm that the selected files are present.
Method 2. Transfer iPhone Photos and Videos to PC with Windows Photos
👍 Best for: Importing photos and videos from the iPhone Photos library with an official Windows tool.
Apple’s current Windows instructions require the Apple Devices app before importing an iPhone through Microsoft Photos. Apple Devices helps Windows recognize and communicate with the connected iPhone, while the actual import takes place in the Photos app.
Step 1. Install Apple Devices from the Microsoft Store. Connect the iPhone to the PC with a USB cable. Unlock the iPhone and tap Trust if prompted.
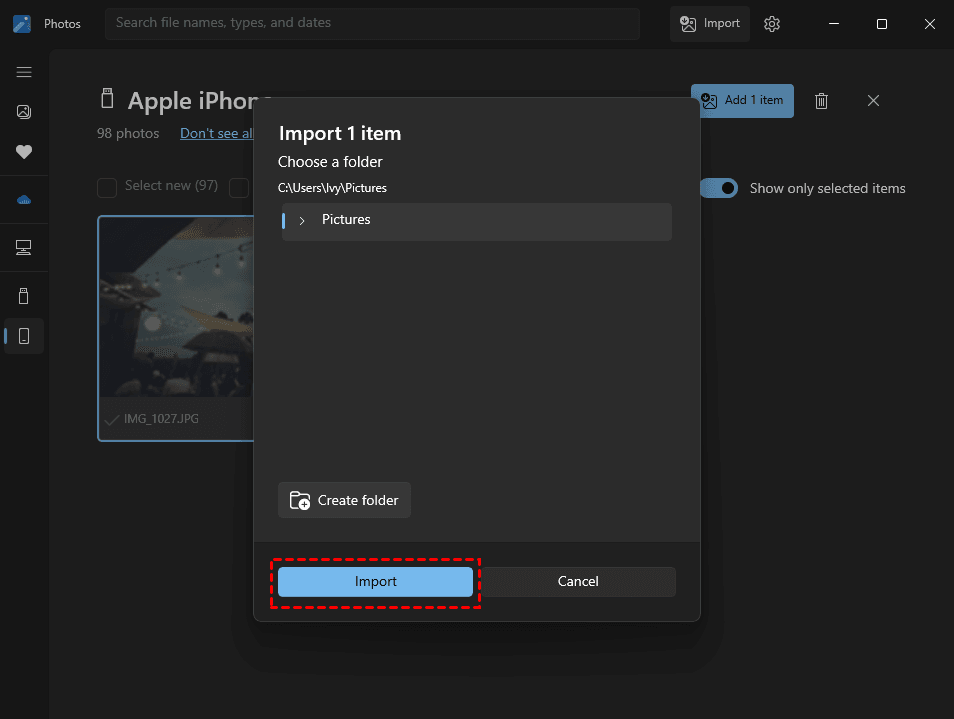
Step 2. Open the Photos app from the Windows Start menu. Then, select Import, then choose the connected iPhone.
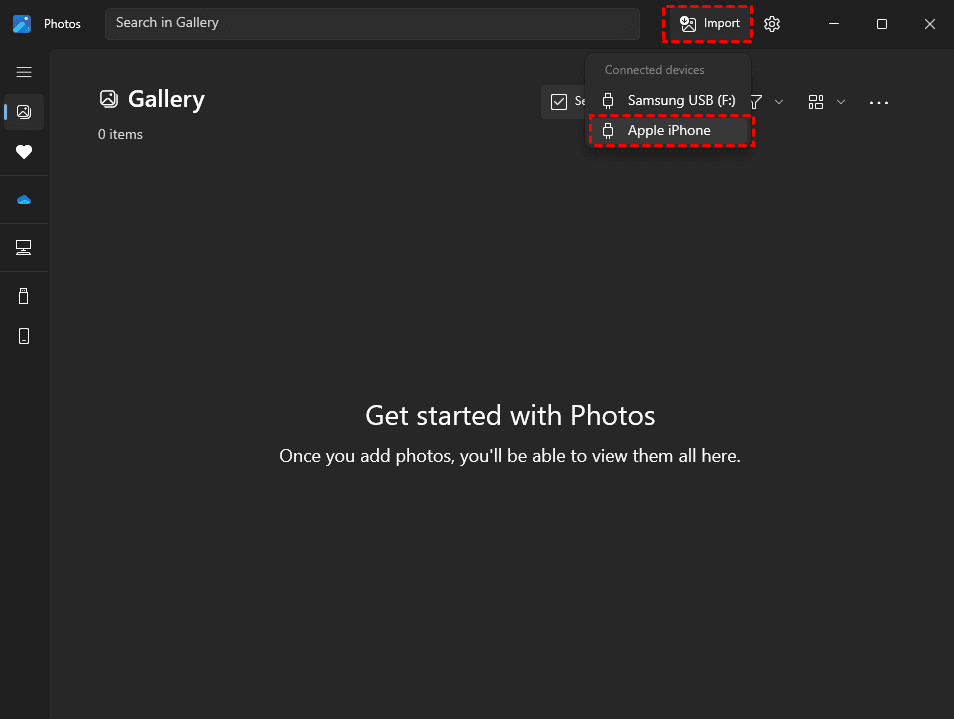
Step 3. Wait while Windows detects the available photos and videos. Select the items you want, click Add > Import to get started.
Method 3. Move iPhone Media to PC through File Explorer
👍 Best for: Manually copying Camera Roll photos and videos from the DCIM folder without using a cloud service.
File Explorer gives you direct access to the camera folders on an unlocked iPhone. It is useful when you want to place files in your own folders, but it does not provide full access to music, app documents, or the original album organization in Photos.
Step 1. Connect the iPhone to the PC. Unlock it and tap Trust if prompted.
Step 2. Open File Explorer, go to This PC > Apple iPhone > Internal Storage > DCIM.
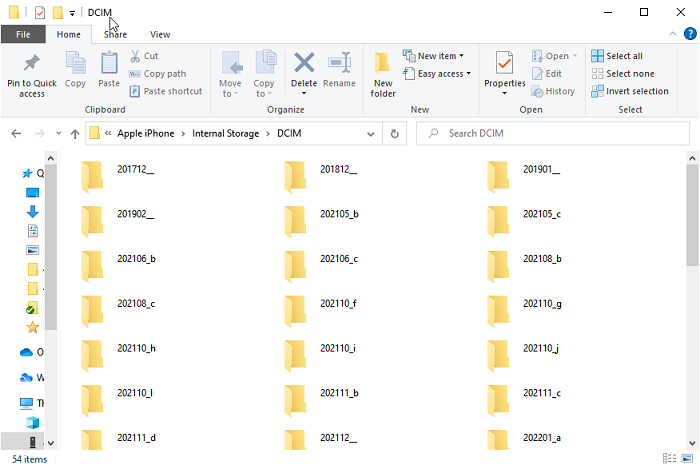
Step 4. Select the photos and videos you want. Copy them and paste them into a folder on the PC.
-
For a large library, copying smaller batches can make it easier to identify which files need to be retried if the connection stops.
If the iPhone does not appear, the DCIM folder is empty, or files keep disappearing, refers to iPhone files not showing up on a PC.
-
See how to transfer and view HEIC photos on Windows if you cannot open HEIC photos or it has blank thumbnails.
Method 4. Transfer App Media from iPhone to PC with Apple Devices
👍 Best for: Exporting photos, videos, audio, or documents stored inside an app that supports File Sharing.
Apple Devices replaces several device-management and File Sharing functions previously handled by iTunes on current Windows PCs. However, it does not let you browse the entire iPhone Photos library. Only files belonging to apps that support File Sharing appear in its Files section.
Step 1. Connect the unlocked iPhone to the PC and tap Trust if asked.
Step 2. Open Apple Devices, select your iPhone in the sidebar. Then, click Files and select an app to see the files it makes available for sharing.
Step 3. Choose the files you want to copy and click Save.
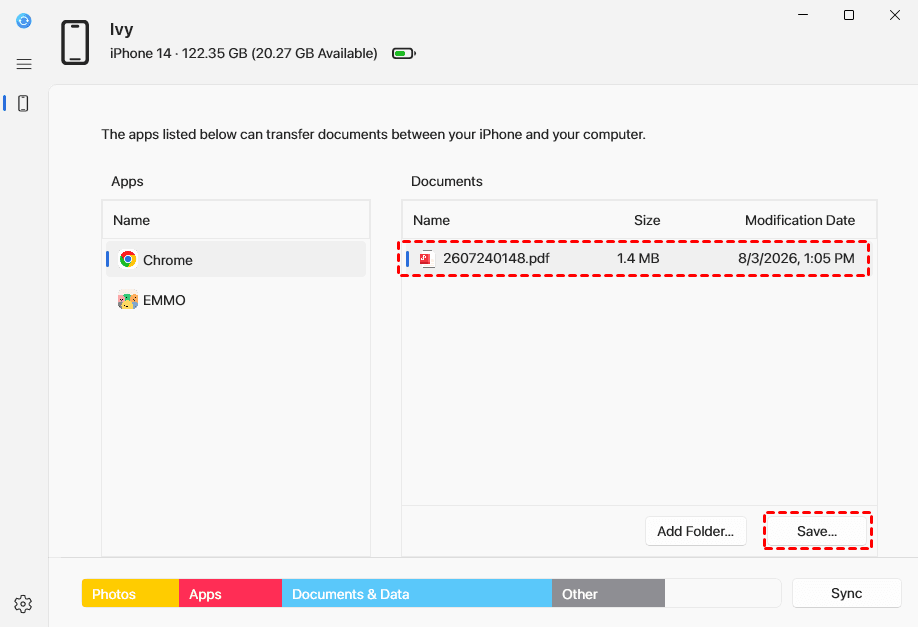
Step 4. When prompted, choose a destination folder and click Open > Save. Once done, navigate to the folder to confirm your files are there.
💬 Before deleting anything from your iPhone, verify the transfer:
- Open several transferred photos.
- Play at least 1 large video from beginning to end.
- Compare the approximate file count and folder size.
- Keep both parts of a Live Photo if Windows displays it as a photo and a separate video.
- Confirm that important dates and file details remain available.
If anything is missing, damaged, or unable to open, keep the originals on the iPhone. Transfer the affected files again or try another method.
Compare the 4 iPhone-to-PC Transfer Methods
| Method | 👍 Best for | Requirements | Main limit |
|---|---|---|---|
| AOMEI FoneBackup | Selected media and flexible folders | USB, software installation | Free Transfer has a daily file limit |
| Windows Photos | Photos library import | Apple Devices, USB | Photos and videos only |
| File Explorer | Manual DCIM copying | USB | Limited organization and access |
| Apple Devices | Files inside supported apps | A File Sharing app | Cannot export the full Photos library |
Choose Windows Photos for a free official import. Use File Explorer when you want direct control over DCIM files. Choose Apple Devices only for supported app files. Use AOMEI FoneBackup when selective transfer and a chosen Windows destination matter more than using a built-in tool.
FAQs
1. Can I transfer iPhone media to a PC without iCloud?
Yes. AOMEI FoneBackup, Windows Photos, File Explorer, and Apple Devices can all use a direct USB connection. You do not need to purchase iCloud or another cloud plan.
2. Why are some photos missing from the iPhone DCIM folder?
The iPhone may still be locked, the PC may not have been trusted, or full-resolution originals may be stored only in iCloud. Unlock the iPhone, reconnect it, tap Trust, and confirm that the originals are available on the device.
3. Does Apple Devices completely replace iTunes on Windows?
Apple Devices handles device management, backups, syncing, and File Sharing on current Windows systems. Apple now separates some media functions into other Windows apps, so Apple Devices should not be treated as a universal media-library exporter.
4. Will transferring iPhone photos reduce their quality?
Copying the original files does not automatically reduce their resolution. However, Windows compatibility settings or later file conversion can change the format. Decide whether you want to preserve the original HEIC/HEVC files or use more widely compatible formats.
5. Can Apple Devices transfer every photo and video from an iPhone?
No. Its Files section only shows files from apps that support File Sharing. Use Windows Photos or File Explorer for items stored in the main Photos library.
Summary
You can transfer media from iPhone to PC without paying for cloud storage:
- Use AOMEI FoneBackup when you want to select supported media and choose where it is saved.
- Use Windows Photos for an official photo-and-video import.
- Use File Explorer for direct DCIM copying.
- Use Apple Devices for files stored inside apps that support File Sharing.
Whichever method you choose, verify the copied files before removing anything from the iPhone. If you prefer a guided, selective transfer to a Windows folder, try AOMEI FoneBackup.

 as a preferred
source on Google
as a preferred
source on Google