



5 Ways to Fix iPhone 14 Stuck on Transferring Data Issue
iPhone 14 stuck on transferring data? This guide covers 5 ways to fix it, from checking Wi-Fi to waiting longer. If nothing works, transfer data with a USB cablewith AOMEI FoneBackup. Plus prevention tips. Keep reading.

By Ivy Updated on July 15, 2026


You just unboxed your brand new iPhone 16, powered it on, and started the data transfer from your old iPhone. Everything was going smoothly until the progress bar stopped. At 1 minute remaining. For the last 30 minutes.
It's frustrating, but you're not alone. This is one of the most common issues iPhone users face when setting up a new device. The good news? In most cases, it's fixable.
This guide walks you through 5 proven fixes, from the simplest checks to more advanced troubleshooting. If none of them work, we've also included a reliable USB-based alternative that bypasses the problem entirely.
Quick Diagnosis: What's Causing Your iPhone to Get Stuck?
Not sure where to start? This quick guide matches your situation to the right fix.
| ❓ Your Situation | 🔍 Most Likely Cause | 🛠️ Try This |
|---|---|---|
| The progress bar hasn't moved for over 20 minutes | Network instability or large data volume | Check Wi-Fi connection (Fix 1) or wait longer (Fix 4) |
| The progress bar is stuck at "1 minute remaining" | Software conflict between old and new iPhones | Place devices closer together (Fix 2) or restart the process |
| The transfer won't even start | Apple servers are busy | Try again later or skip to USB Transfer |
| You don't have time to troubleshoot | Multiple factors combined | Jump straight to USB transfer |
Why Is Your iPhone Stuck on the Transferring Data Screen?
Understanding the root cause can help you choose the right fix. Here are the most common reasons why iPhones get stuck during data transfer:
-
Unstable Wi-Fi connection: The transfer requires a stable network. If your Wi-Fi is spotty, the process can slow down or freeze entirely.
-
Software conflicts: The system on your old iPhone may have compatibility issues with the new device's iOS version.
-
iPhone glitches: Temporary system errors can interrupt the transfer.
-
Large data volume: If you're transferring hundreds of gigabytes, the process will take time. A 100GB+ transfer can take 1-2 hours or more.
-
Apple server congestion: When many users are setting up new devices simultaneously, Apple's servers can become overloaded.
Not sure which one applies to you? Start with Fix 1 - it addresses the most common cause. If that doesn't work, work your way through the remaining fixes in order.
How to Fix iPhone Stuck on Transferring Data Step by Step
Fix 1. Check Wi-Fi Connection and Network Settings
A stable Wi-Fi connection is essential for iPhone-to-iPhone data transfer. If your network is unstable, the transfer can stall or fail entirely.
🛠️ What to do:
Step 1. Make sure both iPhones are connected to the same Wi-Fi network.
Step 2. Restart your router to refresh the connection.
Step 3. If the issue persists, reset network settings on your old iPhone. Go to Settings > General > Transfer or Reset iPhone > Reset > Reset Network Settings.
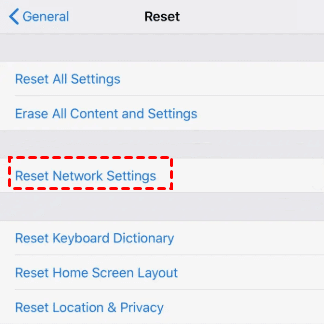
After resetting network settings, reconnect to Wi-Fi and restart the transfer. If it's still stuck, move to Fix 2.
Fix 2. Place Both IPhones Close Together
iPhone-to-iPhone transfer relies on a direct wireless connection between the two devices. If they're too far apart, the connection can be interrupted.
🛠️ What to do:
Step 1. Keep both iPhones within a few inches of each other throughout the entire transfer process.
Step 2. Avoid moving either device during the transfer.
Step 3. If you've already started the transfer and it's stuck, cancel it, place the devices closer together, and try again.
With both devices close together, the connection should stabilize. If it's still stuck, move to Fix 3.
Fix 3. Turn Off Low Power Mode
Low Power Mode reduces background activity and can affect performance, potentially interrupting the Wi-Fi connection or slowing down the transfer.
🛠️ What to do:
Step 1. On your old iPhone, go to Settings > Battery. Toggle off Low Power Mode if it's enabled.
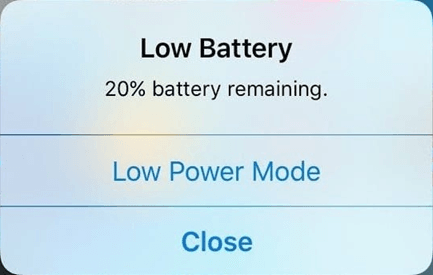
Step 3. Restart the data transfer process.
With Low Power Mode disabled, the transfer should run at full speed. If it's still stuck, move to Fix 4.
Fix 4. Wait Longer - It May Not Be Stuck
Data transfer can take much longer than expected, especially if you're moving a large amount of data or using a slow Wi-Fi connection. What looks like a "stuck" transfer may just be a slow one.
🛠️ What to do:
Step 1. Plug both iPhones into a power source to prevent battery drain during the transfer.
Step 2. Set the devices aside and wait. A large transfer (100GB+) can take 1-2 hours or more.
Step 3. Check back periodically. If the progress bar is still moving, even slowly, the transfer is still working.
After waiting an hour or more, the transfer may complete. If it's still stuck at the same point, move to Fix 5.
Fix 5. Check If the Transfer Has Actually Completed
Sometimes, the progress bar gets stuck even after the data transfer is complete. Other users have reported that the iPhone remains on the transfer screen even after all data has been successfully transferred.
🛠️ What to do:
Step 1. Check your new iPhone to see if your data - photos, contacts, messages, apps has already appeared.
Step 2. If everything you need is already on your new iPhone, you can safely force restart it and start using it.
- Press and quickly release the Volume Up button, then the Volume Down button.
- Then, press and hold the Side button until the Apple logo appears.
If your data is already on the new iPhone, the transfer was successful. The screen is just stuck - a force restart will solve it.
What to Do If None of the Fixes Work?
If you've tried all five fixes and your iPhone is still stuck on the transferring screen, don't panic. You still have options.
Wireless Transfer vs USB Transfer: Which One Is Better?
Wireless transfers are convenient, but they're also vulnerable to network issues, interference, and server congestion. When wireless transfer fails repeatedly, switching to a wired connection is the most reliable solution.
| Comparison | Wireless Transfer (Quick Start) | USB Transfer (AOMEI FoneBackup) |
|---|---|---|
| Network dependency | Requires stable Wi-Fi | No network needed |
| Transfer speed | Slower, limited by Wi-Fi | Faster, USB 3.0 up to 5Gbps |
| Stability | Prone to interference and interruptions | Stable, won't get stuck mid-transfer |
| Data selection | All-or-nothing | Transfer everything or selected files |
| Best for | Small data, good network conditions | Large data, unstable network |
Transfer Data with a USB Cable with AOMEI FoneBackup
AOMEI FoneBackup is a free iPhone data backup and transfer tool for Windows users. It allows you to transfer data between iPhones via a USB cable, bypassing the wireless transfer issues that cause the "stuck" problem.
 AOMEI FoneBackup
- 3 transfer modes - iPhone to PC, PC to iPhone, iPhone to iPhone. No iCloud or Apple ID needed.
- Selective Transfer - Transfer everything, or choose only what you need, i.e., photos, messages, songs, Safari data, and more.
- Stable USB connection - No Wi-Fi, no interruptions, no "stuck" progress bars.
- Fast transfer speed - Complete the transfer in under 30 minutes.
- Preview files: See what you're transferring before you start.
- Wide compatibility - Work with iPhone 4 to iPhone 17, and Windows 7/8/10/11.
- Flexible Storage - Save files to your computer, flash drive, external hard drive, etc.
 100% Secure
 How to transfer data with AOMEI FoneBackup:
Step 1. Download and install AOMEI FoneBackup on your Windows computer. Connect both iPhones to the computer via USB cables.
Step 2. Launch AOMEI FoneBackup, click Phone Transfer. Then, select iPhone to iPhone and click Get Started.
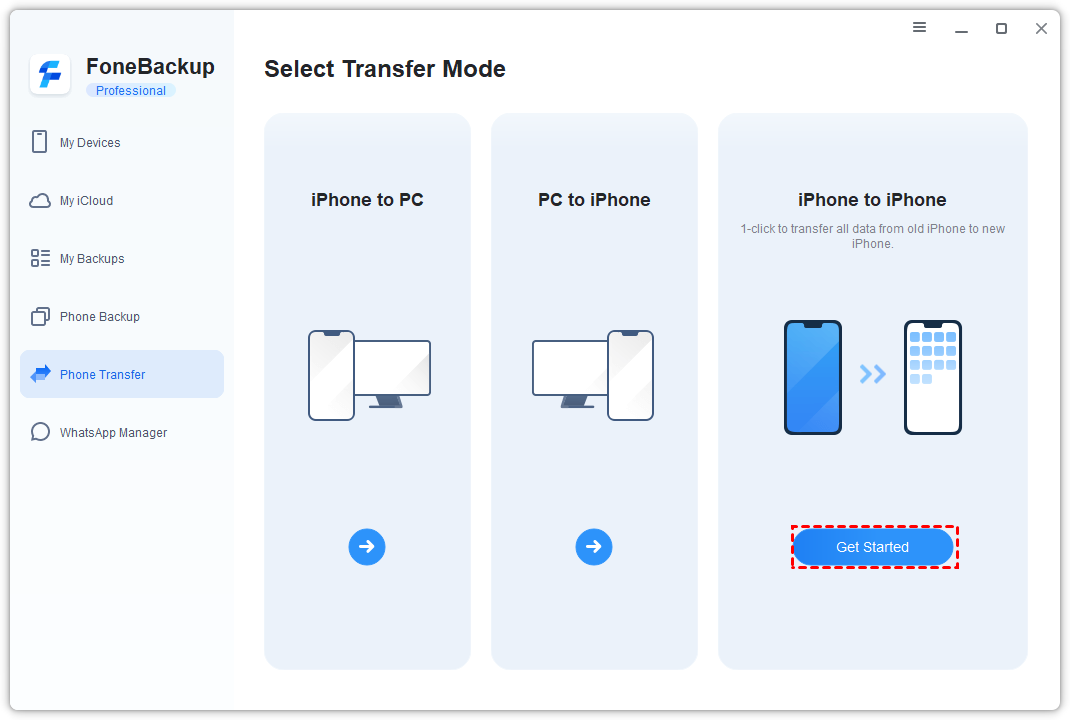
Step 3. Enable Backup encryption to protect your privacy and click Start Transfer to transfer data from old iPhone to new iPhone.
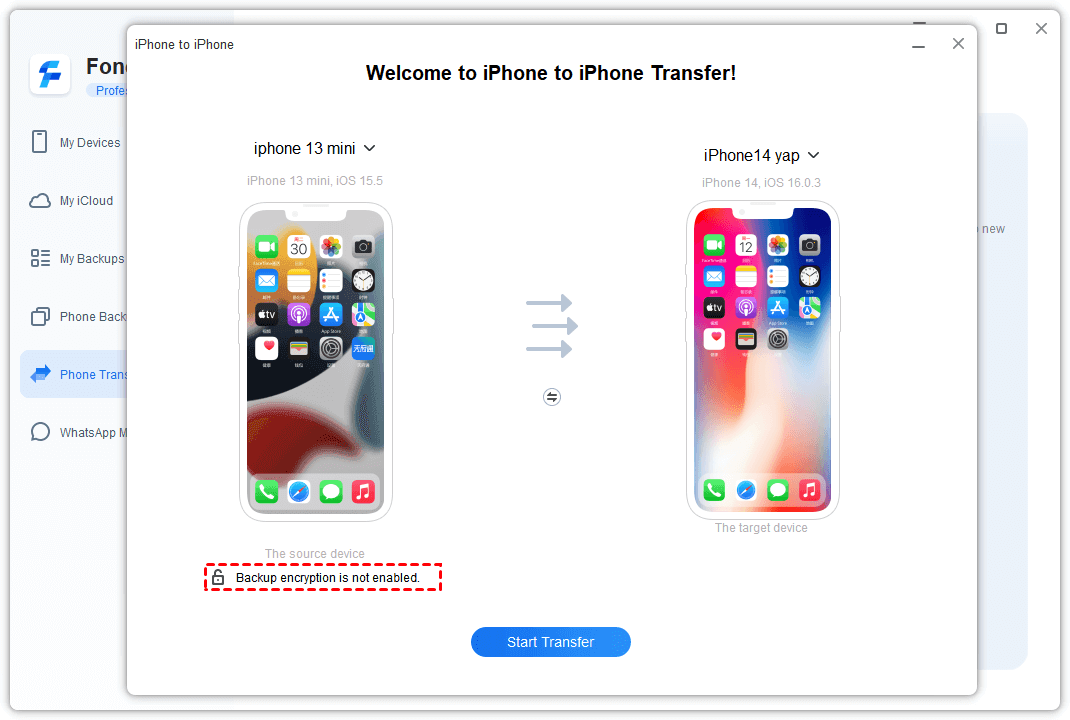
⚠️Note:
- Keep this password safe, and you'll need it to access your data later.
- Data tied to your Apple ID or iCloud won't transfer, but you can re-download or sync it after signing in.
AOMEI FoneBackup also supports transferring data after setup, managing iCloud Drive files, transferring data from Android to iPhone, and more.
How to Prevent iPhone Data Transfer Issues
Nobody wants to go through the frustration of a stuck transfer again. Here are four practical steps to ensure smooth data migration next time:
1. Back up before you transfer
Create a full backup of your old iPhone using iCloud, iTunes, or AOMEI FoneBackup before starting the transfer. If the transfer fails, you can restore from backup instead of starting from scratch.
2. Check your network before starting
Make sure you have a stable Wi-Fi connection. Test your network speed if it's slow, consider transferring at a different time or using a USB cable instead.
3. Charge both devices fully
A low battery can interrupt the transfer process. Plug both iPhones into the power before you begin.
4. Keep your iPhone updated
Ensure both devices are running the latest version of iOS. Software updates often include fixes for known transfer issues.
Final Words
A stuck iPhone data transfer can be frustrating, but as this guide shows, you have multiple ways to fix iPhone 14 stuck on transferring data. This also applies to iPhone 15, 16, and 17.
Here's the simple rule:
-
Start with the 5 fixes in order - most issues are resolved by checking the network, placing devices closer, or simply waiting longer.
-
If none work, skip to AOMEI FoneBackup - the USB transfer method bypasses wireless issues entirely and gets your data moved in under 30 minutes.
-
To avoid future headaches - back up regularly, check your network beforehand, and keep your devices charged.
Your new iPhone is worth the effort. Try these solutions, and you'll be up and running in no time.

 as a preferred
source on Google
as a preferred
source on Google