How to Import Contacts to iTunes from iPhone |2 Easy Ways
Need to import contacts to iTunes from iPhone? This guide walks you through the official sync method, plus a faster alternative to backup and manage contacts easily.
By Kelsey Updated on May 14, 2026
With so many instant messaging apps on the market today, such as WhatsApp, Telegram, and Signal, you might think that traditional text messaging and phone communication will gradually disappear. But that's not the case. At critical moments, we still pick up the phone or send a text message. This means that your iPhone contacts are actually quite important.
Losing this information would be a dream. That is why it is actually very important to master the method of how to import contacts from iPhone to iTunes. iTunes has been around for a long time and is still a reliable way to back up your contacts to your computer. This guide will take you through the official iTunes method and will also give you an extra tip if you wish to save your contacts in CSV format. And if iTunes annoys you (and you're not alone), we'll have a better option for you at the end.
Method 1. Sync iPhone Contacts to iTunes (The Official Way)
Before you start, make sure you've got the latest version of iTunes installed on your computer. Apple updates it fairly often, and an old version might not play nicely with your iPhone.
Here's how to backup iPhone contacts to iTunes:
Step 1. Grab your USB cable and connect your iPhone to your computer. Open iTunes. (If it doesn't open automatically, give it a nudge.)
Step 2. Look for the little phone icon near the top left of the iTunes window. Click it. Then, from the left sidebar, click "Info."
Step 3. You'll see a bunch of options. Find the box that says "Sync Contacts with" and check it. From the dropdown menu next to it, choose "Windows Contacts."
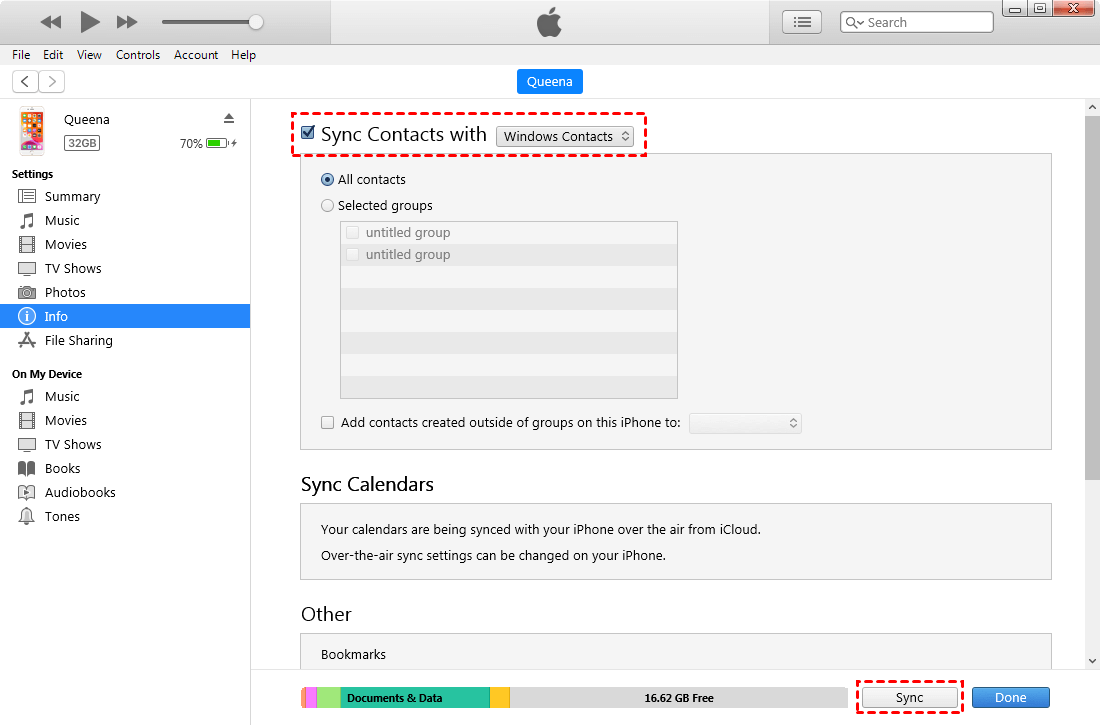
Step 4. Now you've got a choice: sync all your contacts, or pick specific groups. Choose what works for you.
Step 5. At the bottom of the screen, click the "Sync" or "Apply" button. iTunes will do its thing. Depending on how many contacts you have, it might take a minute or two.
Step 6. When it's done, you can check your contacts on your computer. Hit the Start button, click your username (that opens your user folder), and look for the "Contacts" folder. Your synced contacts should be sitting right there.
Method 2. Easily Transfer Contacts from iPhone to Computer
Let's be honest. iTunes still works, but it doesn't perform very well. The interface is clumsy and synchronized in a way that can be confusing. And, what if you only want to transfer one contact's information? iTunes does not offer this "single transfer" feature. If you're looking for a simpler, more flexible solution, AOMEl FoneBackup is worth checking out. This is a tool specifically for iPhone data transfer that lets you preview what you want to transfer before transferring.
- See your contacts first. You can preview every single contact on your iPhone and pick exactly which ones to transfer. Not just groups, individual contacts.
- Choose your format. Want them in CSV? Or maybe VCF (vCard) works better for you? AOMEI lets you pick, no extra steps needed.
- Does more than contacts. It handles photos, music, videos, messages, pretty much everything. And it works with iPads and iPods too.
- Goes both ways. iPhone to computer, computer to iPhone, even iPhone to iPhone. Whatever you need.
Step 1. Download and install AOMEI FoneBackup on your Windows PC. Connect your iPhone to the computer with a USB cable. When your iPhone asks if you trust this computer, tap "Trust" and enter your passcode.
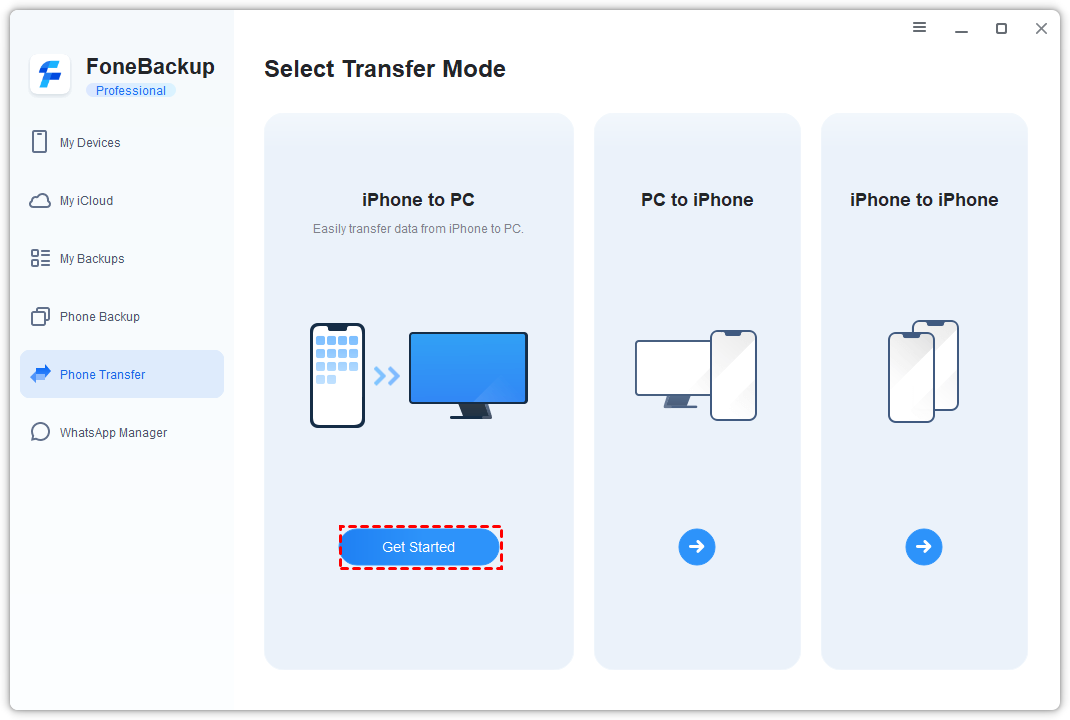
Step 2. Open AOMEI FoneBackup. On the home screen, click Phone Transfer, then choose iPhone to PC, and hit Get Started.
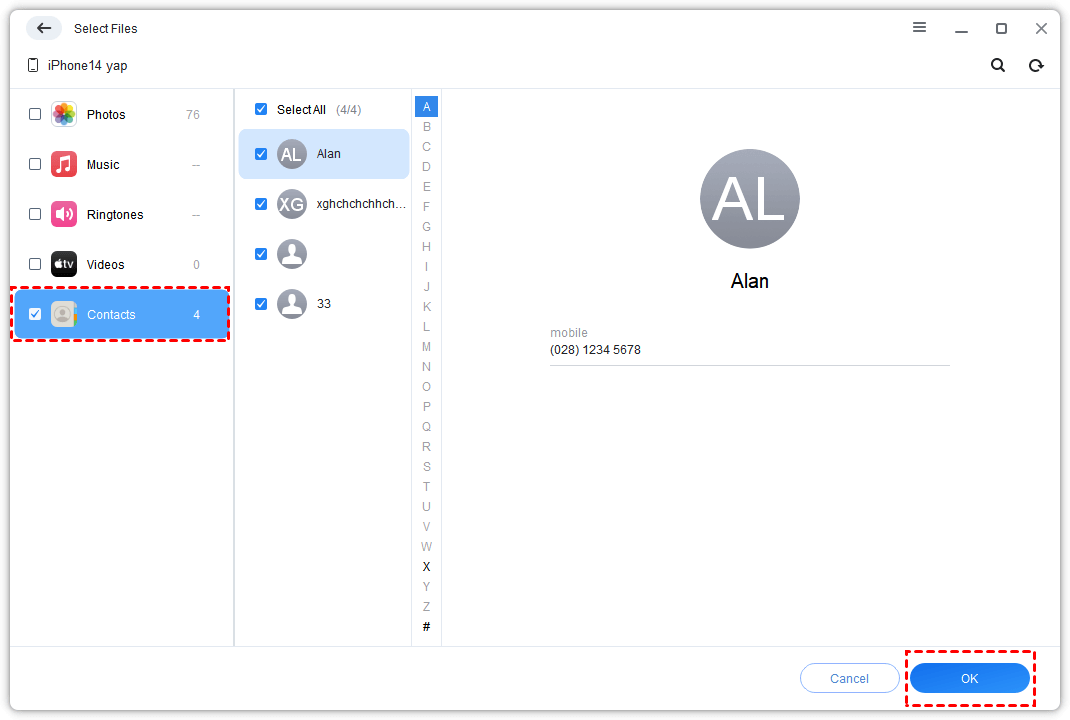
Step 3. You'll see icons for different file types. Uncheck everything except "Contacts." Now you'll see a preview of all your contacts. Select the ones you want to transfer - one, a few, or all of them. Click OK.
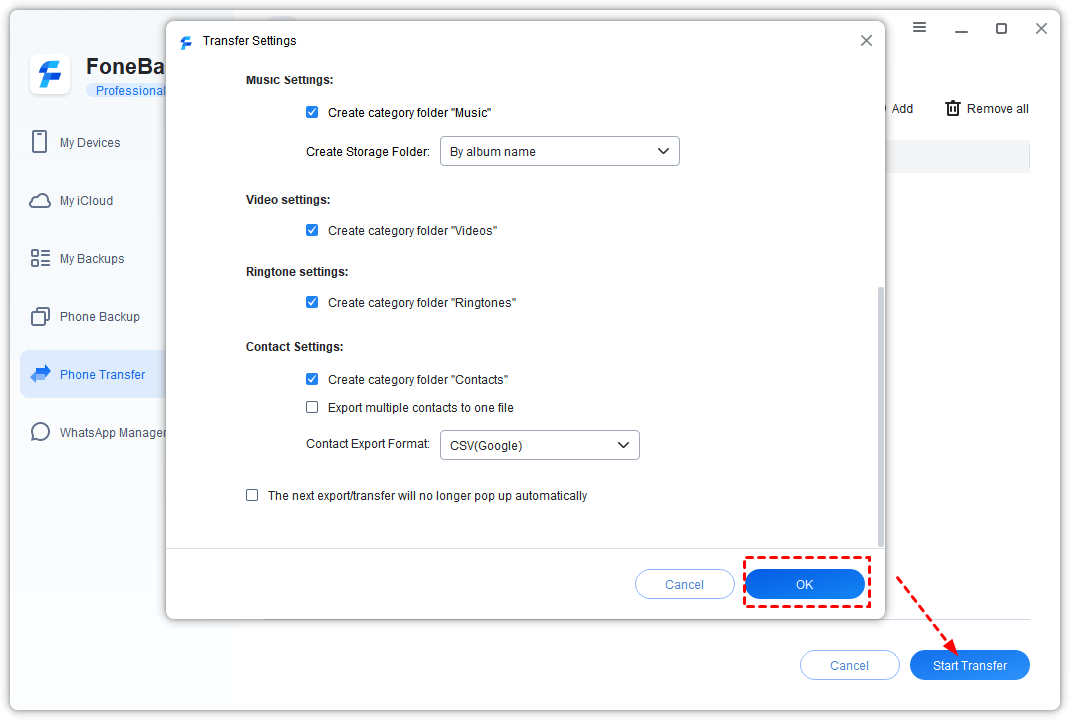
Step 4. Before you start the transfer, click Transfer Settings. Pick where you want to save the file, and choose your preferred format (CSV or VCF). Then click Start Transfer.
Step 5. Wait a few seconds. That's it. Your contacts are now on your computer in the format you wanted.
-
AOMEI FoneBackup also works as a backup tool. Use Selective Backup to save specific files, or Full Backup to grab everything on your iPhone. Handy if you're planning to upgrade to a new phone.
Bonus Tip: Export iTunes Contacts to CSV for Spreadsheets
Here's the thing: Windows Contacts format is fine, but what if you want to actually do something with those contacts? Maybe import them into Excel, or use them for a mailing list? That's where CSV format comes in handy.
How to export contacts to CSV after syncing:
Step 1. Navigate to that "Contacts" folder we just talked about. Open it up.
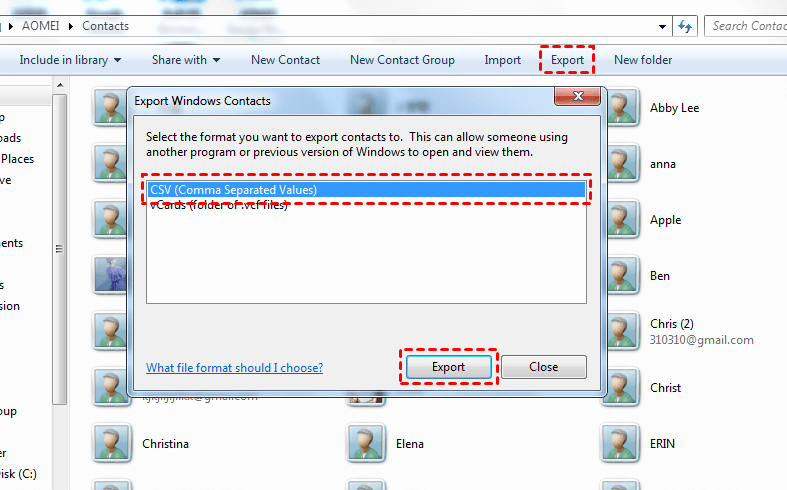
Step 2. Look at the top of the folder window. You'll see an "Export" button in the toolbar. Click it.
Step 3. A dropdown menu will appear. Choose "CSV (Comma Separated Values)" as your format. Click "Export" to confirm.
Step 4. Give your file a name. Pick where you want to save it. (The desktop is always a safe bet if you're not sure.) Click "Save."
Step 5. A new window might pop up asking which contacts you want to export. Select what you need and click "Finish." Done. You've now got a CSV file with all your contacts.
The Bottom Line
So there you have it. If you need to import contacts to iTunes from iPhone, the built-in method works fine—sync to Windows Contacts, then export to CSV if needed. But if you want something simpler, faster, and more flexible, AOMEI FoneBackup is the better way to go. You get to see what you're moving, pick exactly what you want, and save in the format that actually works for you. Give it a try and see the difference.