
Easily Merge Partitions and Unallocated Space in Windows 11/10/8/7
Looking for a way to merge partitions with unallocated space on a Widows PC? This guide walks through both native Windows utilities and reliable third-party solutions, offering practical methods to efficiently reorganize your disk layout across Windows 11, 10, 8, and 7 systems.
By Hedy Updated on March 24, 2026
Understanding merge partitions and unallocated space
If you’ve ever tried managing your disk space on Windows, you’ve probably seen the term unallocated space. Unallocated space is a portion of your hard drive or SSD that isn’t assigned to any partition. Similarly, merging partitions means combining two or more partitions or adding unallocated space to an existing partition to expand storage.
Many users struggle with full partitions, especially their system drives. Understanding how to merge partitions unallocated space can save you from running out of storage and simplify disk management.
How to manage unallocated space using Windows built-in tools
Unallocated space is disk space not assigned to any partition. Windows provides built-in tools to manage it safely, letting you create new partitions, extend existing ones, or format space for immediate use.
Tool 1. Disk Management
Disk Management is a graphical Windows tool for managing drives and partitions. It’s user-friendly and ideal for beginners who want to create, extend, or delete partitions without using command-line instructions.
Step 1. Press Windows + X and select Disk Management from the menu.
Step 2. Locate the unallocated space on your drive.
Step 3. Right-click the unallocated space and choose New Simple Volume.
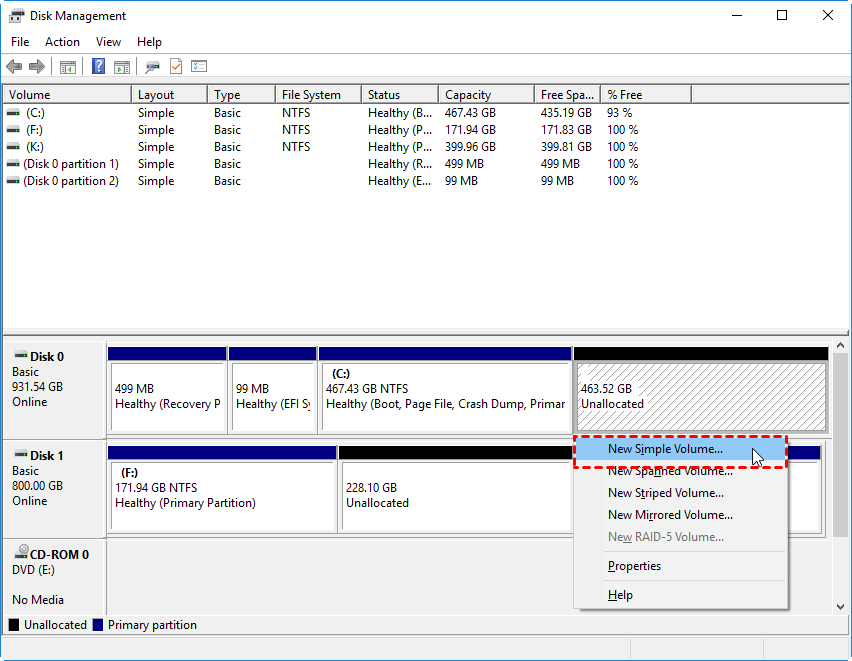
Step 4. Follow the New Simple Volume Wizard to assign size, drive letter, and format the partition.
Step 5. Click Finish to complete the process. The unallocated space is now a usable partition.
Optional: To extend an existing partition, right-click a partition adjacent to unallocated space and choose Extend Volume. Follow the wizard to add the unallocated space to the existing partition.
Tool 2. DiskPart command-line tool
DiskPart is a powerful command-line utility that allows precise disk management. It is suitable for advanced users who need more control over partitions, including creating, deleting, or extending volumes with specific parameters.
Step 1. Press Windows + S, type cmd, right-click Command Prompt, and select Run as administrator.
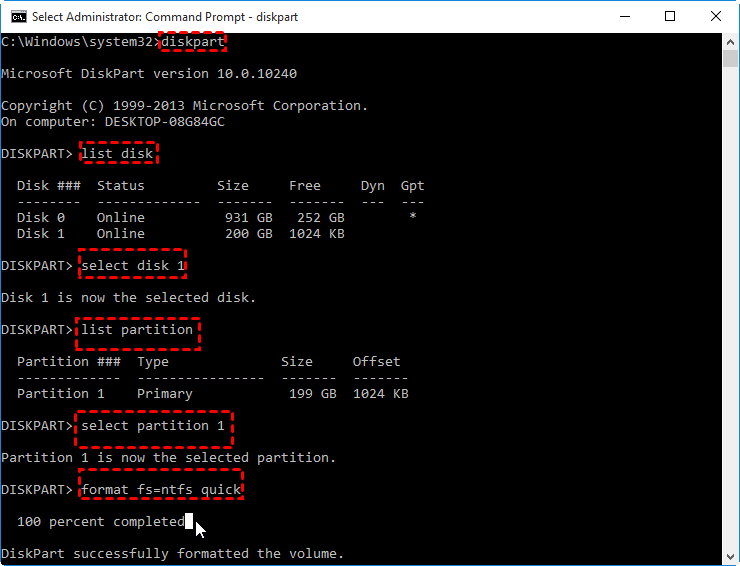
Step 2. In the command prompt, type diskpart and press Enter.
Step 3. List all disks by typing list disk and pressing Enter.
Step 4. Select the target disk using select disk X (replace X with the disk number).
Step 5. Type list partition to see current partitions.
Step 6. Create a new partition with create partition primary size=XXXX (replace XXXX with the size in MB).
Step 7. Format the new partition using format fs=ntfs quick (or fat32 if needed).
Step 8. Assign a drive letter using assign letter=X (replace X with your preferred letter).
Step 9. Type exit to leave DiskPart.
Why Windows tools may not be enough?
Windows built-in tools like Disk Management and DiskPart are convenient, but they have limitations that can make managing unallocated space tricky in some scenarios. Here’s why they may not always be enough:
📢 Limited partition operations: Windows tools cannot merge non-adjacent partitions or move partitions easily. If unallocated space isn’t right next to the partition you want to extend, Disk Management cannot help.
📢 File system restrictions: Windows may only support certain file systems for formatting, like NTFS or FAT32, and has size limitations (e.g., FAT32 cannot format drives larger than 32 GB in Disk Management).
📢 No advanced recovery options: If partitions are corrupted or lost, Windows tools provide minimal recovery options. You cannot easily recover deleted partitions or repair broken file systems.
📢 No automation or scripting for complex tasks: DiskPart requires command-line knowledge, and even then, complex operations like resizing multiple partitions or aligning SSD partitions can be error-prone.
📢 Risk of data loss: Mistakes in DiskPart commands or improper resizing in Disk Management can lead to permanent data loss, which makes these tools risky for critical drives.
For these reasons, many users rely on third-party partition managers like AOMEI Partition Software, which can safely resize, move, merge, or recover partitions without risking data loss.
How to merge partitions and unallocated space using AOMEI Partition Software
AOMEI Partition Software is a professional partition management tool that simplifies complex disk operations. It allows you to safely merge partitions, extend volumes, or integrate unallocated space without data loss, even when Windows tools fall short.
A free and reliable disk partition software that helps you resize partitions, migrate OS, convert disks, and optimize PC efficiently.
Scenario 1. Merging two adjacent partitions
Merging two adjacent partitions is often needed to consolidate space and improve disk organization. With AOMEI Partition Software, this process is straightforward and preserves all data in one of the partitions.
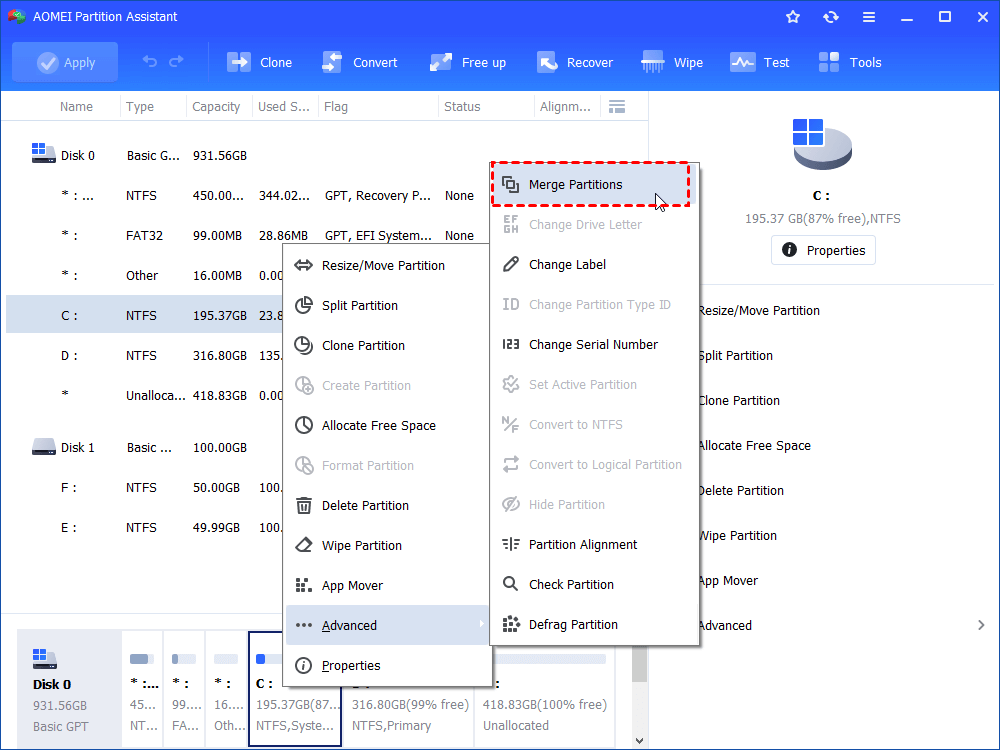
Step 1. Install and launch AOMEI Partition Software. Right-click the partition (here is C:) you want to merge, and click "Advanced" and then select the "Merge Partitions" feature in the drop-down menu.
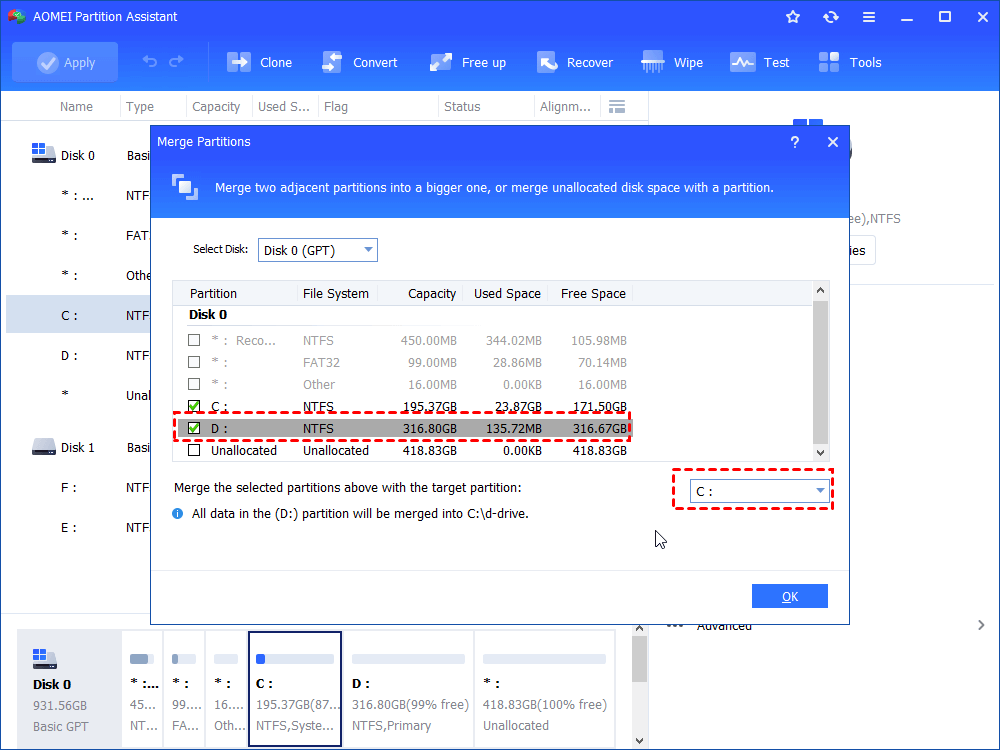
Step 2. In the pop-up window, tick the partition (here is C:) in the check box and select the other partition (we choose D:). And then click "OK" to continue.
Step 3. To start the operation, please click "Apply" on the toolbar. Then, you can preview the conversion under "Pending Operations". Then, you can click "Proceed" to start the merge operation.
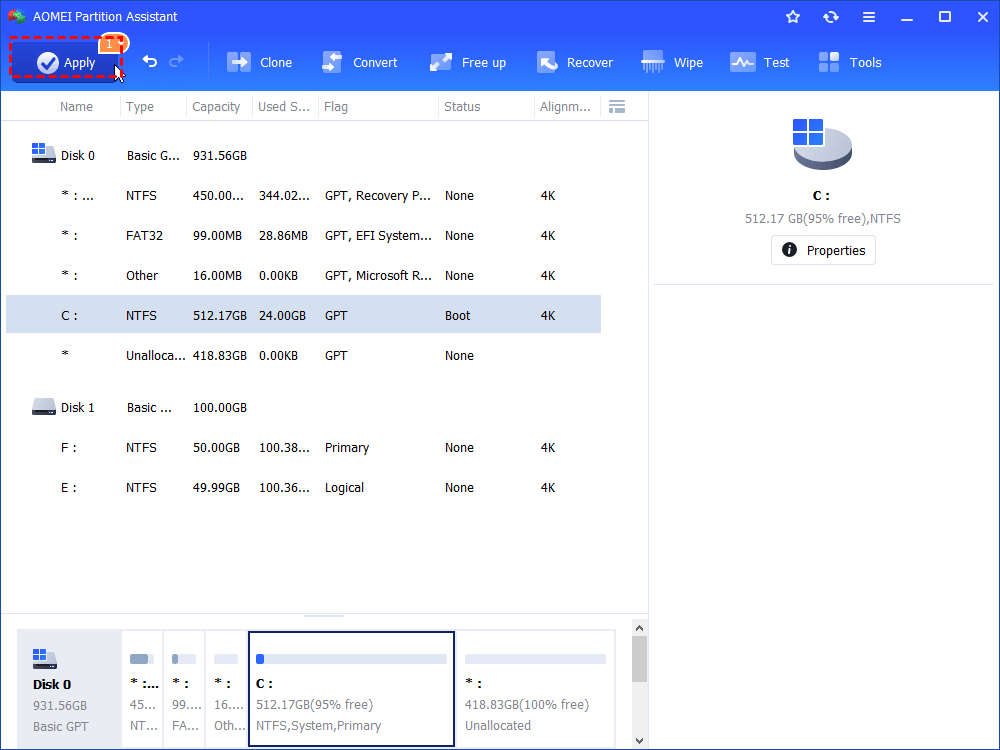
Step 4. Wait for the process to be finished. Once it is finished, you will find D: is merged into C: partition.
Scenario 2. Merging unallocated space into an existing partition
Sometimes unallocated space exists next to a partition, but Windows cannot extend it. AOMEI Partition Software makes it easy to merge unallocated space into an existing partition safely.
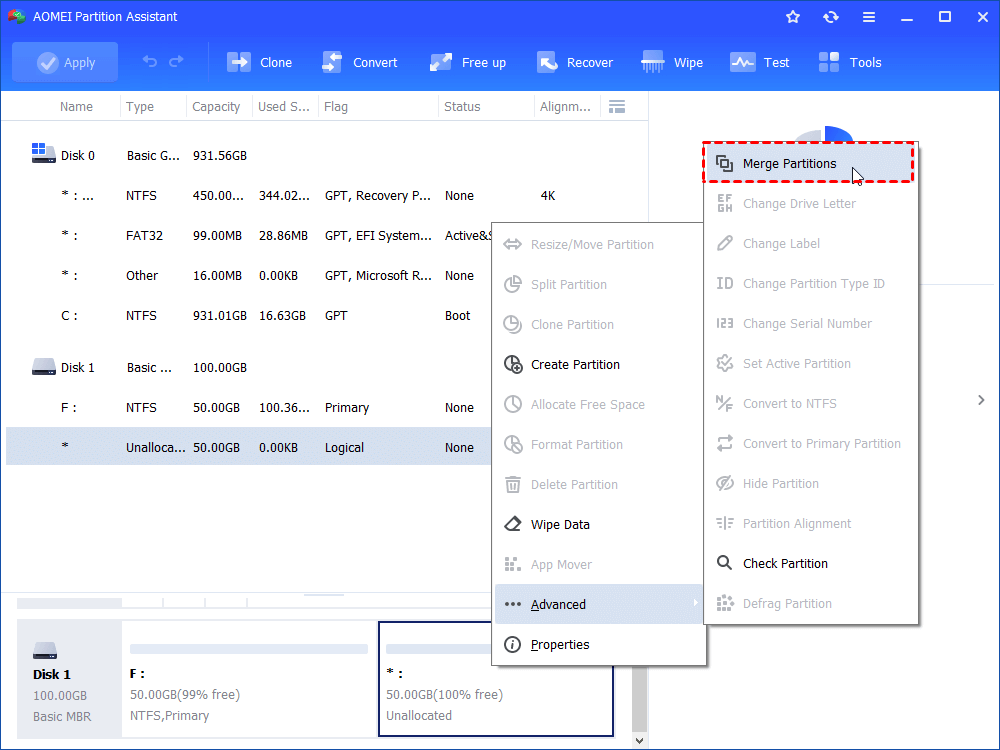
Step 1. Install and launch AOMEI Partition Software. In this example, there is an unallocated space behind F: partition. Right-click the partition (here is F:) where you want to merge unallocated space to and click "Advanced" and then select the "Merge Partitions" feature in the drop-down menu.
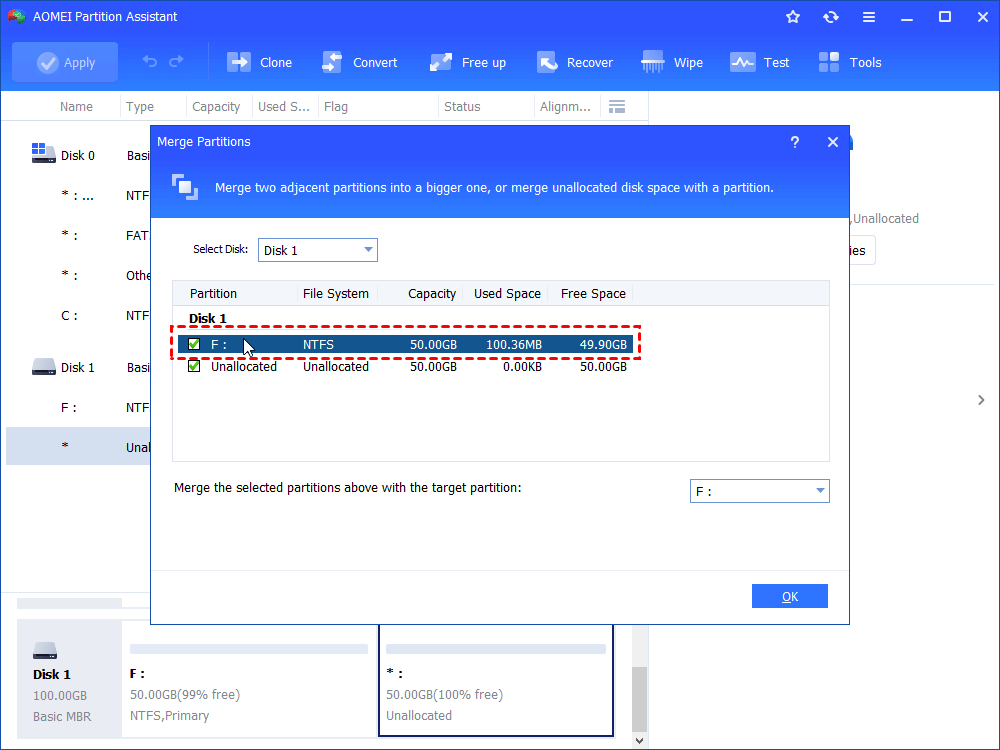
Step 2. In the pop-up window, tick the check boxes of which are in front of the partition and the unallocated space, and then click "OK" to continue. In this case, you cannot specify the target partition because F: is selected as the target partition in default and there is no other choice.
Step 3. You can preview changes. To start the operation, please click "Apply" on the toolbar. Then, you can preview the conversion under "Pending Operations". Then, you can click "Proceed" to start the merge operation.
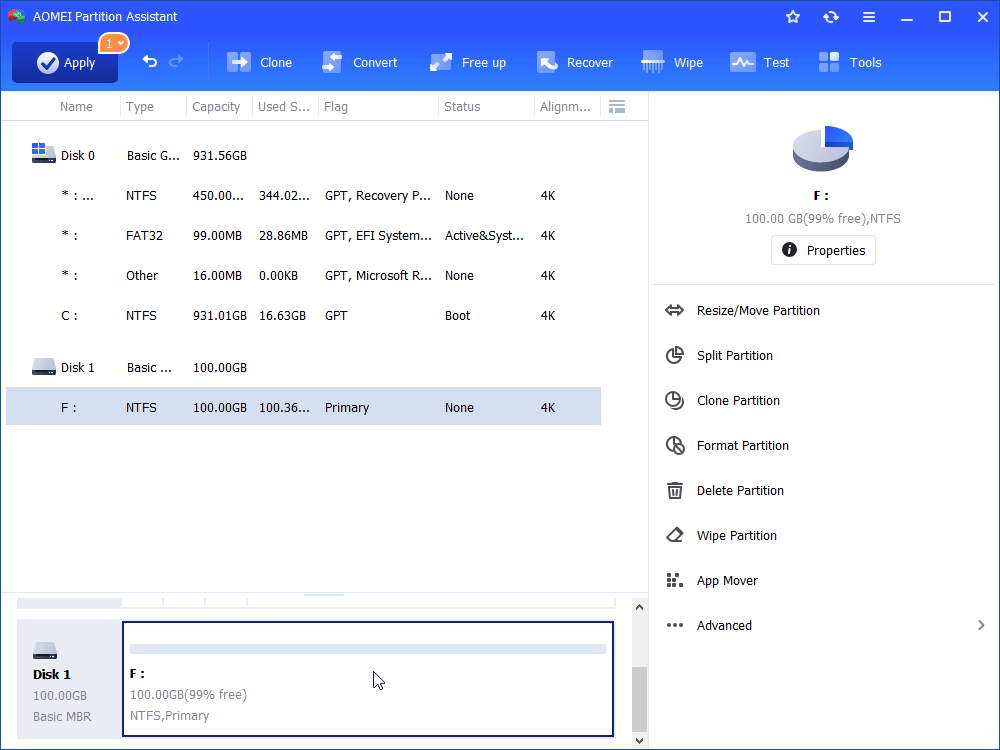
Step 4. Wait for the process to be finished. Once it is finished, you will find the unallocated space is merged into F:.
Conclusion
Merging partitions and managing unallocated space is essential for efficient disk usage in Windows. While built-in tools like Disk Management and DiskPart handle basic tasks, they come with limitations and risks. For more flexible, safe, and advanced operations—such as merging non-adjacent partitions or avoiding data loss—third-party solutions like AOMEI Partition Software provide a more reliable and user-friendly approach.