
What to Do If PC Always Returning to PreOS Mode After Reboot?
This article explains steps to take when a PC is always returning to PreOS mode after reboot, addressing common boot loop and safe mode issues.
By Irene Updated on June 3, 2026
What causes the issue PC always returning to PreOS mode after reboot
A PC that always returns to PreOS mode after reboot usually means Windows cannot start correctly and keeps falling back to a recovery environment. This problem often appears when the system fails to load the operating system and instead loops into PreOS mode. Several common issues can cause this behavior.
Corrupted Boot Configuration Data can stop Windows from loading and force the PC into PreOS mode every time you restart. Unfinished system updates or failed software changes may also interrupt startup and push the system into PreOS to complete or repair the process. Disk errors, damaged system files, or problems on the system drive can prevent a normal boot. Sometimes the PC is still set to start in PreOS or safe mode due to past troubleshooting, which creates a PreOS boot loop. Hardware issues such as faulty RAM or storage can also trigger repeated PreOS loading. These may also lead to some kind of Windows stuck operations issues.
For users of AOMEI Partition Assistant, a common cause is the ampa.exe file stored in the C:\Windows directory. This file may make the system restart into AOMEI-PreOS again and again. To fix this, you can create a bootable media, and then boot into WinPE, delete the ampa.exe file, and restart the PC. After that, Windows should load normally. You can then reinstall Partition Assistant and use a bootable media for future operations if you worry about the issue coming back.
In short, a PC always returning to PreOS mode usually points to a boot configuration problem, disk error, unfinished update, or software-related conflict. Identifying the cause will help you stop the PreOS loop and restore normal Windows startup.
How to fix PC always returning to PreOS mode after reboot?
Fix 1. Reinstall the Software
The most straightforward way to fix the failed to start program load driver issue is to refresh all program files through a clean installation. When drivers load abnormally or fail to load at all, reinstalling the software often clears the conflict.
You can uninstall AOMEI Partition Assistant through Control Panel and make sure the installation folder is fully removed. After uninstalling, restart your computer so any cached driver data is cleared from memory. Once the system boots up again, download the latest version of the program from the official website and install it. This fresh installation will place a new and intact ampa.sys driver in the correct location and should restore normal program startup.
Fix 2. Perform boot repair
If your PC always returns to PreOS mode after reboot, the problem may come from damaged MBR or BCD files. When these core boot records are corrupted, Windows cannot find the correct startup path and may repeatedly enter PreOS instead of loading the system. Repairing the MBR or rebuilding the BCD can restore the normal boot structure and help Windows start properly again.
If the PC falls into a boot loop after hardware changes such as a RAM upgrade, a boot repair tool can make the process much easier. AOMEI Partition Assistant offers a built-in Boot Repair feature designed to fix common startup issues like missing boot files, corrupted boot records, and repeated reboot loops. You can create a bootable USB with the software, start your PC from it, and run the Boot Repair function to restore normal startup. This approach is safe, simple to follow, and avoids complex command-line steps, making it a practical option for users who want a quick and reliable fix.
A safe and reliable disk partition management tool that helps you migrate OS to SSD or HDD, reorganize disk space, and improve overall PC performance.
Step 1. Install AOMEI Partition Assistant on a working PC and connect a USB drive with enough storage to this PC.
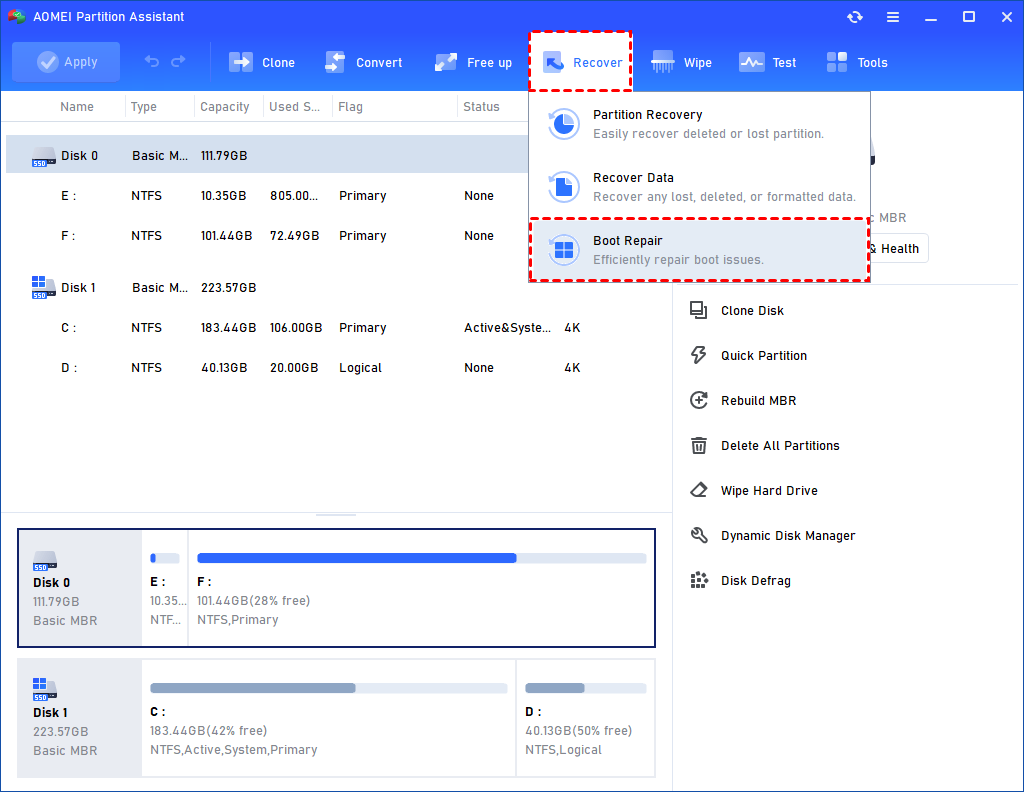
Step 2. Open this software and select the Boot Repair tool below the Recover section.
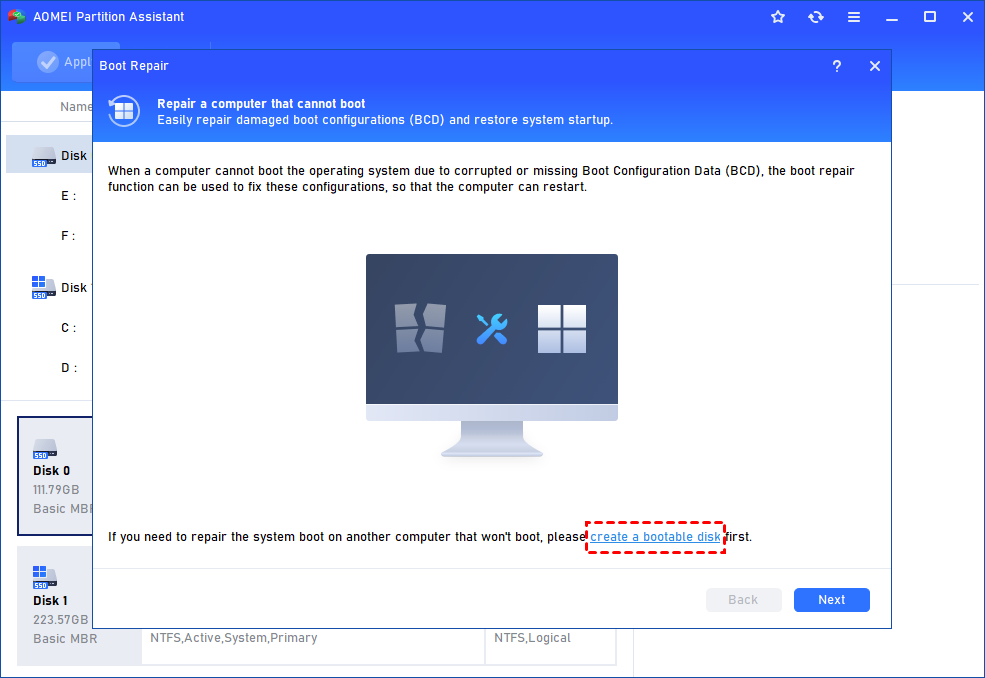
Step 3. Click the create a bootable disk option to create a WinPE Boot Repair USB drive.
Step 4. Plug the created drive into the non-booting computer, then enter the BIOS settings to change the boot order so that the computer boots from it. It will automatically load the Boot Repair tool and perform a scan of boot entries.
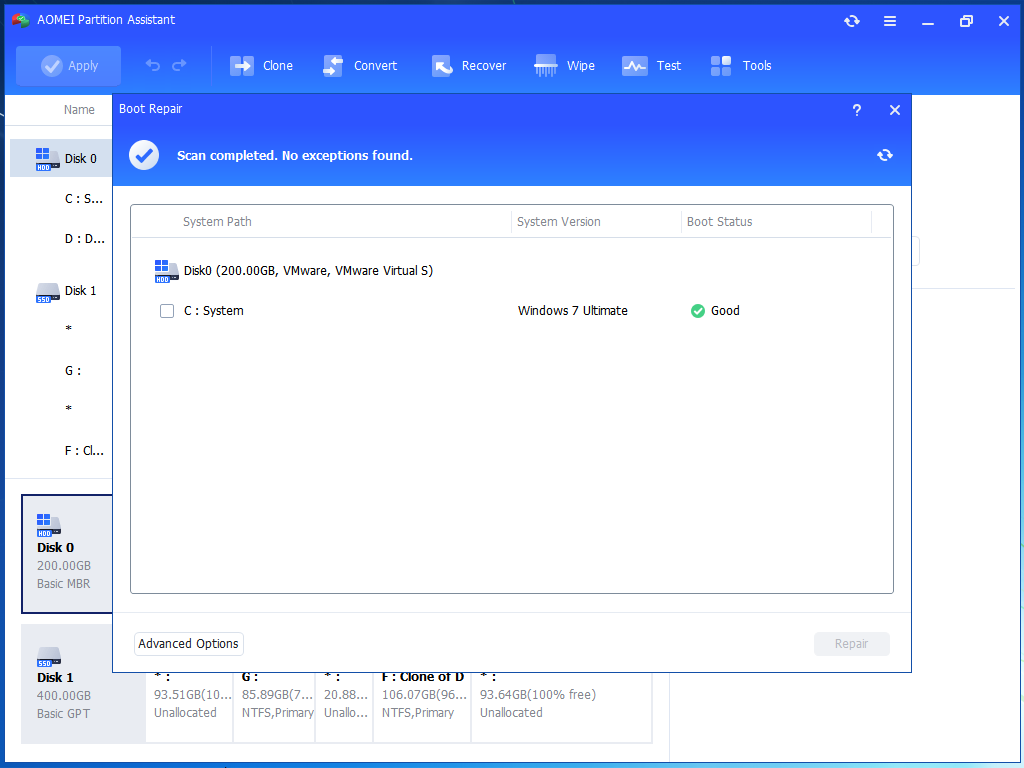
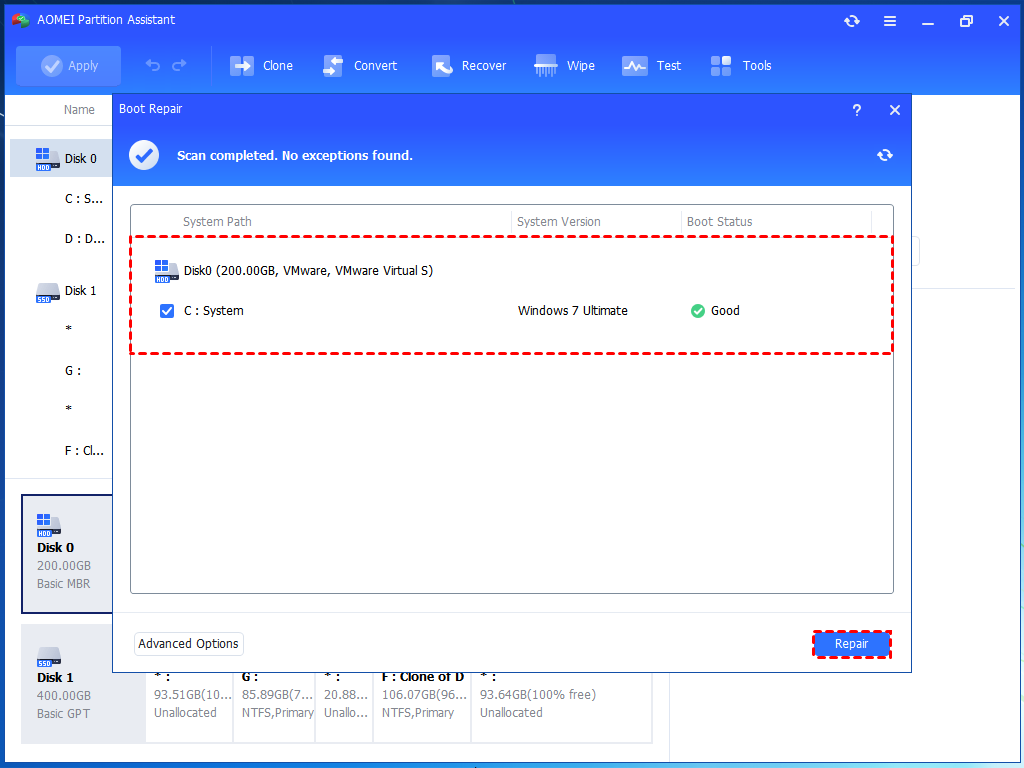
Step 5. Once the process completes, you will see all scan results, including system paths, system versions, and boot status. Select the repairable boot entries you want to repair and click the Repair button.
Step 6. Wait for the repair process to finish, then remove the bootable USB drive and boot the PC from the original system drive.
Fix 3. Perform Startup repair
Startup Repair is a built-in Windows utility designed to automatically detect and fix problems that prevent your system from booting such as corrupted registry entries, damaged system files, or faulty boot configuration. If your PC always restarts into PreOS Mode or shows error code 12, you can follow these steps:
Step 1. From the Windows Recovery Environment, select Troubleshoot.
Step 2. Click Advanced Options, then choose Startup Repair.
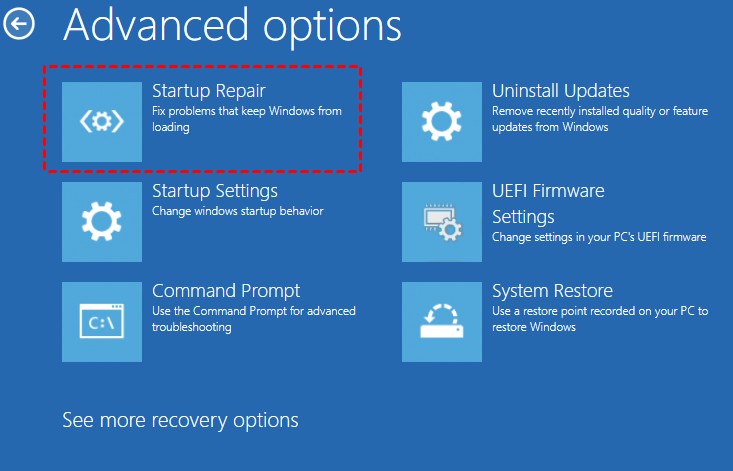
Step 3. The tool will begin scanning your system for startup-related issues and attempt to fix them.
Step 4. Once the repair is complete, restart your PC to check if the issue is resolved.
Conclusion
A PC that keeps returning to PreOS mode after reboot can be caused by many different startup problems, but most of them can be solved with the right repair method. Whether the issue comes from corrupted boot files, damaged system data, or conflicts related to AOMEI Partition Assistant, using tools like clean reinstallation, Boot Repair, or Startup Repair can help restore normal Windows startup. Once the underlying cause is fixed, your system should boot smoothly again without returning to PreOS mode.
A safe and reliable disk partition management tool that helps you migrate OS to SSD or HDD, reorganize disk space, and improve overall PC performance.