Complete Guide | Backup VPS to Ensure Data Security and Reliability
By Owin Updated on June 26, 2026
What is VPS
Before we delve into VPS backup strategies, it's crucial to understand what a VPS is. A VPS, or Virtual Private Server, is a virtualized server that runs within a physical server. It provides users with dedicated resources, greater control, and flexibility compared to shared hosting. VPS hosting allows users to run their own operating systems and install software as per their requirements. However, this independence also brings the responsibility of ensuring data security and reliability.
Why backup VPS is essential
Data is the backbone of digital operations, and safeguarding it is critical for several reasons:
- Data Loss Prevention: Data loss can result from hardware failures, human errors, software glitches, or malicious activities. Without proper backups, the risk of losing critical data looms large.
- Business Continuity: For businesses relying on VPS, downtime can translate into significant financial losses. Having a backup VPS ready to take over ensures business continuity, minimizing disruptions.
- Compliance Requirements: Many businesses must adhere to legal and industry-specific compliance standards that mandate data retention and protection, often requiring regular data backups.
How to backup VPS with Windows Server Backup
Backing up your Virtual Private Server (VPS) is a crucial task to ensure the safety of your data and maintain business continuity. Below, I'll guide you through the steps to backup VPS server effectively:
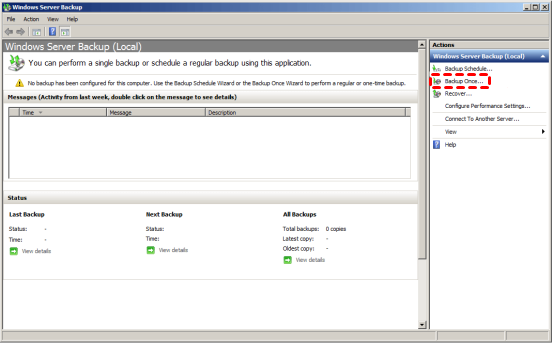
1. Launch Windows Server Backup to configure the backup feature to back up your VPS data.
2. In the right-hand wizard panel, opt for the Backup Once option, then make your backup selections before proceeding by clicking Next.
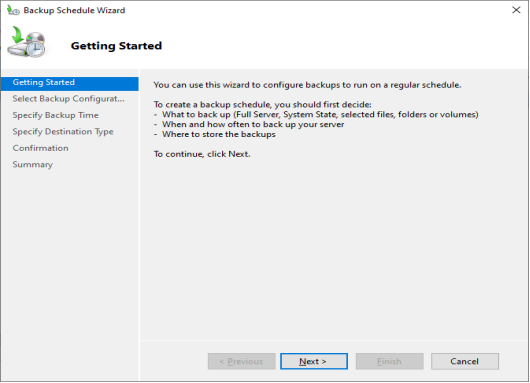
3. Scroll down to Select Backup Configurations and opt for a Full Server backup, which is the recommended choice. A full server backup covers all your server data, applications, and system state.
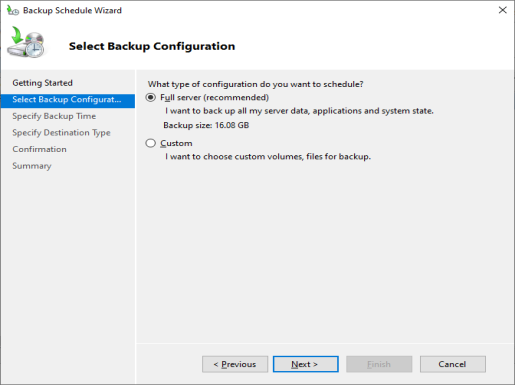
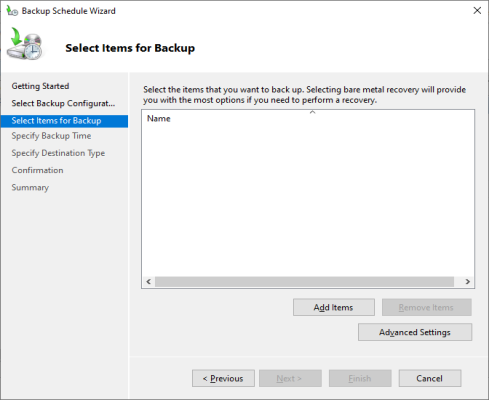
- If you choose custom, the subsequent step involves selecting the specific items you wish to back up. Click Add items to pick the folders for backup, and the chosen folders will appear in the window. Afterward, click OK.
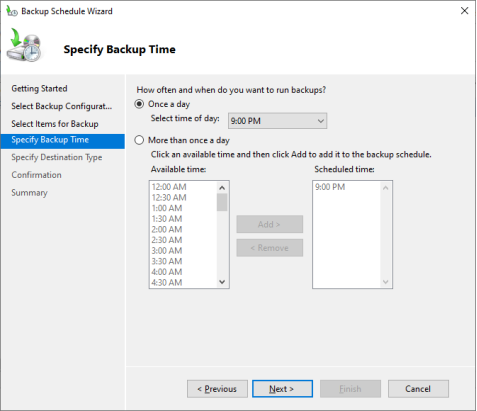
4. Proceed by clicking Next to define the backup frequency, specifying how often backups should occur and the preferred time of day. The frequency can be set for once a day or more, depending on your data generation rate.
5. Continue by clicking Next to Specify Destination Type for your VPS backup. This is where you determine where your backup data will be stored, whether on a dedicated hard drive, local drives, or a remote shared folder.
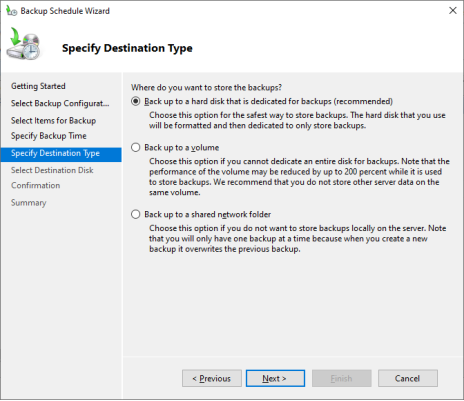
The most secure and advisable choice is to back up to a dedicated hard drive solely meant for backups. After clicking Next, a window will appear to help you select the destination disk to backup VPS to local.
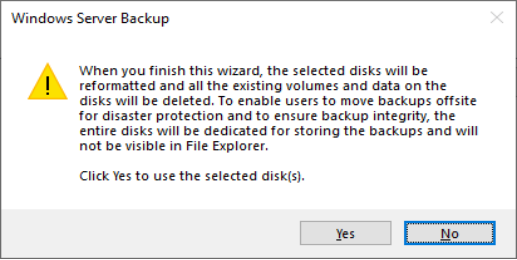
- If you have a valid storage disk, all the data on the selected disk will be erased to ensure backup integrity before transferring your data to the dedicated disk. Click Yes to acknowledge the warning and proceed.
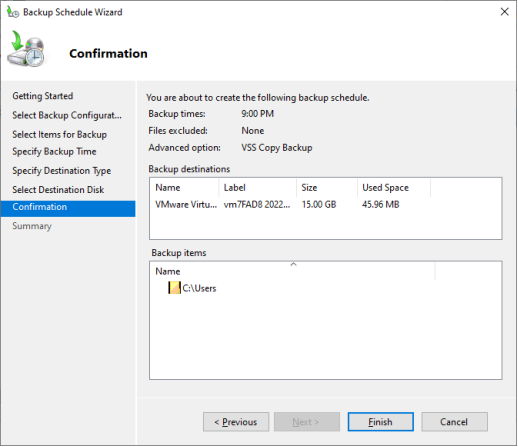
6. On the left-panel wizard, move down to Confirmation to review and confirm the backup configuration settings before finalizing by clicking Finish.
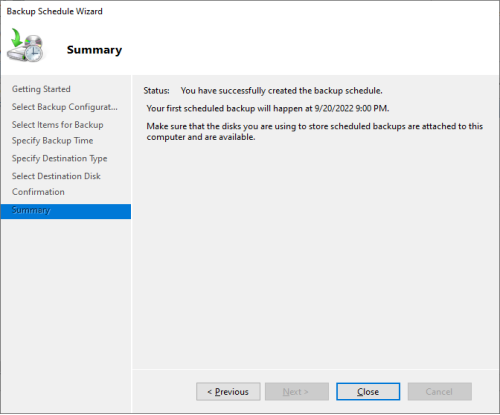
7. The backup schedule will be created, and an informational window will appear as indicated below:
Best way to backup VPS data via AOMEI Cyber Backup
AOMEI Cyber Backup is a robust solution designed to make VPS data backup and recovery straightforward and efficient. With features such as automatic scheduling, incremental backups, and a user-friendly interface, it provides a better way to back up VPS data:
❈Automatic Backups: It offers automated scheduling, allowing you to set up regular backups without manual intervention.
❈Incremental Backups: Optimize storage usage by only backing up the changes made since the last backup, reducing backup times and storage requirements.
❈Secure Offsite Storage: You can store your VPS backups in secure, offsite locations, including cloud storage and remote servers.
❈Reliable Recovery: Simplify the recovery process, allowing you to quickly restore your VPS to a previous state.
You can click the following button to download the freeware to enjoy those benefits:
Download FreewareWindows Server & PC
* Both free and paid version of AOMEI Cyber Backup support Windows Server 2016/2019/2022/11,10,8,7.
Steps to back up your VPS data with ease
1. At first, please download the latest version of AOMEI Cyber Backup Agent on your computer.
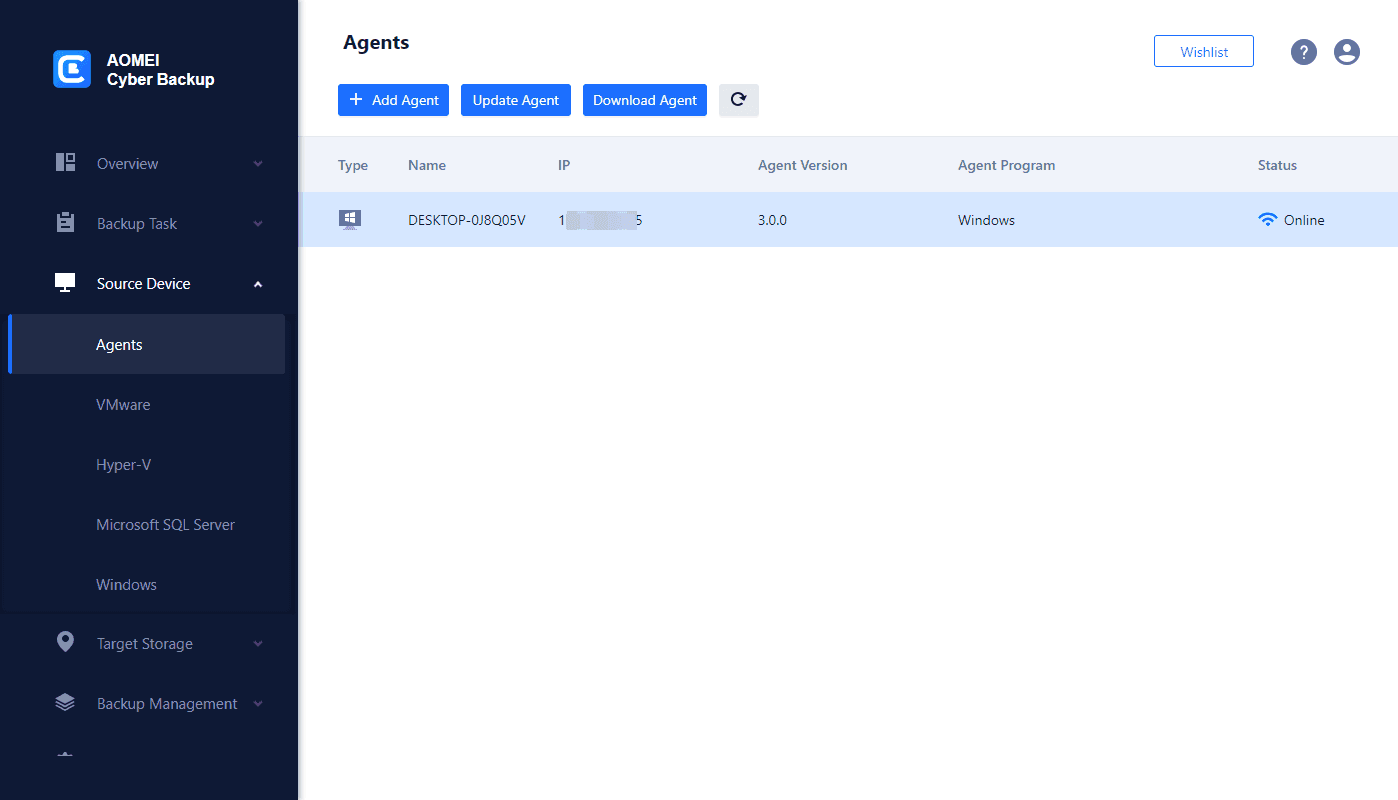
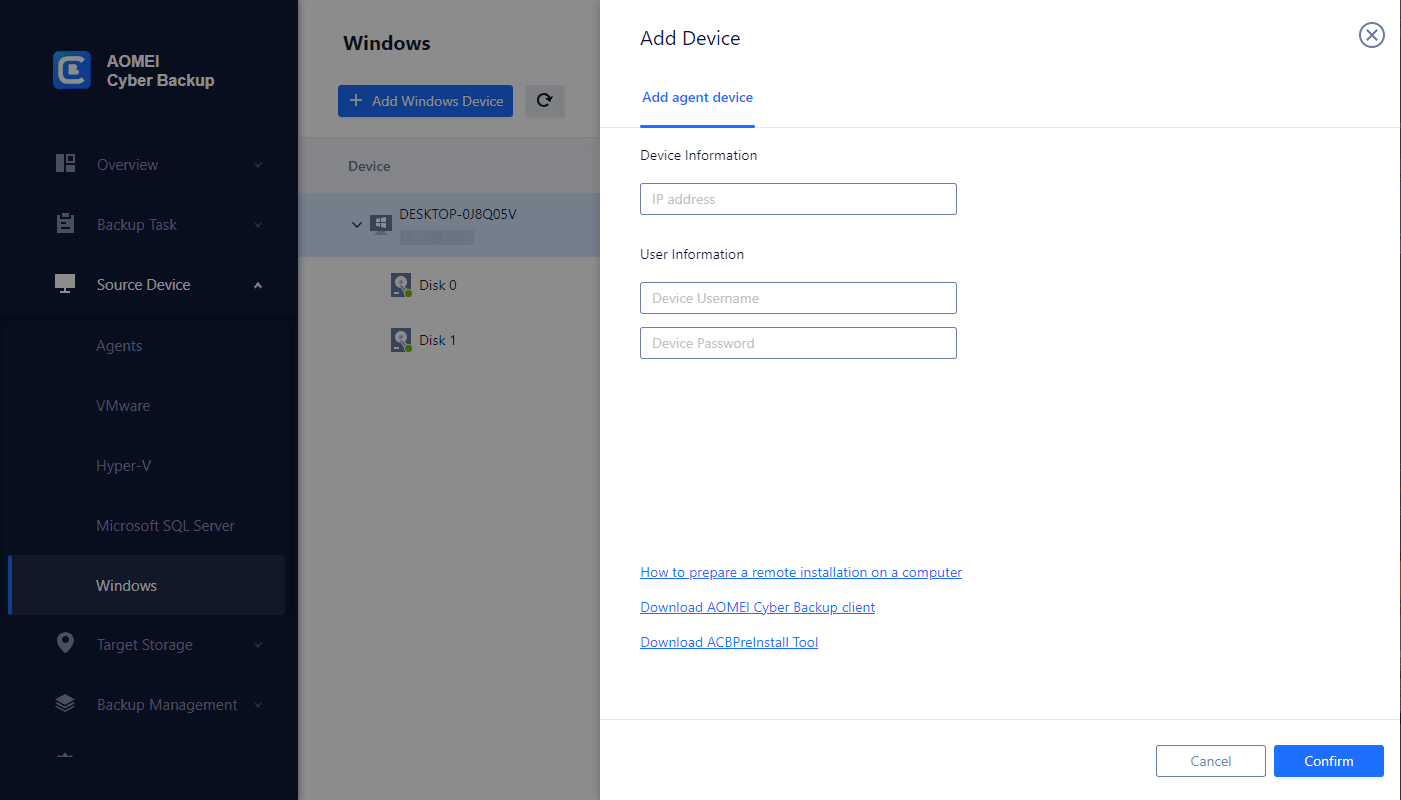
2. To bind device, access to Source Device >> Windows or click + Add Windows Device to add your device by entering both Device Information and User Information.
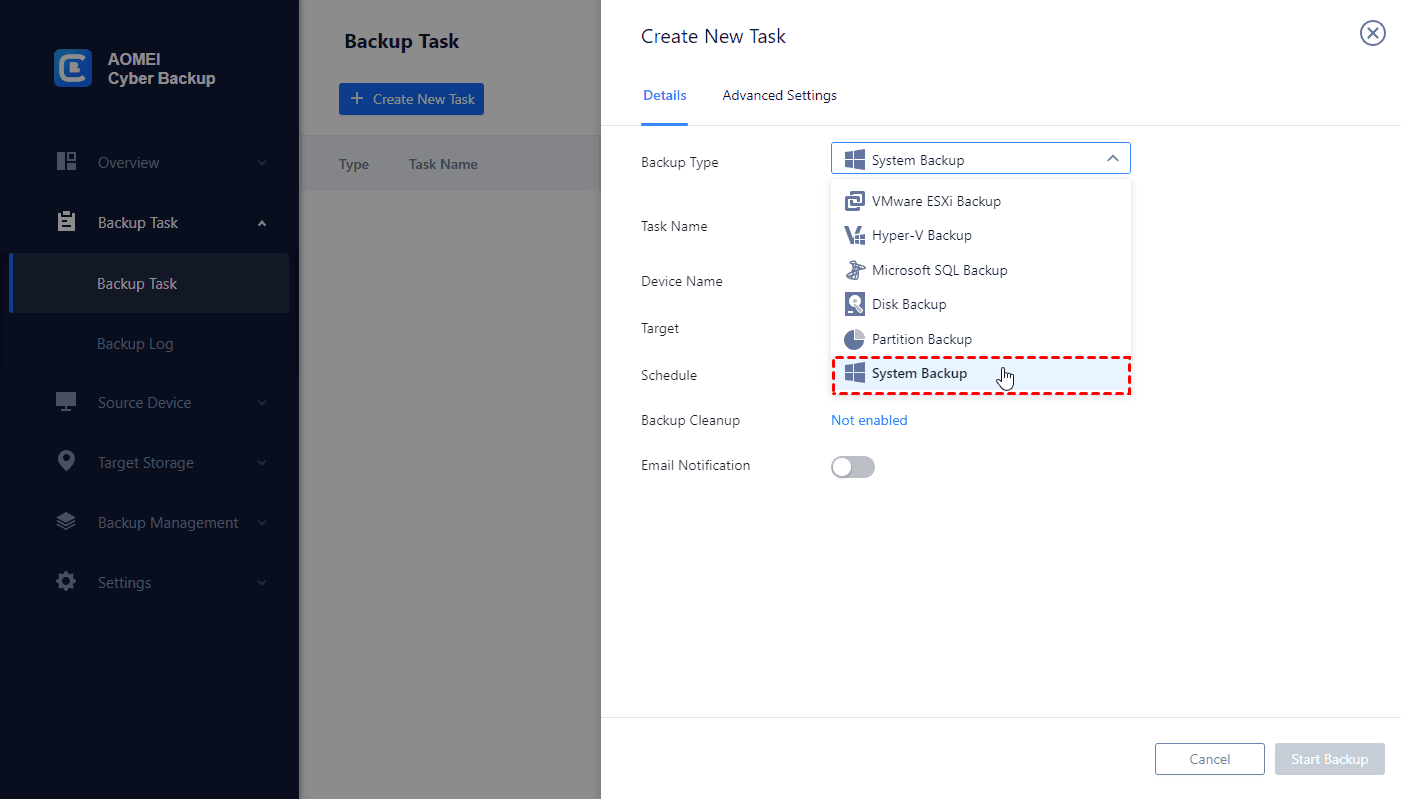
3. Access to Backup Task >> + Create New Task, and select System Backup as your backup type.
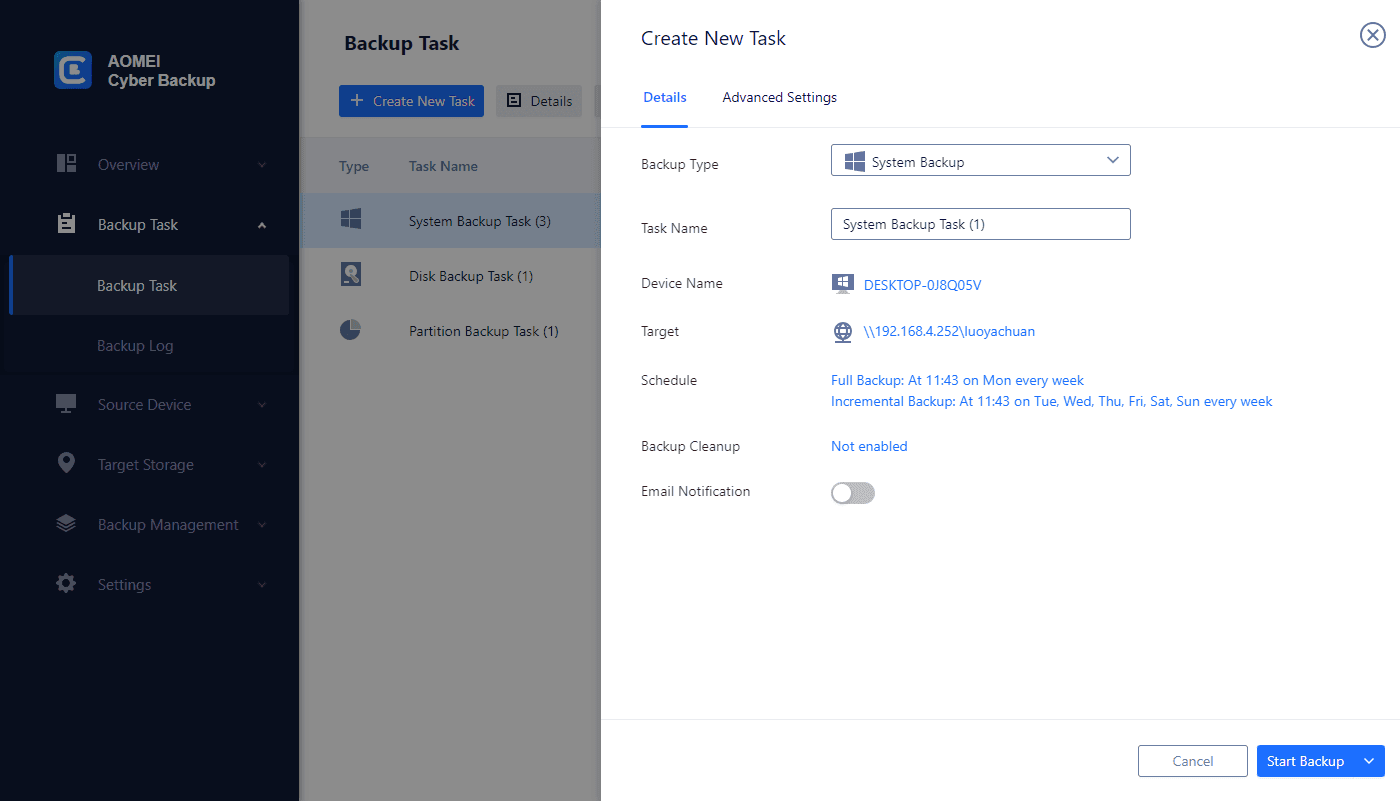
4. Specify your backup settings - Task Name, Device Name, Target, and Schedule as you need.
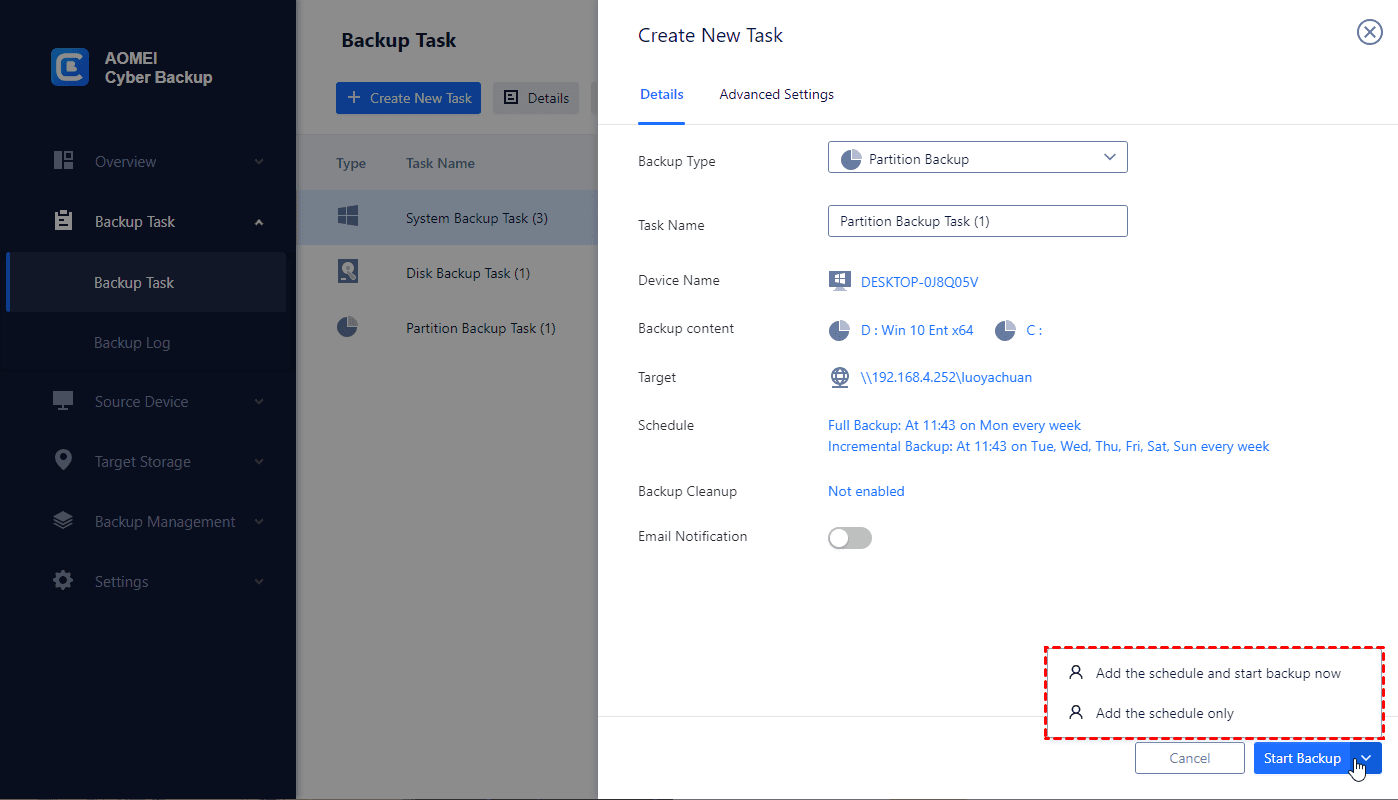
5. Start Backup: You can select Add the schedule and start backup now, or Add the schedule only.
6. Restore from backup: You can easily restore the Windows system to the original PC, saving the trouble of re-configuration and reinstallation.

Conclusion
In an increasingly digital world, data protection is paramount. VPS hosting offers numerous advantages, but it's vital to implement a robust backup strategy to safeguard your digital assets. Whether you're a business owner, a web developer, or an IT administrator, recognizing the importance of VPS backup is a crucial step toward ensuring data security and business continuity.
By embracing a proactive approach to VPS backup, you can secure your digital investments and rest easy knowing that your data is protected and can be swiftly restored in case of unexpected data loss or system issues.