How to Partition and Backup SD Card with Multiple Partitions
By Owin Updated on June 26, 2026
The use of SD card
Secure Digital (SD) cards are compact and versatile storage devices widely used in a variety of electronic devices, from digital cameras and smartphones to laptops, tablets, and other gadgets. They have become an essential tool for data storage and transfer due to their small size, convenience, and compatibility with various devices. The use of SD cards spans several applications and scenarios:
- Digital Photography and Videography: SD cards are a popular choice for storing photos and videos captured by digital cameras and camcorders.
- Smartphones and Tablets: Many mobile devices, including smartphones and tablets, come equipped with SD card slots.
- Portable Media Players: SD cards can be used to store music, audiobooks, and other media content for playback on portable media players.
- Data Transfer and Sharing: SD cards provide a convenient way to transfer files between devices.
The benefits of backup SD card with multiple partitions
Backup SD card with multiple partitions offers a range of significant benefits, enhancing data organization, security, and flexibility. Here are the key advantages of opting for a partitioned backup approach for your SD card:
- Enhanced Organization: Partitioning SD card allows for better organization of data, separating different types of files or applications.
- Data Isolation: If one partition becomes corrupted or inaccessible, other partitions remain unaffected, minimizing data loss risks.
- Flexible Backup Strategies: Multiple partitions enable more customized backup plans, focusing on specific partitions or data types.
- Efficient Space Management: Partitioning ensures efficient space utilization, preventing one type of data from overrunning the entire card.
How to partition SD card
Partitioning an SD card involves dividing the storage space on the card into separate sections, each of which functions as an independent storage unit. This can be useful for organizing data, creating multiple file systems, and even setting up different operating systems. Here's a general guide on how to partition an SD card:
Note: Partitioning involves manipulating the storage structure of your SD card, which can lead to data loss if not done correctly. Make sure to perform Windows partition backup before proceeding.
1. Insert your SD card into a card reader or adapter and connect it to your computer. Ensure that any important files on the SD card have been backed up before proceeding.
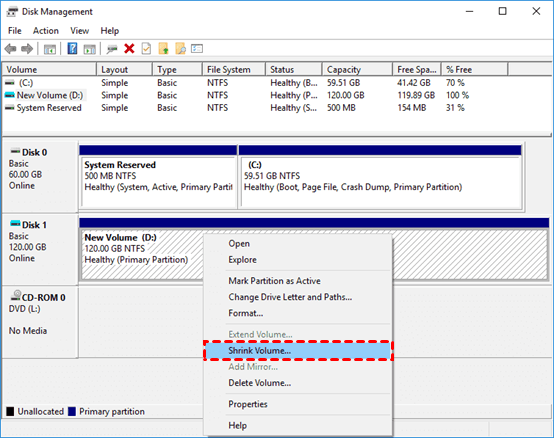
2. Access Disk Management by right-clicking on the Start menu and selecting Disk Management. You will find a list of all storage devices, including the SD card.
3. Right-click on the SD card and choose the Shrink Volume option from the contextual menu.
4. Specify the desired size for the partition you intend to create. If you're unsure about the size, you can opt for the recommended value. Afterward, click the Shrink button and wait briefly as unallocated space appears on the SD card.
5. Right-click on the newly created unallocated space and select New Simple Volume.
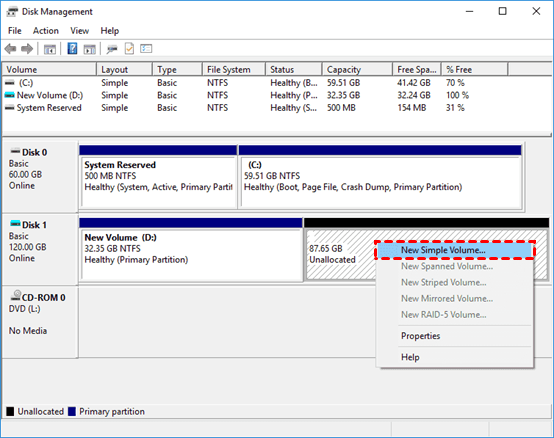
6. This will initiate an onscreen wizard for partition creation. Follow the prompts provided by the wizard to create a new partition within the unallocated space of the SD card. You will need to input details such as partition size, drive letter, file system type, allocation unit size, volume label, and formatting preferences. Alternatively, you can opt to use the suggested parameters to establish the partition.
How to backup SD card with multiple partitions to Google Drive
Backup SD card to Google Drive involves a few steps to ensure that all your partitioned data is safely stored in the cloud. Here's a guide on how to do it:
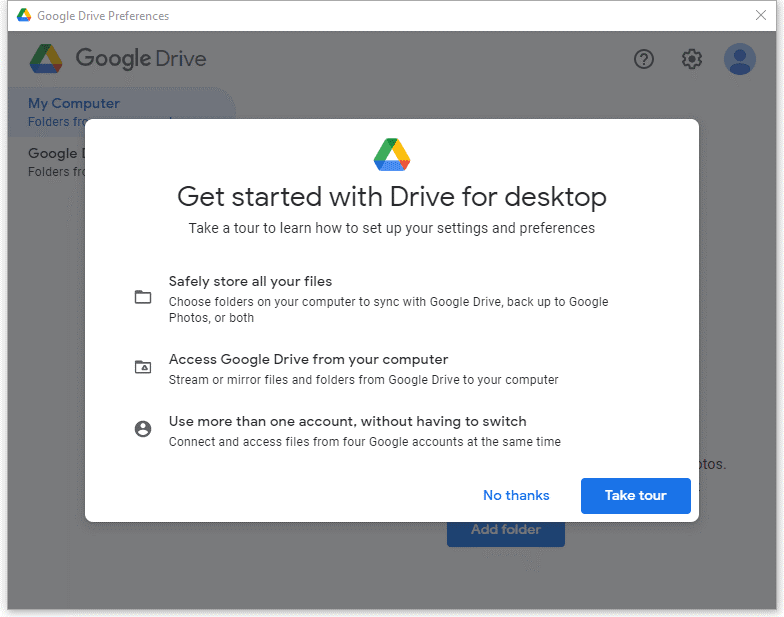
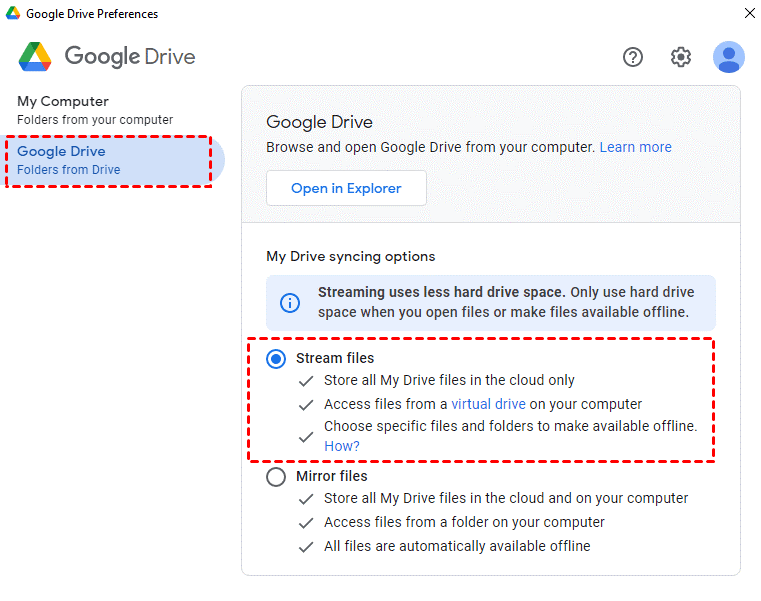
1. Open the Google Drive for desktop application by clicking its icon located on the taskbar. Then, access the Settings menu and choose Preferences. At this point, you will be presented with the option to either skip the introductory steps by selecting No thanks or proceed with a guided tour by choosing Take tour.
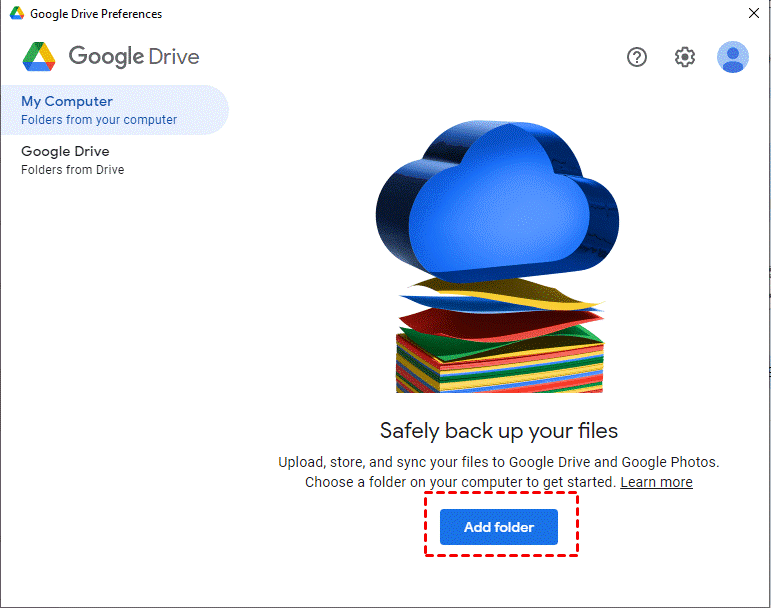
2. Navigate to the My Computer section and click on the Add Folder button. From there, you can select files or folders on Android device that you wish to include.
3. Choose between two synchronization options: Sync with Google Drive or Back up to Google Photos. The former accommodates all types of files, while the latter is specifically designed for uploading photos and videos. It's important to note that selecting the second option won't result in automatic synchronization of changes.
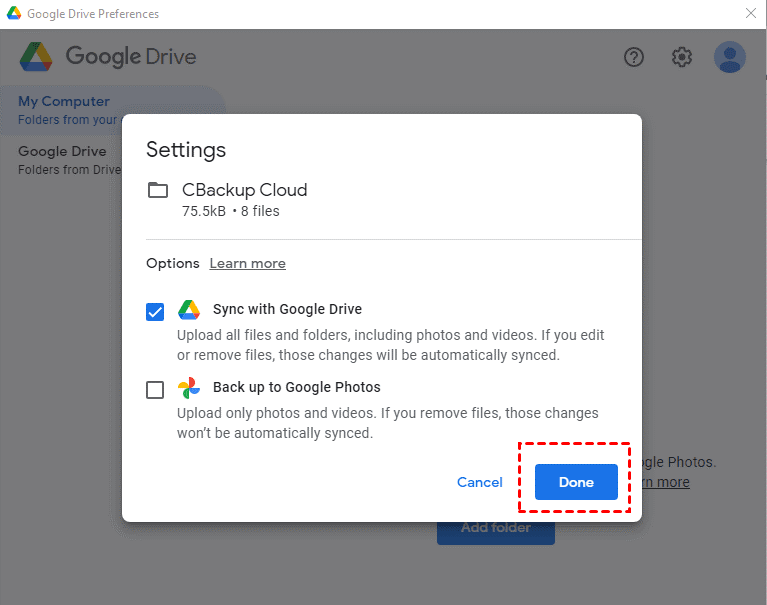
4. Return to the primary My Computer interface and finalize the process by clicking Save. This action will initiate the backup or synchronization of the chosen files.

✍ Pay Attention:
✦ The desktop application continues to enable automatic synchronization between Google Drive and your local drive through its Google Drive feature. It presents two synchronization choices, with the Stream files option being advised to conserve hard drive capacity.
✦ The desktop app will eliminate files that have been deleted from your local computer. For a more secure alternative, you can safeguard your files on the website. Simply select New and then opt for File upload or Folder upload to transfer your files or directories.
More secure and convenient way to perform Windows partition backup
In addition to creating a backup of an SD card with multiple partitions, it is equally important to safeguard the data stored on your Windows partition. By backing up your Windows partition, you can ensure the protection of crucial files and system configurations, allowing for a seamless recovery in the event of data loss or system failure.
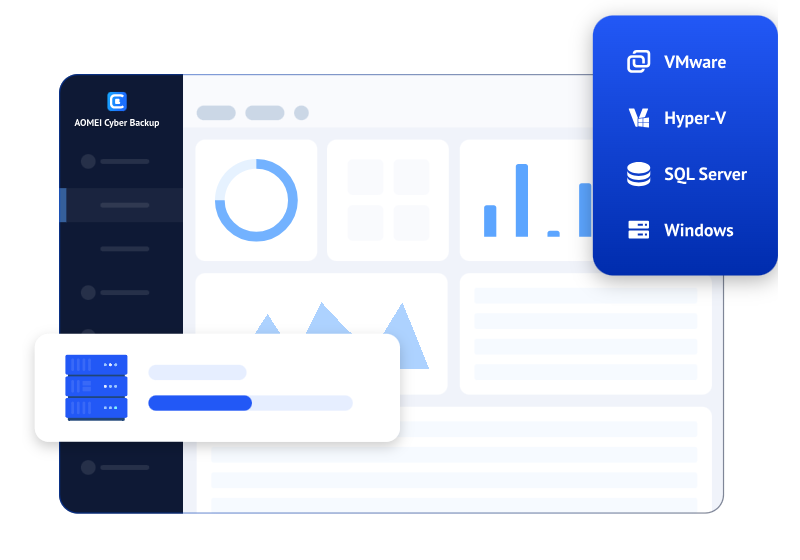
Whether you're looking to safeguard personal documents, system settings, or application data, a comprehensive backup strategy will provide you with the ability to swiftly restore your system to a previous state. AOMEI Cyber Backup is a good choice for you to consider, which can be harnessed to perform Windows Partition Backup, offering a comprehensive solution to fortify your digital defenses.
❊Perpetual Free: No time limit for AOMEI Cyber Backup Free Edition.
❊Easy-to-use: With the user-friendly interface, connect, create task, and protect will be completed with a few clicks.
❊Space Optimization: By selecting exactly which areas you need to back up, you can conserve your storage space even more.<
❊Instant Recovery: In event of a catastrophic failure, this software enables instant recovery to protect your hard disk against data loss.
Please click the button below to download the freeware to simplify your partition backup task:
Download FreewareWindows Server & PC
* Both free and paid version of AOMEI Cyber Backup support Windows Server 2016/2019/2022/11,10,8,7.
Steps to perform Windows partition backup and restore
1. Prerequisite for backup: Please download and install the latest version of AOMEI Cyber Backup Agent to your computer.
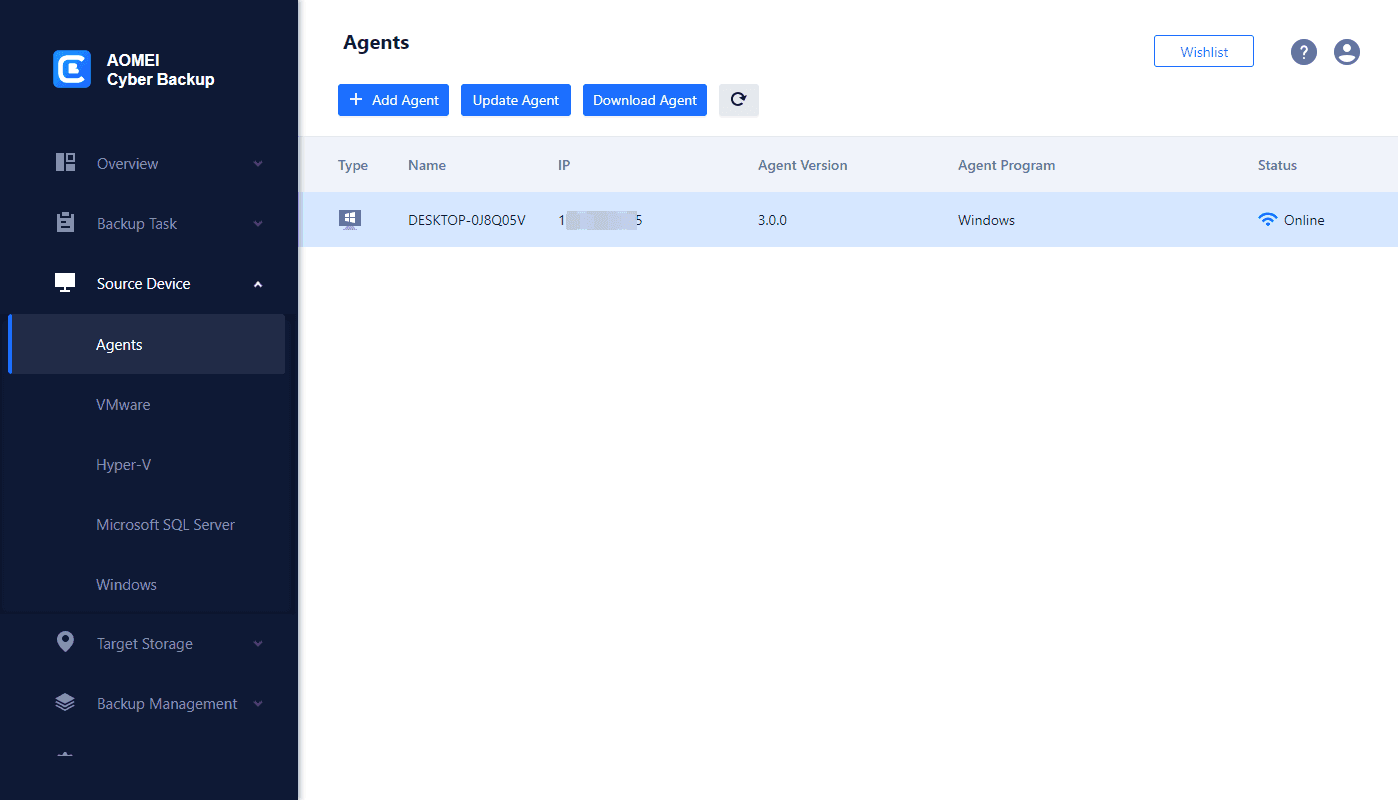
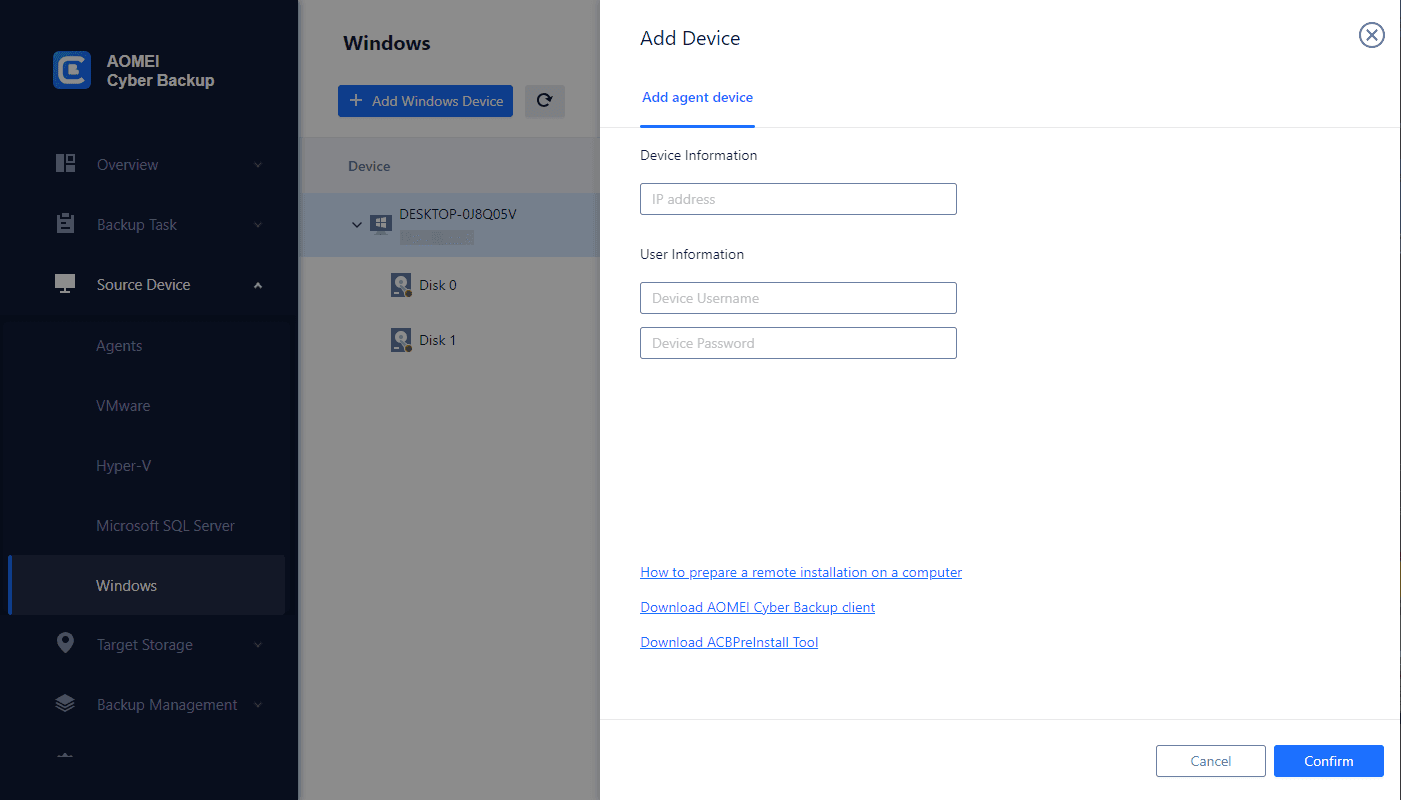
2. Bind Device: Navigate to Source Device >> Windows. Otherwise, you just need click + Add Windows Device to add your device.
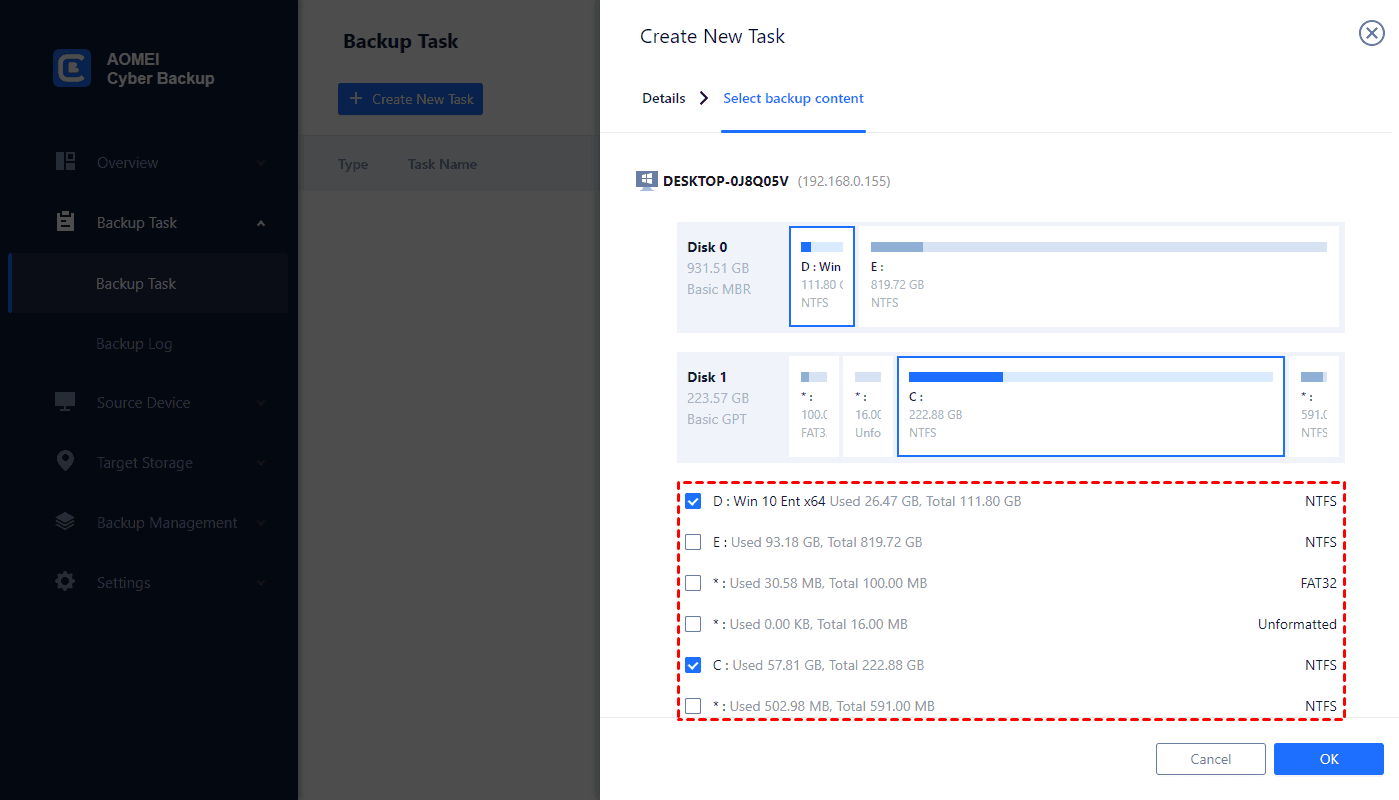
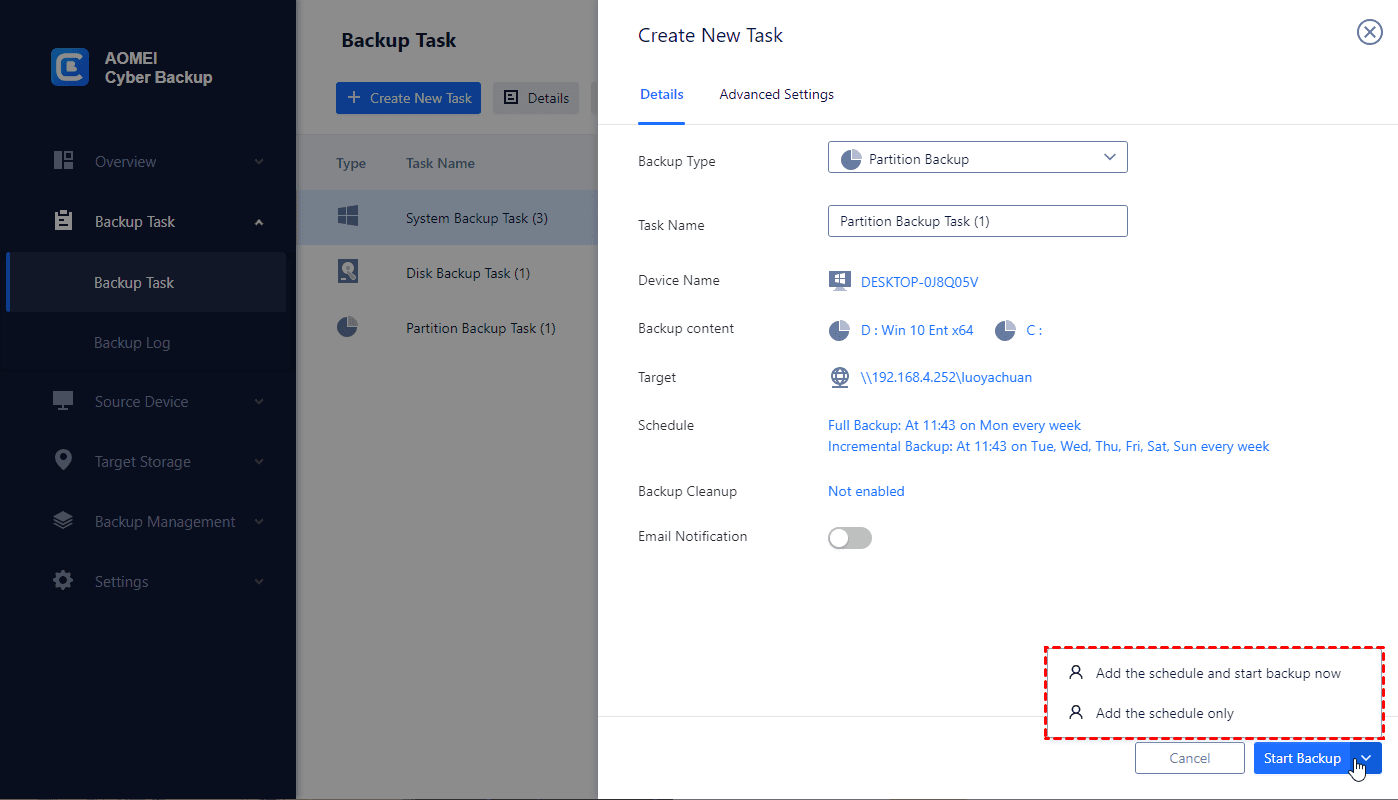
3. Create Backup Task: Click Backup Task >> + Create New Task >> Partition Backup. Then specify the backup details, such as: Task Name, Device Name, Backup Content, Target, and Schedule as you need.
- Backup Content: Select the areas you want to back up according to your needs, you can select more than one area at the same time.
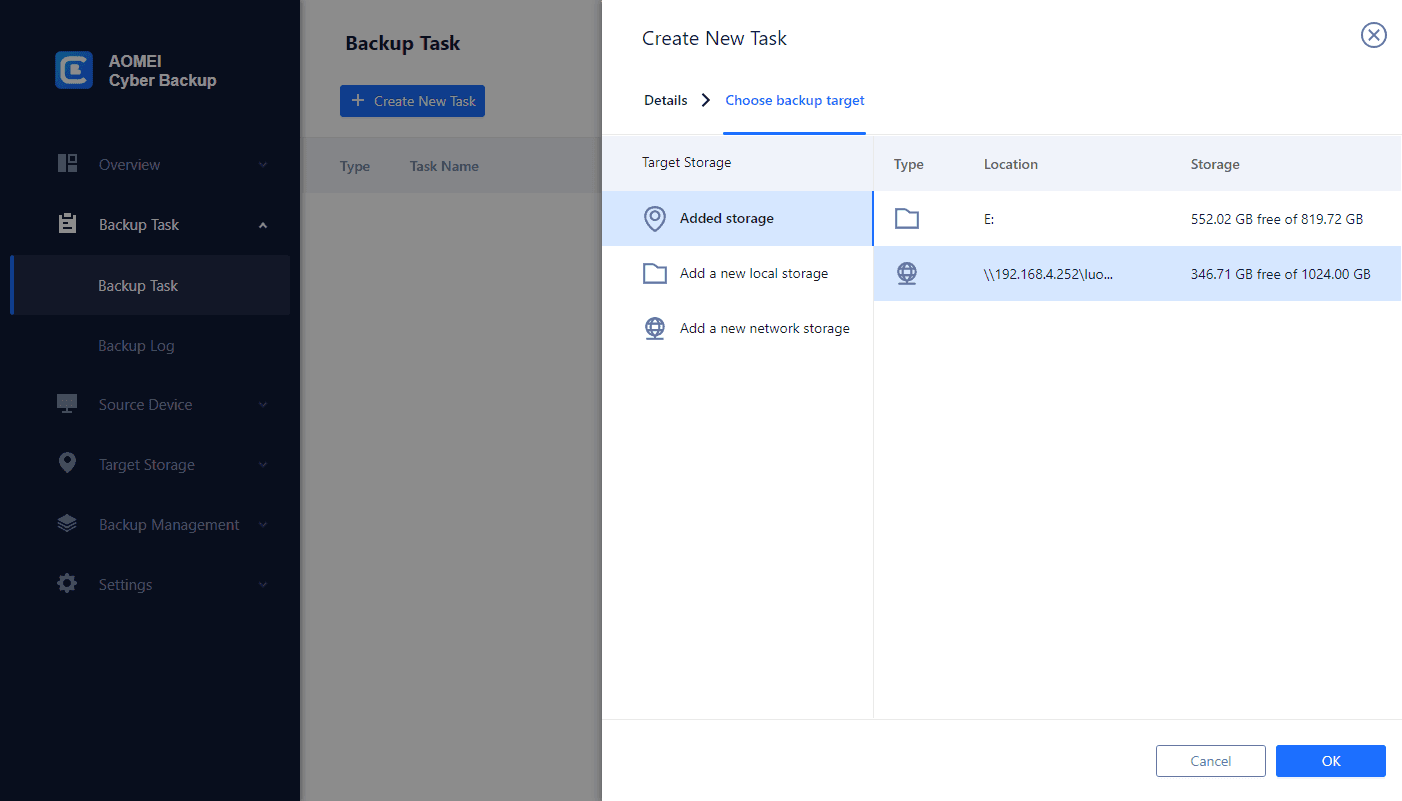
- Backup Target: Specify a local or network location to store the backups.
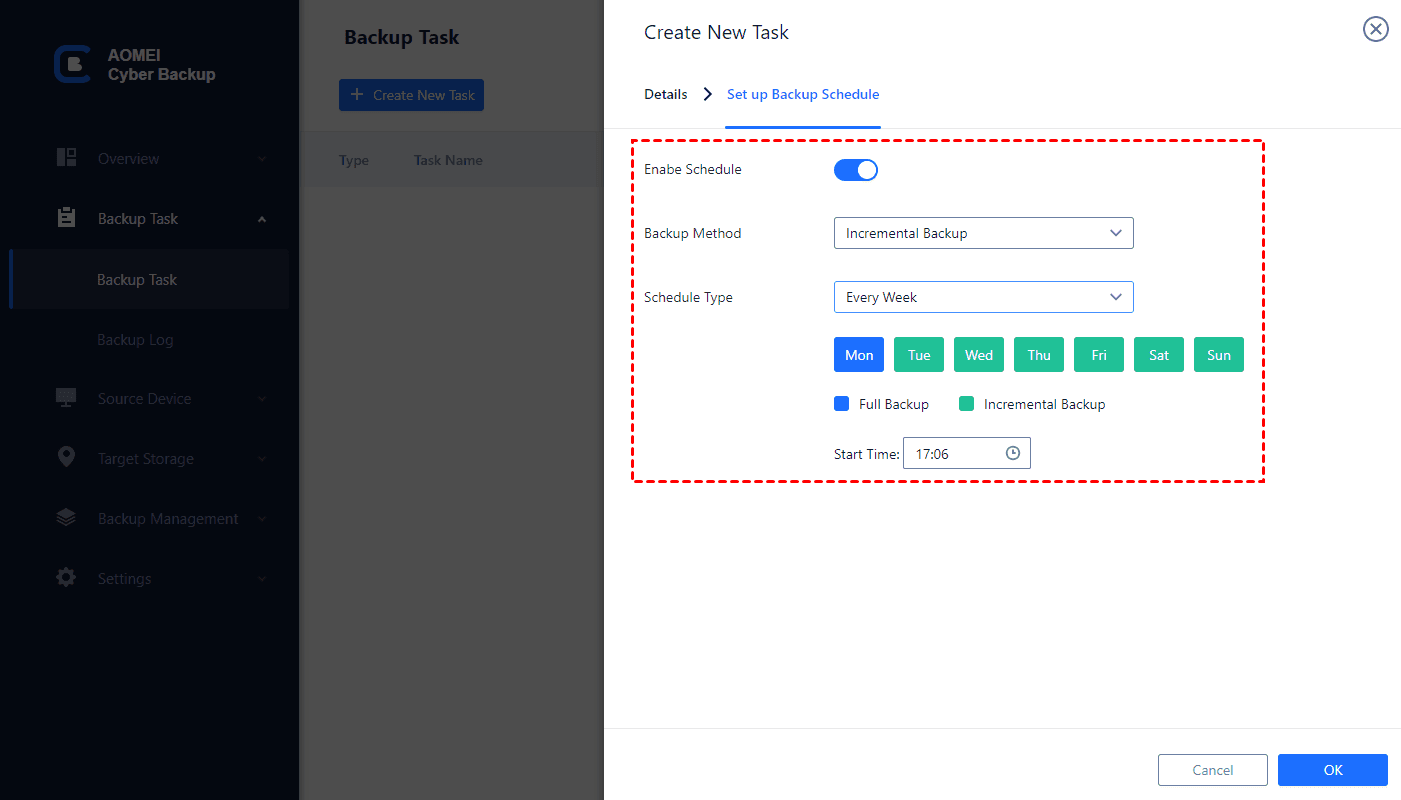
- Schedule Backup: Create the automated backup based on daily/weekly/monthly, and it can keep tracking the VM data with full/incremental/differential backup.
4. Start Backup: You can select Add the schedule and start backup now, or Add the schedule only.
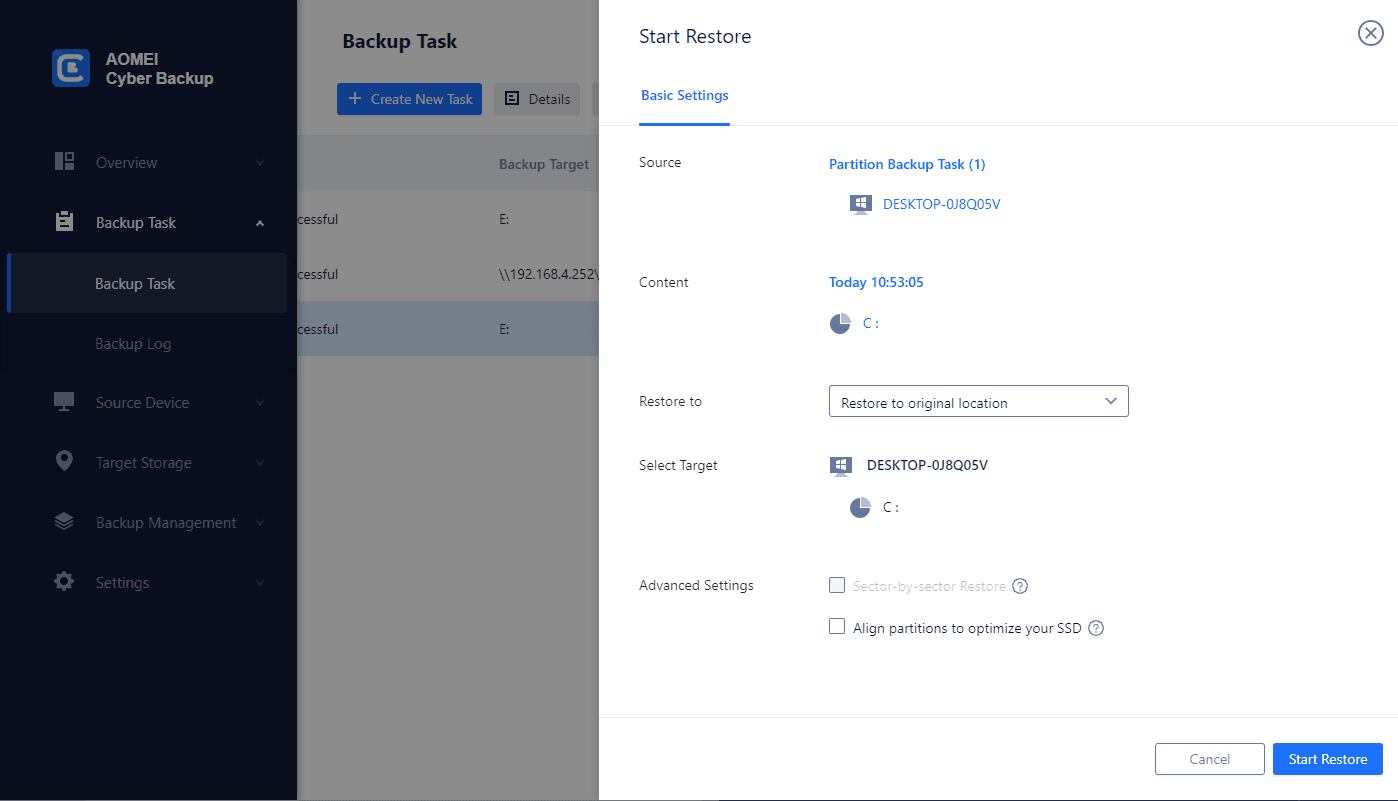
5. Start Restore: From the created backup tasks, locate the backup task you want to restore and click … >> Restore. Choose to Restore to original location to create the same data directly from the backup.
Conclusion
Backup SD card with multiple partitions is a proactive step towards safeguarding your valuable data. By understanding the concept of partitions, recognizing the significance of SD cards, and embracing the benefits of partitioned backups, you empower yourself with the tools needed to ensure data integrity and seamless data recovery. Implementing this versatile and efficient backup solution can offer peace of mind and secure your digital assets against unexpected data loss.