4 Ways: ASUS BIOS Not Detecting SSD
This post offers 4 ways to troubleshoot the ‘ASUS BIOS not detecting SSD’ error and offers one useful way to protect business data integrity.
By Owin Updated on March 19, 2026
User case: Motherboard not detecting any SSDs
I have an Asus ROG Crosshair VIII Hero Wifi and it refuses to detect both my m.2 and a SATA SSD. I replaced the motherboard (returned the first to amazon and bought from newegg) so I dont believe it is the motherboard. Bought the drives from bestbuy but I find it hard to believe both are broken, so am I missing some sort of setting?
Why is my BIOS not detecting my SSD?
BIOS, or the Basic Input/Output System, kicks off by checking and preparing hardware, then fetching boot programs from storage like hard drives, before launching the operating system. Usually, when you install a new SSD on your motherboard, it pops up in the BIOS. But sometimes, it might not show up, causing a headache. So, how do you fix it? Well, let's start by figuring out why it's happening.
This problem usually happens for a few reasons. Here are the main ones:
1. The SSD isn't turned on in the BIOS settings.
2. The SSD isn't connected correctly to your computer.
3. The BIOS settings might be wrong.
Some users search for the solutions of NVMe not detected in BIOS ASUS, here are some stepwise methods to troubleshoot this issue.
What do I do if my ASUS Prime b560m a NVMe not detected?
To solve ASUS BIOS not detecting SSD, try out the below methods one by one.
Fix 1. Fix faulty hardware
Many SSD problems stem from hardware issues, like broken cables or improper connections. Here's what you can do:
Step 1: Turn off your computer. Check the SATA or NVMe data cables to ensure they're secure. Also, verify the power cable connection to your SSD.
Step 2: Insert the SSD drive into the SATA port.
Step 3: See if the SSD is now recognized in the BIOS.
Step 4: If needed, reset the BIOS settings to default.
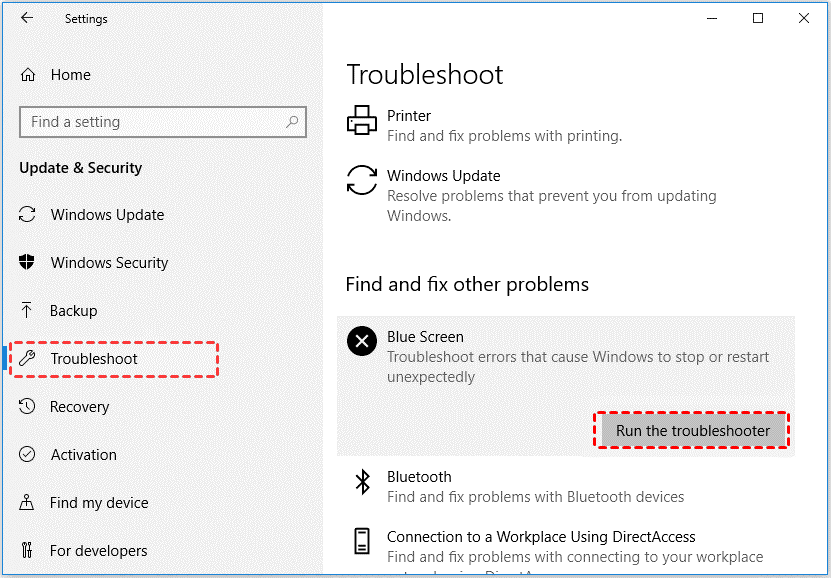
Fix 2. Run hardware & Device troubleshooter
To fix SSD issues, use the Hardware and Drive Troubleshooter:
Step 1: Open "Settings".
Step 2: Click on "Update & Security".
Step 3: Choose "Troubleshoot".
Step 4: Under Hardware and Devices, select "Run the troubleshooter".
Step 5: It will scan for any issues with your hardware and devices.
Step 6: The troubleshooter will attempt to fix any problems automatically.
Step 7: Once done, it will tell you if it resolved the issue.
Fix 3. Format SSD drive
If your SSD has malware or viruses, the best solution is to format it:
* Note: Formatting will delete all data on the SD card, leaving it clean and blank. So please back up your SD card before formatting, ensuring that your files remain safe even if issues arise during the formatting process.
Step 1: Press "Windows key + R" to open Disk Management.
Step 2: Choose your SSD drive and click "Format...".
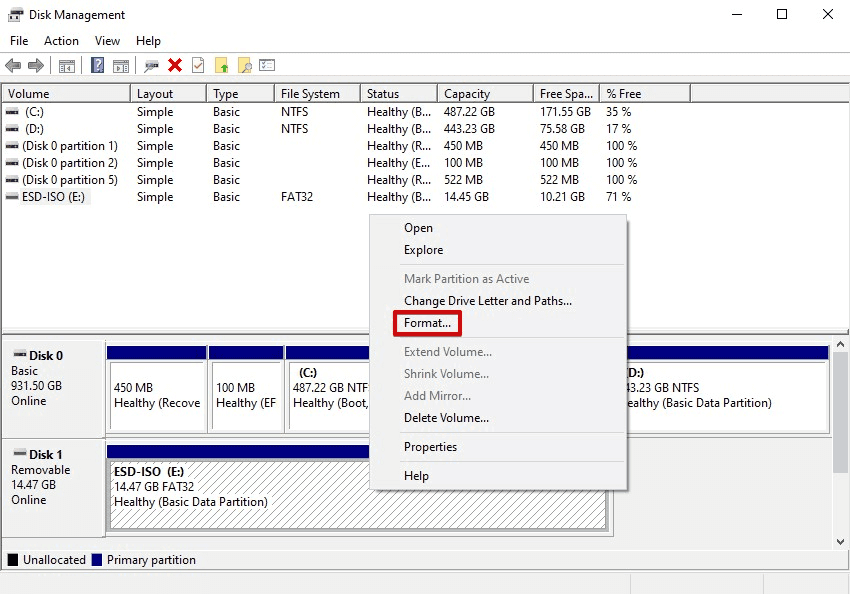
Step 3: Pick the file format (usually NTFS) and allocation unit size (you can keep the default).
Step 4: Hit "OK" to start formatting.
Fix 4. Configure SSD settings in BIOS
If your BIOS isn't recognizing your new SSD, adjusting the SSD settings in BIOS might help:
Step 1: Start your computer.
Step 2: Access the Boot menu in BIOS.
Step 3: Find and adjust the SSD settings (names can vary based on your motherboard).
Step 4: Save your changes and exit BIOS.
Easier way to migrate your system to SSD
After reviewing the information provided, it sees that you can solve ASUS BIOS not detecting SSD issue can be solved. If you are considering a successful transition of your operating system from HDDs to SSDs without reinstallation, you can use AOMEI Backupper Professional for system cloning.
AOMEI Backupper Professional offers professional system cloning services and supports various Windows operating systems, including Windows 11/10/8.1/8/7/Vista/XP, among others. With just a few simple clicks, you can clone all data from the original system partition, including the operating system, software, and applications, to the new SSD.

How to protect your SSD to keep it safe
Businesses depend significantly on their physical servers to store crucial data and run essential applications. Safeguarding this data and ensuring its availability is crucial. In this guide, we'll outline the steps to create backups to protect your vital information effectively.
AOMEI Cyber Backup presents a robust solution for backing up physical servers, delivering a host of benefits for businesses.
AOMEI Cyber Backup offers several key features for businesses:
- Bare-Metal Recovery: With AOMEI Cyber Backup, you can perform complete bare-metal recovery, allowing you to restore your entire physical server to its previous state.
- Centralized Management: Manage and monitor all your server backups conveniently from a single interface. This centralized approach streamlines the backup process and enhances efficiency.
- Flexible Scheduling: Customize backup schedules according to your business requirements with AOMEI Cyber Backup. This flexibility ensures that your server data remains current and protected at all times.
- Disaster Recovery: In the event of a disaster, AOMEI Cyber Backup facilitates swift recovery, enabling you to restore your servers promptly to minimize business disruptions.
▶Prerequisites to Windows server backup:
1. Start by going to "Source Device" and then "Agents." Click on "+ Add Agent." If you haven't installed the AOMEI Cyber Backup Agent on your computer, or if the installed version isn't compatible, you'll need to download or update the agent first.
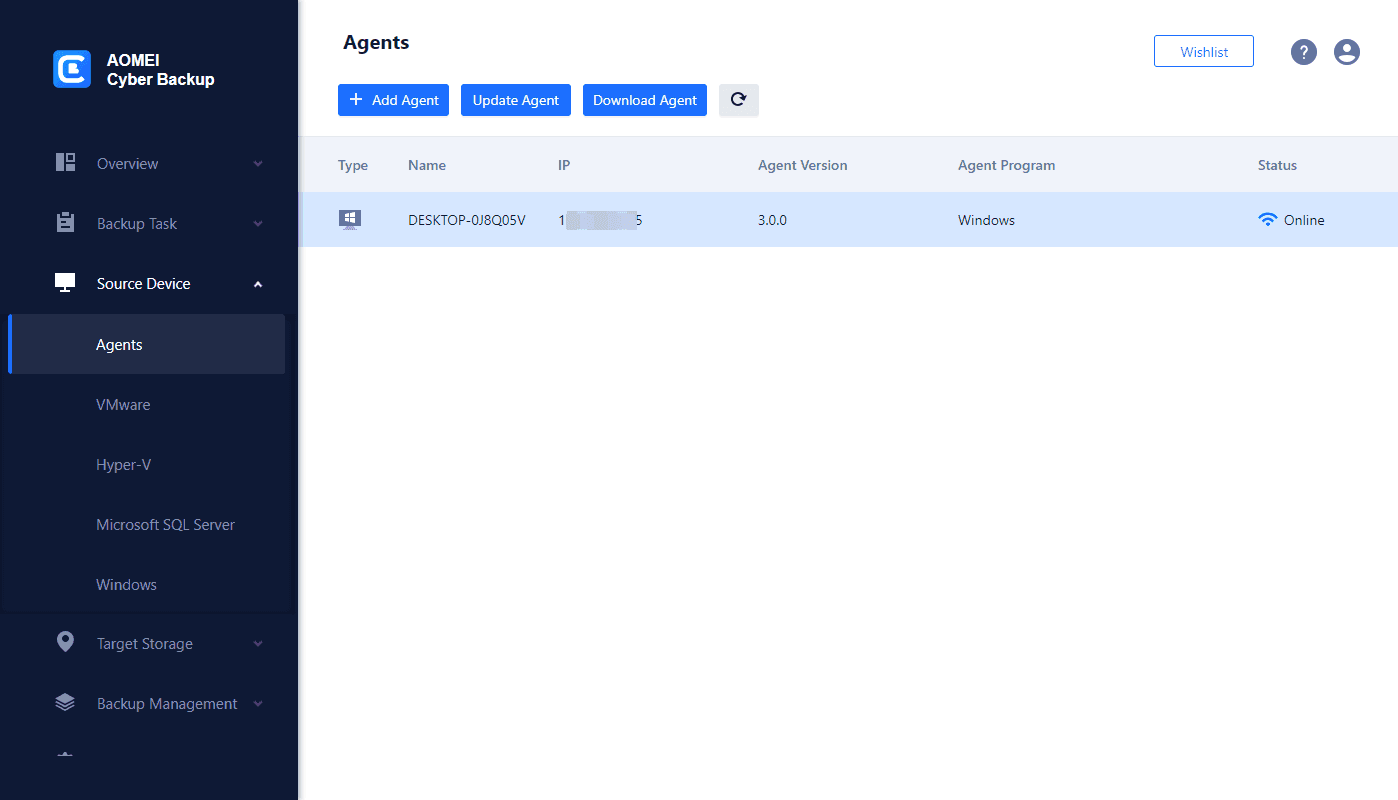
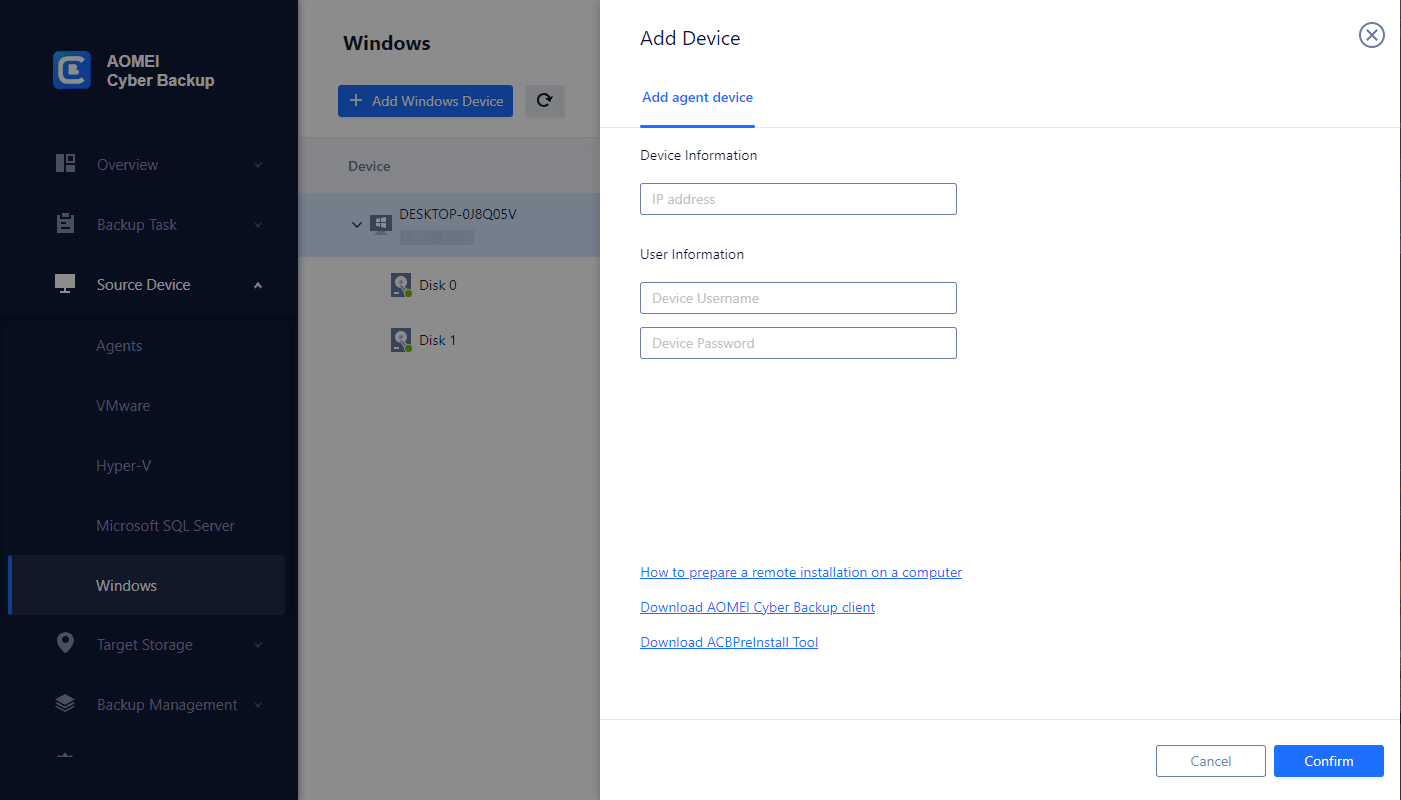
2. Navigate to "Source Device" and select "Windows." If your device is compatible and online, it should appear automatically. If not, you can add a Windows device by clicking on "+ Add Windows Device" and entering your device and user information.
▶Backup and Restore Windows system via AOMEI Cyber Backup:
1. Creating a Backup Task:
- Click on "Backup Task" and then "+ Create New Task."
- Choose "System Backup" as the backup type.
- Specify the Task Name, Device Name, Target, and Schedule.
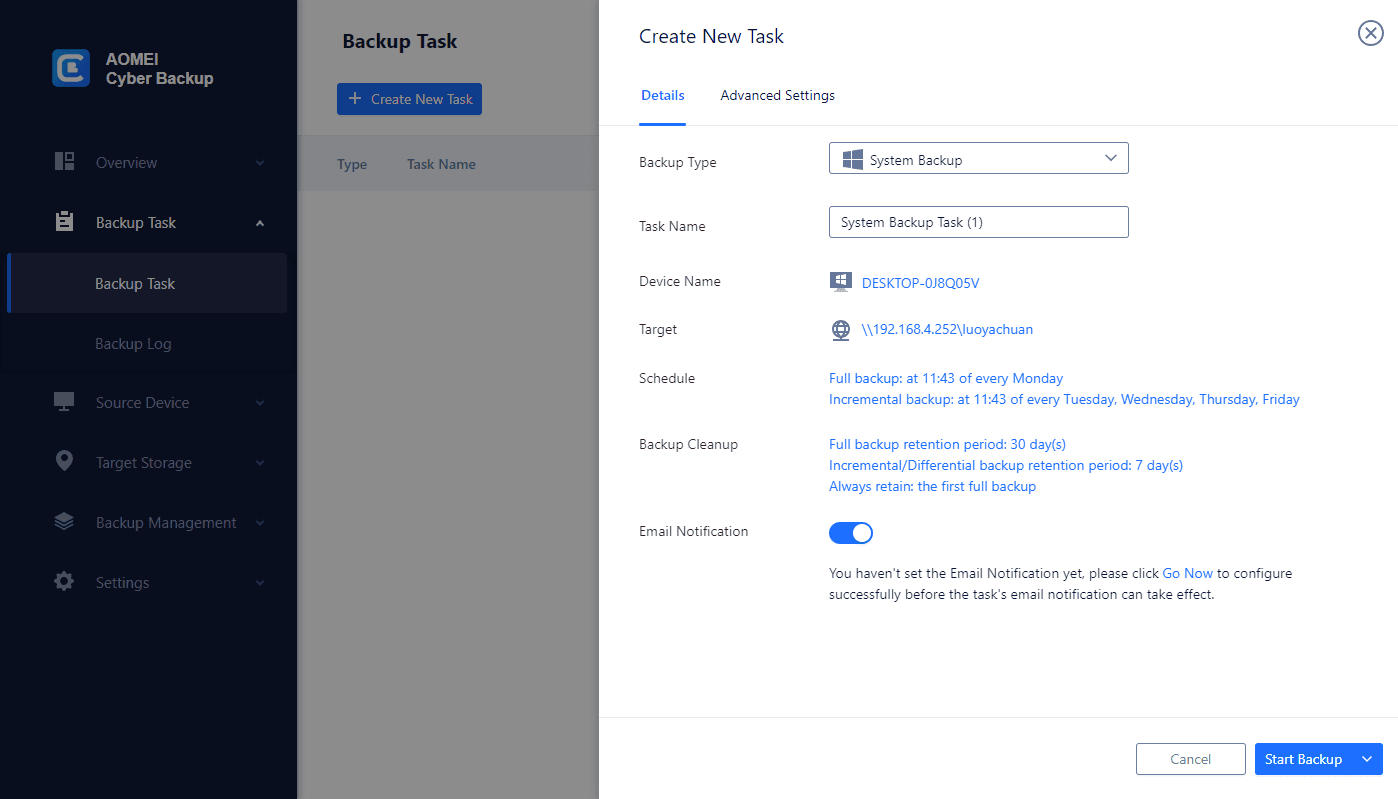
- Task Name: Give your backup task a unique name.
- Device Name: Select your Windows server.
- Target: Decide whether to back up to local or network storage.
- Schedule: Set up the backup frequency (daily, weekly, monthly) and type (full, differential, incremental).
- Start Backup: Choose to start the backup now or add it to the schedule only.
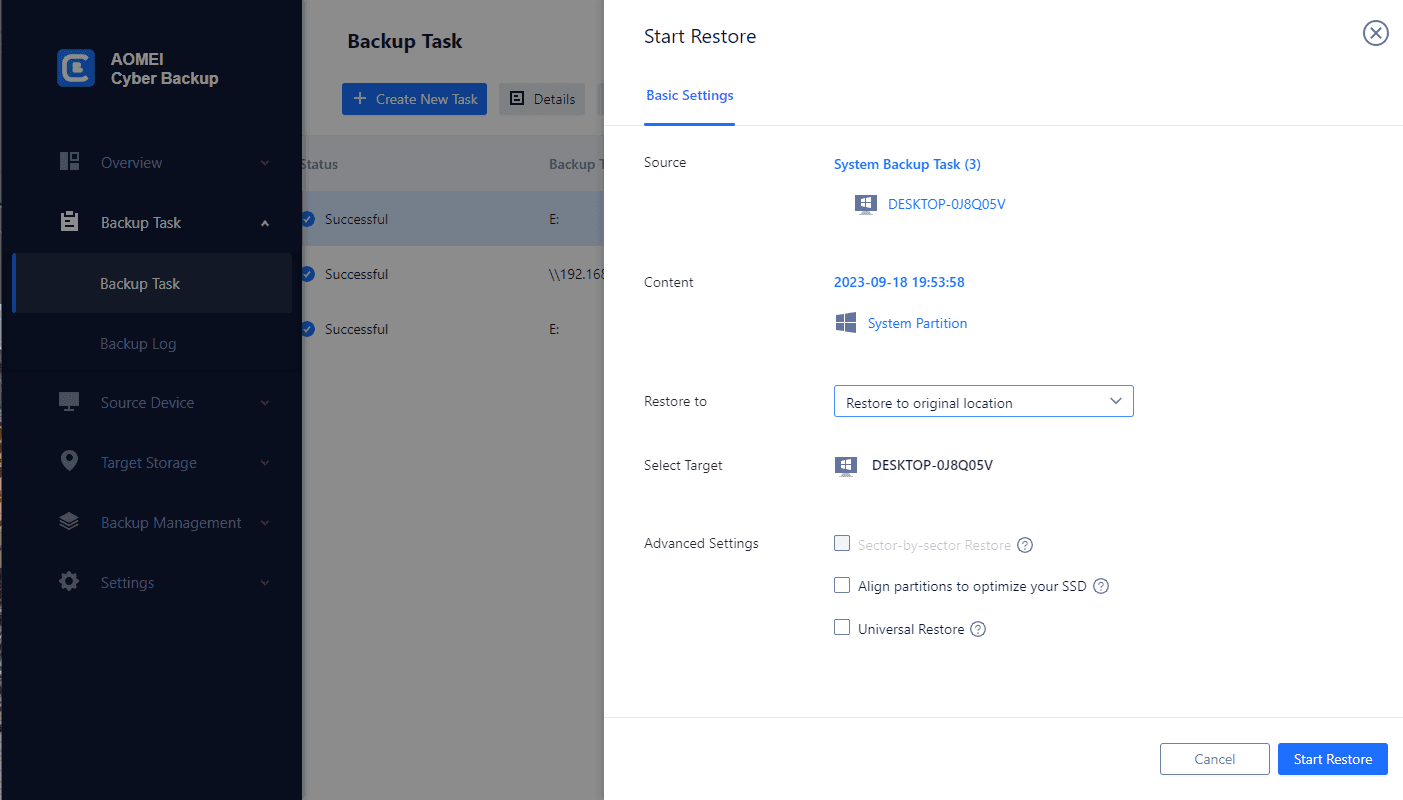
2. Restoring from Backup:
- Click on "..." and then "Restore" next to the backup task to begin setting up the Windows system recovery task.

Restoring Content:
- Confirm the source task for the restore and click "Select Content" to choose a specific restore point.
- Click "OK" to confirm your selection.
Restore Location:
- Specify the target location where you want to restore the data. Choose "Restore to original location" for a quick restoration from any backed-up version.
Start Restore:
- Click "Start Restore" to begin the restoration process. You can track the progress and details in the "Restore Records."
In sum
If you find that ASUS BIOS not detecting SSD, you can refer to the above several methods. If you want to migrate your operating systems from old hard drive to new SSD, you might encounter some errors like missing boot partition or incorrect clone. This time you can use AOMEI Cyber Backup to protect your system data to keep potential data loss.