
Move Installed Programs to Another Drive Windows 11 | 3 Ways
Learn how to move programs to another drive in Windows 11 using three effective methods. Also discover a way to relocate your operating system and apps together.
By Lily Updated on November 20, 2025
Can I move installed programs to another drive?
Yes — you can move installed programs to another drive in Windows 11, but how you move them depends on the type of application. Windows 11 offers basic support for transferring certain apps, while others require dedicated migration tools or even reinstallation. Understanding these differences is essential to avoid corrupting files or breaking the program.
Here is a table about what you can move and what you shouldn’t:
|
⭕ Safe to Move |
❌ Shouldn’t Move |
|
|
If you want to move not only programs but also the operating system, try the best cloning software - AOMEI Cloner.
How to move installed programs to another drive in Windows 11
Now I’ll walk you through how to move installed software to another drive in Windows 11 step by step. There are three methods for your reference:
💡Tip: Always back up your data before modifying installed software.
Method 1: Move Installed Apps via Windows 11 Settings
This method works only for Microsoft Store apps and some modern Windows apps that support relocation. Traditional desktop programs (.exe installers) will not show the “Move” button.
1. Press Win + I to open Settings.
2. Go to Apps > Installed apps. Find the app you want to move.
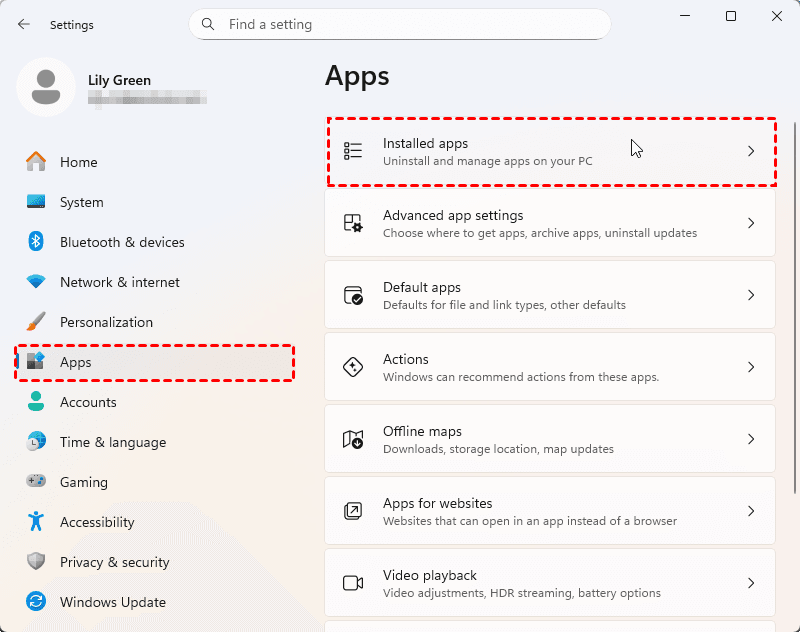
3. Click the three dots (…) and choose Move.
4. Select the destination drive from the drop-down list.
5. Click Move again to confirm.
Method 2: Move Installed Programs Using Symbolic Links
If an application does not support moving through Settings, you can use symbolic links (symlinks) to redirect Windows from the original location to a new folder on another drive. This tricks Windows into believing the program still exists in its old directory, while all files are actually stored elsewhere. Follow the steps below to move programs from C to D in Windows 11 using symbolic links:
1. Create a folder on the new drive (e.g.: D:\Programs).
2. Go to the program’s current installation folder. Usually in C:\Program Files or C:\Program Files (x86).
3. Cut and paste the entire program folder to the new location.
4. Press Win + S, type cmd, then select Run as administrator.
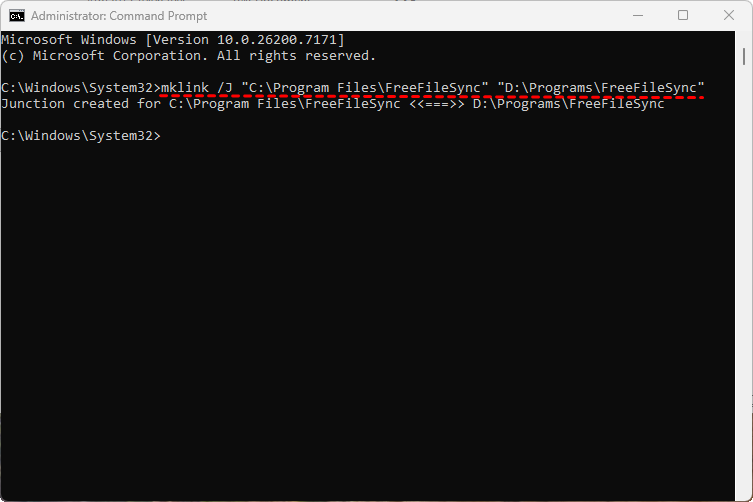
5. Create a symbolic link using the following command:
mklink /J "C:\Program Files\FreeFileSync" "D:\Programs\FreeFileSync"
✍ Notes:
◆ /J: Creates a directory junction.
◆ Replace "C:\Program Files\FreeFileSync" with the program’s original path.
◆ Replace "D:\Programs\FreeFileSync" with the program’s new path.
6. After the junction is created, you’ll see a folder named “FreeFileSync" under C:\Program Files. It looks like a regular folder, but has an icon similar to a shortcut. Open the moved program to test if it works properly.
Method 3: Reinstall the Program to Another Drive
When Windows cannot move the app and symbolic links are not suitable, the safest and most reliable option is to reinstall the program directly on another drive.
1. Press Win + I → go to Apps > Installed apps.
2. Select the program you want to move and click Uninstall.
💡Tip: Before uninstalling, check the app’s settings for export or backup options (especially for games, creative tools, or productivity software) to save your custom settings and data.
3. Download the installer again from the official website.
4. Run the installer and choose Customize, Advanced, or Install location if available.
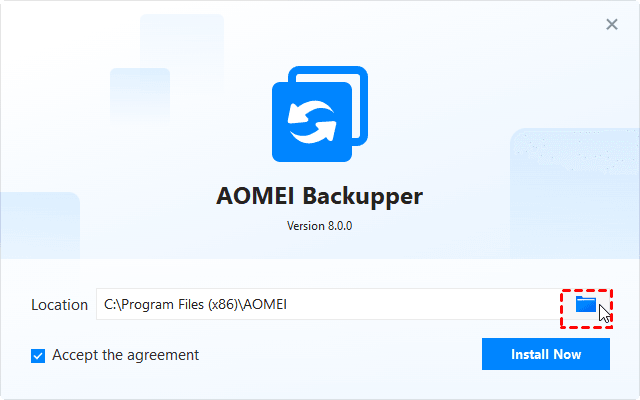
5. Set the installation path to your other drive, such as D:\Programs. Then complete the installation normally.
Bonus: Move OS and installed software to another drive
If your goal is not just to move a few apps but to transfer your entire Windows 11 system — including all installed programs, settings, and personal data — to another drive, AOMEI Cloner provides the most efficient and user-friendly solution. Instead of manually relocating apps, this method creates a complete, bootable clone of your system on a new SSD or HDD.

- Clones Windows 11 and all installed programs at once, preserving system settings, activation, and app configurations.
- Provides Intelligent Clone (default mode) for cloning to smaller disks and Edit Partitions for cloning to larger disks.
- Offers 4K alignment to maximize SSD performance and extend its lifespan.
- Supports NVMe, SATA, and external HDDs/SSDs. You can also use it to clone USB drives.
Download AOMEI Cloner and use these steps to move Windows 11 and installed apps to a new drive:
1. Install your new SSD/HDD inside your PC or connect it via USB-to-SATA/NVMe adapter. Make sure Windows detects the new drive.
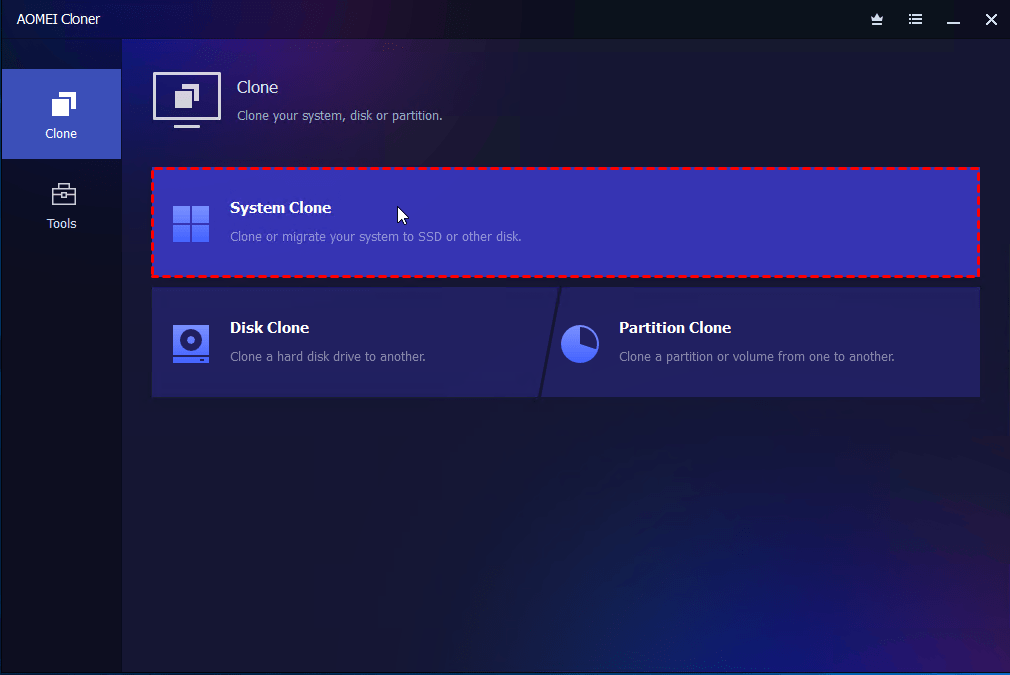
2. Install and open AOMEI Cloner. Click Clone and select System Clone to move only the OS and system-related partitions.
3. Boot-related partitions are selected by default. Select your new SSD or HDD as the target drive.
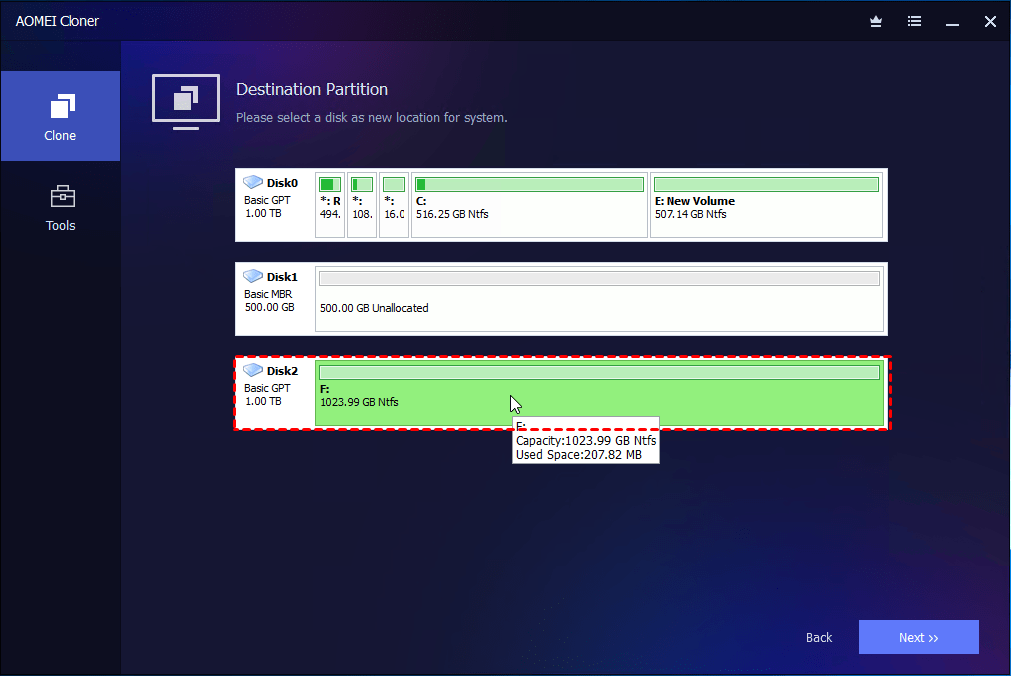
💡Tip: If the target drive is not empty, AOMEI will warn you that all data on the target drive will be overwritten. Backup files and click OK to continue.
4. Enable SSD Alignment if you're cloning to an SSD (improves speed and lifespan). Then click Start Clone to begin moving OS and apps.

Boot from the New Drive
After cloning completes:
- Shut down your computer.
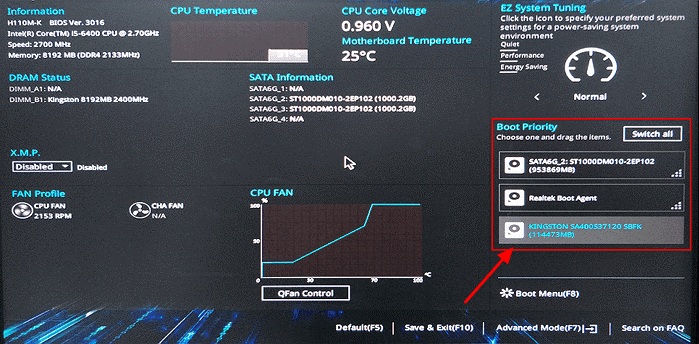
- Enter BIOS/UEFI by pressing F2, F12, DEL, or ESC at startup.
- Set the new drive as the first boot device.
- Save changes and restart.
Verdict
This page offers you 3 effective methods to move installed programs to another drive in Windows 11. Microsoft Store apps can be moved easily through Windows Settings, while traditional desktop programs often require advanced methods like symbolic links or a reinstall.
For users upgrading storage or wanting to migrate everything at once, AOMEI Cloner offers the most reliable solution. It is powerful disk cloning software that enables you to clone HDD to SSD, clone NVMe SSD to NVMe SSD, etc. Don’t hesitate to try it out!
