
REAGENTC.EXE: The Windows RE Image Was Not Found | Fix Now
Receiving “REAGENTC.EXE: the Windows REimage was not found” error while attempting to enable WinRE? Click to get 4 simple and effective methods. Try alternatives if nothing works!
By Ivy Updated on November 6, 2025
What Does “Windows RE Image Was Not Found” Mean?
When Windows shows “REAGENTC.EXE: The Windows RE image was not found”, it means the system can’t locate the Windows Recovery Environment (WinRE) and access advanced tools for repair and troubleshooting when Windows won’t boot normally. Without it, you may be able to use a USB installer.

The Windows RE image (winre.wim) is normally stored in C:\Recovery\WindowsRE or a hidden Recovery partition. It may be missing or corrupted due to:
- The Windows RE is disabled
- Major Windows Updates or feature upgrades
- Corrupted system files or recovery partition
- Other reasons, such as change partitions, migrate Windows, etc.
Method 1: Re-Enable Windows RE Manually
Sometimes Windows RE isn’t missing, it’s simply disabled. Before fixing anything, check the system status. If yes, try to re-enable Windows RE and point Windows to the correct path:
Step 1. Type cmd in the Start menu, select Command Prompt, and Run as administrator.
Step 2. Type reagentc /info and press Enter. You need to check the WinRE status and location.
Step 3. If it’s disabled, type reagentc /enable and press Enter.
Step 4. If the WinRE location is “Not found”, the path may be broken. Try to point Windows to the correct path. Type:
reagentc /setreimage /path C:\Recovery\WindowsRE
Step 5. Wait until the process completes and check the status again.
Method 2: Repair System Files
If Windows RE still cannot be enabled, system file corruption may be blocking Windows from loading the recovery image. Running SFC and DISM can automatically repair damaged files and restore missing WinRE components.
Step 1. Open CMD as administrator
Step 2. Type: sfc /scannow and press Enter. It will scan Windows for corrupted or missing system files and replace them automatically.
Step 3. When it finishes, restart your PC.
Step 4. If SFC reports errors it can’t fix, continue with: DISM /Online /Cleanup-Image /RestoreHealth. It repairs the Windows image itself, including recovery components that WinRE depends on.
Step 5. Try enabling WinRE again and checking its status.
- reagentc /enable
- reagentc /info
Method 3: Manually Download WinRE.wim File
If system files are not the issue, try to download Windows 10 ISO and extract winre.wim file from it. This restores the Recovery Environment even if the recovery partition was deleted or damaged.
Step 1. Download Windows 10 ISO files from Microsoft. Install 7-Zip as well to extract .wim or .esd files.
Step 2. Right-click the ISO file and select Mount.
Step 3. Navigate to the sources folder. Right-click install.wim or install.esd file and select 7-Zip >Open archive.
Step 4. You will see folders with a bunch of numbers. Check them individually and select the folder corresponding to your Windows version, such as Windows 10 Home, Pro, etc.
Step 5. Open the file and go to Windows> System32> Recovery. Then locate and extract the Winre.wim file to your computer.
Step 6. On your computer, go to C:\Windows\System32\Recovery and delete all files there. Then, paste the extracted Winre.wim file into the Recovery folder.
You should now be able to enable the WinRE in the Command Prompt window.
Method 4: Re-create the Recovery Partition
If the recovery partition was deleted during disk cleanup, cloning, or repartitioning, Windows has nowhere to store the WinRE image.Usually, the WinRe location displays as WinRE location: Not set. Creating a new partition and pointing Windows to it can fully restore the Recovery Environment.
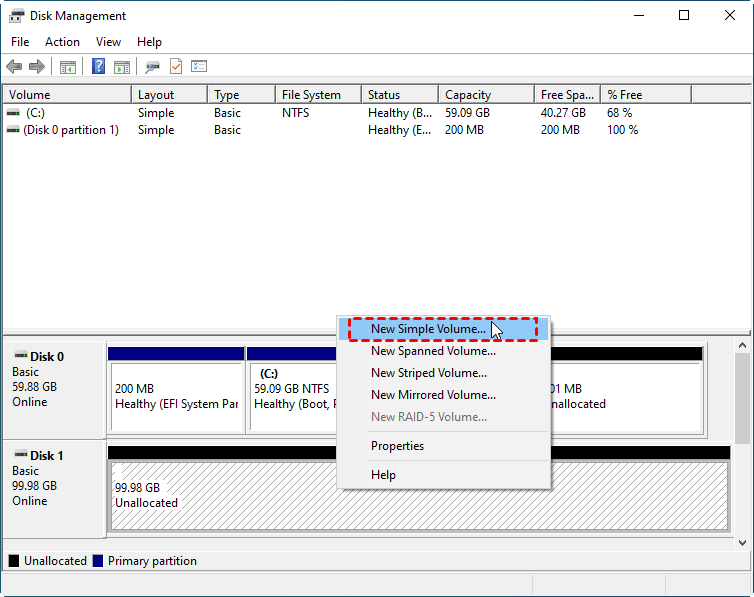
Step 1. Press Win + X and select Disk Management. Right-click the existing drive (usually C:) and click Shrink Volume. Set the space to about 500–1000 MB.
Step 2. Right-click the unallocated space and select New Simple Volume. Then, follow the wizard to create a new partition.
Step 3. Open this new partition. Then, create a Recovery and WindowRE folder, respectively.
Step 4. Copy winre.wim file into the new folder from Windows 10 ISO.
Step 5. Once the new partition is ready, re-register WinRE and enable it. Replace C: with the new partition letter.
- reagentc /setreimage /path C:\Recovery\WindowsRE
- reagentc /enable
- reagentc /info
Nothing Works? Create a Windows 10 Bootable USB for Emergencies
If Windows RE still refuses to enable after repairing system files, restoring winre.wim, and rebuilding partitions, you can choose to create a bootable USB for emergencies.
#1: Create Windows 10 Installation USB
Step 1. Download the Windows 10 MediaCreationTool from Microsoft. Run it and accept the license agreement.
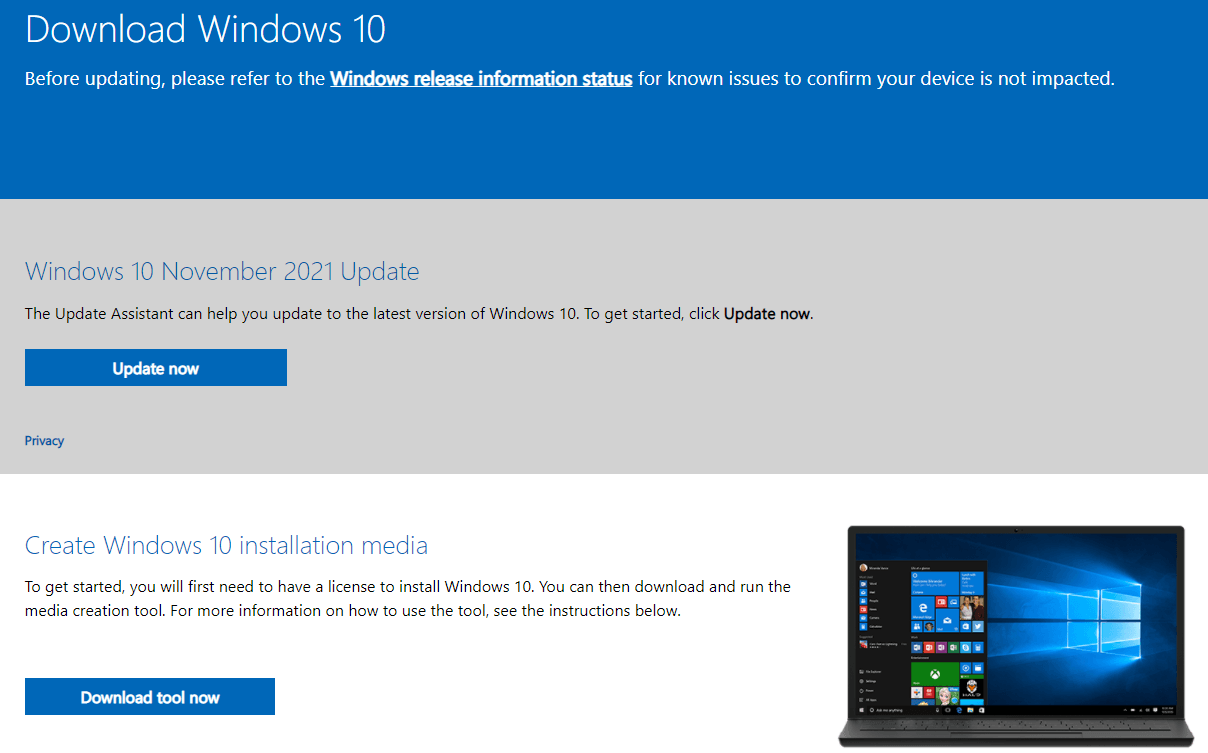
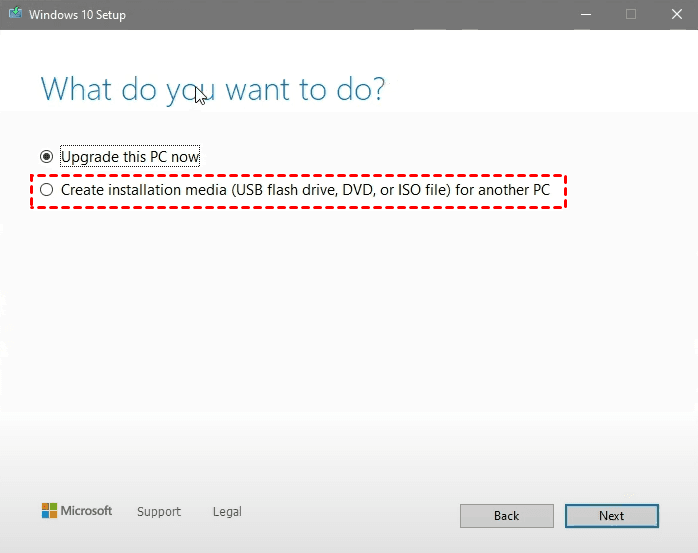
Step 2. Check Create installation media (USB flash drive, DVD, or ISO) for another PC and click Next.
Step 3. Select your language, edition, and architecture - Windows 10 64-bit or 32-bit edition.
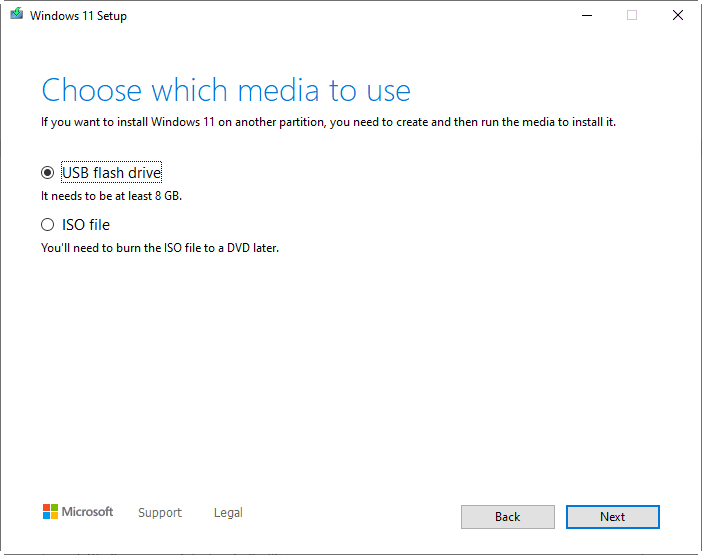
Step 4. Select the USB flash drive and click Next.
Step 5. Select your USB drive and let it download all the needed files. You can then repair, restore, or reinstall Windows without any obstacles.
This lets you fix boot problems, repair missing system files, or perform a clean install if Windows is corrupted beyond repair.
#2: Directly Create Windows 10 Recovery Environment (without USB)
If you don’t have a USB drive, consider using AOMEI Backupper Professional, an all-in-one backup software. It allows you to directly add a boot option to enter the Windows recovery environment. You can then backup and restore Windows 10 to new hard drive or SSD easily, all without extra software.
Step 1. Download and install AOMEI Backupper Professional. Click Tools and select Recovery Environment.
Step 2. In the Recovery Environment Settings window, toggle Enable the boot option of AOMEI Backupper recovery environment. Change the standing time if needed.
Step 3. Click OK to let it create the AOMEI Backupper recovery environment. You can then select Enter into AOMEI Backupper upon the next system startup.
Note that the recovery environment created by AOMEI Backupper is kept under the path C:\Aomei Recovery. If your C drive is damaged, it will not work. It’s suggested to create a Windows 10 recovery disk to ensure there is always a way to start your computer, even when it’s unbootable.
Final Thoughts
To fix reagentc enable the windows re image was not founderror, the easiest method is to check the status and enable it again. If it’s enabled, try to repair system files or manually download the Windows 10 ISO file, even recreate one.
The worst situation is nothing work. In this case, it’s suggested to create a Windows 10 bootable USB just in case, preferably creating a system image or disk backup for recovery. AOMEI Backupper integrates all these features, making the process much easier.
