
How to Check, Create and Revert to 11 System Restore Point
System Restore is one of the best features Windows has to offer, but it needs to be enabled before anything bad happens. So, how do you know if it has been enabled on your Windows 11 computer, and how to create a restore point in case of your recovery needs?
By Delia Updated on March 25, 2026
System Restore is a Windows feature that has been around for years and has been introduced in Windows 11. This feature creates snapshots of the current working state of the system, saves them as restore points that can be reverted to when an unexpected event occurs.
System Restore is one of the best features Windows has to offer, but it needs to be enabled before anything bad happens. So, how do you know if it has been enabled on your Windows 11 computer, and how to create a restore point in case of your recovery needs?

How to check if System Restore is enabled in Windows 11
In Windows 10, the System Restore setting is part of the Advanced System Settings in Control Panel, which is a bit tricky to find, but it is much easier to find it on Windows 11.
1. Open the Start menu and click the “Settings” icon, or press Win + I to open Settings app.
2. Select “System” on the left pane, then scroll down to the bottom of the page and select “About”.
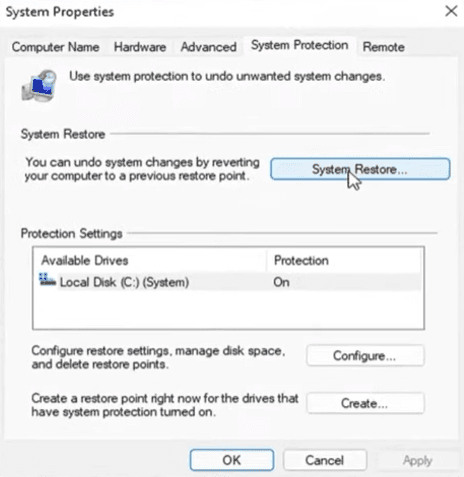
3. On the About page, click “System protection” in the Related links section, which will open the System Properties window.
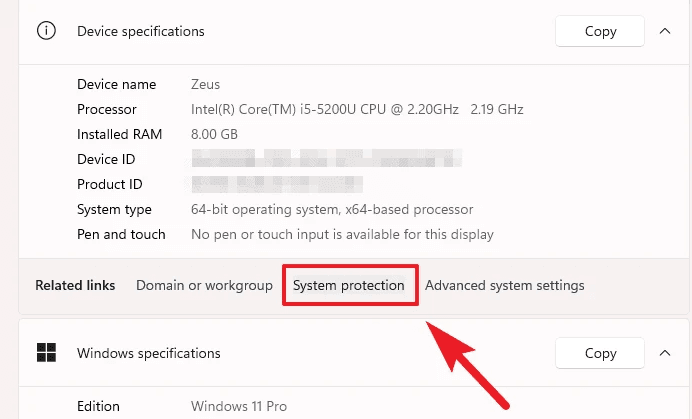
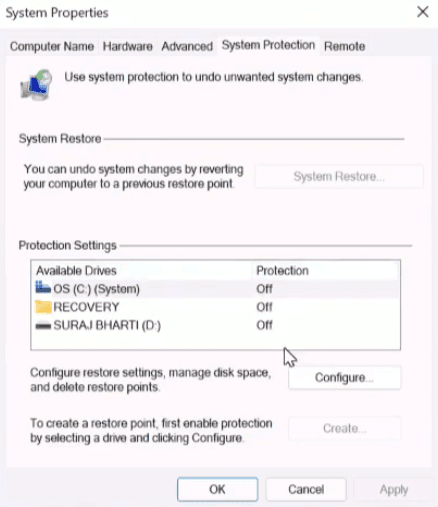
4. Then check the "Protection Settings" section. If you see "Off" next to the primary drive or any other drive, it means that the System Restore feature is disabled. Another indication that this feature is off is when you see the "System Restore" button at the top of the window is grayed out. If it shows "On", it means System Restore is enabled.
How to enable System Protection and create Restore Point on Windows 11
Windows 11 does not have System Restore enabled by default, so if you check through the steps above and find that System Protection is not enabled, then you need to enable it in System Properties.
1. Select your primary hard drive under the Protected Settings section, then, click the “Configure” button.
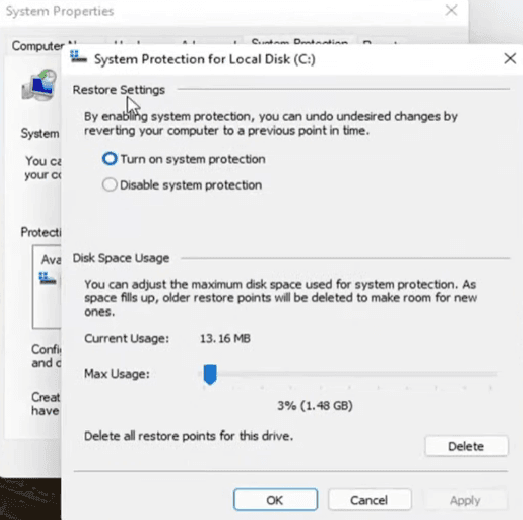
2. In the pop-up window, check the option of “Turn on system protection” under the Restore Settings section. You can also adjust the Max Usage slider to determine how much space your Windows 11 system should reserve for restore points. When you have finished configuring, click “Apply” and then click “OK”.
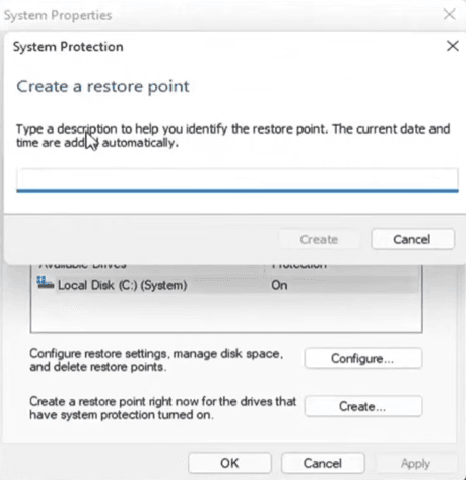
3. Once the configuration is complete, the System Restore feature is enabled. This means that the system will automatically create a restore point when a specific system change occurs or a system update is installed. Of course, you can also click "Create" to manually create a restore point immediately.
If you have other hard drives in your system, make sure that system protection is enabled on those drives as well. All you need to do is perform the above actions on each hard drive.
Keep in mind that System Restore is designed to undo changes and is not created as a backup solution. This means that this feature can only restore PCs that have configuration problems, not when you accidentally erase files and folders.
If you need to make a backup of your system, you can refer to Windows 11 backup and restore.
How to perform System Restore with restore point
1. If you have successfully created a system restore point, then when you need to restore, just click the "System Restore" button in the "System Properties" window.
2. In the pop-up window, click “Next” and you will see the specific state of the restore point you want to revert to and the applications that will be affected.
3. Continue by clicking “Next” and then press “Finish”. After confirming the last warning window, the system restore will start. Please be patient until the restore is complete, and then the computer will restart automatically.
What if the computer cannot start up properly
You can also perform a system restore in Windows Recovery Environment, especially if your system has gone out of order and cannot boot properly.
To do this, you can either use the Windows 11 recovery drive, or press the power button off when the computer starts up with a logo > power on > power off, when the computer fails to start up 3 times it will automatically enter the recovery environment. Then you can use the System Restore function in Advanced options and follow the wizard to complete the whole process.
