
8 Tips to Fix Windows 10 Not Shutting Down Properly
There are various reasons that may cause Windows 10 not to shut down properly, and the following is a list of possible solutions to the problem.
By Delia Updated on December 10, 2024
Some users who want to shut down their Windows 10 computers after performing operations find that the computer does not shut down properly, even if they click the Shut down button several times, it does not respond. At this point, many people may choose to force shutdown, but we all know that this can lead to data loss or even damage. So are there any other solutions?
There are various reasons that may cause Windows 10 not to shut down properly, and the following is a list of possible solutions to the problem.

1. Disable fast startup
The reason why Windows 10 does not shut down successfully is most likely the fast startup feature. It keeps your computer from shutting down completely while you perform this action, so it can restart quickly. However, this mode can cause many problems, including our shutdown issues.
To verify this, you can hold Shift while clicking Power > Shutdown on the Start menu. This method bypasses the fast startup feature and puts the system into a shutdown state. If you can shut down the system using this method, the fast startup should be the problem. You can disable fast startup at the next boot by doing the following.
Open Control Panel and select "Power Options".
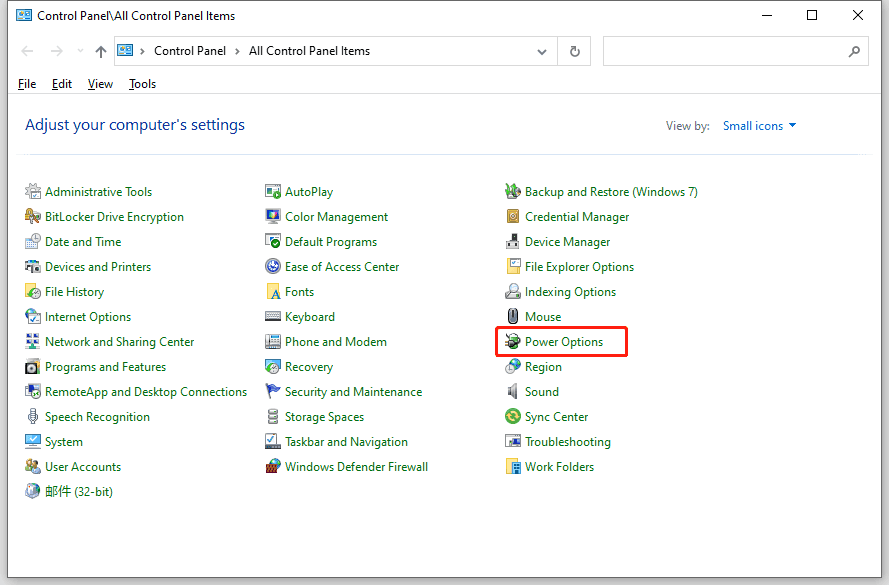
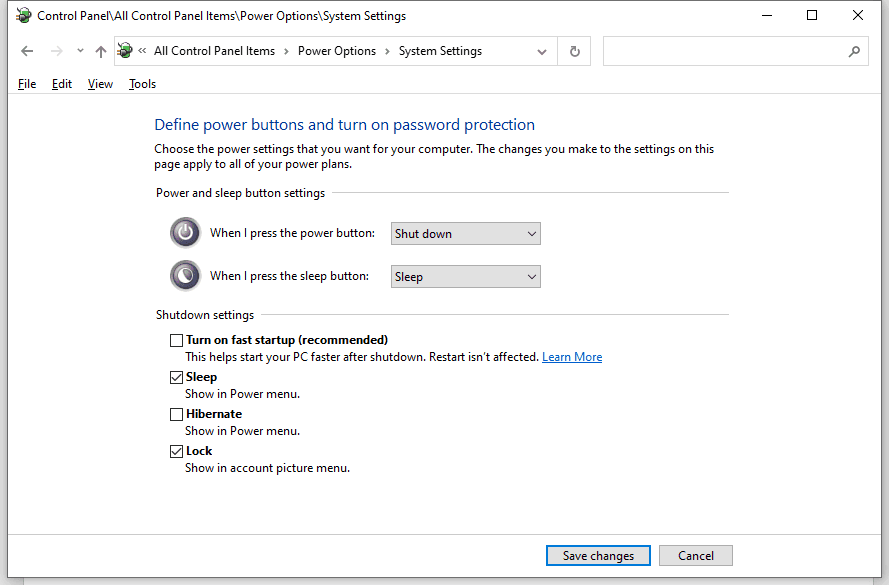
From the left pane, select the "Choose what the power buttons do", and then click "Change currently unavailable settings".
Uncheck "Turn on fast startup" and select "Save Changes". Then the fast startup feature is turned off.
2. End tasks and disable Startup apps
Some applications and processes may be running in the background when you want to shut down your computer and cannot be closed immediately, which is one of the possible reasons why you may not be able to shut down your computer. In addition, it is likely that these applications are already running automatically at Windows startup without asking your permission. So here we can disable them from starting automatically at boot.
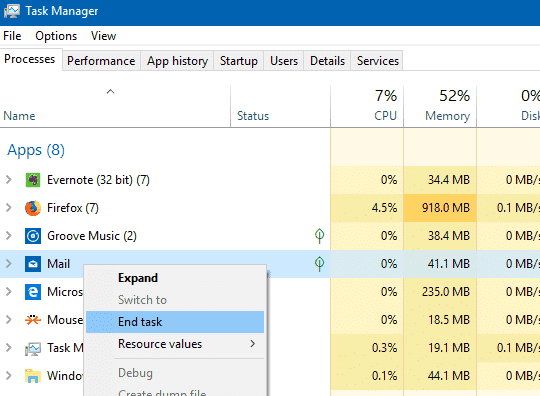
Open Task Manager from the taskbar or by pressing Ctrl + Shift + Esc.
If you see the small panel, click “More details” to switch to the large panel.
Next, check the “Processes” tab to see if there are any apps in the Apps and Background processes list that have not been successfully closed. If so, right-click on it and select "End task".
Then go to the "Startup" tab, right-click on the startup items you don't want and select "Disable". This way, they will not start automatically the next time you turn on your computer.

Once you have done this, you can try again to see if you can shut down your computer normally.
3. Shut down your computer with Command Prompt
CMD (Command Prompt) enables you to directly request a forced shutdown to stop any running applications. Here are the steps.
Type "cmd" in the Start menu and select "Run as administrator".
Type the following command in the window and press Enter to execute it.

Your computer should now shut down immediately without installing or processing any updates.
4. Run Windows troubleshooter
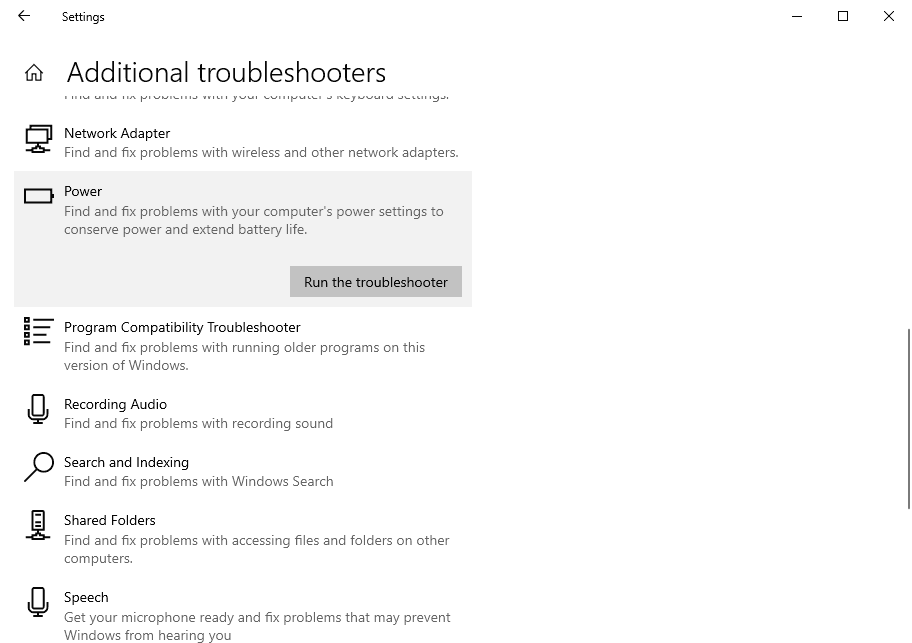
In the Start menu, type "Troubleshooting" and then select Troubleshooting settings from the search results.
In the Troubleshoot window, click "Additional troubleshooters" and select “Power” > “Run the troubleshooter” to try the troubleshooting.
If necessary, select "Try troubleshooting as an administrator".
The troubleshooter will look for issues and apply fixes automatically.
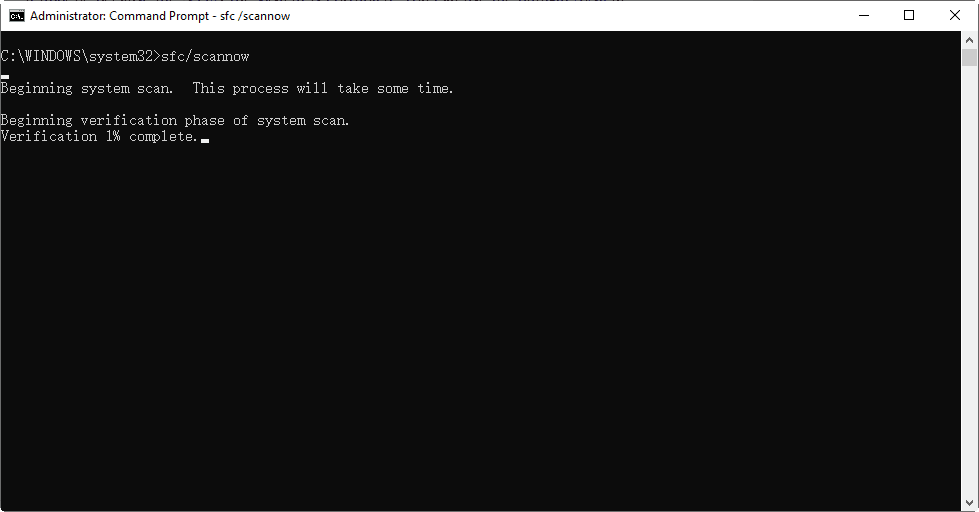
5. Repair Windows system files
If there are problems with some system files, it may also prevent you from shutting down your computer properly. You can try to fix all system errors in this way.
Type "cmd" in the Start menu, right-click Command Prompt and select Run as administrator.
Type the following command and press Enter to execute it.
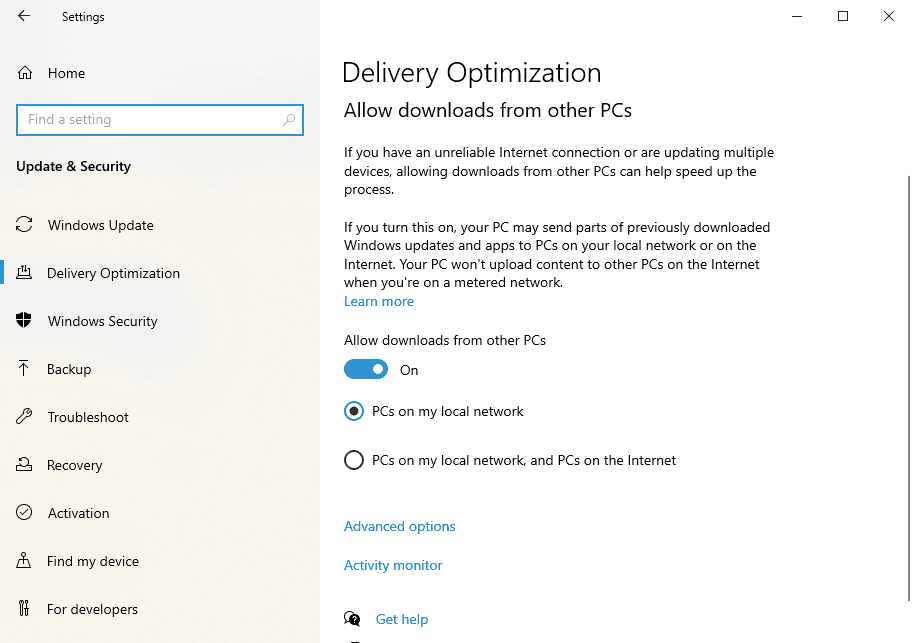
6. Stop Windows Delivery Optimization
Windows 10 is always downloading updates, which is why Microsoft came up with this service, so that if there are multiple Windows 10 machines on the same network, the computers can exchange update files instead of downloading them on each computer. So if a computer on the network gets any updates from your computer, it won't shut down until the file transfer is complete. The good news is that you can turn this feature off as follows.
Open Settings from the Start menu.
Next, go to “Updates & Security” > “Windows Update”.
On the Windows Update page, click “Advanced options”.
Now, click “Delivery Optimization”.
Click the switch of “Allow downloads from other PCs” to disable it.
Now try to turn off your computer again.
7. Check for updates in Windows Update
Microsoft sends new updates and fixes for common problems through Windows Update, so we can always check for updates to start fixing problems.
Press Win + I to open the Settings app and click on "Update & Security".
Click the "Check for updates" button and your computer will check, download and install any updates it finds.
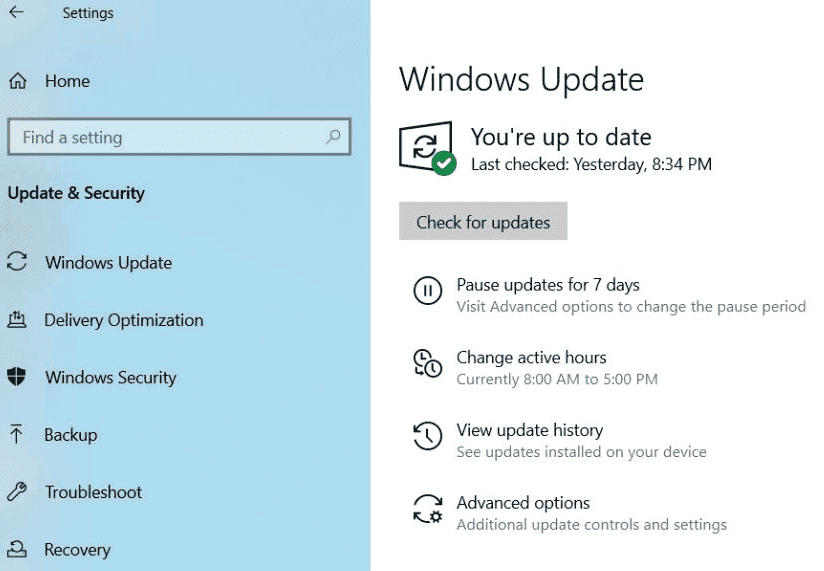
After updating your Windows version, check whether your computer can be shut down.
8. Forced shutdown
If all else fails, or if you are sure that the items you are working on have been saved, you can also try forcing the computer to shut down.
Press and hold the power button until the computer shuts down.
Remove any power (battery/power cord/unplug the power cord) for 5-10 minutes.
Start your computer again and try to shut it down normally.
These are the 8 suggestions for Windows 10 computer not shutting down properly, you can try them one by one to see if they solve the problem.
