
Full Guide to Transfer Windows Live Mail to Windows 10 Mail
Need to transfer your Windows Live Mail data to Windows 10 Mail? Follow our step-by-step instructions on this page.
By Lily Updated on January 6, 2026
Why Transfer Windows Live Mail to Windows 10 Mail?
Moving from Windows Live Mail to the Windows 10 Mail app is not just about convenience—it’s often a necessity. Here are the key reasons why making the switch makes sense:
⭐ Windows Live Mail is discontinued
Microsoft no longer supports Windows Live Mail, which means no security updates, bug fixes, or compatibility improvements.
⭐ Better compatibility with Windows 10 and newer systems
The Windows 10 Mail app is designed to work seamlessly with modern Windows updates and hardware.
⭐ Easier account synchronization
The Mail app supports IMAP, POP3, Exchange, and Outlook.com, making it easier to manage multiple accounts in one place.
⭐ Cleaner and more modern interface
Windows 10 Mail offers a simpler layout, faster navigation, and better performance compared to Windows Live Mail.
Important: Backup Windows Live Mail Before Transferring
Before you transfer Windows Live Mail to Windows 10 Mail, creating a full backup is a critical safety step. Migration errors, sync failures, or accidental overwrites can result in permanent email loss if you don’t have a backup.
To ensure maximum protection, it’s highly recommended to use AOMEI Backupper Professional, a reliable and user-friendly backup solution.

- Supports All Major Services: Back up emails from Yahoo, Gmail, Outlook, Hotmail, Windows Live Mail, and more.
- Full or Selective Backup: Choose entire accounts or specific folders to back up simultaneously.
- Multiple Storage Destinations: Save to your computer, external drives, USB devices, or NAS.
- Automated Scheduling: Configure the "Schedule" feature for regular, automatic backups.
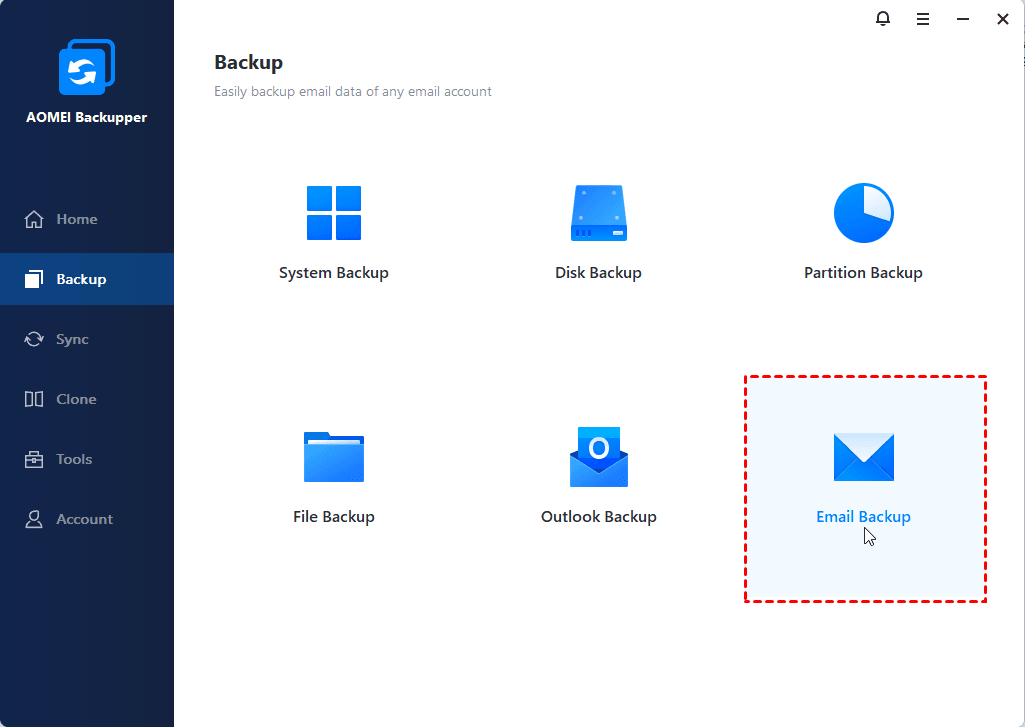
Download and install AOMEI Backupper on your PC now! To backup Windows Live Mail to your computer, click Backup > Email Backup and follow the wizard to finish the process.
How to Migrate from Windows Live Mail to Windows 10 Mail Step by Step
In this part, you’ll learn two effective methods to transfer Windows Live Mail to Windows 10 Mail. These steps also apply to moving Windows Live Mail to a new computer.
Method 1: IMAP Synchronization (Recommended)
This is the most reliable way to transfer messages by using a modern email account (like Outlook.com or Gmail) as an intermediary. Follow the steps below:
Step 1: Prepare an IMAP Account
Log in to a modern webmail account (e.g., Outlook.com or Gmail). Create new folders to hold your WLM messages.
💡 Note: Make sure the options “Let devices and apps use POP” and “Let devices and apps use IMAP” are enabled.
Step 2: Add Account to WLM
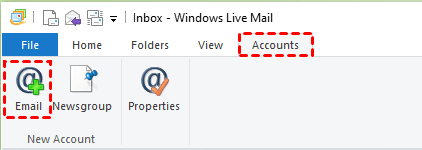
1. In Windows Live Mail, go to Accounts > Email.
2. Enter your IMAP email credentials. Check Manually configure server settings, and then click Next.

3. Select IMAP as Server Type and enter other information to complete the setup and allow the account to sync.
Step 3: Transfer Emails
In WLM, select the emails or folders you want to move and drag/drop them into the newly created folders under the IMAP account. Wait for them to sync to the cloud.
💡 Note: Move emails in smaller batches to avoid sync errors or timeouts.
Step 4: Connect to Windows 10 Mail
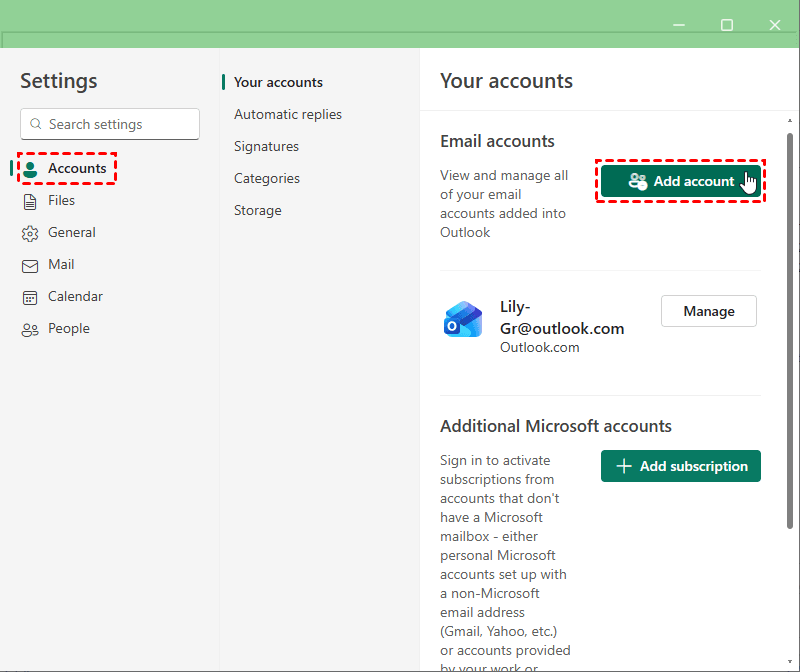
Open the Mail app in Windows 10, go to Settings (gear icon) > Accounts > Add account, and sign in with that same IMAP account. Your emails will appear automatically.
Method 2: Manual Export/Import (For "New Outlook")
If you have been upgraded to the New Outlook, you can import files directly. Here’s how to do it:
Step 1: Export Emails from Windows Live Mail
1. Create a new folder on your desktop to store the exported emails.
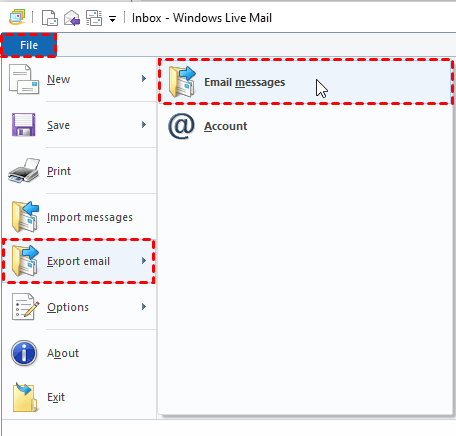
2. Open Windows Live Mail. Click File > Export email > Email messages.
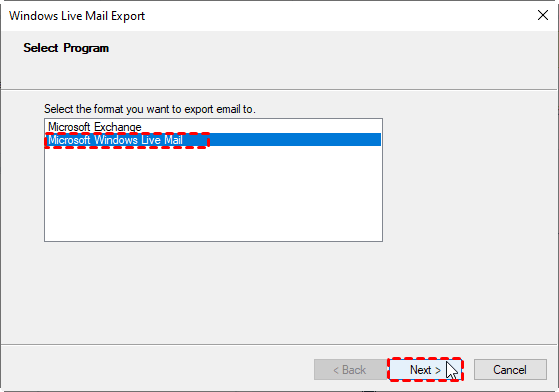
3. Choose Microsoft Windows Live Mail as the export format and click Next.
4. Click Browse to select the new folder you created earlier and click Next.
💡 Note: The destination folder must be an empty folder, so you’d better use a new folder.
5. Select All folders or specific folders to export and click Next.

6. When you see “Export Complete”, click Finish.
Step 2: Import Emails in Windows 10 Mail
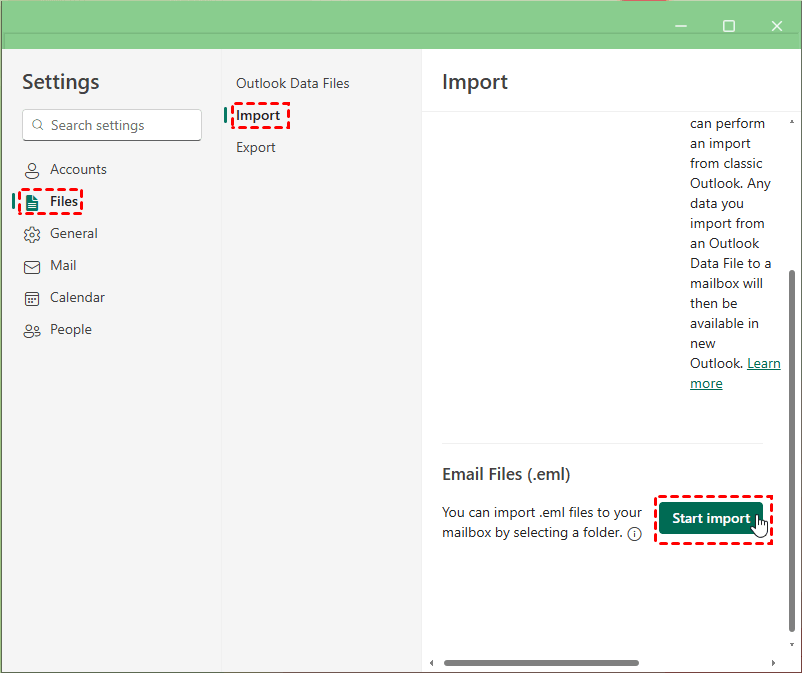
1. Open the Mail app in Windows 10. Go to Settings > Files > Import, then click Start import.
2. In the pop-up window, select the folder that contains the .eml files and click Upload.
3. Select the destination account and folder and click Import.

Tips to Ensure a Successful Windows Live Mail Migration
Migrating from Windows Live Mail to Windows 10 Mail is usually straightforward, but a few best practices can help you avoid common problems and ensure nothing gets lost along the way.
✅ Use an IMAP-enabled email account whenever possible
IMAP provides better folder synchronization and reduces the risk of incomplete transfers compared to POP-based methods.
✅ Check mailbox storage limits in advance
Make sure your email account has enough server space to hold all messages before uploading large mail folders.
✅ Keep Windows Live Mail open during syncing
Closing the program too early may interrupt the upload process and lead to missing emails.
✅ Verify emails after migration
Check folders, message counts, attachments, and timestamps in Windows 10 Mail to confirm everything transferred correctly.
✅ Maintain a stable internet connection
A dropped connection can interrupt syncing and cause partial migrations.
✅ Clean up duplicate or unnecessary emails afterward
Once the migration is complete, organizing and removing duplicates helps improve performance in Windows 10 Mail.
Summary
Now you know how to transfer Windows Live Mail to Windows 10 Mail. You can try IMAP synchronization or manual import & export. To avoid email loss due to unexpected migration errors, you may backup your emails with AOMEI Backupper beforehand.
Besides email backup, you can also use AOMEI Backupper to backup C drive, sync OneDrive to external hard drive, etc. Don’t hesitate to download it and try it out!
