
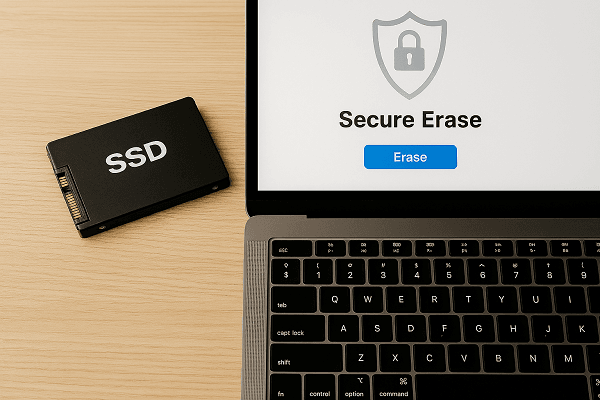
Best Ways to Perform SSD Secure Erase on Windows
Ensure your SSD data is permanently gone. Whether you prefer an official manufacturer utility or versatile third-party software, you can find a way to go from this page.
By Lily Updated on December 18, 2025
What Is SSD Secure Erase?
SSD secure erase is a specialized data removal process designed specifically for solid-state drives. Instead of deleting files or formatting partitions, it uses a built-in command at the firmware level to permanently remove all data stored on the SSD. Once completed, the drive is restored to a factory-like state, with no user data remaining and no practical way to recover it.
Best SSD Secure Erase Tools for Windows PC
Below are two excellent options to help you wipe SSDs in Windows: one general-purpose backup and disk wipe suite, and one manufacturer-specific utility for Samsung drives.
1. AOMEI Backupper Professional (for all SSDs)
Beyond comprehensive backup and recovery, AOMEI Backupper Professional features a robust wiping utility for securely erasing disks and partitions.

- It supports disk, partition, and free space wiping.
- It works with internal/external HDDs, SSDs, and USB drives.
- It offers multiple wiping methods, including Fill sectors with Zero, Fill sectors with random data, DoD 5220.22-M, and Gutmann.
- As for SSDs, it supports different types (SATA, NVMe, PCIe, M.2, U.2, etc.) and various brands (Crucial, Intel, Samsung, Western Digital, Integral, etc.).
- It is also embedded with backup features to help you backup important files before erasing.
2. Samsung Magician (for Samsung SSDs)
If you have a Samsung SSD, Samsung Magician is one of the most trusted tools for managing and optimizing your drive — including secure erasure. This feature allows you to perform a complete, hardware-level wipe that effectively sanitizes the entire drive, ensuring all data is permanently and irrecoverably deleted—a crucial step before selling or disposing of your device.
Key advantages:
- Official Samsung support: Built specifically for Samsung SSDs, ensuring compatibility and reliability.
- Performance optimization: Includes firmware updates, benchmarking, and health monitoring.
- Secure erase feature: Lets you wipe the SSD back to factory state with an easy wizard-style interface.
How to Securely Erase SSD on Windows 10/11
Now learn how to use the best two SSD wipe tools to perform SSD secure erase on Windows 10/11.
Method 1: Using AOMEI Backupper
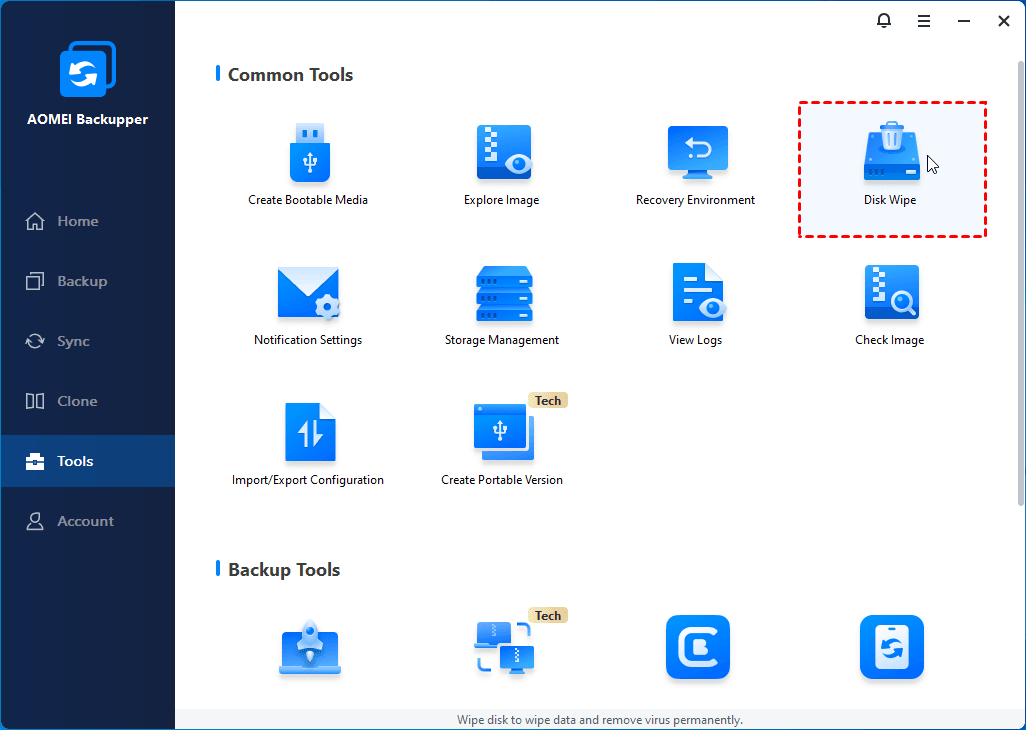
Step 1. Download, install, and launch AOMEI Backupper Professional. From the main interface, click Tools and select Disk Wipe.
Step 2. In the pop-up window, select Wipe disk from the drop-down menu.
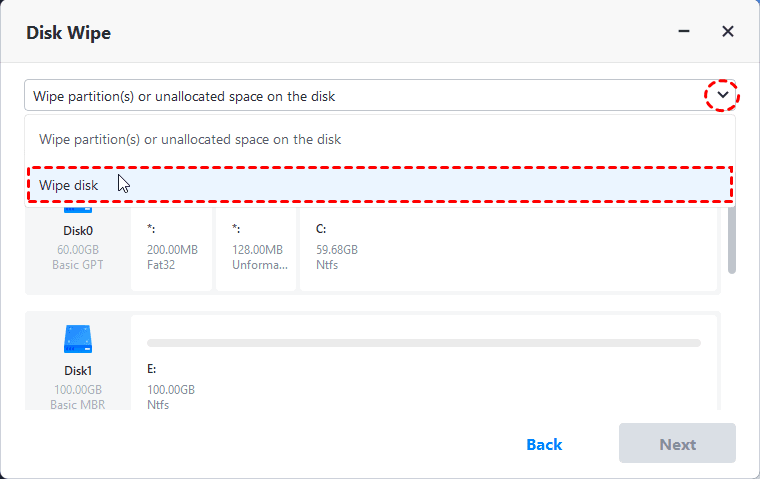
Note: If you want to wipe specific partitions instead of the whole disk, please choose Wipe partition(s) or unallocated space on the disk.
Step 3. Click on the SSD that needs to be wiped and click Next. If the SSD is a system disk, you’ll be prompted to execute the operation in reboot mode.
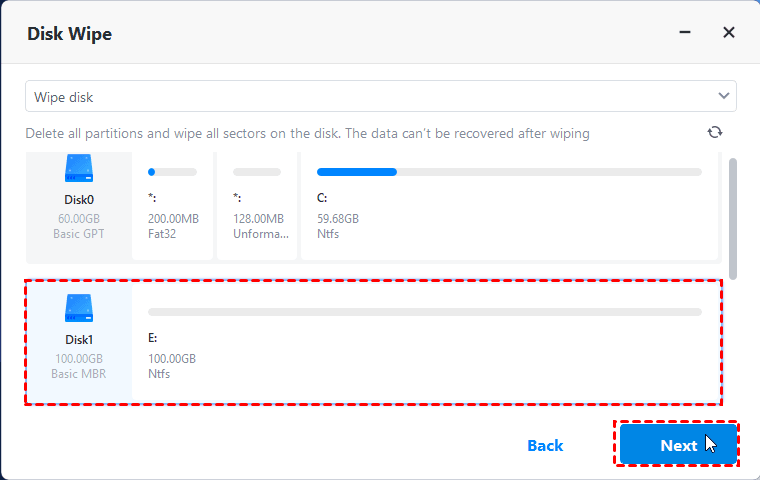
Step 4. Choose a wiping method based on your need and click Start to begin SSD wiping.
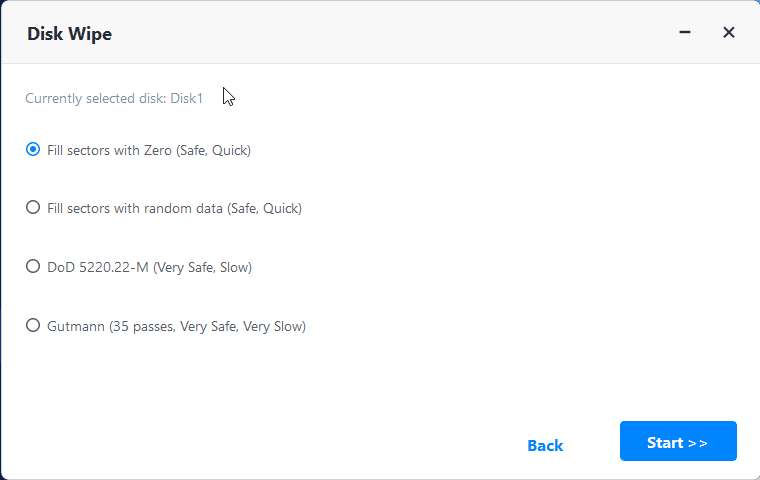
Note: Selecting a higher-security wipe method will result in a longer process time.
Method 2: Using Samsung Magician
Step 1. Connect the Samsung SSD you want to erase and an empty USB drive with suggested 8GB size to your computer. Then download the Samsung Magician software from its website.
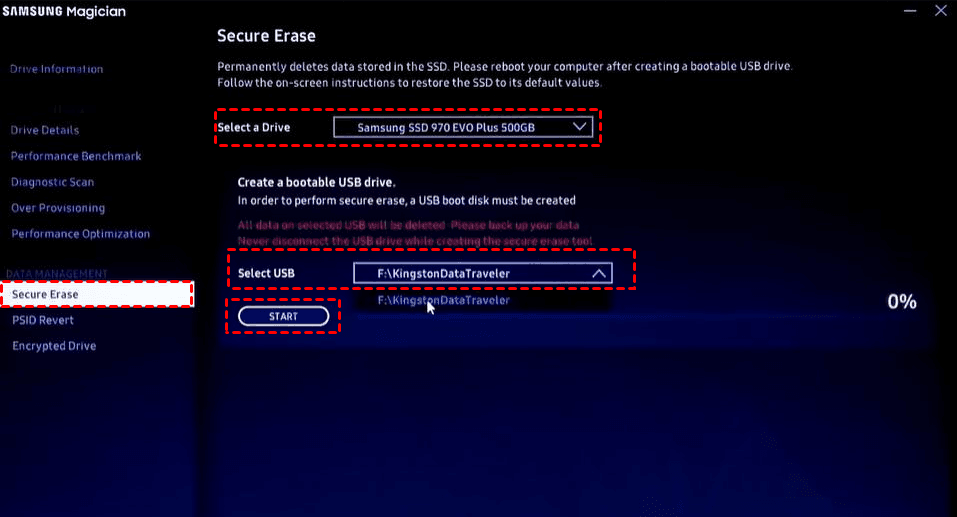
Step 2. Open Samsung Magician and click the Secure Erase tab from the left panel. Then select the Samsung SSD you connected.
Step 3. You’ll need to create a bootable USB drive to allow the utility to work. Choose the USB drive connected before and click Start.
Step 4. After the bootable media is created, click OK to restart in the BIOS/UEFI menu.

Note: If you don’t see the BIOS/UEFI menu, you can go to the BIOS menu manually by pressing F2 or Del during boot.
Step 5. Inside the BIOS/UEFI menu, set the USB drive as the first boot option.
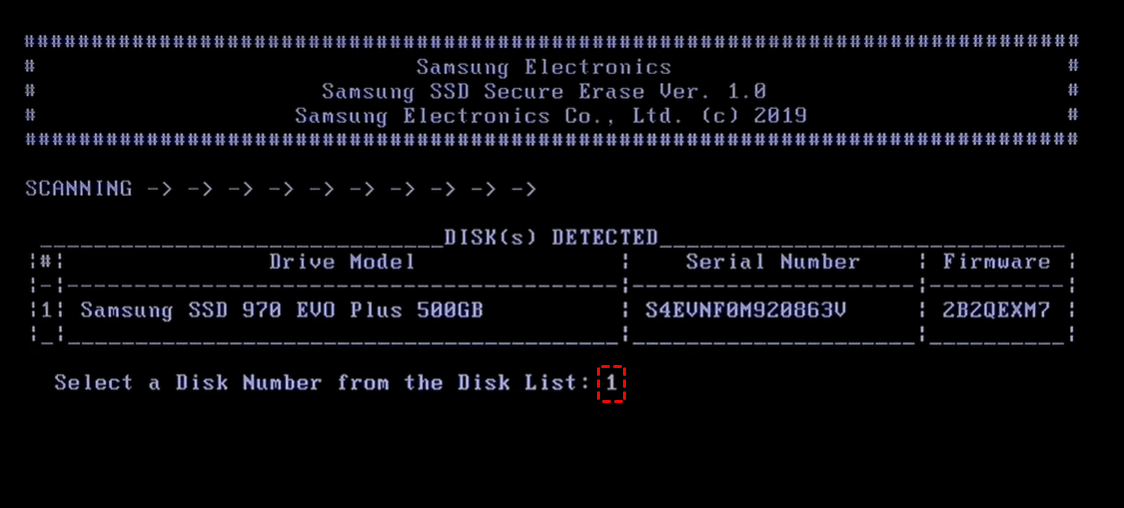
Step 6. On the Welcome page, type Y and hit Enter to continue.
Step 7. Press the number key to select the SSD to be wiped and hit Enter.
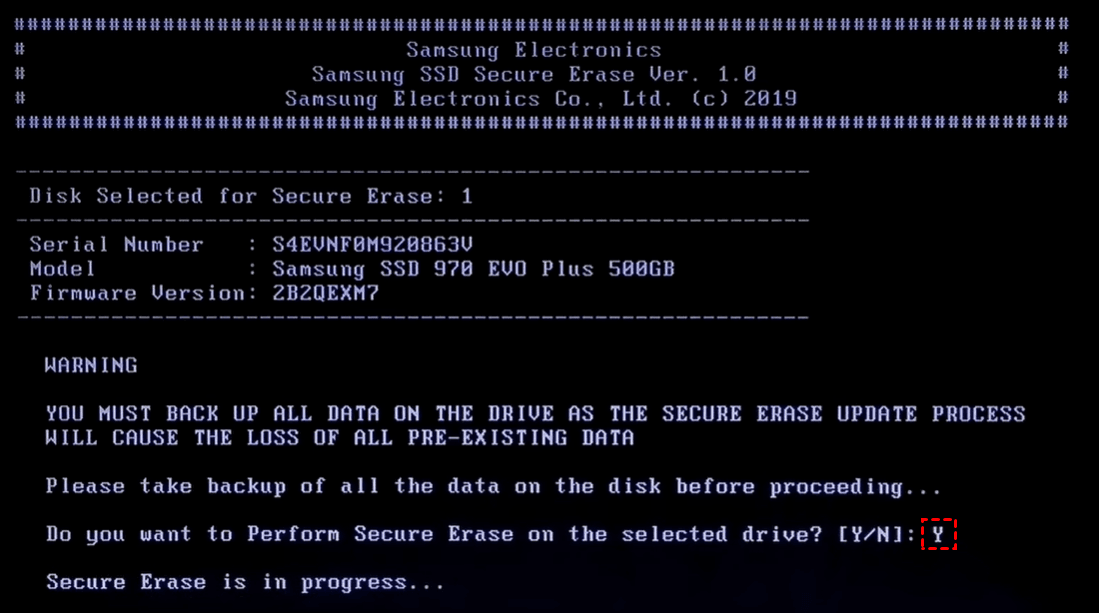
Step 8. On the WARNING page, type Y and hit Enter to begin wiping Samsung SSD.
Step 9. Once secure erase is done, you will press any key to restart your computer and you will go to the BIOS again. Change boot order to boot from your original system disk.
FAQs about SSD Secure Erase
1. Is SSD secure erase really permanent?
Yes. SSD secure erase works at the firmware level and clears all memory cells on the drive. Once completed, the data cannot be recovered using normal or professional data recovery tools.
2. Does SSD secure erase damage the drive?
No. SSD secure erase is a manufacturer-supported function and does not harm the drive when used correctly. In fact, it can restore the SSD to a factory-like state.
3. Will SSD secure erase reduce the lifespan of the SSD?
Not significantly. Secure erase is a single, controlled operation and causes far less wear than repeated overwriting methods, making it safe for normal use.
4. Is formatting the same as SSD secure erase?
No. Formatting only removes file system references and does not fully erase data from SSD memory cells. SSD secure erase permanently deletes all stored data.
5. Do I need to back up my data before secure erase?
Absolutely. SSD secure erase removes everything on the drive. Always back up important files before starting the process.
Conclusion
SSD secure erase is the most reliable way to permanently remove data from a solid-state drive. By using trusted tools such as AOMEI Backupper Professional or manufacturer utilities like Samsung Magician, Windows users can wipe SSDs safely and efficiently.
While its disk wipe feature is robust, AOMEI Backupper is, at its core, a complete backup and restore solution. You can use it to backup C drive and restore your computer when problems occur. Why not give it a shot?
