
How to Schedule Your Computer to Shut Down Automatically
To set up a timer shutdown is really a matter of a few steps and requires no third-party tools. Here are the specific steps based on Windows 10 - they should also apply to Windows 11, Windows 7, etc.
By Delia Updated on March 19, 2026
Nowadays, everyone has long been used to using computers for daily work and entertainment, and the last action after finishing the using is to shut down the computer. The operation of shutdown is simple, but sometimes it can become a hassle. If we are performing some operations that require a lot of time, such as downloading large audio and video files, performing video rendering, or running a big project, we must wait for it to finish before we can manually shut down the computer.
At this point, we may want to set the computer to shut down automatically at a set time. This way it will not interfere with what is going on, nor will it prevent us from going out or doing other things.
To set up a timer shutdown is really a matter of a few steps and requires no third-party tools. Here are the specific steps based on Windows 10 - they should also apply to Windows 11, Windows 7, etc.
Method 1. Use command line to shut down computer at a set time
1. Press Win + R to open the Run window.
2. In the text box, type "cmd" to open Command Prompt.
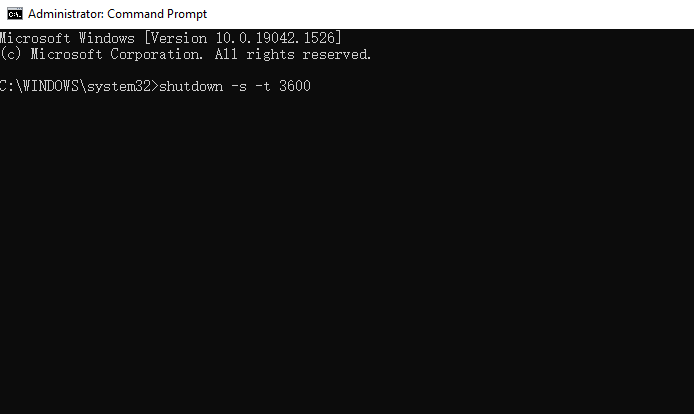
3. then enter the following command and press Enter to execute:
In this command, "3600" stands for 3600 seconds or 1 hour, which means the computer will shut down automatically after 1 hour. You can also replace it with any integer you want, such as 7200, 10800, etc.
If you don't want to cancel the automatic shutdown, you can also run the following command:
Method 2. Use batch file to shut down the PC automatically
This method is actually the same as the rest of the above, except that the command line is created as an executable file, so that you can click on it every time you want to shut down your computer automatically.
1. Open Notepad and copy the commands mentioned in the previous method in it, such as
2. Save the file and change the suffix to .bat so that the text file will become an executable file.
3. Whenever you want to set automatic shutdown, just double-click this batch file.
You can also create the following command as a .bat file, so that when you want to cancel the automatic shutdown, just double-click it.
Method 3. Use Task Scheduler to set automatic shutdown
Windows comes with a Task Scheduler tool to help you perform tasks on a regular basis, including shutdowns.
1. On the desktop or in File Explorer, right-click "Computer" (Windows 7) or "This PC" (Windows 10/11) and click "Manage".
2. Navigate to "System Tools" → "Task Scheduler", and select "Create Basic Task" on the right.
3. In the pop-up window, name and describe the task according to your preference, and click "Next".
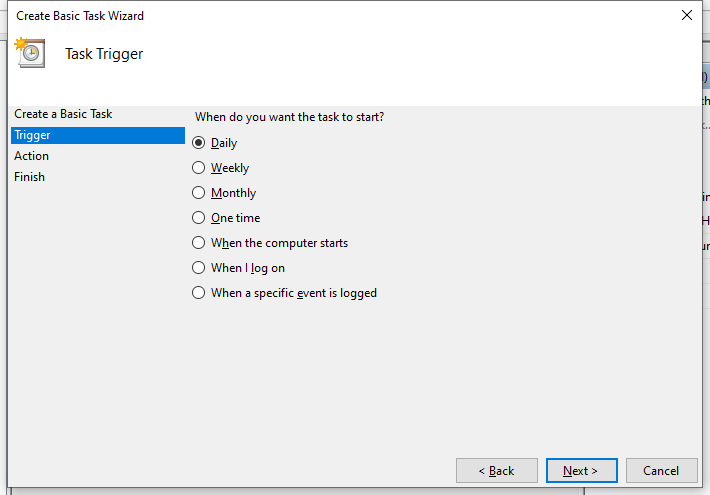
4. Select the frequency of the task as needed, such as "One time", and then click "Next".
5. Set the specific time you want to shut down the computer, and then click "Next".
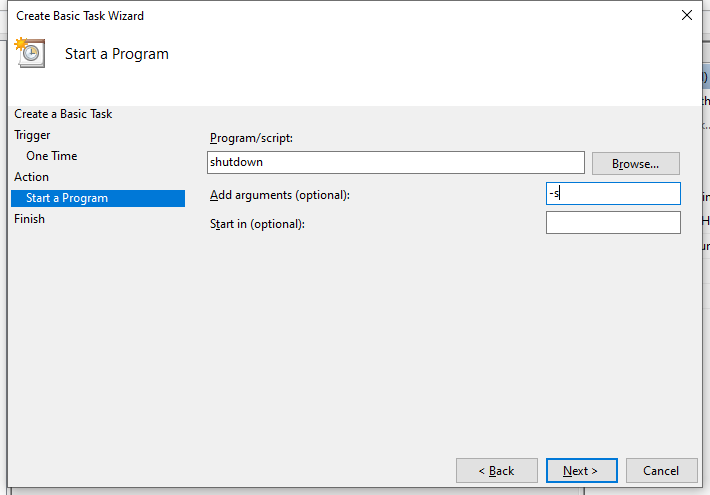
6. Confirm the scheduled action as "Start a program", click "Next".
7. Type "shutdown" in the text box under Program/script, and then add the argument "-s" after Add arguments (optional), click Next.
8. Confirm that there are no errors, click "Finish".
Then the computer will shut down automatically according to the time or frequency you set. With this tool, you can also perform other operations at regular intervals, such as auto copying files to another folder.
These are just a few of the ways to set up automatic shutdown in Windows 11/10/8/7. I hope they can help you.
