
Lagging After Upgrading to Windows 11? 5 Tips to Speed It Up
Windows has some default settings for appearance and performance, but this default setting does not give it the best performance. If you feel laggy after upgrading to Windows 11, then try the following settings.
By Delia Updated on December 10, 2024
If you are open to new things and have a sufficiently configured computer, you may have a pleasant experience even with the default settings after upgrading to Windows 11.
But if you feel laggy when using it, then maybe you need to do some optimization settings to improve the system performance. Here are 5 tips you can try.
1. Turn off visual effects
Windows has some default settings for appearance and performance, but this default setting does not give it the best performance. If you value performance more than appearance, then try the following settings.
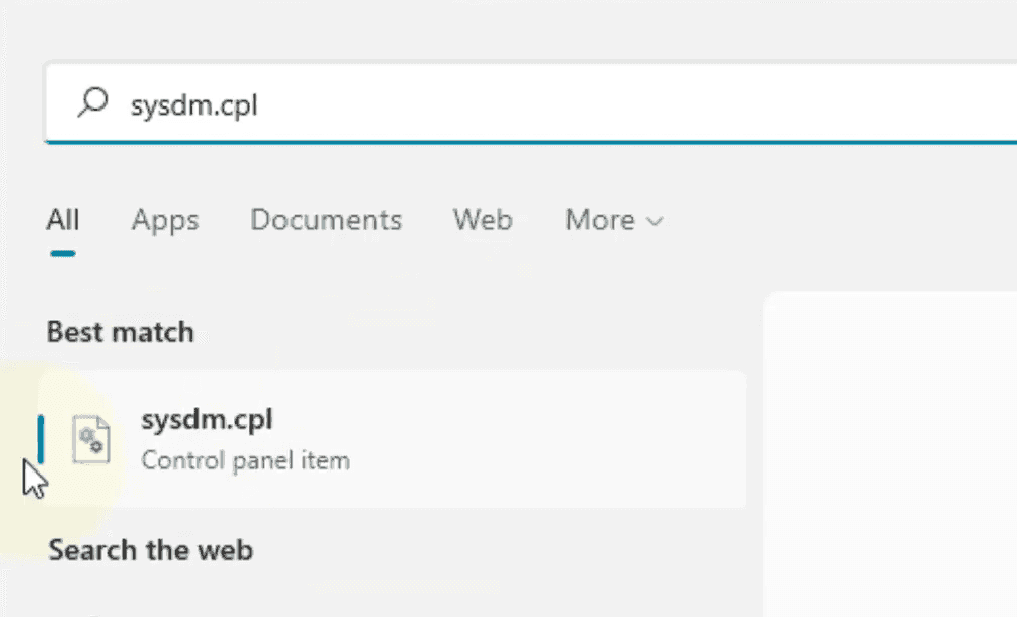
Click the Start menu, type "sysdm.cpl" in the search box, then click on the search result.
Switch to "Advanced" tab and hit "Settings" under Performance, check the "Adjust for best performance" option in the pop-up dialog box.

Then check the "Smooth edges of screen fonts" and "Show thumbnails instead of icons" options from the following list, then click "Apply" and "OK".
This will improve your computer's performance, but it does sacrifice some appearance. The choice is yours.
2. Switch to high performance mode
The power plan can also affect computer performance, especially for laptops.
To improve performance, open the Start menu and search for "Power Options". Then you can select power plan as "High performance".
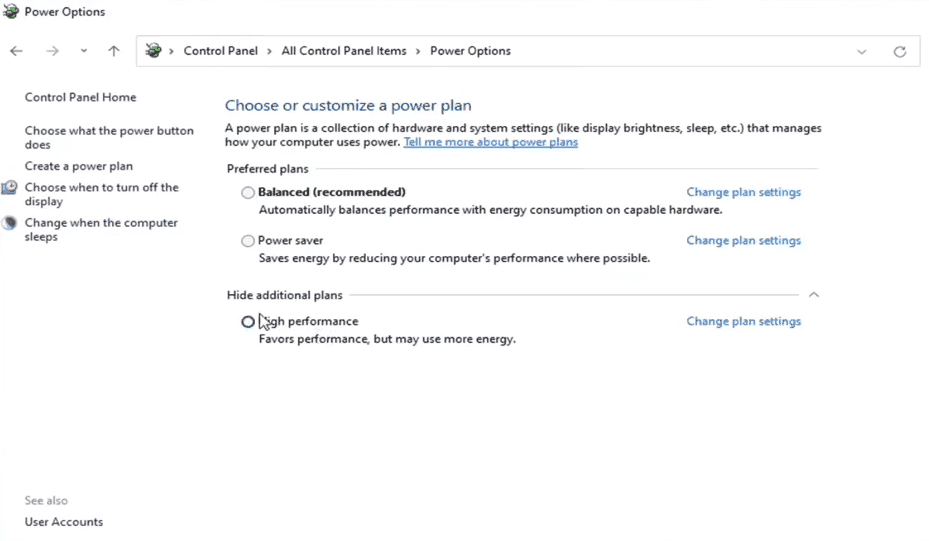
If you can't find the High Performance option, you can also click on "Create a power plan" on the left side and select "High performance". Name the plan, and then click "Next" and "Create", you can have high performance mode now.
3. Disable startup programs
Some applications are automatically enabled when you turn on your computer and continue to occupy memory. If you don't want to close them manually every time, then you can disable the ones you don't need directly.
Press Win + i to open Settings, click on "Apps" on the left side, and click "Startup" on the right side. Turn off all the applications that you don't need.

Or, you can also press Ctrl + Shift + Esc to open Task Manager, click "Startup" option, and here you can also turn off all the apps that don't need to be started automatically.
4. Turn on storage sense
On the left side of the Settings page, click "System", then "Storage", and find "Storage Sense" switch under Storage management.
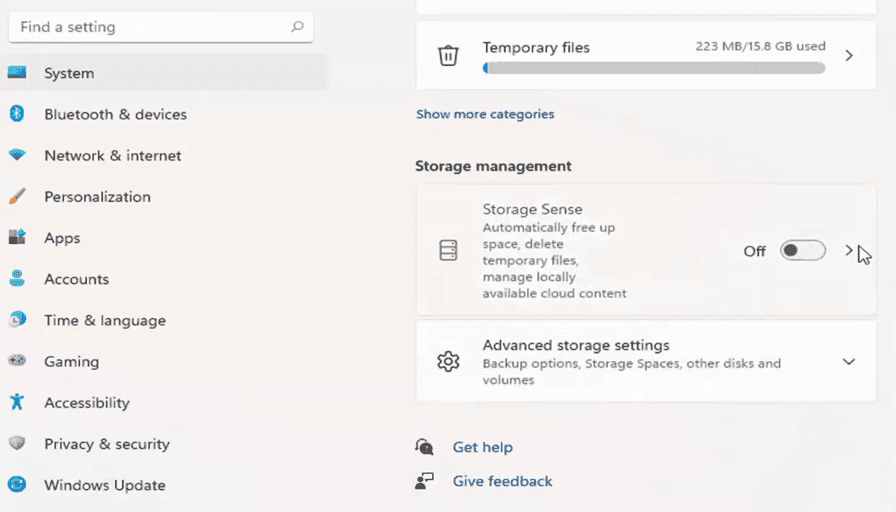
By turning it on, the system will automatically clean up junk files when your computer is running low on space. You can also click in to configure your own cleanup schedule, if you don't like the trouble of setting it up, just follow the system default.
In addition to the automatic cleaning of junk files with storage sense, you can also manually remove temporary files from the system at any time by going back to the Storage interface, finding the "Temporary files", clicking in, and then delete them with one click.
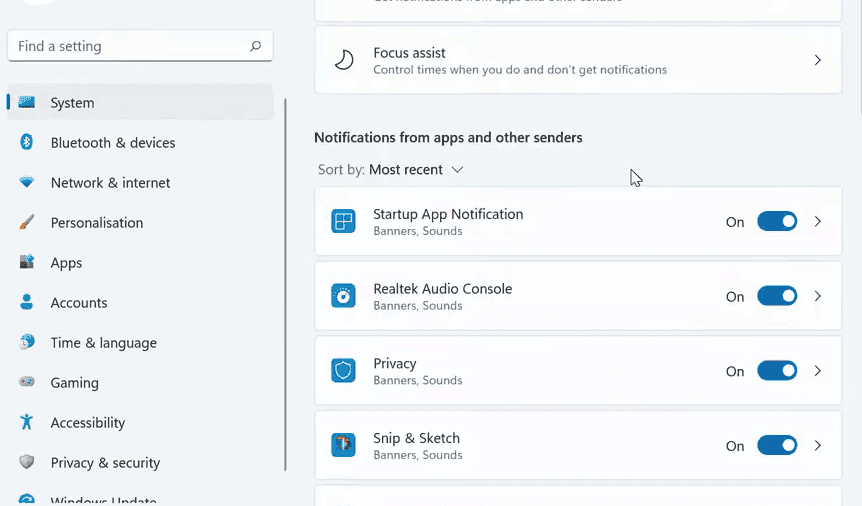
5. Disable notifications
Too many system notifications may be annoying, and also drag down your computer's performance. As we all know, system notifications cannot be turned off in Windows 10, but fortunately, Windows 11 allows you to turn off these system notifications.
The way to close them is to open Settings and click "System" on the left side, then select "Notifications". Now you can turn off all the system notifications you don't need. If it's too much trouble to close them one by one, you can also simply turn off the general switch for notifications with one click.
But please note, if there are some notifications that you need to receive, it is better not to turn off all of them with one click. Otherwise, you may not receive any notifications and delay your business.
