
Windows 11 Won't Go to Sleep Mode | How to Fix
Sleep mode is ideal when you are isolated from your device for a short period of time. It helps save power and ensures PSU security, and your PC won't develop overheating problems. However, some users have reported that they can't enter sleep mode after upgrading their PCs to Windows 11.
By Delia Updated on December 10, 2024
Windows 11 PC won't go to sleep
Sleep mode is a power-efficient mode of Windows that allows your device to go to rest without having to shut down completely and wake up to load the last session executed before sleep, avoiding the hassle of reopening applications and tabs again.
Sleep mode is ideal when you are isolated from your device for a short period of time. It helps save power and ensures PSU security, and your PC won't develop overheating problems. However, some users have reported that they can't enter sleep mode after upgrading their PCs to Windows 11, how do you fix this? Here are some of the methods we have collected.

*If your Windows 11 computer can go to sleep but cannot wake up, you can also refer to this article.
1. Turn on sleep mode manually
Press Windows + I to open the Settings app, then navigate to "System" in the left panel, and then navigate to "Power" from the right.
Now scroll to the "Screen and sleep" section and manually set the inactivity interval when you want your computer to go into sleep mode.
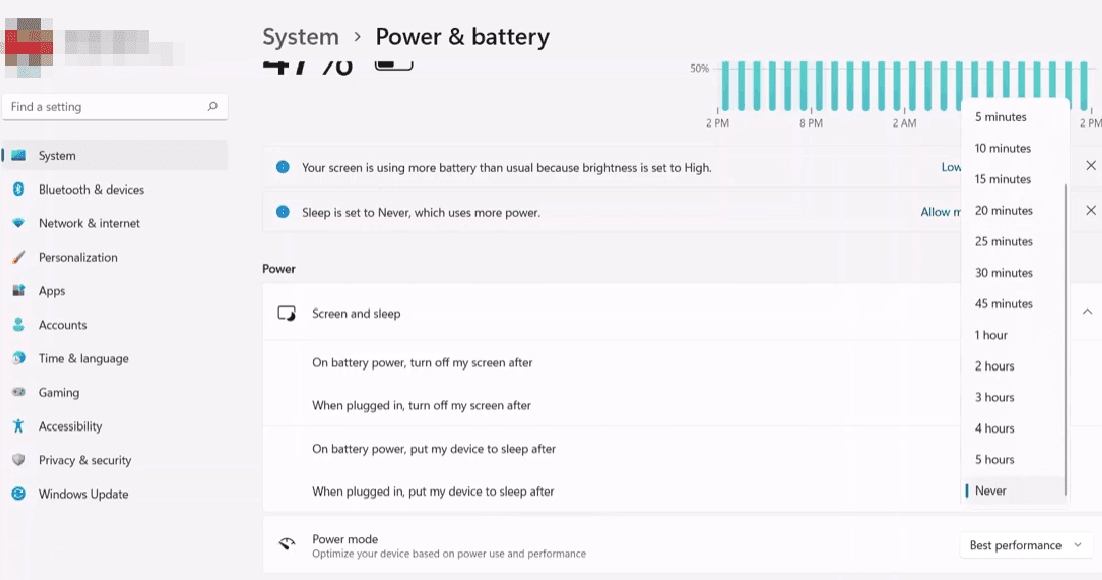
Then just exit the settings.
2. Turn off Link State Power Management
Hybrid mode is a combination of sleep mode and hibernation mode in Windows 11, but it can cause some problems in practice. Therefore, you can try to disable this mode to solve the problem of your computer not sleeping.
Open Control Panel via Windows Search.
Go to “Hardware and Sound” > “Power Options”.
Find “Balanced” under Preferred plans, click “Change plan settings” next to it.
Then select “Change advanced power settings”, and navigate to “PCI Express” > “Link State Power Management > “Moderate power savings”.
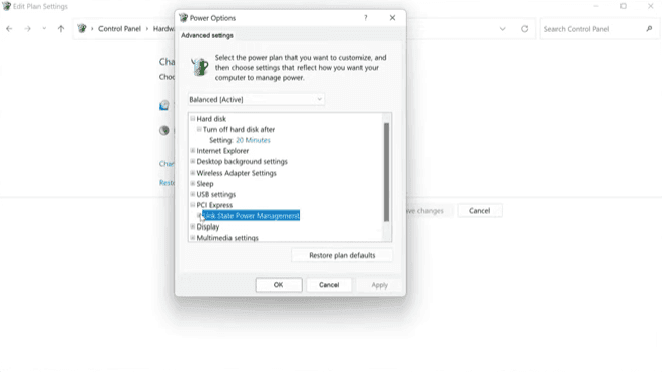
Click on this option and choose “Off” to turn it off. Then “Apply” the change and click “OK”.
3. Disable fast startup
Fast startup is a feature that allows your computer to start up quickly after a complete shutdown, and it is enabled by default on Windows 11. However, some older laptops and desktops do not support fast boot and may have sleep mode issues when running Windows 11. For this, you can disable this feature from the Control Panel.
Open the Control Panel and go to “Hardware and Sound” > “Power Options”.
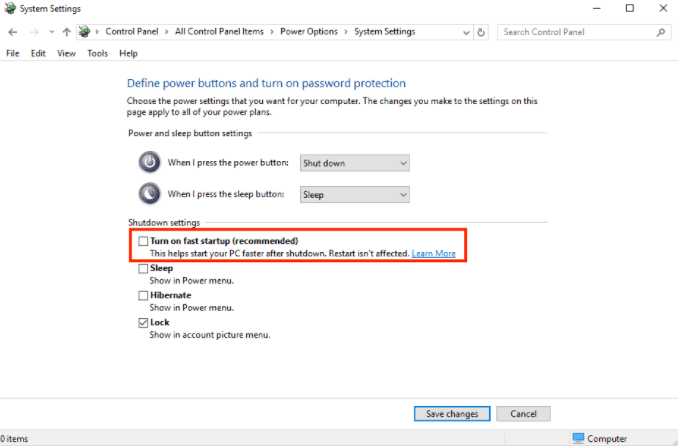
Select “Choose what the power buttons do” > “Change settings that are currently unavailable”.
Then, uncheck the option “Turn on fast startup” under Shutdown settings.
4. Turn off the screen saver mode.
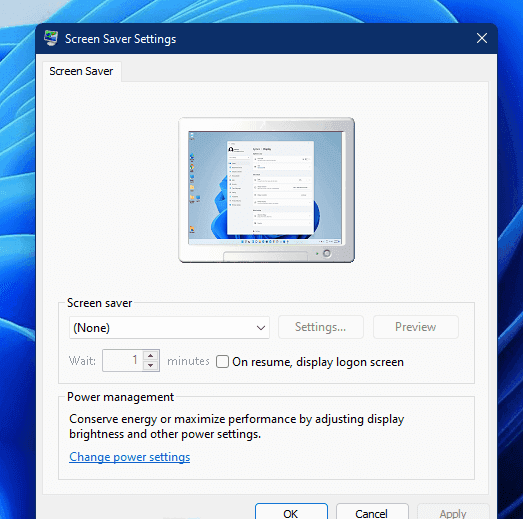
Press Windows + S to open the search bar, then type “screen saver” and click it from the search result.
In the pop-up window, select “None” under Screen saver, and then confirm the settings.
5. Remove the battery
This step applies to users using a laptop or desktop computer. If your computer often refuses to sleep, even if all the settings are correct, the most likely culprit is the battery itself. It is recommended to remove the CMOS battery for 15 minutes and then reinsert it to see if the problem has been resolved.
6. Disconnect external devices
Devices such as mouse, keyboards, controllers, etc. should not cause problems with sleep mode, but printers, scanners, webcams can cause your computer to be awake for hours. Therefore, you can try disconnecting all these devices to see if the problem persists.
There can be several reasons why Windows 11 cannot enter sleep mode. If none of the above steps work for you, make sure you have Windows 11 installed correctly and updated to the latest version.
